Simple Sunflower Blossom

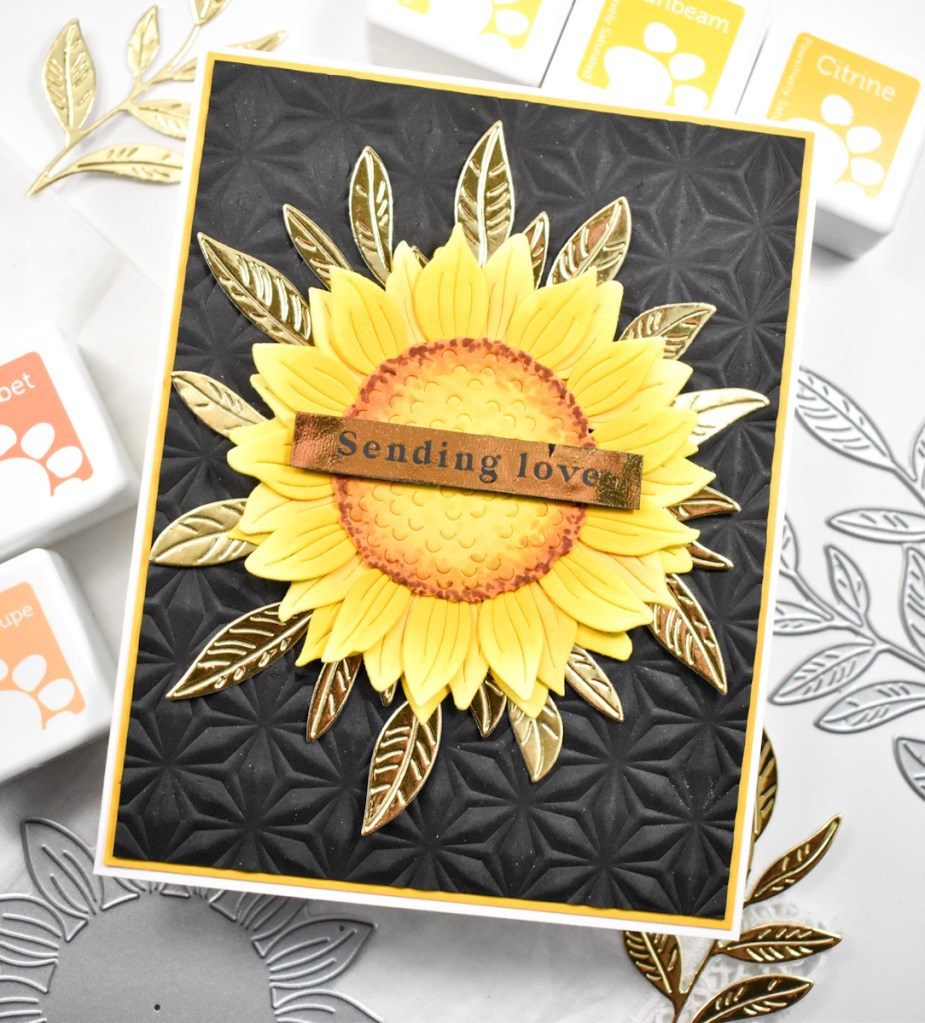
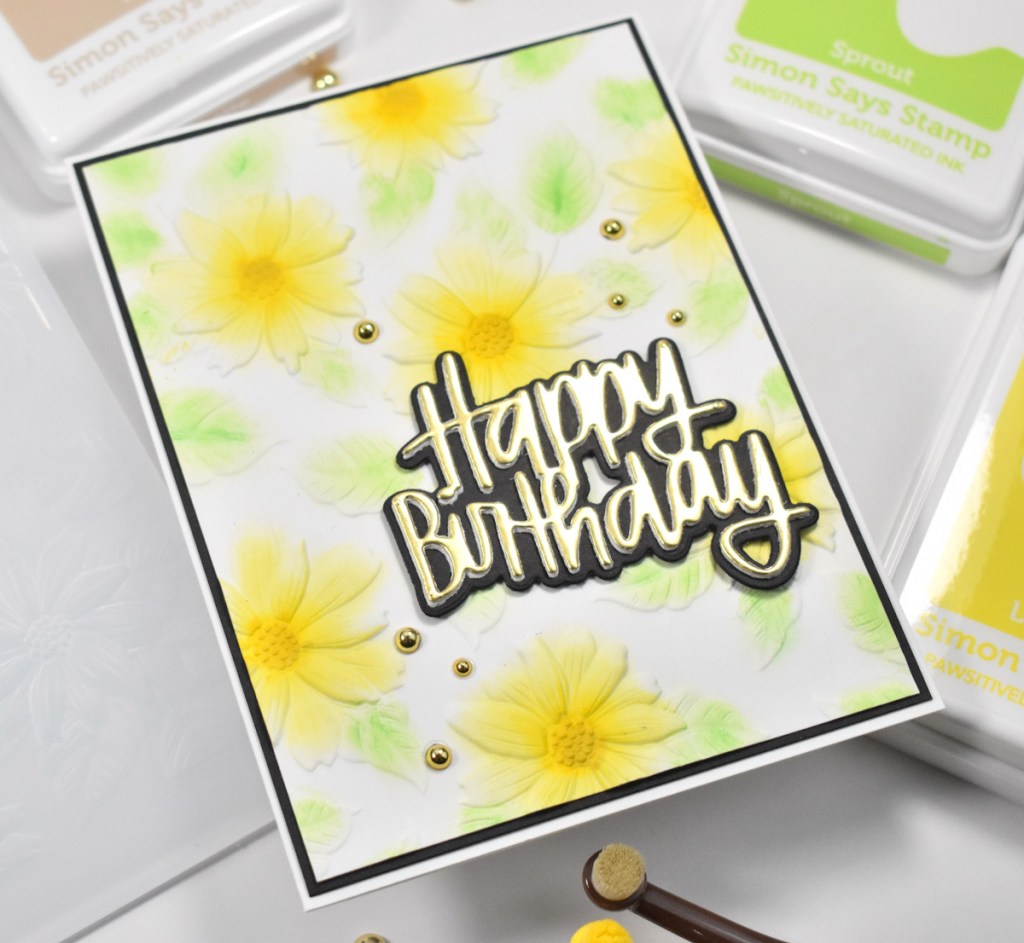
Hello Crafty Friends, and welcome back to my blog! I’m so glad that you stopped by! I’m back today with a card featuring the brand new Bountiful Sunflower Blossom, from Simon Says Stamp’s latest release Out of This World. I can’t even express how much I love this die! Flowers and sentiment dies are my jam, so I was thrilled to receive this sunflower die! Let’s run through the details for this project, shall we?

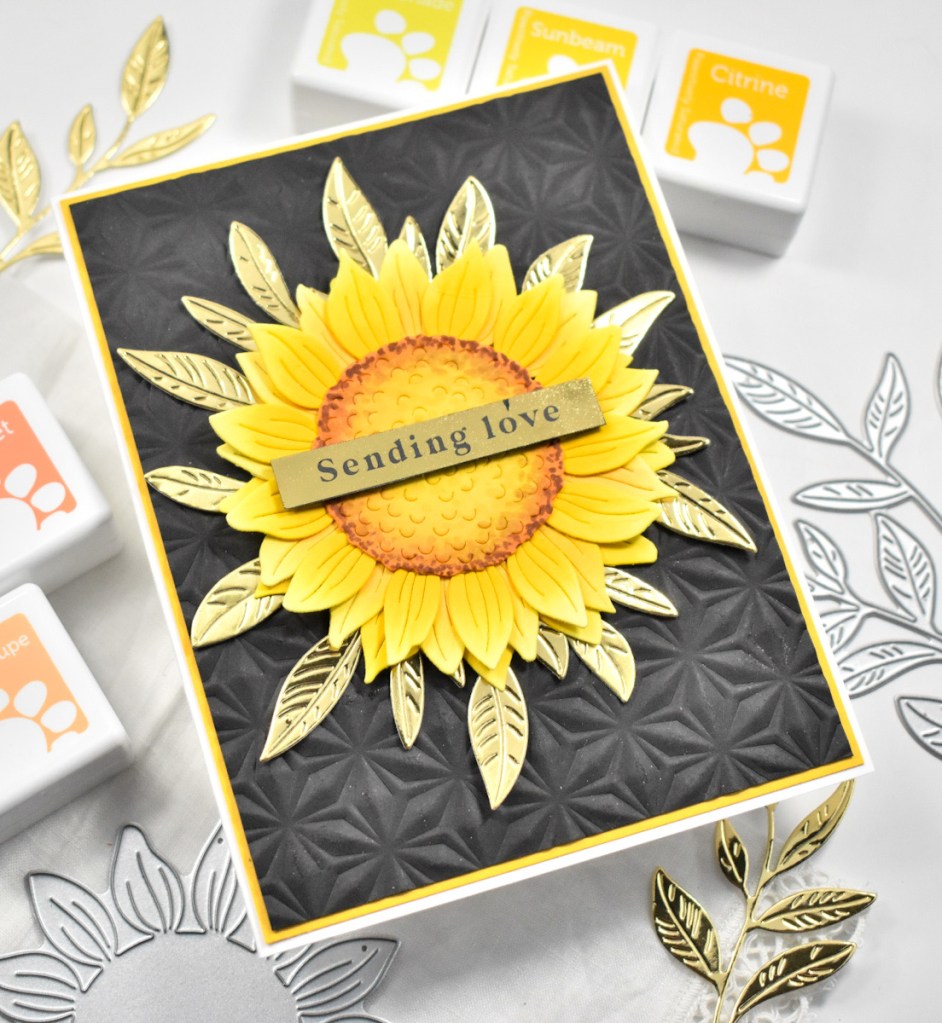
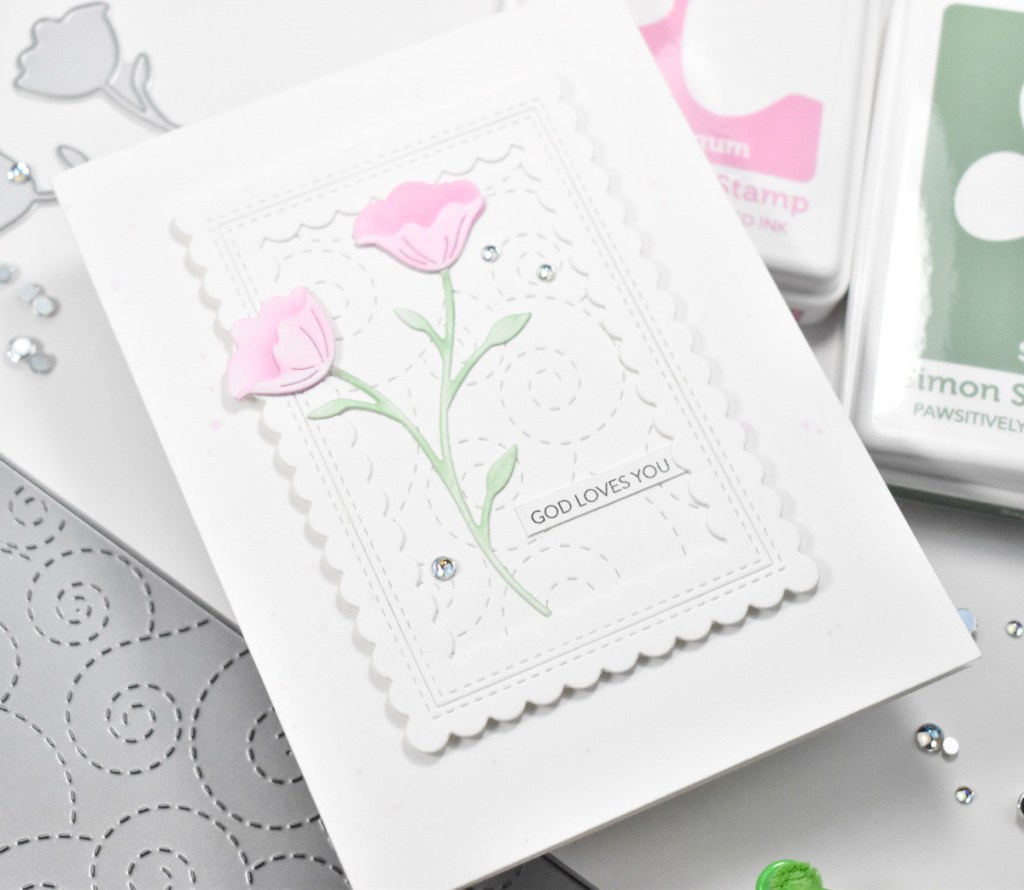
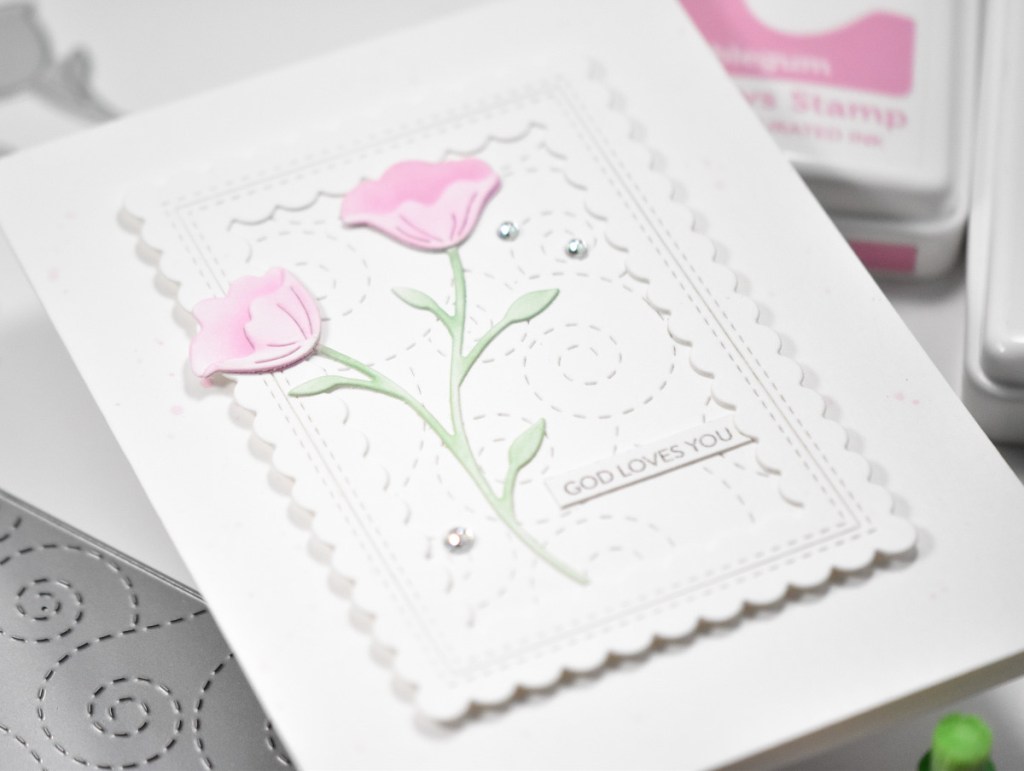
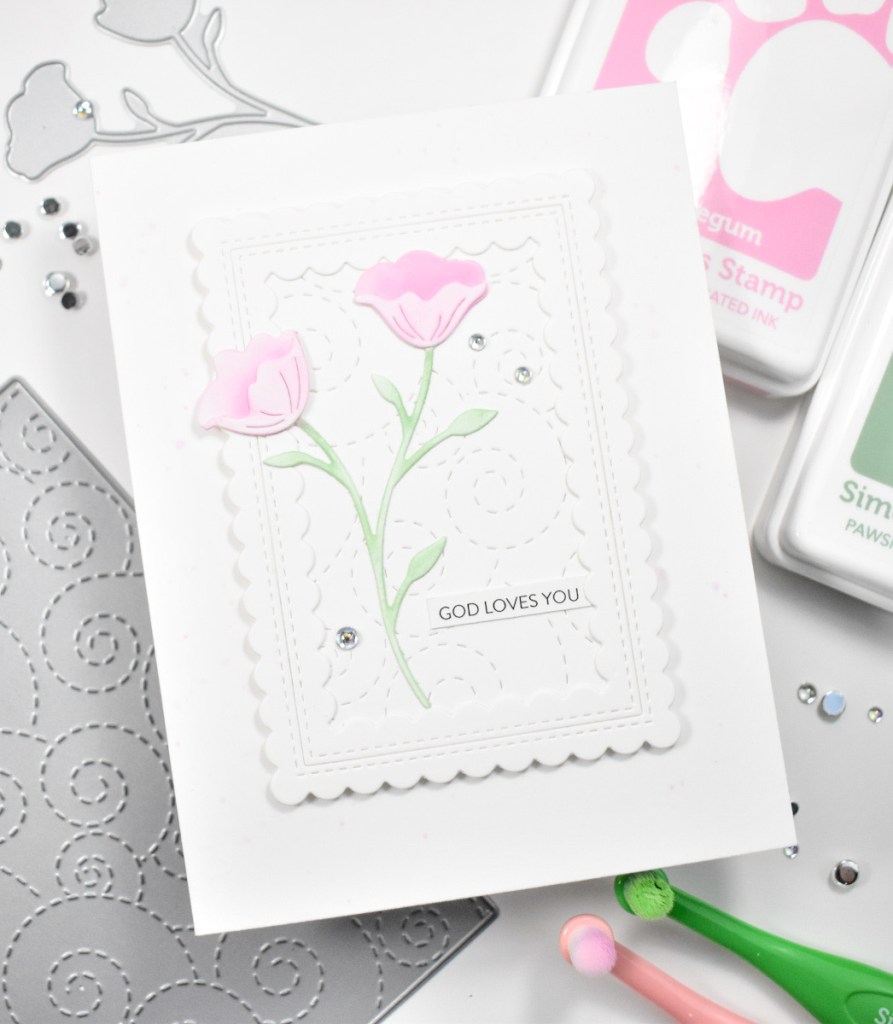
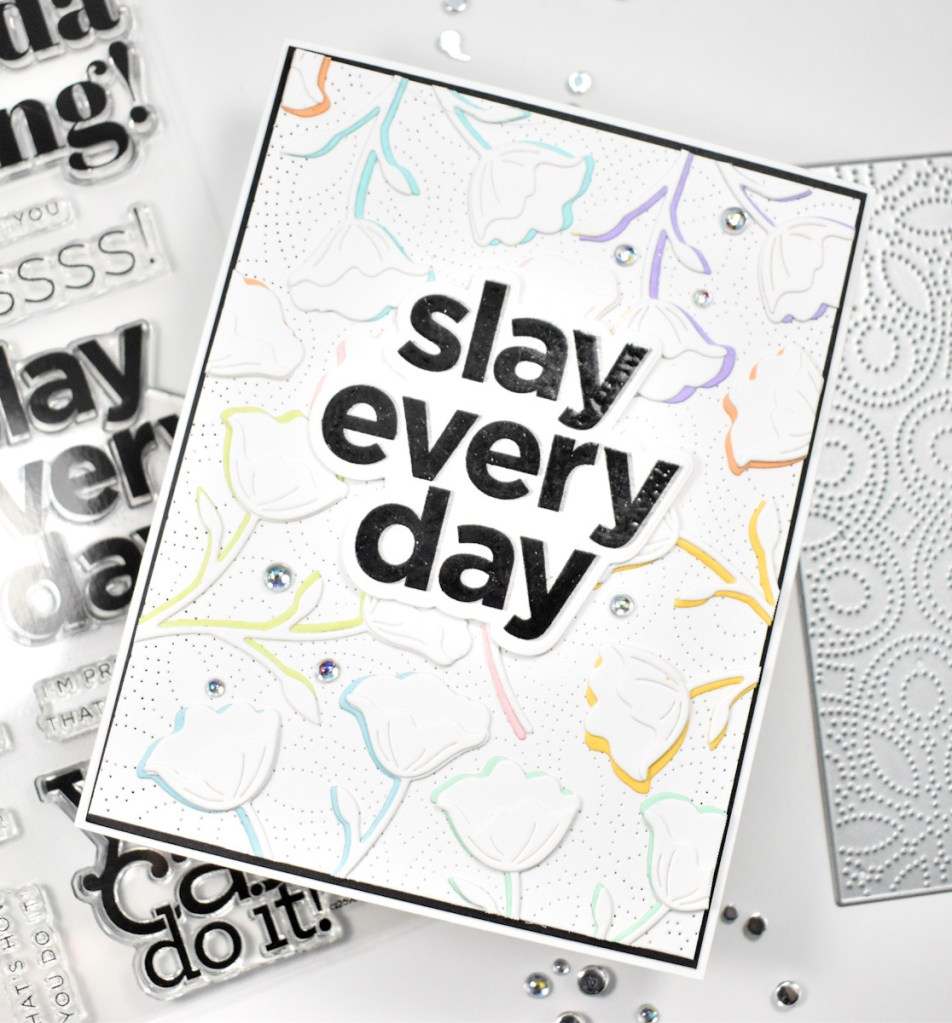
I had a lot of ideas going on when making this card, and it originally was going a different direction when I decided that I liked the white on white texture of this one. I began by cutting the SSS Bountiful Sunflower Blossom five times from Neenah 110lb cardstock and assembling those together using liquid glue.

I played around with the placement of the flowers on the card front, trying to cover as much surface area as possible. Once trimmed, I filled in with the remaining pieces and petals. I decided that a white on white theme was quite calming, so I opted for a more suitable sentiment.

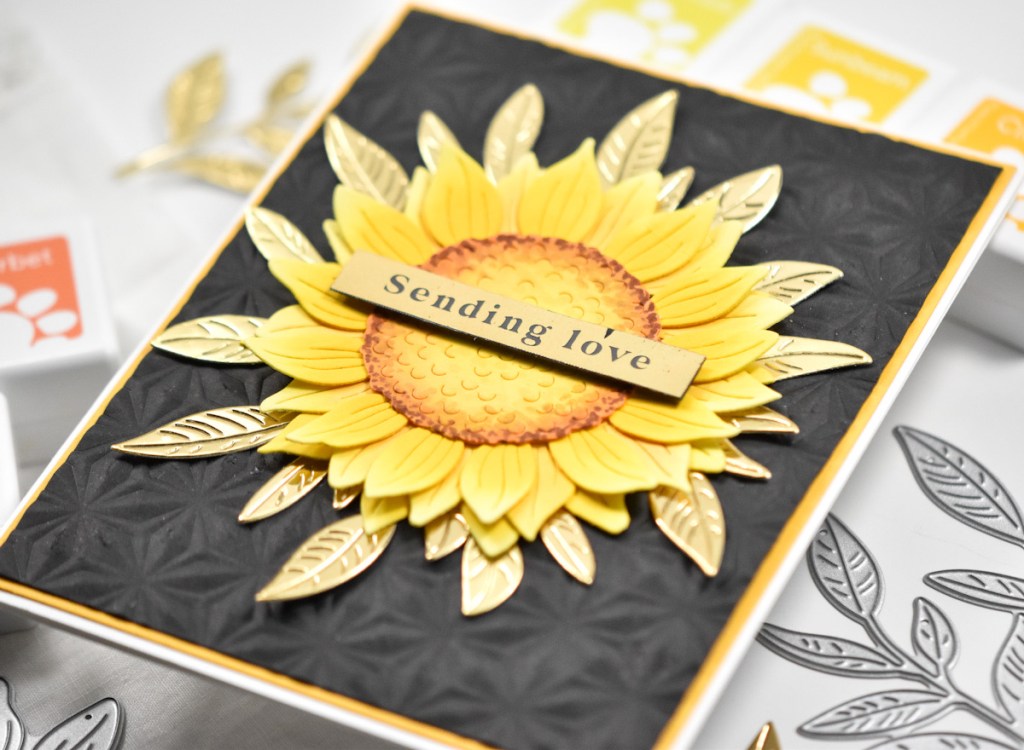
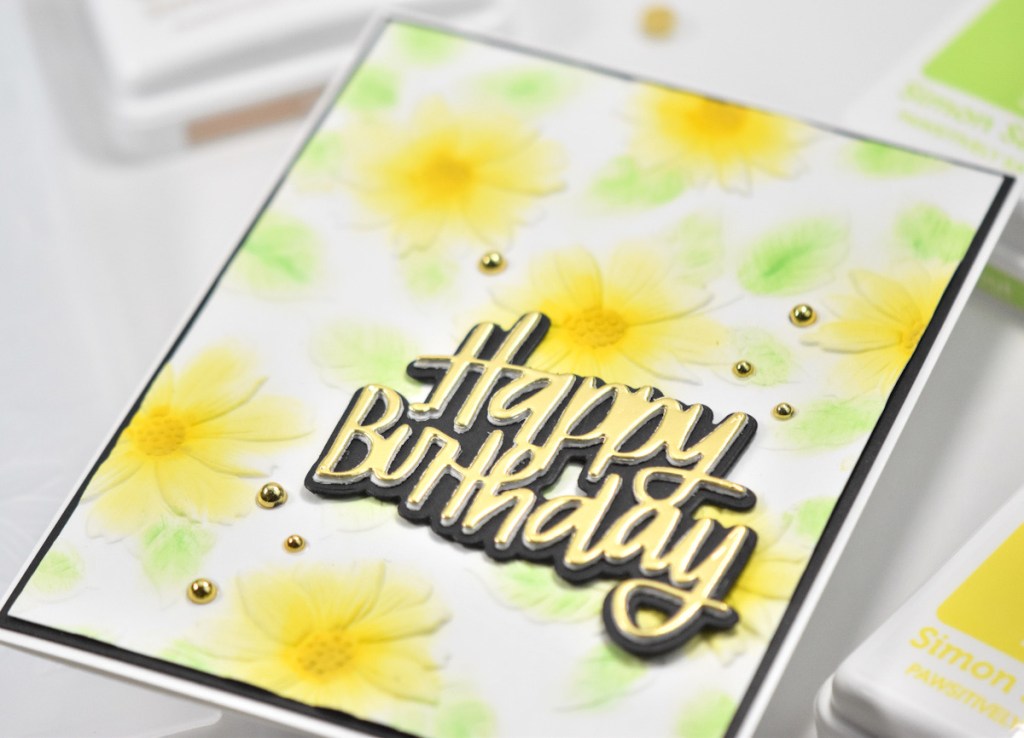
The SSS Prayers die seemed a suitable fit for this card. I tried a white sentiment, but ultimately decided on using Polished Gold cardstock. I cut the shadow portion of the die three times and the sentiment portion once and adhered all of those together before gluing to the card.

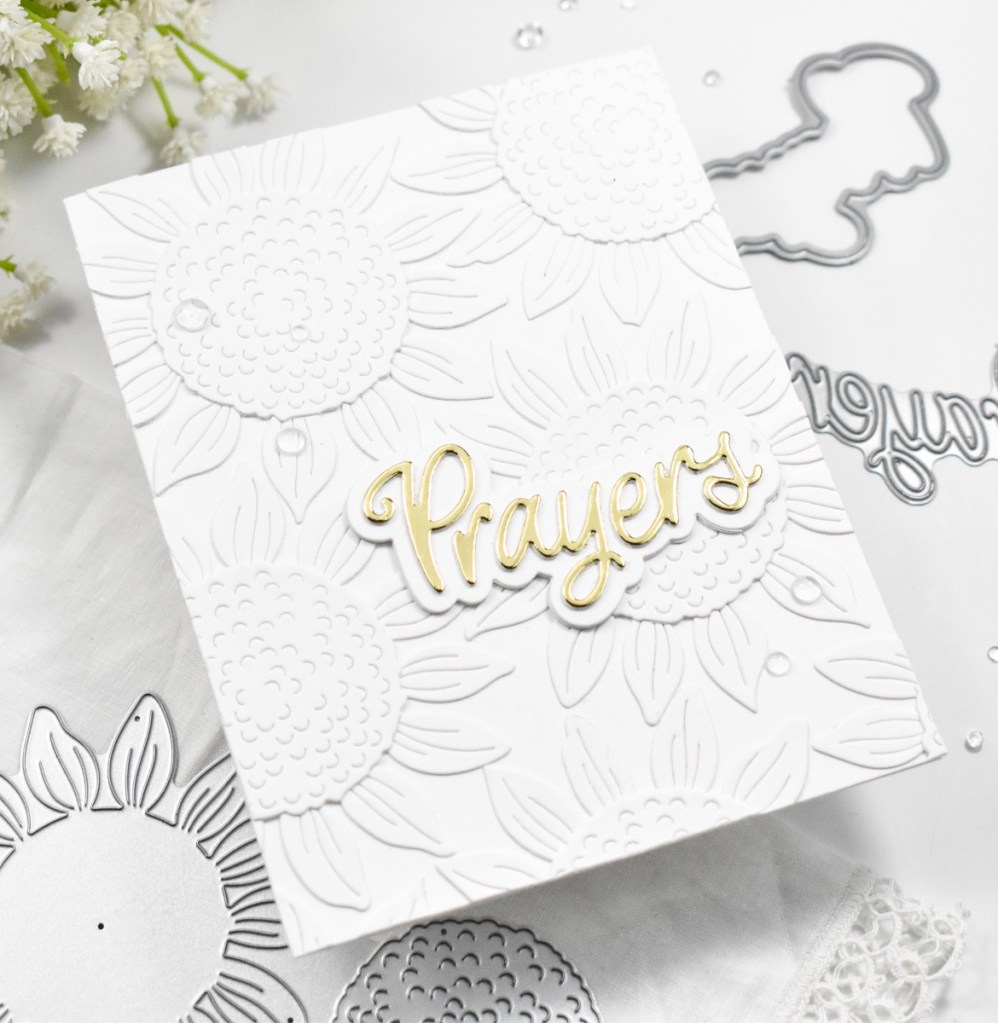
To finish up, I added some clear drops for a little added interest. That finishes up this card. Super simple, but I like the way it turned out. Simple isn’t usually my go-to, and I struggle with this design process, so I hope you enjoyed it! Don’t forget to check out the entire Out of This World release, and let me know your favorites! Thanks again for stopping by, have yourself a wonderful day, and stay awesome friend!

Supply List:

* Affiliate links used at no cost to you. Thank you for your support!

Latest Posts

Latest Instagram Posts

Sending Love Sunflower

Hello and welcome back friends! I’ve been having a lot of fun playing with goodies from Simon Says Stamp’s latest release, Out of This World. For today’s card, I’m featuring the new Bountiful Sunflower Blossom. Let’s go through the deets, shall we?

To begin, I cut the SSS Bountiful Sunflower Blossom twice from Neenah 110lb cardstock and did some ink blending using the new Pawsitively Saturated Ink Cubes in Yellow Sunsets. Once all of the color was added, I adhered the layers together using liquid glue. I also added a little bit more detail using Copic Markers E18, E31, E35 and E55.

I used the SSS Kaleidoscope Embossing Folder to emboss a black panel, and I used the SSS Privet Branch to cut leaves from Polished Gold cardstock. I played around with the placement of the leaves before gluing those in place, and then glued the sunflower atop the leaves.

A foiled sentiment seemed to be the perfect fit for this card, so I used a sentiment from the SSS Everyday Acetate Sentiment Strips set and hot foiled that using gold foil. I adhered the sentiment over the sunflower using foam tape for some added dimension.

The finished panel was then adhered to a yellow panel for some contrast before being adhered to the card base.

That finishes up this project. I hope you enjoyed it, and I hope it inspires you to get crafty! Stop by and check out the entire Out of This World release and let me know your favorites. Have a wonderful day and stay awesome!

Supply List:

* Affiliate links used at no cost to you. Thanks so much for your support!

Latest Posts

Latest Instagram Posts

Pastel Birthday Wishes

Hello Crafty Friends! I hope you’re having a wonderful day! I’m back with a card featuring a new product from Simon Says Stamp’s latest release, Out of This World. This release has a lot of fun things, including a few new embossing folders, and some gorgeous flowers, just to name a few! Today’s card is featuring the new A2 Scalloped Rectangle Stencils. Let’s go through all of the deets for this one, shall we?

To begin, I used the SSS A2 Scalloped Rectangle Dies to cut a panel of Neenah 110lb cardstock. Then, I taped the SSS A2 Scalloped Rectangles Stencil to the panel and did some ink blending. The colors that I used were Bubblegum, Lemonade, Seafoam and Lilac.

Once the ink blending for that stencil was done, I taped a Tim Holtz stencil over the scalloped stencil and ink blended the same colors to get the dot detail in the background. Double-stenciling, if you will. I removed both stencils, cleaned them and set them aside.

I chose the focal points for the card and die cut the SSS Cosmos Stem from Neenah 110lb and adhered those to the panel using liquid glue. I opted to use the birthday sentiment from SSS Elegantly Modern Greetings stamp set and stamped that using VersaFine Onyx Black ink and heat set it using Ranger Clear Embossing Powder. I repeated that process for a second time to achieve a smoother finish on the embossing. I then used the coordinating die to trim that out, along with two additional die cuts for added dimension.

The sentiment was adhered together and placed over the cosmos stems using foam tape. The sub-sentiment was glued directly to the panel. I added some iridescent drops for added bling, before adhering the panel to the card base.

That does it for this one! Have you tried double stenciling before? I really like the look that it gives. I hope you enjoyed this project, and I hope it inspires you to get crafty! Thanks so much for stopping by and don’t forget to check out the entire Out of This World release. Stay awesome friend!

Supply List:

* Affiliate links used at no cost to you. Thanks so much for your support!

Latest Posts

Latest Instagram Posts

Simon Says Stamp Dreamy Daisy Birthday

Hello Crafty Friends, and welcome back to my blog! Today’s card is featuring the new Painted Rainbow background stamp from Simon Says Stamp’s latest release, Dear Friend. This is such a fun release and I had lots of fun playing with different color combos using this stamp. Let’s get to the details!

This is a pull apart stamp, so you can stamp the arches of the rainbow as close or as far apart as you’d like them. I did do a card that has the spacing as the stamp is put together, and you’ll see that another day. Anyhoo, I began by placing a panel of Neenah 110lb cardstock in the Misti and stamping the arches in the selected colors of SSS Pawsitively Saturated Ink, which are Seafoam, Surf, Violet, Amethyst and Lilac.

Once I had stamped enough to cover a panel, I trimmed it down using the PFS Diagonal Stitched Rectangles. I then cut several flowers using the SSS Dreamy Daisy Layers and did some light ink blending on them using the Seafoam ink. I also cut some leaves using the SSS Winsome Branch. I adhered the flowers together using Bearly Art Glue and set everything aside while I worked on the sentiment.

I’m running short on birthday cards, so I opted to use the SSS Basic Box Card Happy Birthday die and cut it three times, adhering all of those together for added dimension. I began the placement and assembly of the card by gluing the leaves under the flowers and gluing the larger daisy directly to the panel. The other two flowers were adhered using SSS 3D Foam Squares.

I nestled the sentiment in the middle using glue and added some PFS Iridescent Clear Drops for that little bit of bling and shine. Everything was then adhered to the card base, which is Neenah 110lb cardstock.

That does it for this project! I hope you enjoyed it, and I hope it inspires you to get crafty! Thanks so much for joining me, and my apologies for the extended break. Don’t forget to check out the entire Dear Friend release and let me know your favorites! Have a wonderful day and stay awesome!

Supply List:

* Affiliate links used at no cost to you. Thank you for your support!

Latest Instagram Posts

Simon Says Stamp Black Eyed Susans Birthday

Hello Crafty Friends and welcome back! How’s your STAMPtember going so far? What are your favorites from the new release? Yeah, I’m nosey! There are so many cool things that it’s hard for me to narrow down my favorites! Anyhoo, today’s project is featuring the new Black Eyed Susans stamp set, so let’s run through the details!

To begin, I stamped the floral images from the SSS Black Eyed Susans set onto a panel of Neenah Classic Crest 110lb cardstock using VersaFine Onyx Black ink and heat set that using Ranger Clear Embossing Powder. I pulled out some Copic markers and began coloring using Y06, Y08, Y18, YR23, E39, E79, E99, G24, G82, YG61, N0 and N1.

Once all of the coloring was complete, I used a Copic Multi Liner 0.5 to add some additional black dot detail to the centers of the flowers. Next, I stamped a bee from the set twice in the same way and colored those using one of the yellow markers along with the Copic 110 Special Black marker. For a bit more added detail, I went over the wings using a Wink of Stella marker as well before fussy cutting them.

I trimmed the floral panel using PFS Diagonal Stitched Rectangles and adhered it to a black panel using SSS Dot Tape Runner. I used the Happy Birthday sentiment from the same set and stamped that onto black cardstock using VersaMark Ink and heat set it using SSS Detail White Embossing Powder. Once that was done, I trimmed it down and adhered it to the panel using SSS Foam Tape.

I adhered the bees to the panel as well using SSS Foam Squares, before adhering everything to the card base. No card is complete without some bling, so I added some PFS Iridescent Clear Drops to finish up this one.

That does it for this project! I hope you enjoyed it, and I hope it inspires you to get crafty! Don’t forget to swing by and check out the entire STAMPtember release! Have yourself a wonderful day and stay awesome!

Supply List:

* Affiliate links used at no cost to you. Thanks so much for your support!

Latest Posts
Latest Instagram Posts

Simon Says Stamp God Loves You

Hello Crafty Lovelies! Thanks so much for stopping by! For today’s project, I played around with the new Blossom Vine die. Of course, I always love the opportunity to play with florals, so let’s go through the details!

To begin, I die cut the SSS Blossom Vine once from Neenah Classic Crest 110lb cardstock and did some light ink blending using the SSS Pawsitively Saturated Inks in Bubblegum and Sage. I then set that aside to work on the remainder of the card.

I die cut the smaller PFS Stitched Scallop Rectangles and trimmed a panel that would go behind the frame, and added texture to it using the SSS Whirl Background. That was then adhered together using liquid glue.

Before adhering anything to the card base, I smooshed a little of the Bubblegum ink on my glass mat and used a water brush to flick some splatters on it. The frame was then adhered to the card base using SSS 3D Foam Squares.

I then glued the flower element to the frame, along with a SSS Sentiment Strip. To finish up, I added some PFS Iridescent Clear Drops.

That finishes up this project! It was actually pretty simple, but I love the elegance of this card. I hope you’ll stop by and check out the entire Dream Big release over on Simon’s website. Thanks again for stopping by! Have a wonderful day and don’t forget to stay awesome!

Supply List:

* Affiliate links used at no cost to you. Thank you so much for your support!

Latest Posts
Latest Instagram Posts

Simon Says Stamp Birthday Floral

Hello Friends, and thanks for stopping by! I’m still playing with goodies from Simon’s latest release, Dream Big. What are your favorites from this one? Today’s project is featuring the new Terrace Floral Embossing Folder and Die Cut. This is a really beautiful folder with so many possibilities! Let’s go through the details.

I began by trimming a panel of Neenah Classic Crest 110lb cardstock, spritzing it with some water and running it through the die cutting machine inside the folder.

Once the panel was ready, I did some ink blending on the flowers and leaves using SSS Pawsitively Saturated Inks in Lemonade, Citrine, Sprout, Fairway and Latte. I trimmed the panel down and adhered it to a black panel for contrast using SSS Dot Tape Runner.

I used the SSS Happy Birthday Brush Script die for the sentiment. I cut it once from gold cardstock and once from black cardstock. I also cut the shadow twice from black cardstock and adhered all of those together using liquid glue.

The sentiment was then adhered to the embossed panel using SSS 3D Foam Squares and then adhered to the card base. I added some PFS Gold Metallic Pearls for that little bit of bling, because all cards need a little bling, am I right?!

That does it for this one! I hope you enjoyed it, and I hope it inspires you to get crafty! Don’t forget to stop by and check out the entire Dream Big release and let me know your favorites! Have an awesome day and stay awesome!

Supply List:

* Affiliate links used at no cost to you. Thanks so much for your support!

Latest Posts
Latest Instagram Posts

Simon Says Stamp Slay Every Day

Hello and welcome back! I’m so glad you stopped by! Today’s project is featuring the new Blossom Vine from Simon’s latest release, Dream Big. I always love floral die cuts and this one was no exception! Let’s get into the details, shall we?

To start, I die cut the SSS Blossom Vine a bunch of times from Neenah Classic Crest 110lb cardstock. A bunch meaning eight times maybe. Then I pulled out an assortment of rainbow colored cardstock and die cut the floral from all of those as well. Yes, lots of die cutting! But, I do love making my own backgrounds using die cuts.

Once all of those were cut, I adhered them together using liquid glue, offsetting them just slightly so that you could see the colors beneath. I used the SSS Detail Bohemian Plate to cut a background for the flowers and glued the flowers atop that trimming off the excess.

I used the Slay Every Day sentiment from the SSS Yay You set and stamped that using VersaFine Onyx Black ink and heat embossed it using Ranger Clear Embossing Powder. I did heat set it a couple of times to give it a smoother finish. I then used the coordinating die to trim it out, and cut an extra to glue to it for more stability. The sentiment was then glued to the floral panel.

That panel was then adhered to a black panel using SSS Dot Tape Runner before being adhered to the card base. I added some PFS Iridescent Clear Drops for a little shine and sparkle to finish up.

That does it for this one! I hope you enjoyed it and I hope it inspires you to get crafty making your own backgrounds! Don’t forget to check out the entire Dream Big release over on Simon’s website. Have a wonderful day and stay awesome!

Supply List:

* Affiliate links used at no cost to you. Thanks so much for your support!

Latest Posts
Latest Instagram Posts

Simon Says Stamp Sunshine Crocus

Hello Friends, and welcome back! The new Simon release, Let’s Chill, is live and boy is it a fun one! Today’s card is featuring the Hello Sunshine die in a repeat pattern. Let’s go through the details, shall we?

I began this project by die cutting the SSS Hello Sunshine twice from four different shades of yellow and orange. I did twice because I wasn’t sure how many it was going to take. I cut a panel of Neenah Classic Crest 110lb cardstock using the SSS Stitched Whirl Background, and began adhering the sentiment die cuts using liquid glue. I began at the top and worked my way down the panel.

Once all of the sentiments were adhered, I trimmed the panel down to the size of the sentiments. Moving along, I used the SSS Etched Crocus Stems to cut a few flowers from Neenah 110lb, and those were then glued directly atop the sentiments.

I splattered my card base using Royal Talens Light Gold Acrylic Ink and then adhered the panel using foam tape for dimension. No card is complete without bling, so I added a few pearls to finish up this project.

That does it! Simple card, but I love stretching my supplies and creating backgrounds from stand-alone sentiment dies. I hope you enjoyed it and I hope you’ll stop by and take a look at the entire Let’s Chill release. Have a wonderful day and don’t forget to stay awesome!

Supply List:

* Affiliate links used at no cost to you. Thanks so much for your support!

Latest Posts
Latest Instagram Posts

Simon Says Stamp Mother’s Day Peony

Hello Crafty Lovelies and thanks for stopping by! Have you checked out the newest Simon release, Yay You? What are your favorites? If you know me, I always love florals and sentiments! So, today I’m playing with the Sketched Peony Blossom Foil and Cut set. Let go through the details, shall we?

I ended up making this card for my Mom for Mother’s Day, and of course, she loved it! I began by foiling the Sketched Peony Blossom on a panel of hot press watercolor paper using Spellbinders Champagne Hot Foil. I always end up foiling a few, but only used one in this case, so I have some to use on another project in the future. While I had the machine hot, I also used the PinkFresh Studio Solid Hot Foil Plate to foil the negative of the flower as well.

Once the foiling was complete, I used Zig Markers in 025, 032 and 040 to do some watercoloring. I also used Copic Markers in Y00 and Y08 to add some yellow to the center of the flower. I then used the included, coordinating die to trim the flower out along with the solid foiled flower as well. Those were then adhered together, slightly off center, using liquid glue.

For the background, I used the SSS Stitched Whirl Background and trimmed that from a panel of Neenah Classic Crest 110lb cardstock. I also used the SSS Olive Leaves to cut a couple of those from Neenah 110lb, as well as some gold cardstock.

I went ahead and worked on the sentiment and use the Happy Mother’s Day sentiment, which is from the SSS Better With Mom set. I stamped the sentiment using VersaMark Ink on a scrap of Neenah 110lb and heat embossed it using Ranger Princess Gold Embossing Powder. When that was complete, I used the coordinating die to trim it out.

To assemble the card, I adhered the whirl background to the card base using SSS Dot Tape Runner and glued the leaves to the panel, while adhering the flower using foam tape for dimension. The sentiment was also adhered with foam tape. And, of course there has to be bling, so I used some PinkFresh Studio Gold Metallic Pearls for that.

That finishes this one up! I hope you enjoyed it and I hope it inspires you to get crafty! Have a wonderful day and don’t forget to stay awesome!

Supply List:

* Some affiliate links used at no cost to you. Thanks so much for your support!

Latest Posts
Latest Instagram Posts