LDRS Grateful Heart

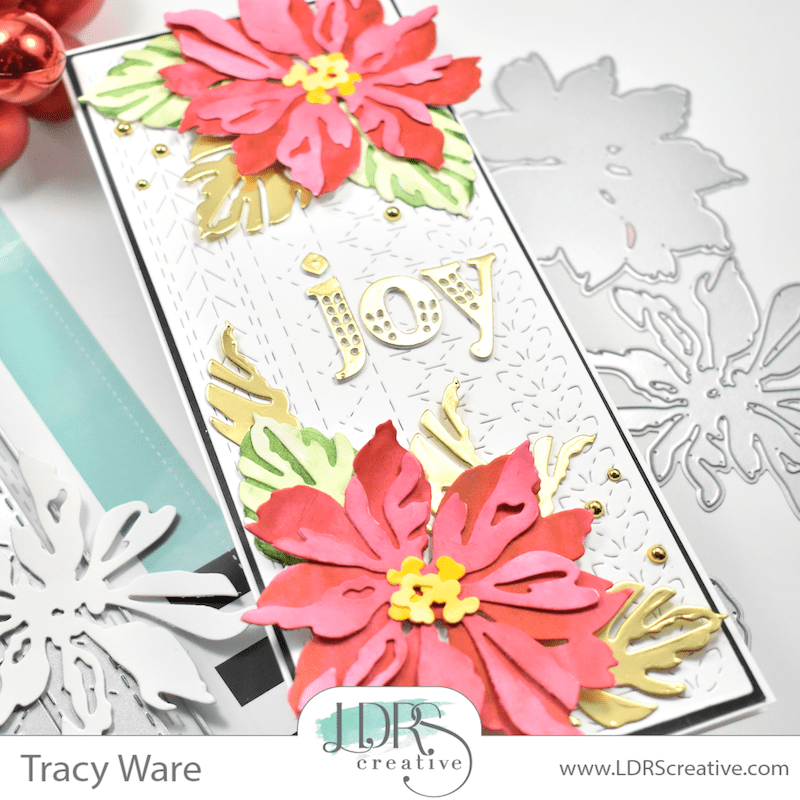
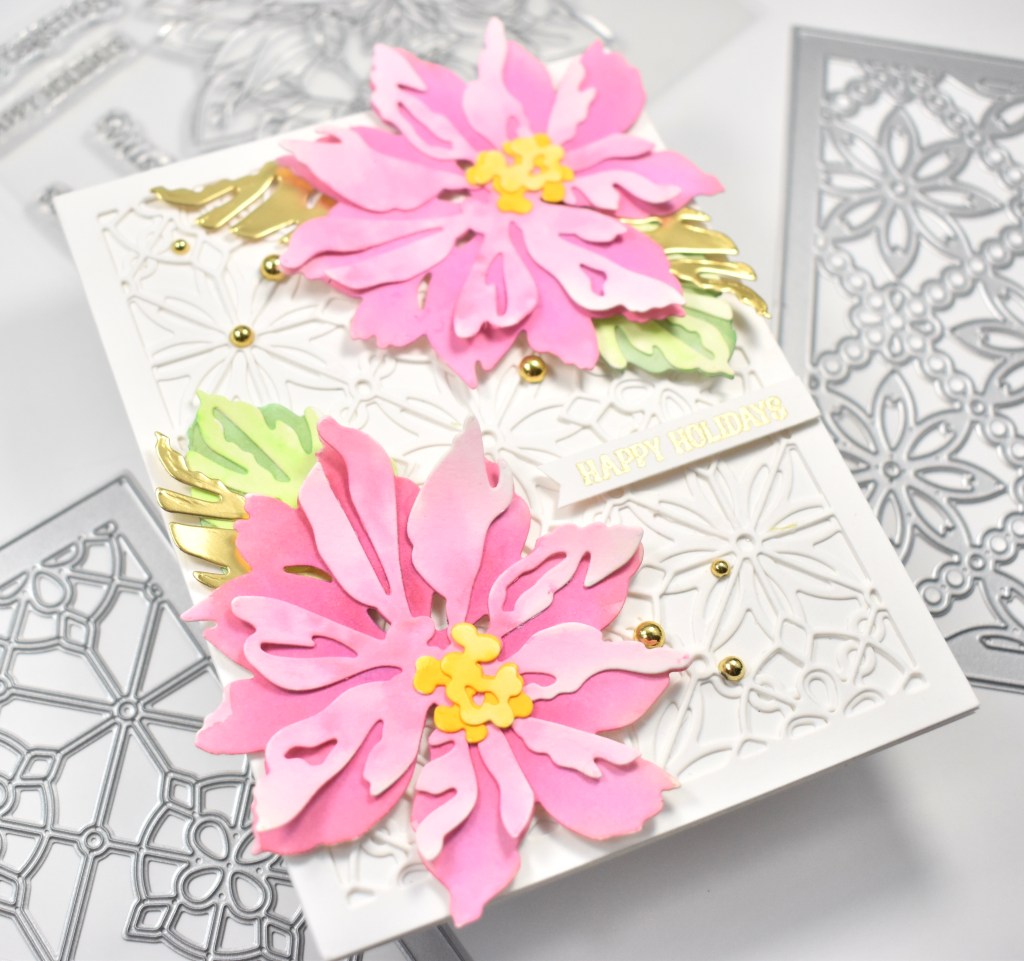
Hello Crafty Friends and thanks for joining me! Today’s project is featuring a couple of new products from the latest LDRS October Collection, the Modern Trellis Coverplate and the Thankful Flowers Slimline set. Let’s get right into the details!

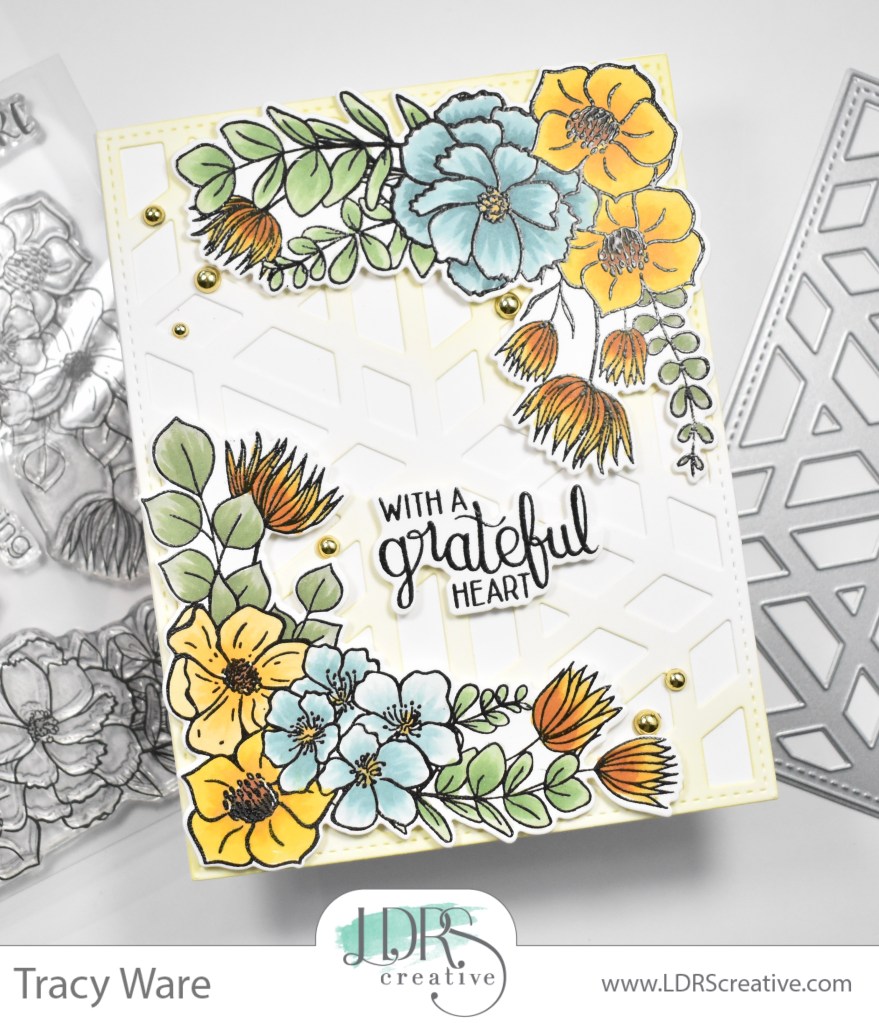
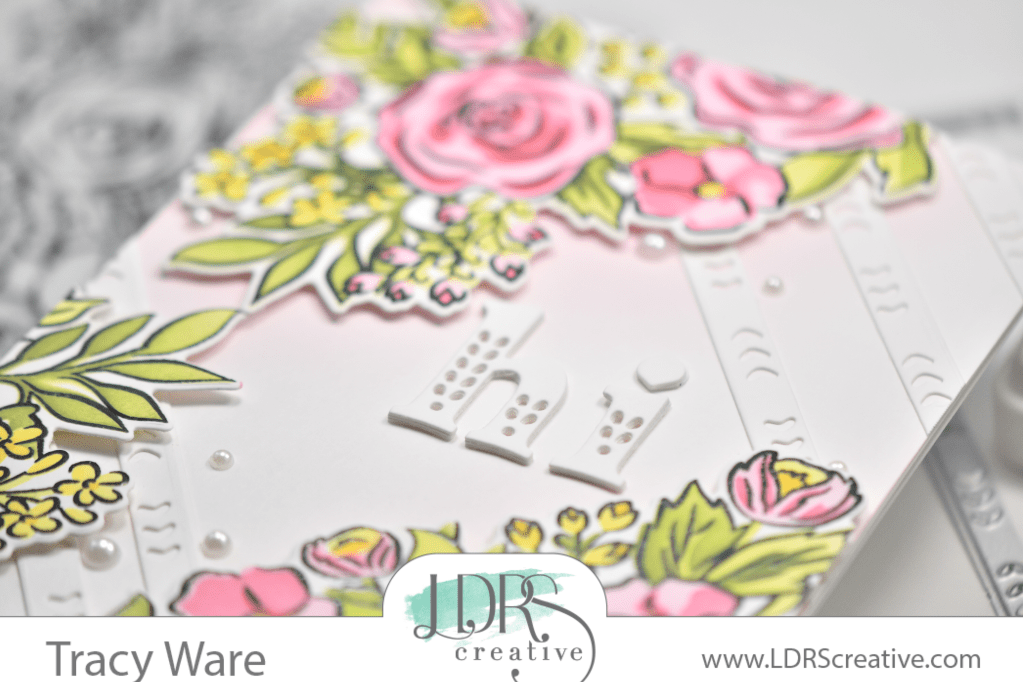
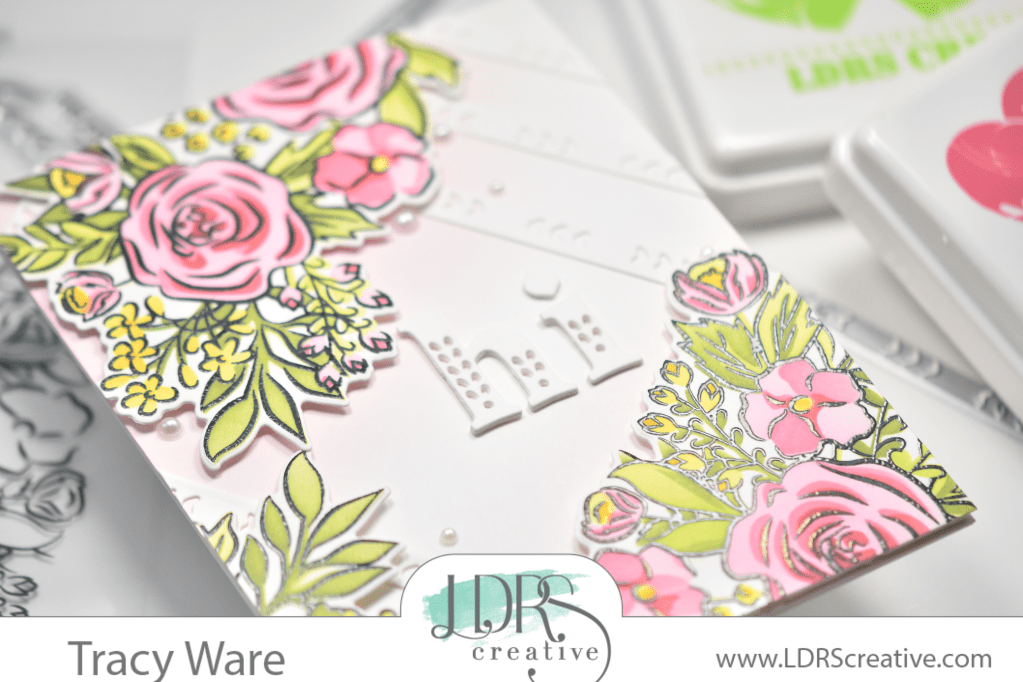
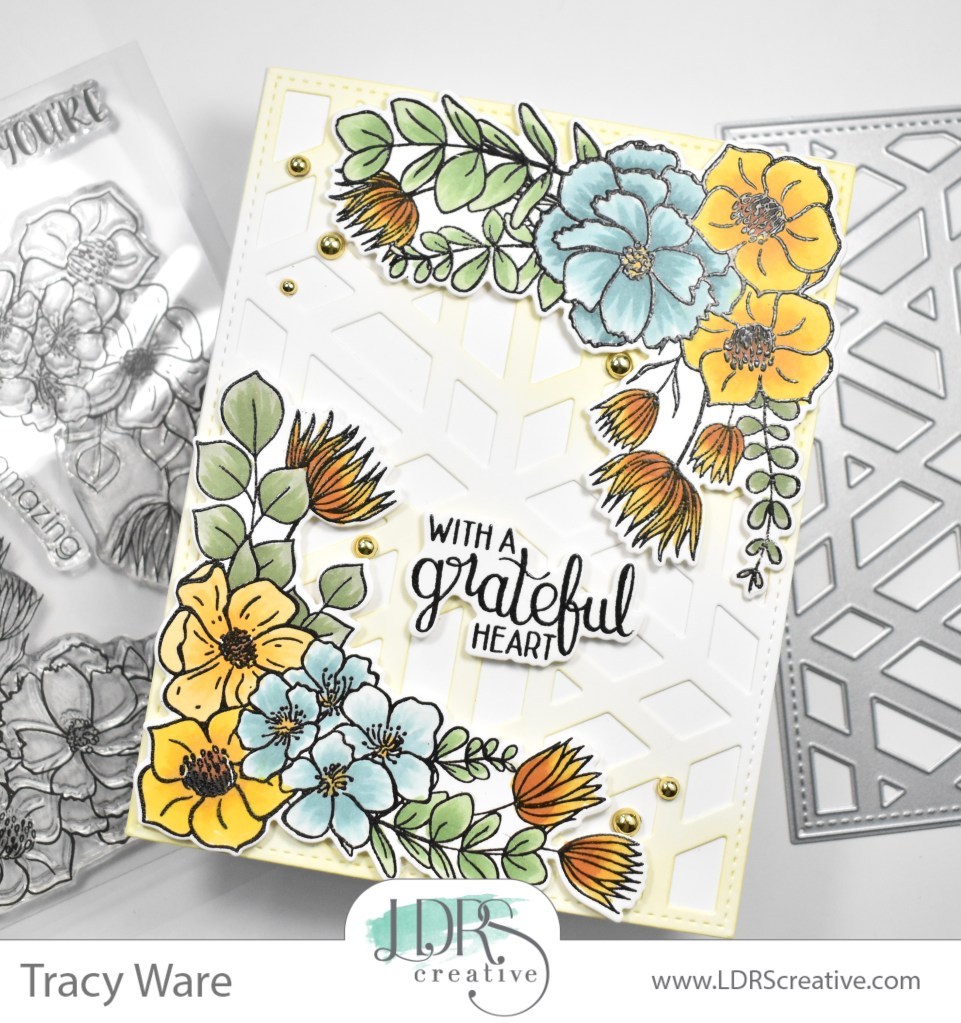
To begin this project, I stamped the florals from the LDRS Corner Garden set on Neenah Classic Crest 110lb cardstock, using VersaFine Onyx Black Ink and heat set that using Ranger Clear Embossing Powder. I then colored the images using Copic markers. Unfortunately, I did not write down the specific colors used, which is unlike me, but sometimes things happen. So I apologize about that.

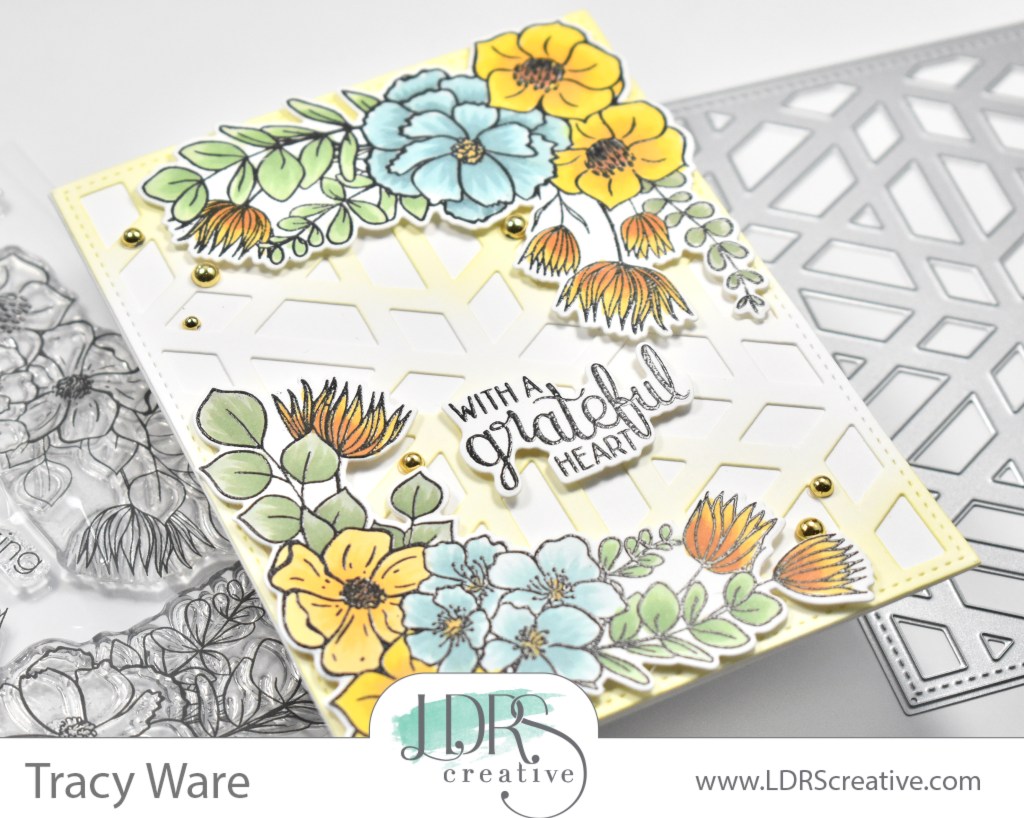
Once everything was colored, I used the LDRS Corner Garden Die set to trim those images out. While I was die cutting, I went ahead and die cut the LDRS Modern Trellis Coverplate from Neenah 110lb, and did some light ink blending, using LDRS Dan-D-Lion ink, on the corners where I intended to put the florals.

I decided on this sentiment from the new LDRS Thankful Flowers Slimline set because I loved it so much. I love die cut sentiments, so I’m thrilled to see some coordinating dies for the sentiments in the sets! Anyhoo, I stamped the sentiment with the same VersaFine Onyx Black Ink and heat set it using the same embossing powder. Once that was done, I used the coordinating die to trim it out.

To assemble the card, I adhered the trellis to the card base, which is also Neenah 110lb, using liquid glue, and adhered the florals to the ink blended corners using foam tape. I nestled the sentiment between those and adhered that with foam tape as well. To finish up, I added a few PinkFresh Studio Gold Metallic Pearls for some added bling!

That does it for this project! I hope you enjoyed it, and I hope it inspires you to get crafty as well! Stop by and check out all of the new October Collection goodies over at LDRS! Have a wonderful day and don’t forget to stay awesome!

Supply List:

* Affiliate links used at no cost to you. Thanks so much for your support!

Latest Instagram Posts

LDRS Poinsettia Joy

Hello Lovelies and welcome back! Thanks for stopping by today to check out my project featuring these gorgeous Layered Poinsettia dies from LDRS. I’ve had so much fun with these! Let’s get right to the details, shall we?

I began my project by die cutting the LDRS Layered Poinsettia dies a couple of times from watercolor paper. I pulled out my watercolors and a water brush and added the color. To do this, I saturated the flowers with water and just dropped in the color, adding more to achieve the darker colors.

Once I was finished with those, I set them aside to dry while I worked on the rest of the card. For the background panel, I used the LDRS Background Stitches Slimline 1 dies. I cut a slimline panel of Neenah Classic Crest 110lb cardstock and taped the dies in place before running it through the die cutting machine. Look at all that gorgeous texture and detail!

While I was die cutting, I went ahead and cut the joy sentiment once from mirror gold cardstock using the LDRS Chloe Alpha Lowercase. I also cut it another time from Neenah 110lb, and adhered all of those pieces together with liquid glue for dimension. I die cut some of the poinsettia leaves from this same mirror gold cardstock, because it would tie the gold elements together and make for a beautiful addition.

I assembled my poinsettias and glued my watercolor leaves and the gold leaves directly to the stitched panel. The poinsettias were then added using foam tape. I positioned the sentiment between the flowers and glued that in place as well.

I then added some PinkFresh Studio Gold Metallic Pearls before adhering the panel to a black cardstock panel, and then to the card base, which is Neenah 110lb.

That does it for this project! I hope you enjoyed it and I hope it inspires you to get crafty! I love these layered dies so much, and I hope you’ll check them out! Have a wonderful day and don’t forget to stay awesome!

Supply List:

* Affiliate links used at no cost to you. Thank you so much for your support!

Latest Instagram Posts

LDRS Creative Happy Holidays

Hello Crafty Lovelies and welcome back! Have you checked out the new Christmas, Holiday and Halloween goodies from LDRS Creative yet? So many cute things! Today’s card is featuring the Layered Poinsettia dies, along with a couple of the Modern Geometric Coverplates. So, let’s just get right into the details, shall we?

I began the project by die cutting all of the pieces from the Layered Poinsettia set twice from watercolor paper. I pulled out a water brush and Karin Brushmarkers. I saturated the pieces with water and dropped in the color using the markers. I added more color on the bottom poinsettia layer to get a darker color.

Once the die cut pieces were dry, I adhered them together using liquid glue. I set those aside while I worked on the rest of the card. I die cut the LDRS Modern Geometric Coverplate II using Neenah Classic Crest 110lb cardstock, and I also cut the LDRS Modern Geometric Coverplate III from the same cardstock.

I adhered the two Geometric Coverplate dies together using glue and then glued them to the card base, which also happens to be Neenah 110lb. I opted for a small sentiment from the LDRS Potted Poinsettia stamp set. I stamped the sentiment on Neenah 110lb using VersaMark ink and heat embossed it using Ranger Princess Gold Embossing Powder and trimmed it down.

I had to play around with the placement of the flowers, leaves and sentiment. I did decide to cut a leaf die out of mirror gold cardstock, because I thought it would tie in well with the gold sentiment. I placed foam tape on the back of the flowers and adhered those in the corners, while gluing the leaves underneath them. The sentiment was also attached using foam tape for added dimension. I had to add bling, so I opted for a few PinkFresh Studio Gold Metallic Pearls.

That finishes up this project! I love the added texture in the background from the cover plates! I hope you enjoyed it, and I hope you’ll stop by and check out all of the new holiday products on the LDRS website. Have a wonderful day and don’t forget to stay awesome!

Supply List:

* Affiliate links used at no cost to you. Thank you for your support!

Latest Instagram Posts

LDRS Hello Lovely

Hello Friend! Thanks for stopping by today! I hope you are doing well and having a wonderful day! I’m back today with an LDRS card featuring the Garden’s Edge Slimline Stamp and die. Wow, this is such a beautiful stamp, and I was super excited to play with it. So, let’s jump right in!

I began by stamping the LDRS Garden’s Edge Slimline stamp on a panel of Neenah Classic Crest 110lb cardstock, using VersaFine Onyx Black ink and heat setting it using Ranger Clear Embossing Powder. I then began coloring using Copic markers BG10, BG11, BG72, G21, G24, Y08, Y11, Y15, Y17, Y32, YR27, E99, RV00, RV10, RV11, RV17 and RV55.

Once the coloring was completed, I used the LDRS Garden’s Edge Slimline Die to trim it out, and I pulled out a piece of watercolor paper for the background. I used Distress Oxide Sprays Broken China and Prize Ribbon, and spritzed them onto my glass work surface, spritzed some water, and then did some ink smooshing to obtain the soft wash of color.

Once the watercolor panel was dry, I popped it into the Misti and stamped the Hello Lovely sentiment, which is also from the same stamp set, using VersaFine Onyx Black ink and heat setting it using the same embossing powder.

Since I was not using this slimline stamped image on a slimline card, I had to choose the placement of the florals. Once decided, I placed foam tape on the back and adhered it to the watercolor panel, trimming off the excess. The excess was then added to another section of the card. We can’t let any of it go to waste, right?! This was then adhered to the card base, which is also Neenah 110lb, using foam tape. I also added a few confetti sequins because we have to have bling!

That finishes up this project! I hope you enjoyed it and I hope you found some inspiration! Have a wonderful day and don’t forget to stay awesome friend!

Supply List:

* Affiliate links used at no cost to you. Thank you so much for your support!

Latest Instagram Posts

LDRS Coneflower Hugs

Hello Crafty Friends, and thanks for joining me! Today’s project is featuring the Coneflower Stencil from LDRS Creative. Ink blending makes for such quick and easy cards, doesn’t it? Let’s get right into the details for this project!

To begin, I trimmed a panel of Neenah Classic Crest 110lb cardstock to just smaller than an A2 card, and attached the stencil using masking tape. I used LDRS inks Lipstick Jungle, In Your Face Orange, Lantern Yellow, Key Lime Pie, Swimming Hole and La La Lavender for the ink blending.

I set my panel aside for just a little bit to dry before moving on to the next step, which was to color the tiny colored portions of the flower centers with a Ranger Clear Emboss It Pen. I colored a few of the centers with the pen and then heat embossed them using Ranger Princess Gold Embossing Powder. This was repeated several times until I had embossed all of the flower centers.

Now onto the sentiment. I die cut the hugs sentiment using the LDRS Chloe Alpha Lowercase from gold cardstock once, and twice from Neenah 110lb, adhering all of those together using liquid glue. The sentiment was then glued to the ink blended panel.

I adhered the panel to a black cardstock panel, using foam tape, because I always love using black on my cards in some way. This was then adhered to the card base, which is also Neenah 110lb. And to finish up, I added some Spellbinders Fashion Gold Embellishments, because every card needs and deserves some bling!

That finishes up today’s project! I hope you enjoyed it, and I hope it inspires you to get crafty! What are your favorite stencils? I’d love to know in the comments! Have a wonderful day and don’t forget to stay awesome!

Supply List:

* Affiliate links used at no cost to you. Thank you so much for your support!

Latest Instagram Posts

LDRS Floral Hi

Hello Crafty Friends and welcome back! I hope you’re doing well and having a fabulous day! Thanks for joining me today! I’m super excited to announce that I’ve joined the LDRS Design Team, and today is my first project for them! Today’s project is featuring the Garden Grandeur Slimline Stamp, Stencil and Die set from LDRS. So let’s just jump right into the details, shall we?

I began this project by stamping the Garden Grandeur floral on a piece of Neenah Classic Crest 110lb cardstock, using VersaFine Onyx Black ink and heat setting it using Ranger Clear Embossing Powder. The coordinating stencil was then adhered to the stamped image using masking tape. I used LDRS inks in Pink Tutu, Lipstick Jungle, Scarlet Rose, Lantern Yellow, Dan-D-Lion, Key Lime Pie and Olive Branch for the stenciling. When the stenciling was completed, I used the coordinating die to cut the flowers.

I cut an A2 panel of Neenah 110lb and used the Pink Tutu ink to do some very light ink blending in the corners. I also used the LDRS Pretty Patterns Slimline Die to cut a frame from Neenah 110lb as well. I positioned the frame diagonally across my panel, trimming off the excess. This is a great way to stretch your supplies! You can use those Slim Line dies in unique ways by positioning them differently on other size cards!

The excess pieces were then added around the corners of the panel, using liquid glue, for added interest. No sense in wasting those right?!? For the sentiment, I chose to use the LDRS Chloe Alpha Lowercase and cut the letters hi three times from Neenah 110lb, adhering with glue.

I played around with the placement of the flowers and sentiment, and when I finally was satisfied, I glued the sentiment directly to the panel and adhered the large floral using foam tape in the upper corner. I trimmed the excess, and placed the remaining portion of the floral in the bottom corner. I still had excess, so I added that to the side. Again, no sense in wasting it! To finish up, I added some pearls for added interest, and adhered everything to the card base, which is also Neenah 110lb.

That finishes up this project! I hope you enjoyed it, and I hope it inspires you to get crafty in your own space! I took no waste to a whole new level on this card! I should have taken a pic of the tiny little pieces that I had left over! Have a wonderful day and don’t forget to stay awesome!

Supply List:

*Affiliate links used at no cost to you. Thank you so much for your support!

Latest Instagram Posts