Simon Says Stamp You’re So Kind Halftone Square Background

All the Feels Release

I’m having such a blast with the products from this release, and today’s project is one of my favorites! Mixed Media really isn’t in my wheel house, but I enjoy the mix of products and textures. You can check out the full All the Feels release HERE. Let me know what your favorites are!

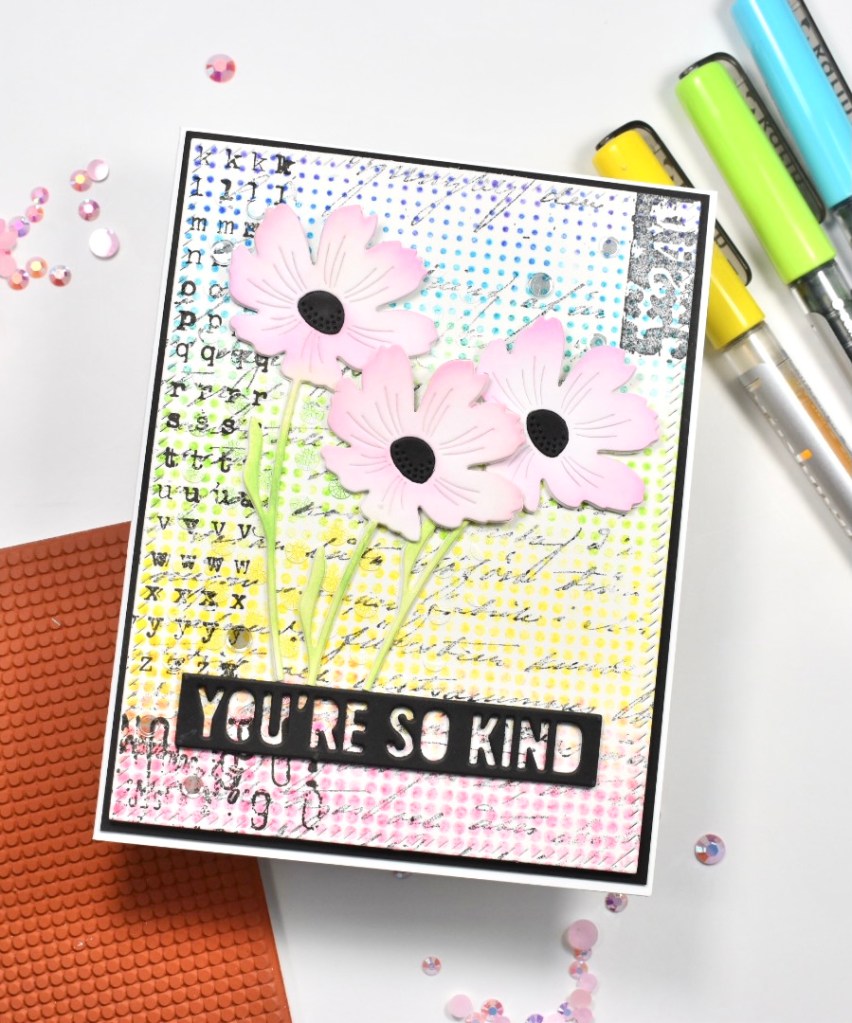
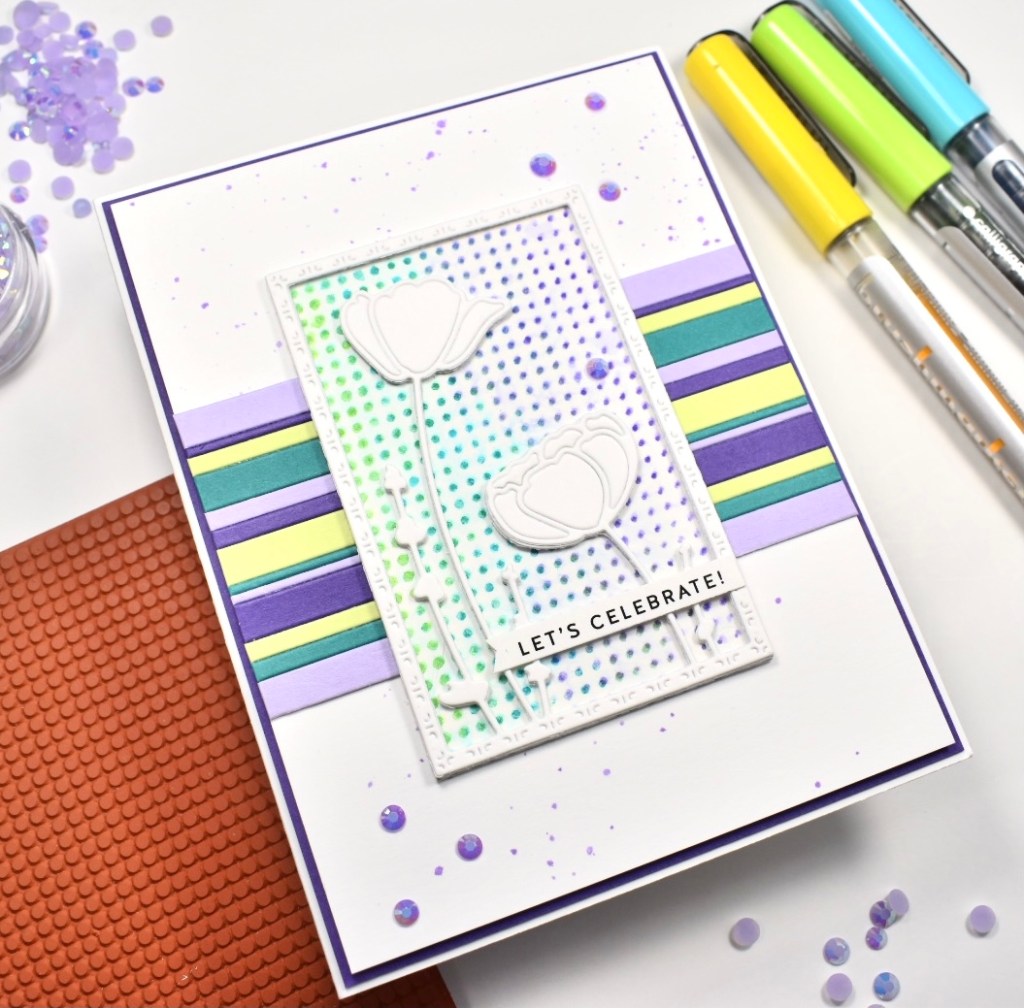
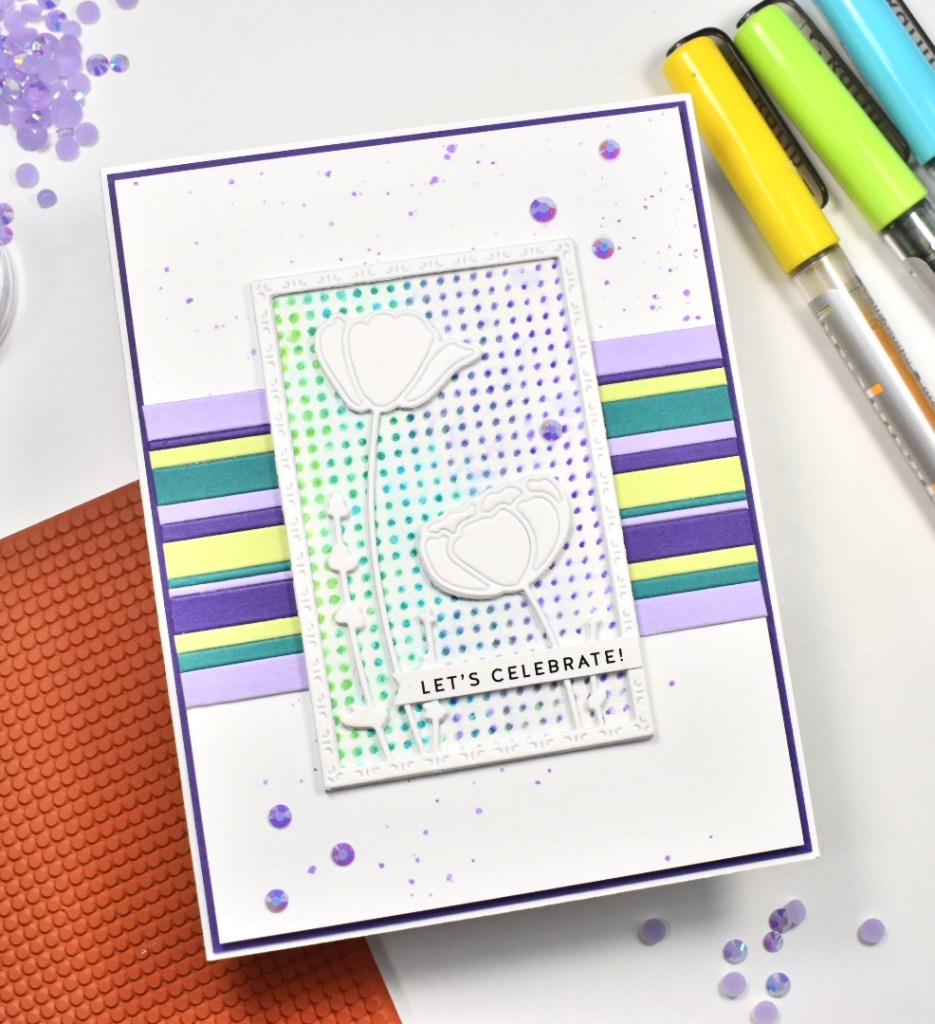
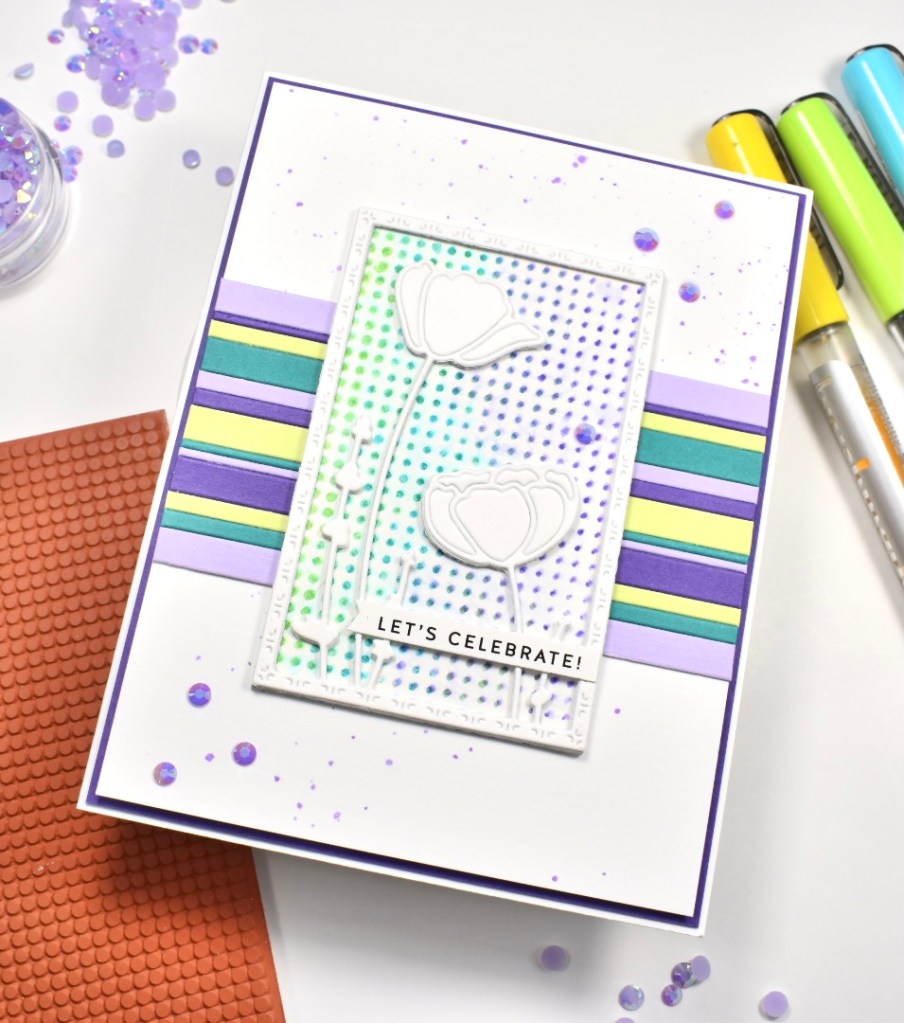
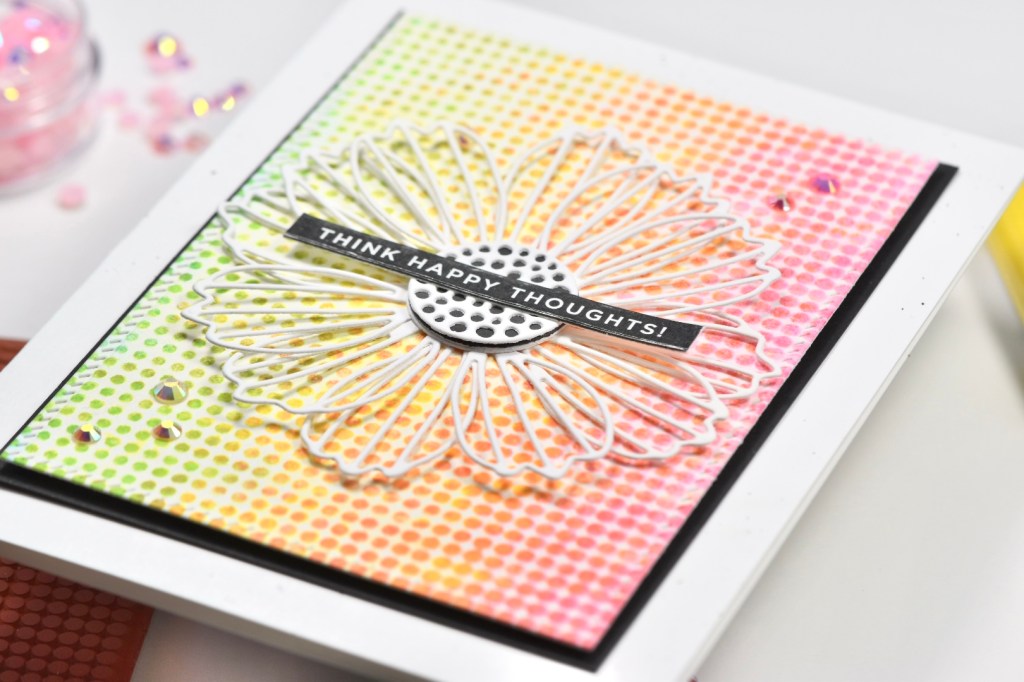
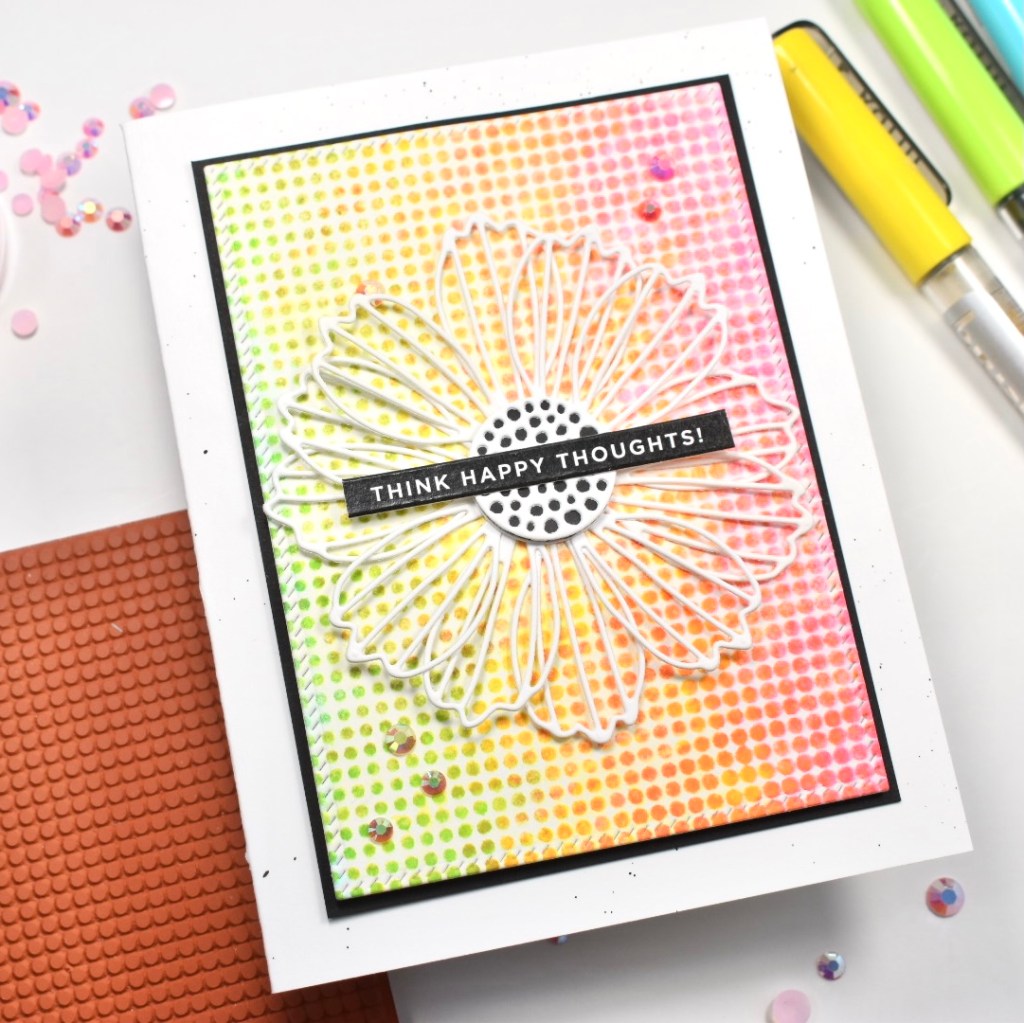
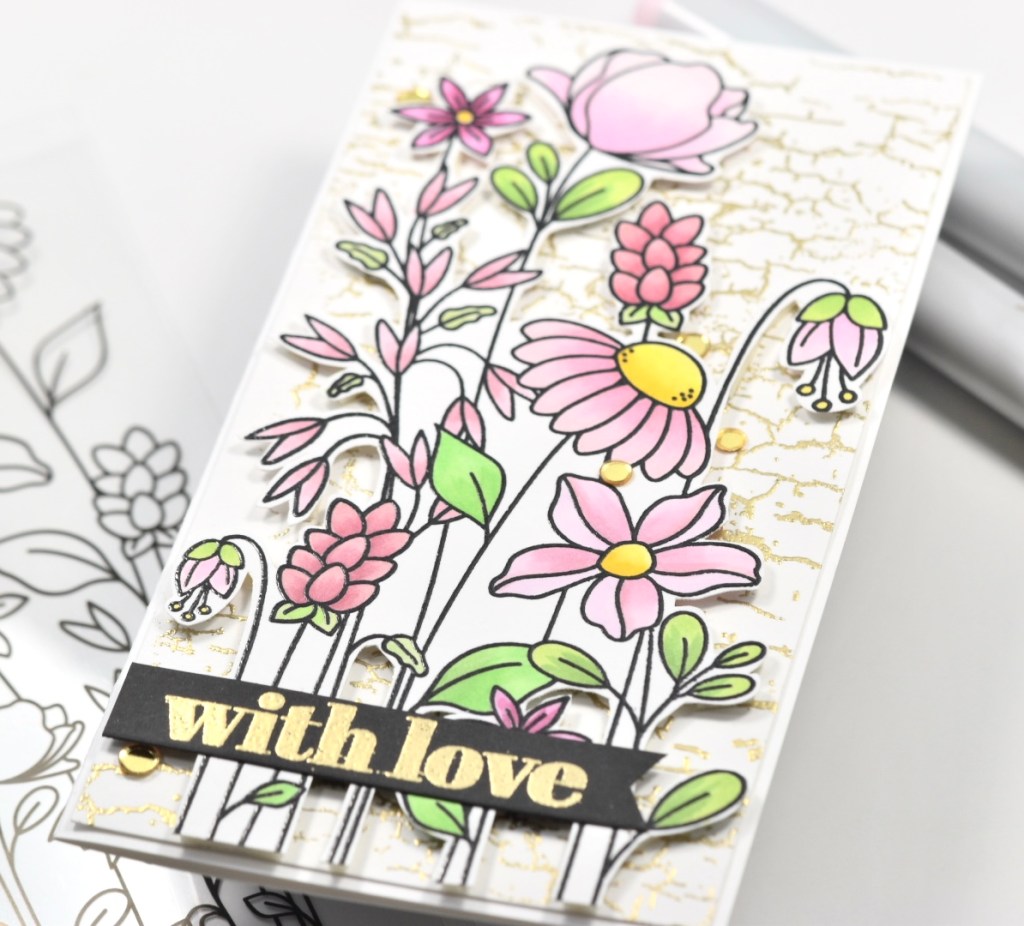
Let’s get into today’s fun project where I’m featuring the new Halftone Square Background stamp. To begin, I put a piece of Fluid Hot Press Watercolor paper in my Misti and positioned my stamp. To achieve this look, I basically scribbled Karin Brushmarkers! Super fun, super easy! I chose a few rainbow colors from my set, and I scribbled one color at a time, spritzed it with water, and stamped! What did I say? Super easy, yet I think the results were kind of cool! I repeated that process with the remaining colors.

I left my watercolor panel to dry overnight .. under some books to help with the warping. I really wanted to use some Ranger Distress Crackle Paste on this, because I had decided that I was going to try a mixed media project. I used the circle stencil from the Mini Slimline Patterns 1 set, which is also a newbie in the All the Feels release. So, I used my spatula thingie to run some paste through the stencil and left that to dry. When it was dry, I took a waterbrush and lightly touched the crackle paste with water and lightly touched that with my Karin Brushmarker. Why? Because the crackle wasn’t showing up that well, so adding just a hint of color helped .. but it still isn’t very visible.

After that was dry .. again, I whipped out some Tim Holtz Stampers Anonymous stamps, because you really can’t have a mixed media piece without Tim Holtz! Am I right?!?! I ended up using stamps from the sets Documented and Ultimate Grunge. I also used the Simon Says Stamp Old Letter Background stamp. For the background stamping, I used some Memento Tuxedo Black ink, as well as some VersaFine Onyx Black ink.

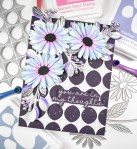
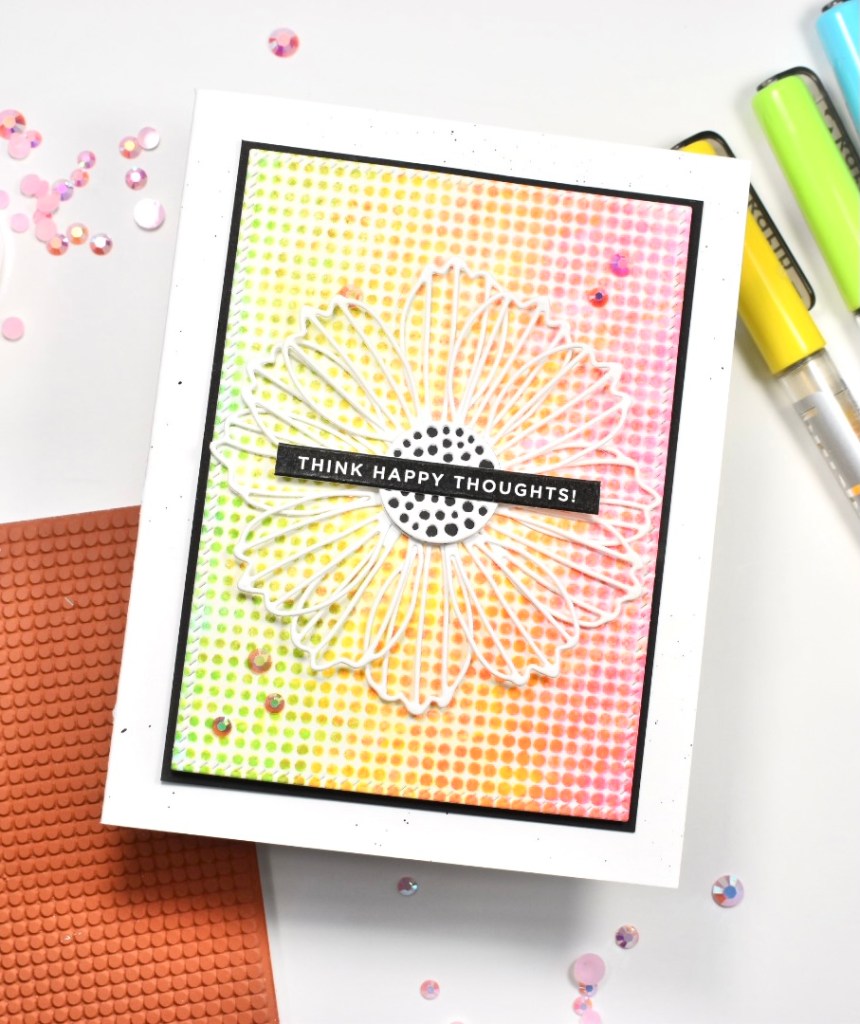
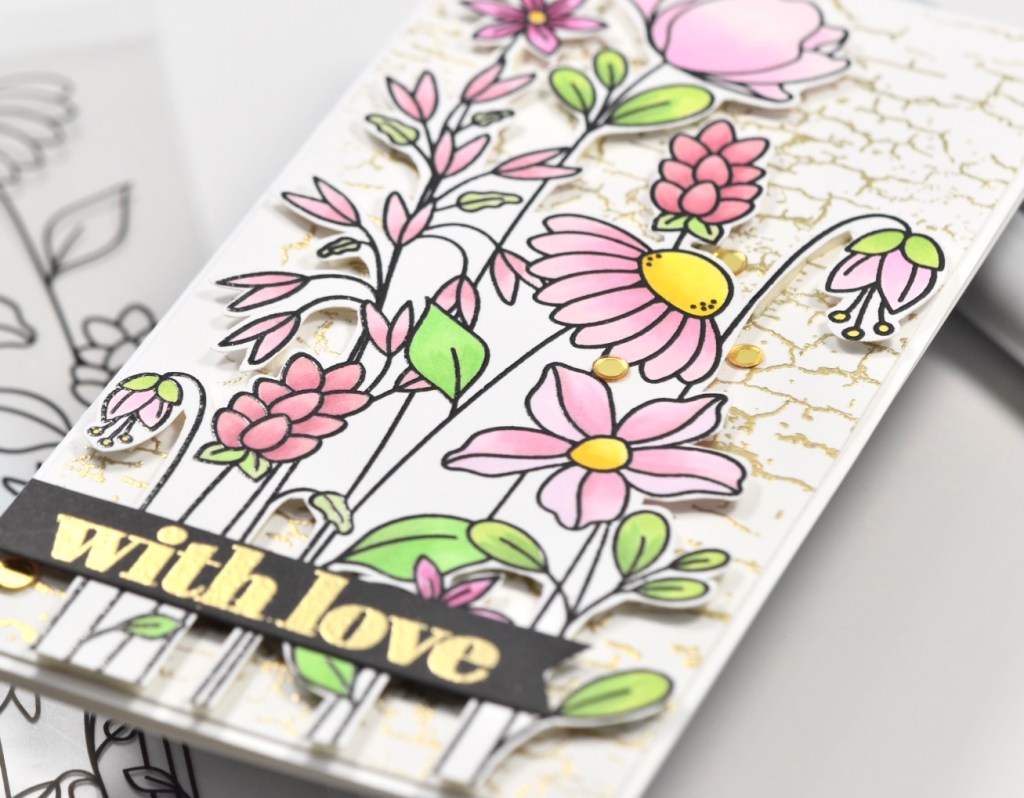
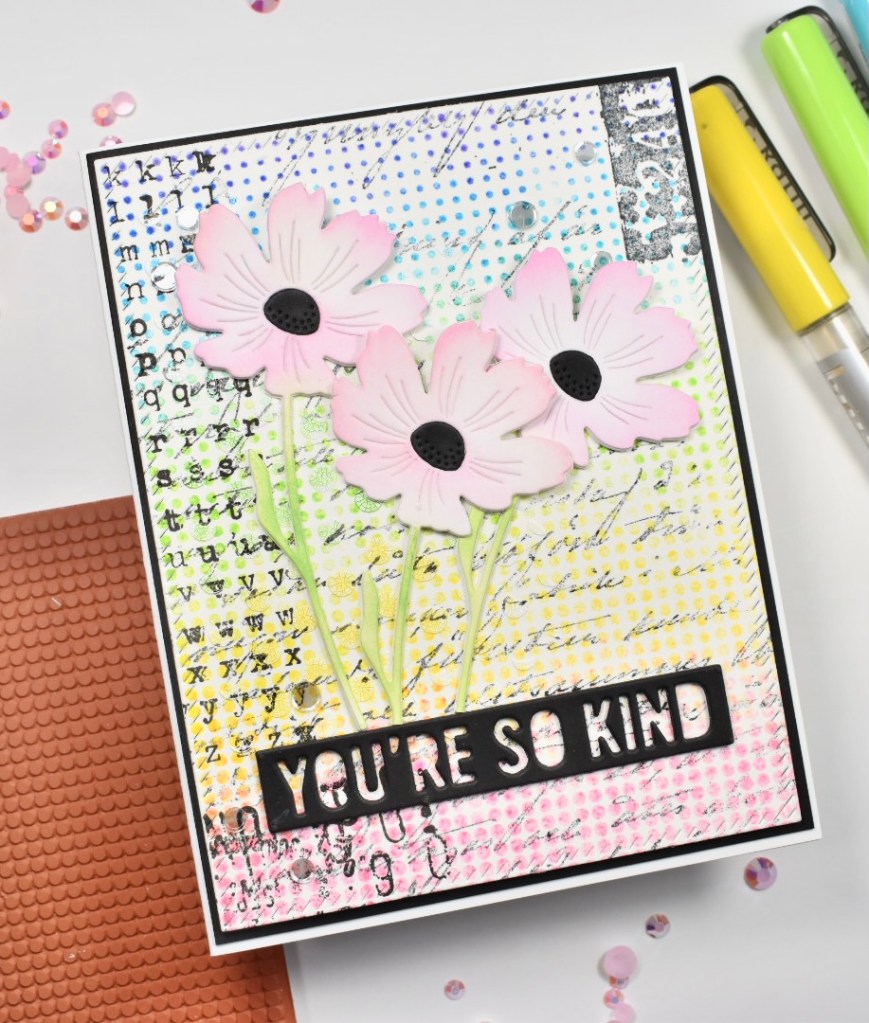
Moving on to my focal point and sentiment .. I die cut the Simon Says Stamp Cosmos Stem three times for each flower from Neenah Classic Crest 110lb cardstock. And .. I cut that little center piece from black cardstock. I thought that would tie all of my black elements together. I added color to one layer for each of the flowers using Distress Oxide Kitsch Flamingo and Distress Oxide Mowed Lawn. I adhered my flower stems together with the colored piece being on top with Craft Tacky Glue. I then die cut the Simon Says Stamp You’re so Kind sentiment three times from black cardstock, and glued those together. Why all this die cutting? Because dimension is life, and die cutting is my jam!

My next step was just dorking around with the placement of everything on my panel. Once I figured it out, I adhered my sentiment to my panel with Craft Tacky Glue, and I had to trim some of my stems before gluing those as well.

Now we all know about the bling situation! There has to be bling! Always! I opted for Simon Says Stamp Moonshine Confetti for this project. It gave just a little bit of shine, but wasn’t too distracting. I adhered my panel to a black panel using 3M Foam Tape and then glued that to my card base, which happens to be Neenah 110lb cardstock.

And there you have it! Like I said, mixed media isn’t my thing, but I do really enjoy it! It’s just so much fun to bring so many different things together on one project! I hope this inspires you to try something new or something that isn’t necessarily your thing either!

Don’t forget to check out the new release, All the Feels!

Thanks so much for stopping by and don’t forget to stay awesome!

Supply List:

*Affiliate links used at no cost to you. Thank you for your support!

Latest Instagram Posts

Simon Says Stamp Mini Slimline Patterns

All the Feels Release

Hello and welcome back! Today I’m featuring a super fun product from the new Simon Says Stamp All the Feels release, Mini Slimline Patterns 1. This is a set of three stencils that consists of circles, stars and stripes, perfect for all of those cute mini slimline cards!

Let’s get into today’s project! To begin, I cut three panels that were the same size as the stencils from Neenah Classic Crest 110lb cardstock, and taped those to the stencils using masking tape. Since I created three cards, I’ll go through each one separately.

For the circle stencil, I ink blended PinkFresh Studio Sparkling Rose, Sunshine and Ocean Breeze. I then went over the ink with Gina K Glitz Glitter Gel – Iridescent, and set that aside to dry while I worked on my sentiment. I die cut the Simon Says Stamp Love You once from gold cardstock and three times from Neenah 110lb cardstock and adhered those together using Craft Tacky Glue. I also die cut the Simon Says Stamp Outline Clustered Leaves once from Neenah 110lb. Once my panel was dry, I glued the leaves down only using the center stem. I then glued my sentiment atop that, along with some PinkFresh Studio Crystals Mix. I adhered my panel to another panel of Concord and 9th Sprout cardstock using 3M Foam Tape. That was then adhered to my card base which happens to be Neenah Classic Crest 110lb.

For the star stencil, I ink blended PinkFresh Studio Mint, Ocean Breeze and Soft Lilac. And again, I went over that with the Gina K Glitz Glitter Gel – Iridescent. I used the Simon Says Stamp Friends die for my sentiment and cut that three times from Neenah 110lb. I adhered those together using Craft Tacky Glue and snipped the “S” off of Friends. I used the new Mini Starts Party die to cut stars from white and glitter cardstock. I used the same inks to do a little ink blending on the white stars. I glued my friend sentiment directly to my card panel and attached the “shine brightly,” which is from Tim Holtz Idea-ology Sentiment Label Stickers, using 3M Foam Tape, along with the stars. I mounted my panel to another panel of Simon Says Stamp Sea Glass cardstock using foam tape, and that was then adhered to my card base finishing up this project.

Now for the striped stencil .. I ink blended Distress Oxide Chipped Sapphire, Tumbled Glass and Spun Sugar and went over that with the same glitter gel. I die cut the Simon Says Stamp Just Because sentiment three times from Neenah 110lb and adhered those together using Craft Tacky Glue. I also used the Simon Says Stamp Cosmo Flower Frame for this one and trimmed the flower out of the frame.

I adhered my sentiment directly to my card panel, and adhered the flower using foam tape. I once again adhered this panel to another panel of Simon Says Stamp Sea Glass cardstock before adhering that to my card base. I ended up using PinkFresh Studio Jewels Mix for my necessary bling!

There’s three projects using the three stencils from the new Mini Slimline Patterns 1! These were super fun to make because I always forget about busting out my gels and pastes! Don’t forget to check out the new release, All the Feels! So much stuff to inspire you!

Thanks so much for stopping by today and stay awesome my friend!

Supply List:

*Affiliate links used at no cost to you. Thank you for your support!

Latest Instagram Posts

Simon Says Stamp Beautiful Definition

All the Feels Release

Hey Guys! How’s everyone doing? Simon Says Stamp is continuing the All the Feels celebration with an Instagram Hop today! You should swing over there to check it out! They are giving away a $25 gift card at every stop on the hop! Wow! You can check out my Instagram or Simon’s Instagram for all the details and a full hop list!

So let’s get into today’s project. I love how this card turned out! I rarely say that about my own cards, because I’m my own worst critic ya know. Today’s card is featuring the Mini Slimline Patterns 1 stencil set, along with the Mini Stars Party Die. To begin, I cut a panel of Neenah Classic Crest 110lb cardstock the same size as the star stencil and taped those together using masking tape. I did some light ink blending using PinkFresh Studio Raspberry Bliss, Sweet Mustard, Grassy Knoll and Slumber.

I die cut the Etched Eucalyptus Wreath twice from Neenah 110lb and adhered those together in a few spots using Craft Tacky Glue. I also die cut the Beautiful sentiment twice from Neenah 110lb and once from glitter cardstock and adhered those together. While I was cutting, I went ahead and cut the Mini Stars Party die from the same glitter cardstock.

I trimmed my ink blended panel to 3×6 and adhered the Eucalyptus Wreaths using glue and adhered the Beautiful sentiment atop that. I adhered the Sentiment Strip to the panel across the wreath using 3M Foam Tape and went ahead and added some glitter stars with foam tape as well. I added my panel to some black cardstock, because I always like the contrast that it provides. Lastly, I adhered everything to my card base, which is Neenah Classic Crest 110lb.

That wraps up today’s project! I hope you enjoyed it, and I hope you’ll stop by my Instagram to check out the hop! Don’t forget, lots of prizes to be won!

Have a wonderful and stay awesome friends!

Supply List:

*Affiliate links used at no cost to you. Thank you for your support!

Latest Instagram Posts

Simon Says Stamp Let’s Celebrate Halftone Square Background

All the Feels Release

Let’s celebrate! What are we celebrating? Simon’s new release, All the Feels! Why are we celebrating? Because we can .. and because it’s just AWESOME! Have you checked it out yet? What are your favorites?

I’m using the new Halftone Square Background stamp on today’s project. When I initially stamped this image, I stamped it twice because, I mess up sometimes and I wanted to have an extra just in case ya know .. I’m sure no one else messes up, but I sure do! By stamping it twice, that allowed me to make three projects from those panels .. hence, seeing multiple projects with the same technique. I think the panels turned out super fun, AND it was a super easy technique. So, if you haven’t seen the other projects, I’ll let you know how I created them.

I began by putting a piece of Fluid Hot Press Watercolor paper in my Misti. I’m using this brand of watercolor paper because it’s what I have. I pulled out some rainbow colors from my Karin Brushmarkers set, and used one marker to scribble directly on the stamp, spritzed it with water and stamped it. I repeated that process with the remaining colors, which ended up being five colors. I left that panel to dry overnight.

The watercolor panel on this particular project was a left over piece from another project .. I couldn’t let that go to waste, right?! The Simon Says Stamp Poppy Frame was the perfect size for this left over piece, so I die cut that frame three time from Neenah Classic Crest 110lb cardstock, and adhered them together using Craft Tacky Glue. I then glued those frame pieces to my small watercolor piece.

Okay, so my card was needing something in addition to my watercolor frame panel, so I decided to make a little striped panel using matching colored cardstock. I think most of this cardstock is Simon, but there might also be a piece from Concord and 9th as well. To make the striped panel, I used the Pretty Pink Posh Simple Strips to cut the colored cardstock. I then used a tape runner to lay down some adhesive on some thin paper and positioned the strips atop that, and trimmed it to fit my card panel.

Before adhering anything to my card panel, I splattered it with a purple Karin Brushmarker mixed with some water. I then adhered my striped panel using Craft Tacky Glue and then adhered my frame panel using the same. I chose a Simon Says Stamp Sentiment Strip to add and trimmed it out using their Sentiment Labels Die. That was then glued to my frame.

And what do I always say? All projects need bling! I used the PinkFresh Studio Jewels Mix to add some coordinating purple jewels. I adhered my card panel to a coordinating purple panel using 3M Foam Tape, because dimension is life! Everything was then adhered to my card base, which is Neenah Classic Crest 110lb cardstock.

That finishes up today’s project! I’m so glad that you stopped by! Give this scribbling technique a try and tag me over on Instagram! I would love to see your creation! Check out Simon’s new release, All the Feels, as well!

Stay awesome .. always!

Supply List:

*Affiliate links used at no cost to you. Thank you for your support!

Latest Instagram Posts

Simon Says Stamp Cosmo Halftone Square Background

All the Feels Release

Hello there! I’m still playing with goodies from the new Simon Says Stamp All the Feels release, and having a blast doing so! You can check out the full release HERE. There’s so many awesome things to choose from!

For today’s project, I’m featuring the new Halftone Square Background stamp. I honestly have so many Simon backgrounds, but I love them all! They are always my go-to when I’m needing a background of some sort. Anyhoo, let’s get into it.

To begin, I put a piece of Fluid Hot Press Watercolor paper in my Misti and positioned my stamp. I chose some rainbow colors from my set of Karin Brushmarkers and scribbled on one color at a time on the stamp, spritzed it with water, and then stamped it. I repeated this process with the remaining colors. I think that I ended up using five colors. You don’t see that many colors in this project because I cut it apart for multiple projects, and you’ll see the other project later on.

I left my watercolor panel to dry overnight before moving on. I used the PinkFresh Studio Diagonal Stitched Rectangles die to cut my panel down to size. For my focal point, I cut a bunch of petals using the Simon Says Stamp Cosmo Flower Petals from Neenah Classic Crest 110lb cardstock. I stacked a few of the solid flower centers together, along with a black one using Craft Tacky Glue and put one of the detailed flower centers on top of that pile.

I then positioned my flower center in the middle of my panel, without adhering it! I held it there while I glued my flower petals underneath it. Once I got all of those adhered, I then glued my flower center over those. In all, I used twelve flower petals for this project.

I chose a Reverse Sentiment Strip, trimmed it down using the Simon Says Stamp Sentiment Labels Die and glued that to the center of my flower. As we all know, no project is complete without bling! I used the PinkFresh Studio Jewels Mix to add that needed bling. I adhered my card panel to a black cardstock panel using 3M Foam Tape. I then adhered those panels to my previously black splattered card base. For my splatter, I used Royal Talens Amsterdam Oxide Black Acrylic Ink.

Alright, that does it for today’s project! I hope you enjoyed it, and I hope it gives you a spark of creativity! Don’t forget to check out the full release HERE! Thanks so much for stopping by.

Don’t forget to stay AWESOME!

Supply List:

*Affiliate links used at no cost to you. Thank you for your support!

Latest Instagram Posts

Simon Says Stamp Mini Stars Party Birthday Card

All the Feels Release

Hello! Hello! Thanks for stopping by today! The new Simon Says Stamp All the Feels release is AMAZING! What are your favorites? I would love to know!

For today’s project, I’m featuring the new Mini Stars Party die cut. Remember the Mini Hearts Party die from the Love You release? Same idea, just with stars! So let’s get started! To begin my project, I die cut a bunch of strips using the Pretty Pink Posh Simple Strips from various colored cardstocks. I used a tape runner to put down some adhesive on a thin piece of white paper and adhered my strips to that.

I die cut the Mini Stars Party die once out of Neenah Classic Crest 80lb cardstock. While I was cutting, I went ahead and cut the Happy Birthday sentiment twice from Neenah Classic Crest 110lb, and cut the shadow twice from black cardstock. I went ahead and adhered the sentiment pieces together using Craft Tacky Glue. I ended up trimming down the Mini Stars Party die because I wanted it to fit across my striped panel without any overhang.

I adhered the star panel directly to my striped panel using glue, and then adhered the Happy Birthday sentiment on top of the stars using 3M Foam Tape. Why foam tape? Because dimension is life! I added some of the white stars to the panel as well using foam tape for interest.

Because I like dimension and contrast, I adhered my striped panel to a black cardstock panel and then adhered that to my 5 x 7 card base, which is Neenah Classic Crest 110lb that I had previously splattered with some thinned black gouache.

That’s it for today’s project! I hope you enjoyed it! Don’t forget to check out the new All the Feels release! You won’t be disappointed! Thanks again for stopping by!

Stay awesome!

Supply List:

*Affiliate links used at no cost to you. Thank you for your support!

Latest Instagram Posts

Simon Says Stamp Floral Garden Spotlight

All the Feels Release

Hey there Crafty Friends! I’m dying over the new Simon Says Stamp release, All The Feels! So many gorgeous things! Did you order anything? I’d love to know what your favorites are!

For today’s card, I’m doing a little spotlight action using the new Floral Garden stamp set. I began by prepping my cardstock with an Anti-Static Powder Tool and stamping the image on Neenah Classic Crest 110lb cardstock using VersaFine Onyx Black ink and then embossing the image with Ranger Clear Embossing Powder. I repeated this process a second time on another piece of Neenah 110lb. The second will be used for the “spotlight.”

I then colored the one flower on one of my images using Copic markers RV00, RV10, RV52, RV55, YG13 and YG17. Once the coloring was done, I carefully fussy cut that one flower. Let me just say, that was rough! I was so worried that I was going to mess it up by cutting wrong or bending that delicate little stem some wonky way! Thank goodness I was able to get it done! Woohoo!

I had not fully decided on a sentiment when I started this card, but as things progressed, I thought a little striped sentiment would be fun! It would give this card some oomph, which it was going to need! I began cutting my stripes with pink cardstock from my stash using the Pretty Pink Posh Simple Strips. I adhered those to a thin sheet of white paper using Craft Tacky Glue.

Time for some die cutting! I cut the Hello sentiment from my striped panel once, and twice from Neenah Classic Crest 110lb. I then cut the Hello shadow three times from Neenah 110lb. Why so many times you might ask? Because dimension is life! I then adhered all of these pieces together using Craft Tacky Glue.

I trimmed my black and white stamped panel down to 4″ x 5.25″ and adhered my single flower on top of the same flower using 3M Foam Tape. I then adhered the Hello sentiment using glue to the bottom left. I mounted this panel onto black cardstock, because I like the contrast that it gives. Everything was then adhered to my card base, which is Neenah Classic Crest 110lb cardstock.

No card is complete without some embellishments, so I added some Studio Katia Arctic Breeze Pearls here and there. Pink gems or even clear drops would be amazing, so use what you have!

I hope you enjoyed this project today! It was super fun to make! You can check out the entire Simon Says Stamp release, All The Feels HERE. Thanks so much for stopping by!

Stay awesome my beautiful friend!

Supply List:

*Affiliate links used at no cost to you. Thank you for your support!

Latest Instagram Posts

Simon Says Stamp With Love Floral Garden Mini-Slimline

All the Feels Release

Hello Friends and welcome back to my blog! The new Simon Says Stamp release All the Feels is live! Have you checked it out yet? Do you have any favorites? I ended up buying quite a few things! Shhhh .. don’t tell my husband!

For today’s card, I’m showcasing the new stamp set Floral Garden. If you like to color or paint, this one’s for you! I had in my mind that I wanted all of the flowers to be pink, and I wasn’t sure how it was going to look, but sometimes you just have to jump in feet first right?! To begin my project, I stamped the floral image on Neenah Classic Crest 80lb cardstock using VersaFine Onyx Black ink and heat embossed it with Ranger Clear Embossing Powder. Once that was done, I started coloring the image with Copic markers YG05, YG07, YG13, YG17, G43, RV00, RV02, RV10, RV11, RV13, RV19, RV32, RV34, RV52, RV55, R81, R83, Y08, Y13 and Y15.

After all of the coloring was completed, I decided that I wanted to cut apart the image, because this stamp is great for creating mini-slimline cards. Lots of fussy cutting ensued! Thank goodness for those little Tim Holtz Scissors!

Next I stamped the Simon Says Stamp Crackle Background on a piece of Neenah Classic Crest 110lb cardstock using VersaMark ink and heat embossed it using Ranger Princess Gold Embossing Powder. I then trimmed that panel down to 3 1/8 x 6 1/8.

My floral image is all cut out, so I began the tedious task of cutting all the little slivers and pieces of 3M Foam Tape to put on the back of that. I then adhered the floral piece to the Crackle panel .. you know, because dimension is life! Or at least it’s my life!

This set includes a few sentiments that are a great size, so I chose the With Love sentiment and stamped it with VersaMark ink on black cardstock and heat embossed it using the same Princess Gold Embossing Powder. I trimmed my sentiment down using the Simon Says Stamp Sentiment Labels Die.

I attached my sentiment strip to my panels using Craft Tacky Glue, and adhered my panels to my card base, which is Neenah Classic Crest 110lb. And, of course, there HAS to be embellishments!

Thanks so much for stopping by! I hope you enjoyed this floral project! You can check out the full All the Feels release HERE.

As always, don’t forget to be awesome!

Supply List:

* Affiliate links used at no cost to you. Thank you for your support!

Latest Instagram Posts

Simon Says Stamp Floral Garden Watercolor

All the Feels Release

Hello Crafty Friends! Simon Says Stamp new release, All the Feels, release is live! I’m playing with the Floral Garden stamp set today, and this is such a beautiful stamp, and really, a beautiful release! I’ve had so much fun coloring and watercoloring different versions of this stamp!

I had to put my Karin Brushmarkers to work on today’s project. To begin, I stamped the Floral Garden image on a piece of Fluid Hot Press Watercolor Paper with VersaFine Onyx Black ink and heat embossed it using Ranger Clear Embossing Powder. I taped my image down to a board using masking tape to prevent warping. My board just happens to be a $2.19 clipboard from Target .. but hey, it gets the job done!

I have to be the world’s slowest colorer! It doesn’t matter if it’s markers or watercolors .. I’m SLOW! That’s just all there is to it. I got my Karin markers down off the shelf and brushed them off and got busy. I ended up using a Black Velvet Silver No. 2 brush for this project. The small brush helps me to have more control over the amount of water and ink .. and Mama needs control!

Once my image was completely dry, I trimmed it down and did some white splatter using Royal Talens Titanium White Acrylic Ink. I love this ink for splatter because the consistency is PERFECT! I have some in gold as well, and it’s pretty dang awesome too! Need to get some in black! While that was drying, I worked on my sentiment. I chose the Missing You sentiment from the Floral Garden stamp set and stamped that on vellum with VersaMark ink and heat embossed it using Simon Says Stamp Detail White Embossing Powder. I die cut the sentiment using the Simon Says Stamp Sentiment Labels Die. I actually die cut another piece of vellum so that I could double them up.

I wrapped my vellum sentiment around my floral panel and adhered it to the back using Craft Tacky Glue. I also tied a piece of black and white twine around the panel as well. I adhered my floral panel to a black cardstock panel using 3M Foam Tape, because I really like the contrast that it provides. I then adhered my panel to my card base, which is Neenah Classic Crest 110lb, that I had previously lightly splattered with thinned black acrylic paint.

I didn’t want to waste the leftover piece of my watercolor panel, so I decided to just make it into a super cute bookmark! I added an eyelet and some tassels, along with the word Read. I used the Simon Says Stamp Rounded Alphabet Small to die cut the letters three times from Neenah 110lb and adhered those together using glue. I think it turned out kind of cute!

That’s it for this project. I hope you enjoyed it, and I hope it inspires you to get crafty! You can check out the entire All the Feels release HERE. Thanks for stopping by!

Don’t forget to stay awesome!

Supply List:

*Affiliate used at no cost to you. Thank you for your support!

Latest Instagram Posts