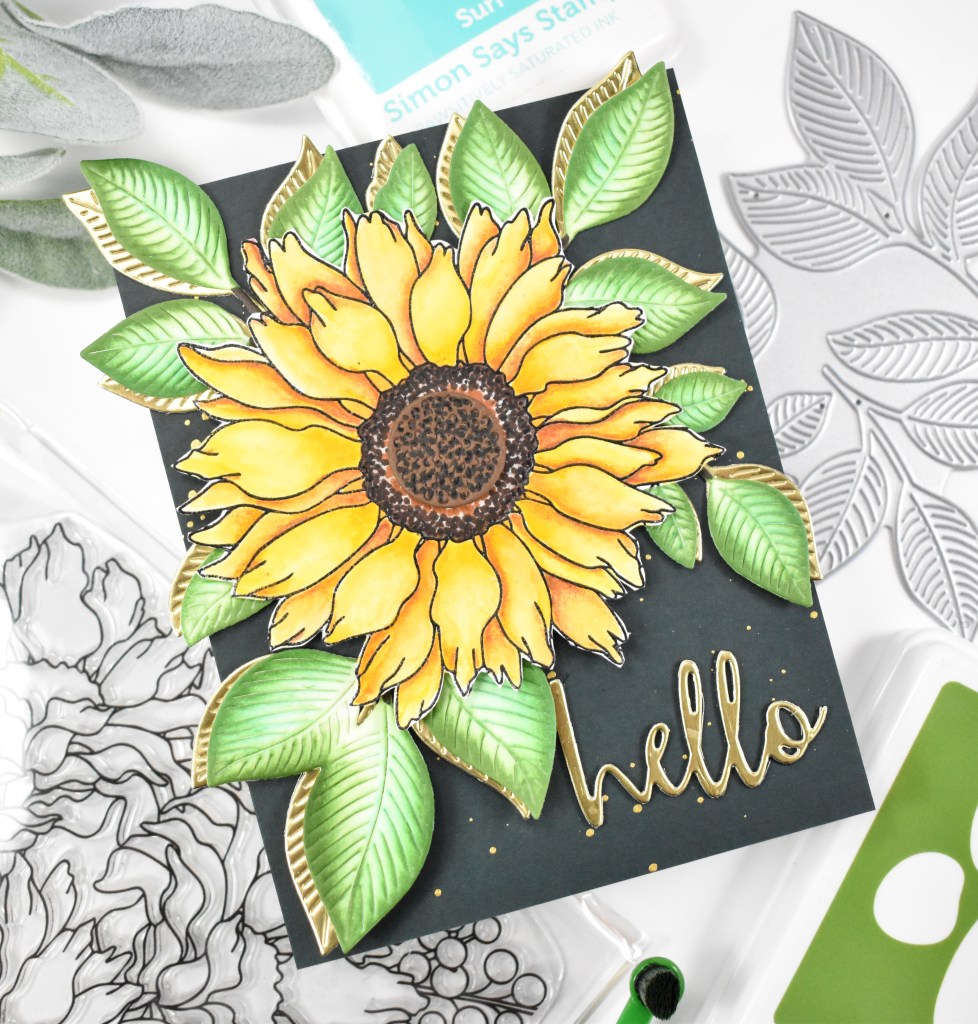
Simon Says Stamp Thinking of You Whirl Butterflies

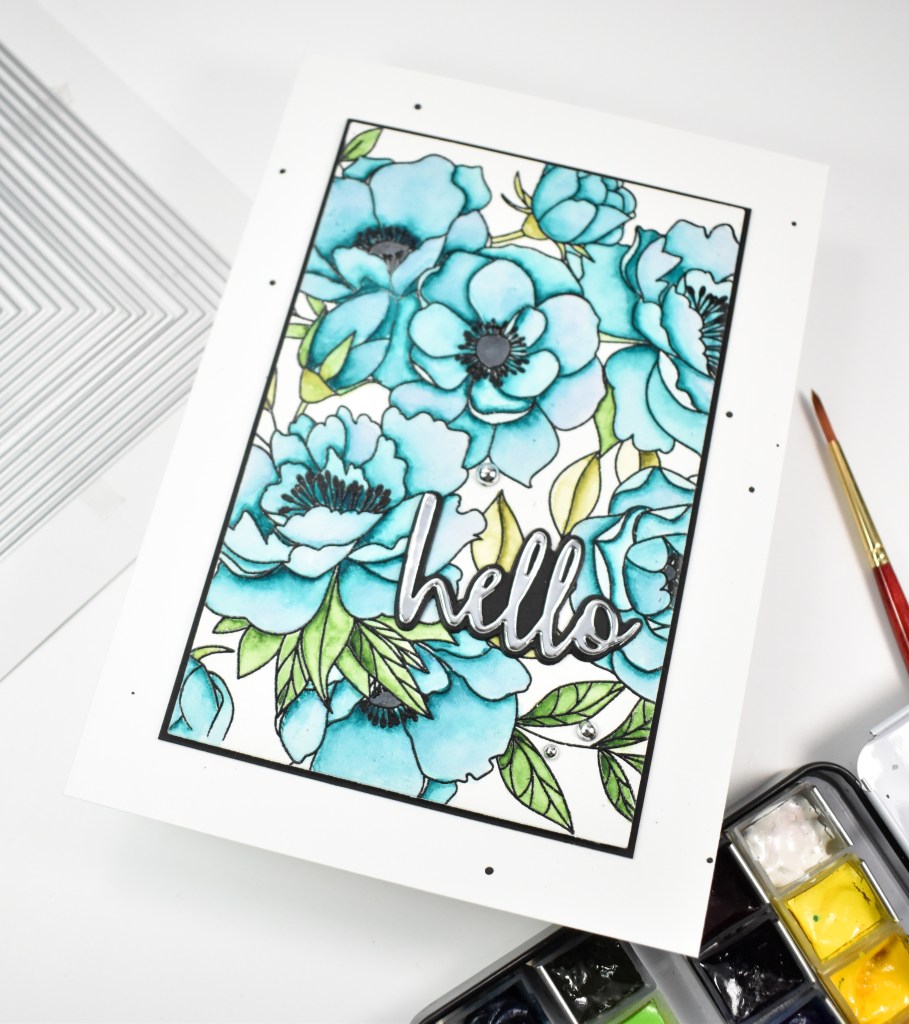
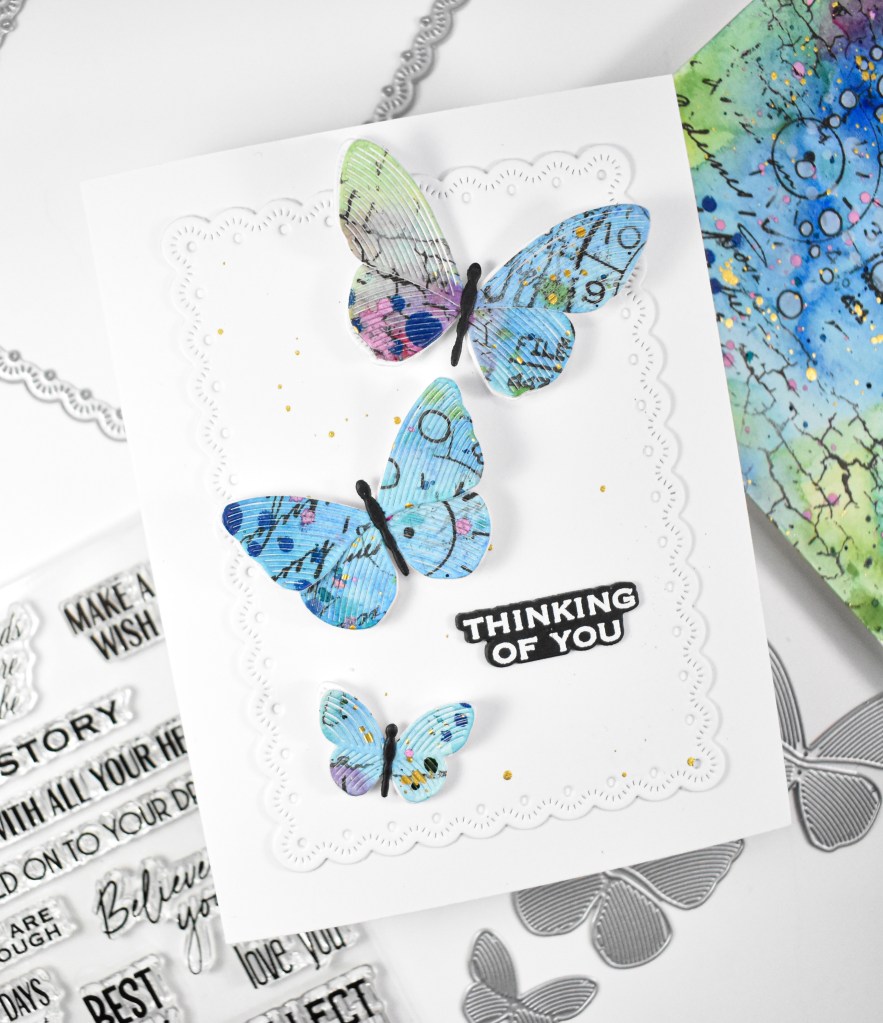
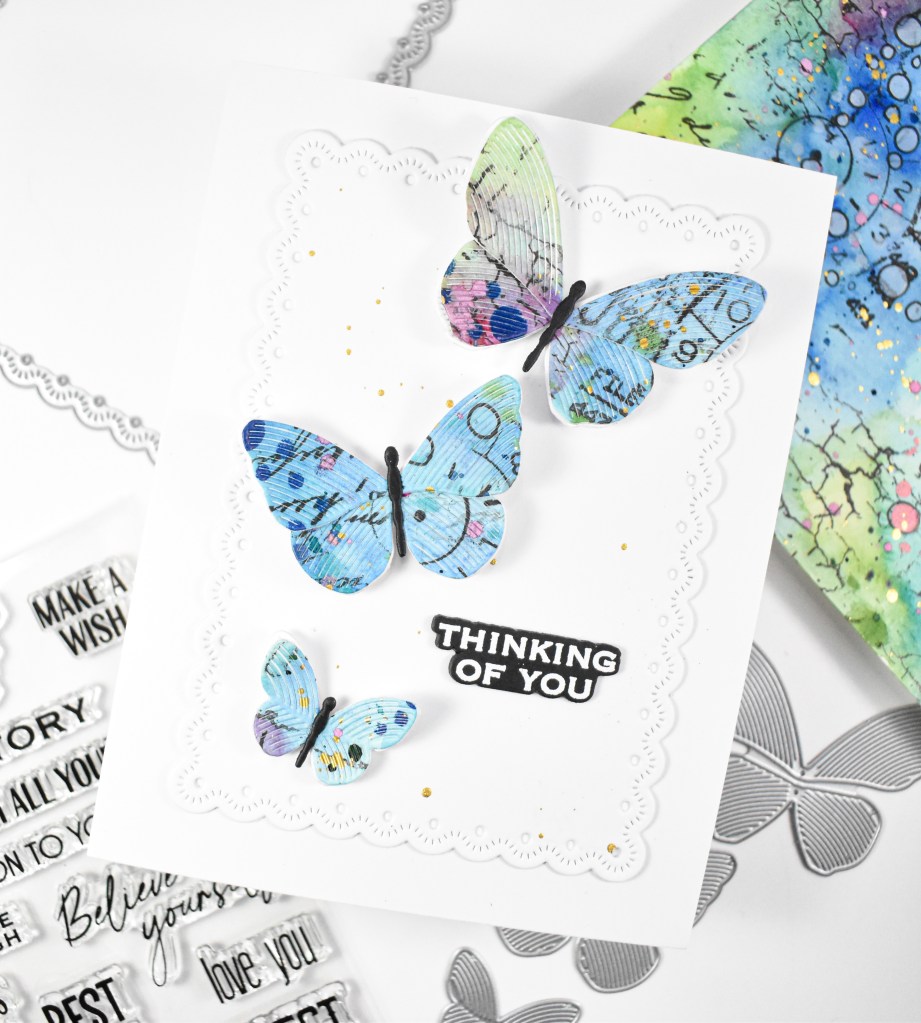
Hello Friends, and welcome back! I’ve had so much fun creating large watercolor panels with various stamping, drawing, splattering, etc lately! I made this panel using blues, greens and a little bit of pink, and I thought the Whirl Butterflies would be cool cut from it. Let’s go ahead and quickly run through the details.
NOTE: all supplies are linked in the thumbnails at the end of this blog post.
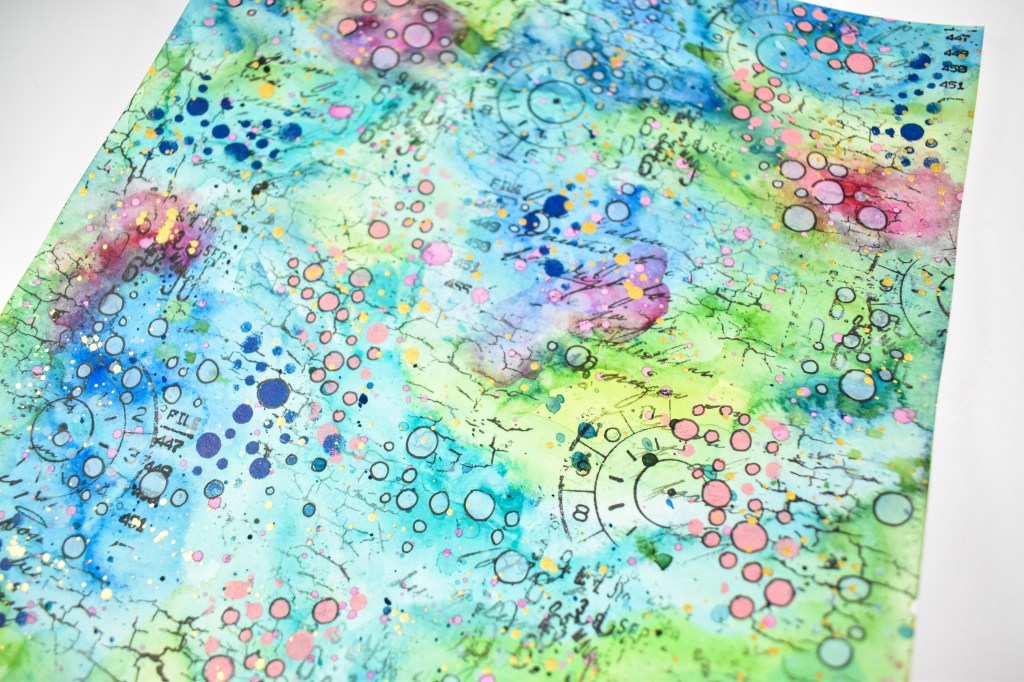
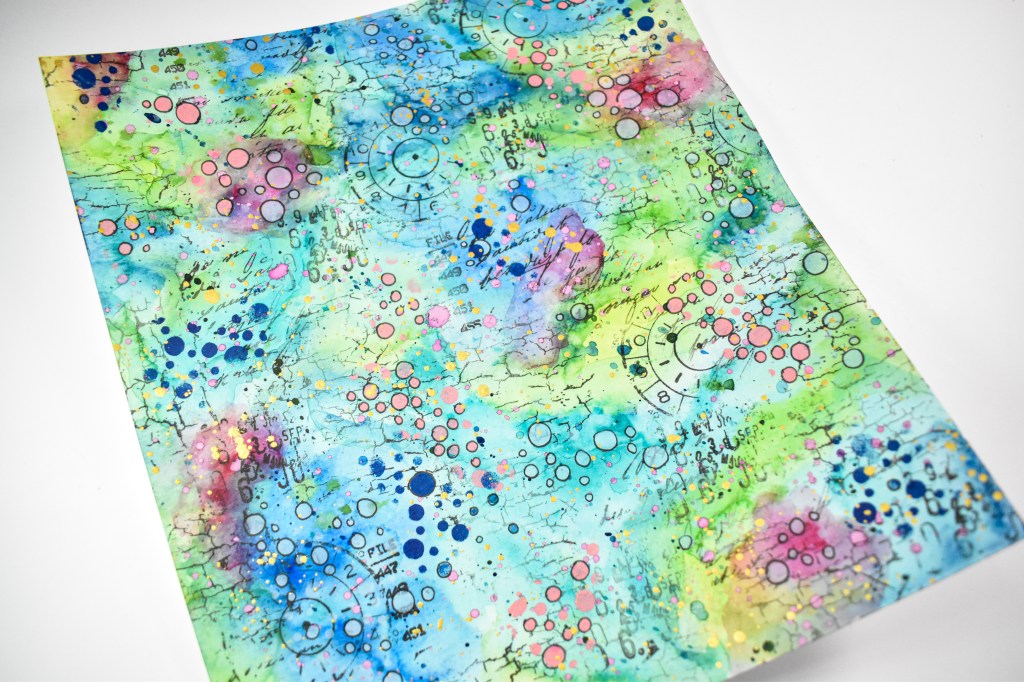
The watercolor panel measures 9 x 12 inches, so I have lots to create cards with! I first added the watercolors to the panel beginning with one color and then adding the next color. I didn’t worry about drying the panel between applications, because I love when the colors blend together. Once I was satisfied with the colors, I let the panel completely dry before moving on to the next step.
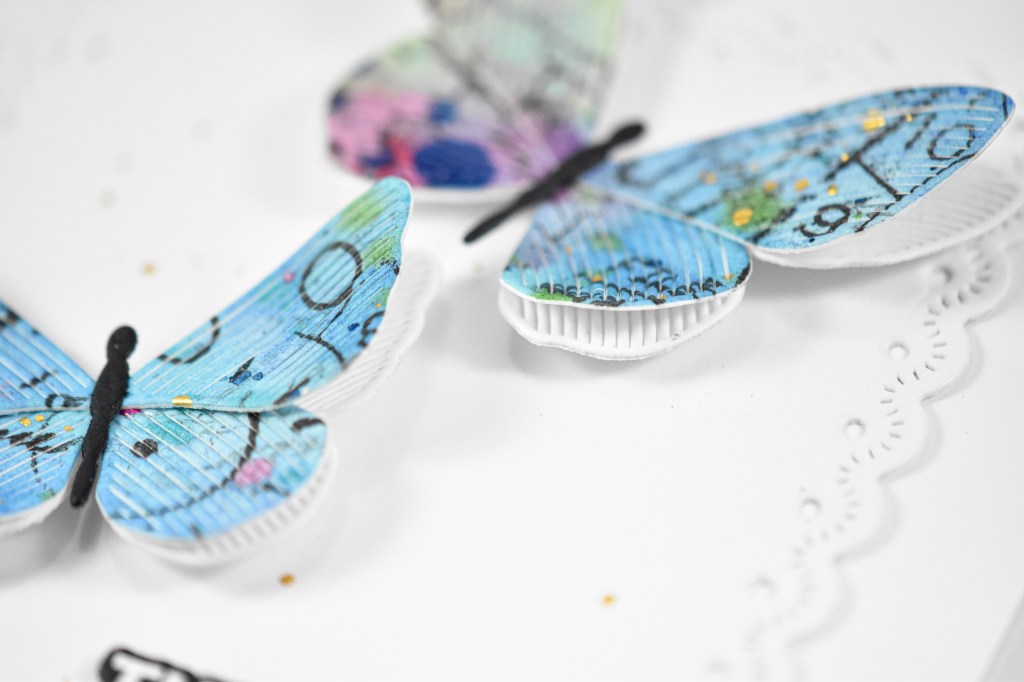
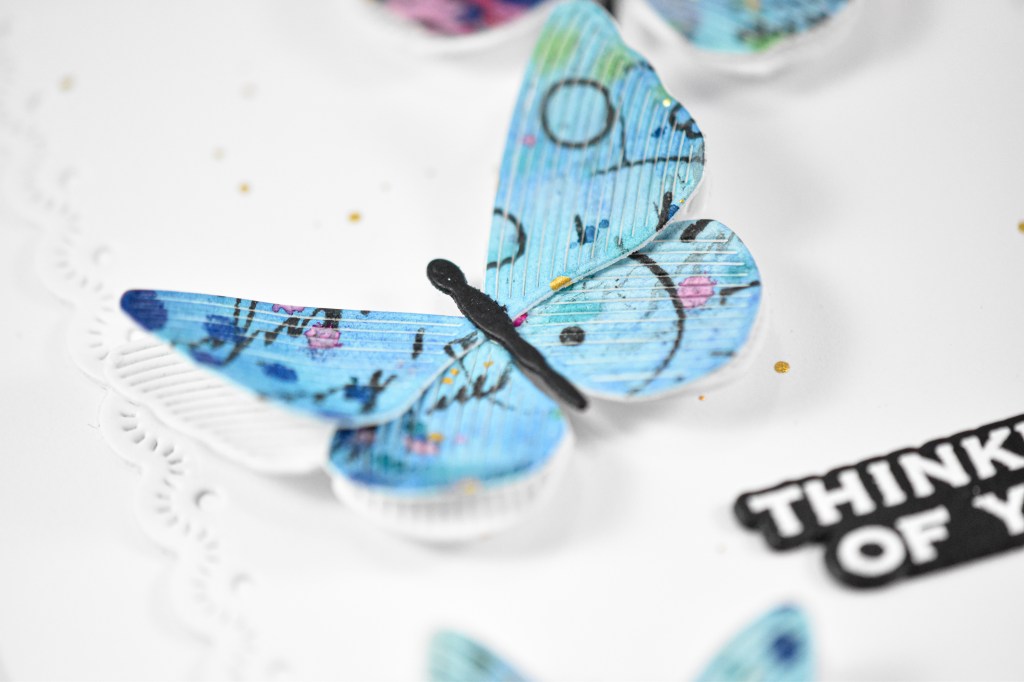
I pulled some various stamps from Simon, as well as from Tim Holtz and randomly stamped onto the panel using Archival Black ink. I then took a stencil and added some white ink, but I think that got lost in the process, so I then took some blue and pink paint and applied that through the stencil. I took a Copic Multiliner and outlined most of the circles. You can’t really tell that on these particular butterflies, but you can on another project that I created. For even more interest, I did lots of splatter with Distress Oxide Sprays, black ink and gold ink.
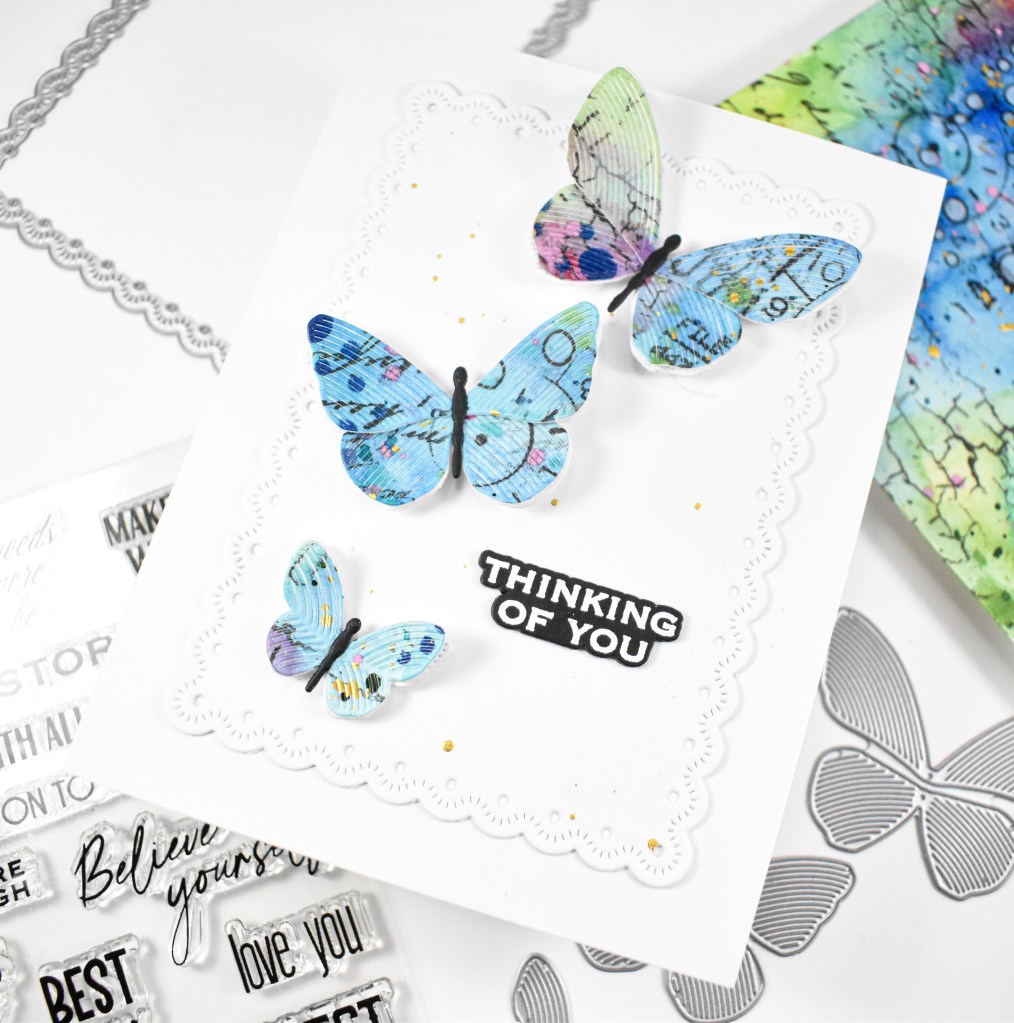
The butterflies were cut from the watercolor panel, as well as from white cardstock, while the bodies were cut from black cardstock. Those were adhered together and foam tape was placed on the back. The panel was created using the Eyelet Layer Frames with more gold splatter to bring everything together. The sentiment was stamped, stacked and adhered to the panel using liquid glue, and the butterflies were added to finish up.
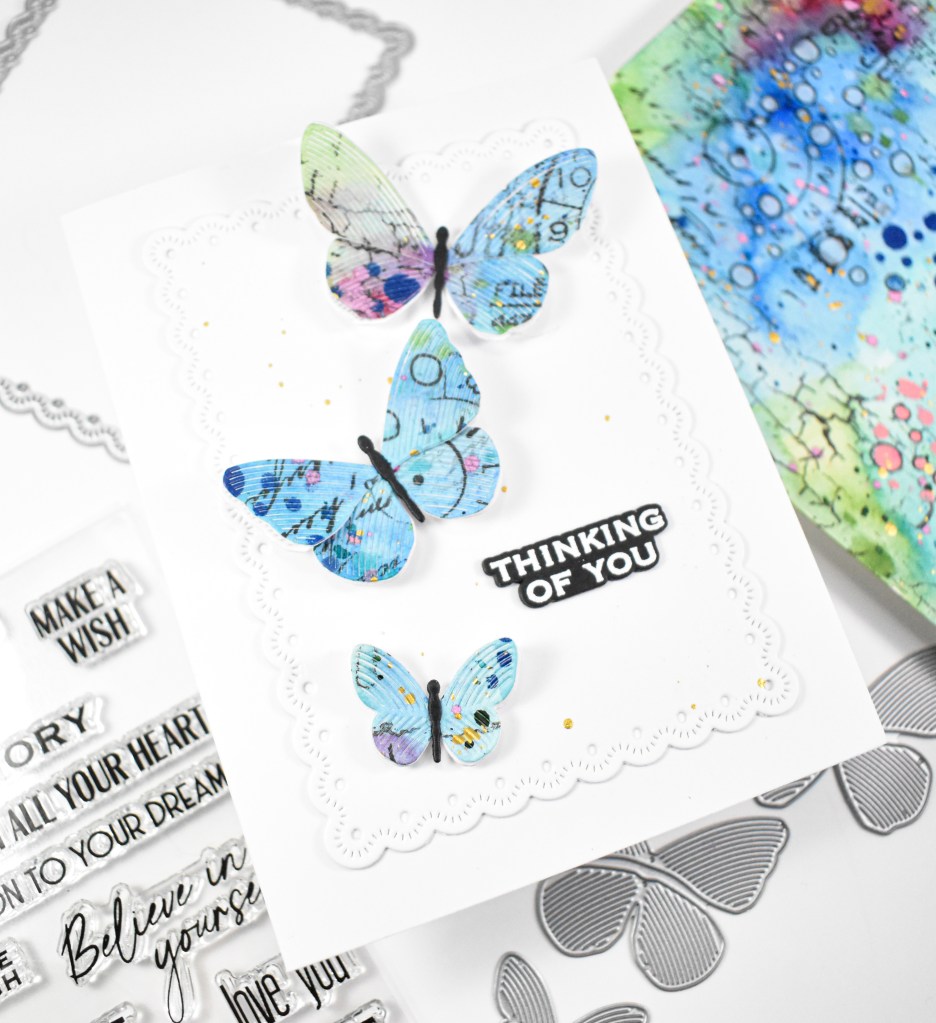
That does it for this project. I hope you like it! I still have quite a bit of panel left and plan to cut some stars from it for birthday cards perhaps. I also created another project using only the smallest butterfly, but you’ll see that some time down the road. Thanks for stopping by, and I hope you have a great day!
Supply List
Affiliate links used at no cost to you. What does this mean? If you use the links within this post to make a purchase, I receive a small commission, which allows me to continue to post crafty content for your enjoyment. I truly appreciate your support!
Latest Posts
- Simon Says Stamp Striped Missing You

- Simon Says Stamp Best Mom

- Simon Says Stamp Latte Birthday Wishes
- Simon Says Stamp Thinking of You Whirl Butterflies

- Simon Says Stamp Groovy Birthday

Latest Instagram Posts