Reverse Confetti Countdown to Confetti Day Two

Hello Fetti Friends and welcome back! So glad that you stopped by for the Reverse Confetti Countdown to Confetti Day two! This is such a cute release with beautiful floral cover panels and a sweet sentiment stamp set! To celebrate the release, we are having a blog hop, so hop along and leave comments for your chance to win a gift certificate! More details and the hop list are below. Please note that new product links will not be active until the release goes live on August 8th. Let’s get into the details for today’s card.

This card is using the new Hello Daisy Cover Panel, and I opted to use it as it was intended. To begin the card, I pulled out a panel of Fluid Hot Press Watercolor Paper and some Distress Oxide Spray in Spun Sugar. I sprayed the ink on my glass mat and spritzed it with water and proceeded to do some ink smooshing. Once I was satisfied with how it looked, I set it aside to dry and began some die cutting.

I die cut the cover panel from Neenah Classic Crest 110lb cardstock and did some light ink blending using Distress Oxide inks Spun Sugar, Mustard Seed, Twisted Citron, Tumbled Glass and Dusty Concord. I went ahead and die cut a bunch of the included flowers using Sizzix cardstock in various colors and adhered those together using liquid glue.

Once the ink smooshed panel was dry, I popped it in the Misti and stamped the sentiment, which is from the new Scripty Sentiments Stamp Set, using VersaFine Onyx Black ink and heat embossed it using Ranger Clear Embossing Powder. I then adhered the frame to that using foam tape for dimension. I began adhering the colored flowers using a combination of foam tape and glue.

I adhered the flowers in their designated spaces on the cover panel, as well as, adding some around the panel and on the frame itself. To finish up, I adhered the panel to a Neenah 110lb card base, and added some PinkFresh Studio Jewels to some of the flowers.

That does it! I hope you enjoyed this project, and I hope it inspires you to get crafty! Don’t forget to hop along and leave comments by noon central time on August 7th for your chance to win a Reverse Confetti $15 gift certificate! The hop list is below! Happy hopping!

Reverse Confetti Blog

Amy Kolling

Tricia Barber

Lisa Henke

Tracy Ware

Dilay Nacar

Jeanne Jachna

Audrey Tokach

Candice Fisher

Rachel Alvarado

Amy Tsuruta

Joe Sysavath

Supply List:

*Affiliate links used at no cost to you. Thank you so much for your support!

Latest Instagram Posts

Reverse Confetti Countdown to Confetti Day One

Hello Fetti Friends and welcome back! So glad that you stopped by today for the Reverse Confetti Countdown to Confetti Day One! There is an August mini release and it’s a sweet one with beautiful cover panels with florals, along with a beautiful sentiment stamp set! To celebrate, we are having a blog hop! So hop along and leave comments for your chance to win a gift certificate! More details below. Please note that the new product links will not be available until the release goes live on August 8th. So let’s get into the details for my card!

I made a few cards using products from this release, as you’ll see in the upcoming days, while trying to use the products in different ways, rather than their intended use. For today’s card, I used the new Hello Daisy Cover Panel. This die includes a large Hello die, with the included frame and floral dies and I decided to make that Hello the focal point! I began by cutting the Hello die from black cardstock. I believe that I ended up cutting it five times to cover this A2 panel.
I also cut the Hello five times from black fun foam for dimension. I adhered all of the cardstock die cuts to the fun foam die cuts using liquid glue. I wanted a panel for assembly to work on, so I cut an A2 panel of Neenah Classic Crest 80lb cardstock for this.

The easiest way for me to get good placement of the Hello die cuts was to start in the middle of the panel with the full Hello word. I adhered that with glue and began placing the remaining die cuts, trimming of the excess, until my panel was completely covered.

I die cut a bunch of the included flowers using various colors of Sizzix cardstock, and adhered those around using a combination of glue and foam tape. To finish, I adhered the panel to a card base, which is Neenah Classic Crest 110lb cardstock.

That does it! I hope you enjoyed these projects, and I hope it inspires you to get crafty! As I mentioned earlier, we are having a blog hop with tons of inspiration projects from the team! Hop along and leave comments by noon central time on August 7th for your chance to win a Reverse Confetti $15 gift certificate! You don’t want to miss it! Hop list below.

Reverse Confetti Blog

Amy Kolling

Tricia Barber

Lisa Henke

Tracy Ware

Dilay Nacar

Jeanne Jachna

Audrey Tokach

Candice Fisher

Rachel Alvarado

Amy Tsuruta

Joe Sysavath

Supply List:

*Affiliate links used at no cost to you. Thank you so much for your support!

Latest Instagram Posts

Spellbinders August Card Kit of the Month Inspiration

Hello Friends and welcome back! A new month brings new Club Kits from Spellbinders, and this month’s kits are amazing! I was super excited to play with the August Card Kit of the Month, Art School! This was such a fun kit to work with! If you’ve never tried a Spellbinders Card Kit, you receive everything that you need to create at least ten cards! There is cardstock, card bases, envelopes, patterned paper, a stamp set, a die set, stickers and tons of ephemera pieces to play with! So let’s jump into the details for the cards!

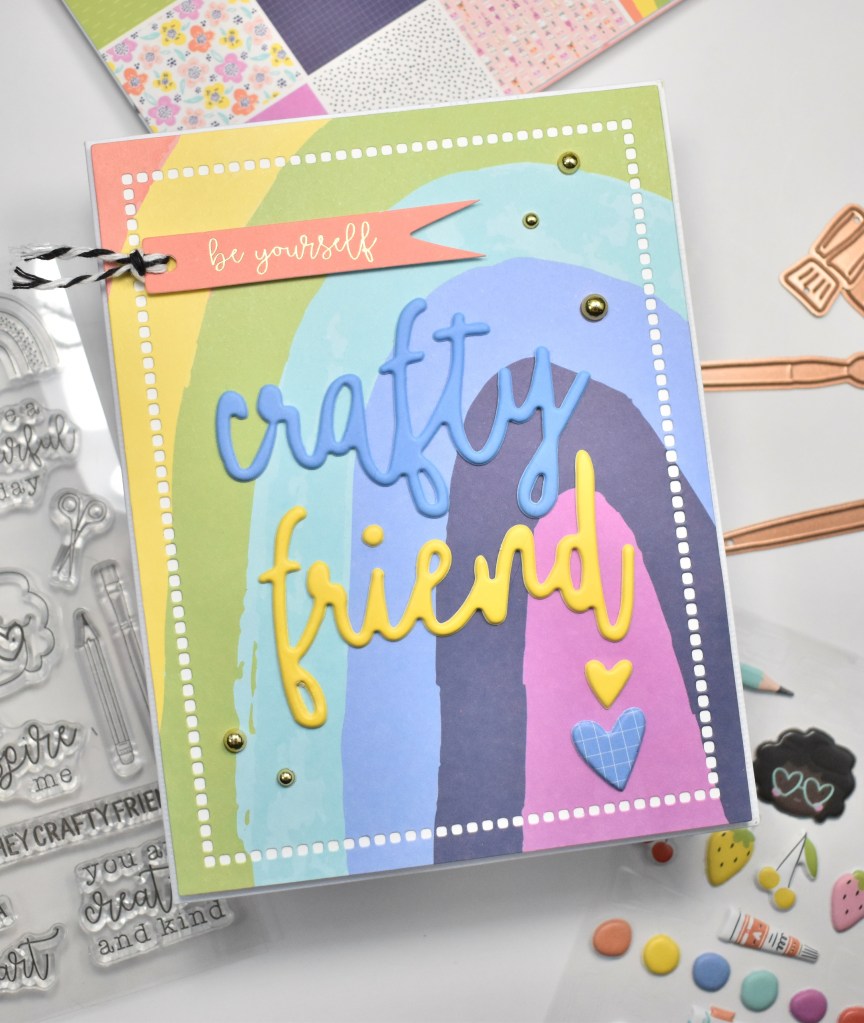
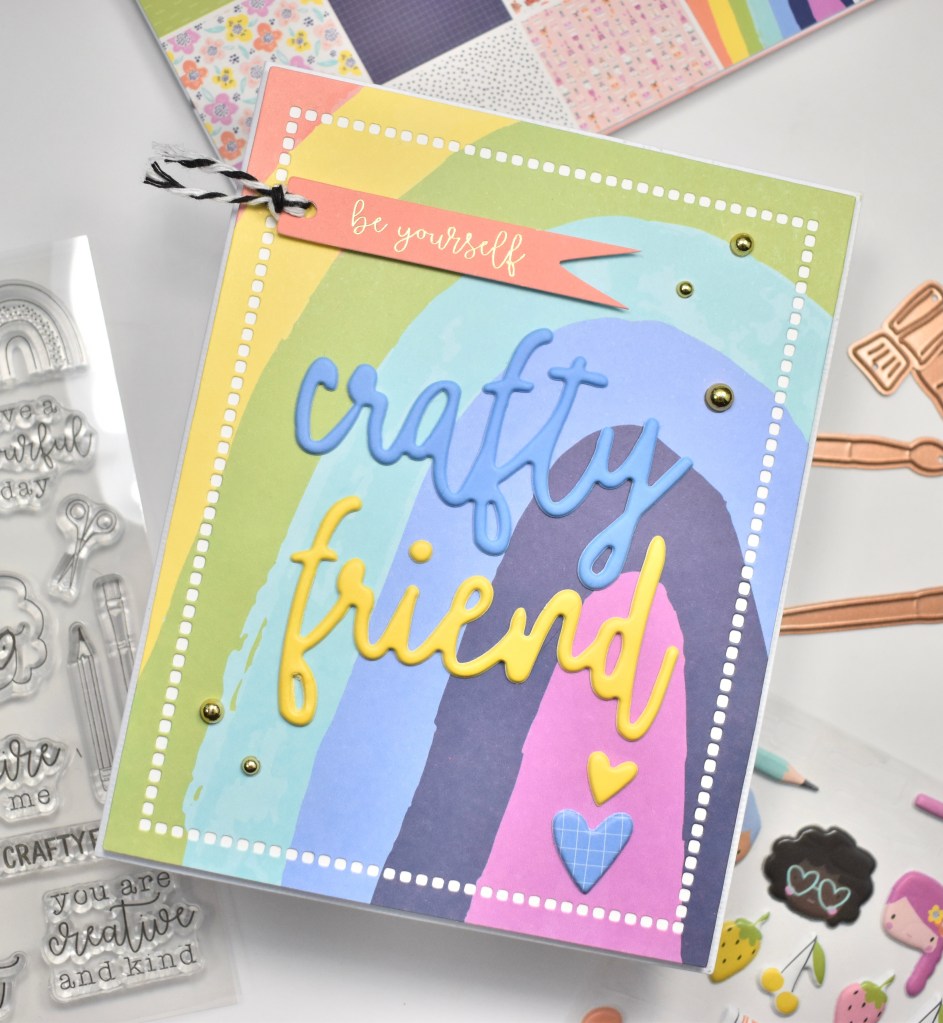
I created five cards using this month’s kit, and there’s so much left to create with! For my first card, Crafty Friend, I used the Spellbinders Hemstitch Rectangles die to trim a piece of rainbow patterned paper and mounted that atop a panel of Neenah Classic Crest 80lb cardstock for more stability. I added some black and white twine to one of the ephemera flags, which says, “be yourself,” and adhered that to the top left corner of the panel using foam tape.

I loved the word stickers included in the kit, so I opted for “Crafty Friend” for this card. I also added some of the dimensional hearts, along with some Spellbinders Gold Mix Color Essentials Gems for added interest.

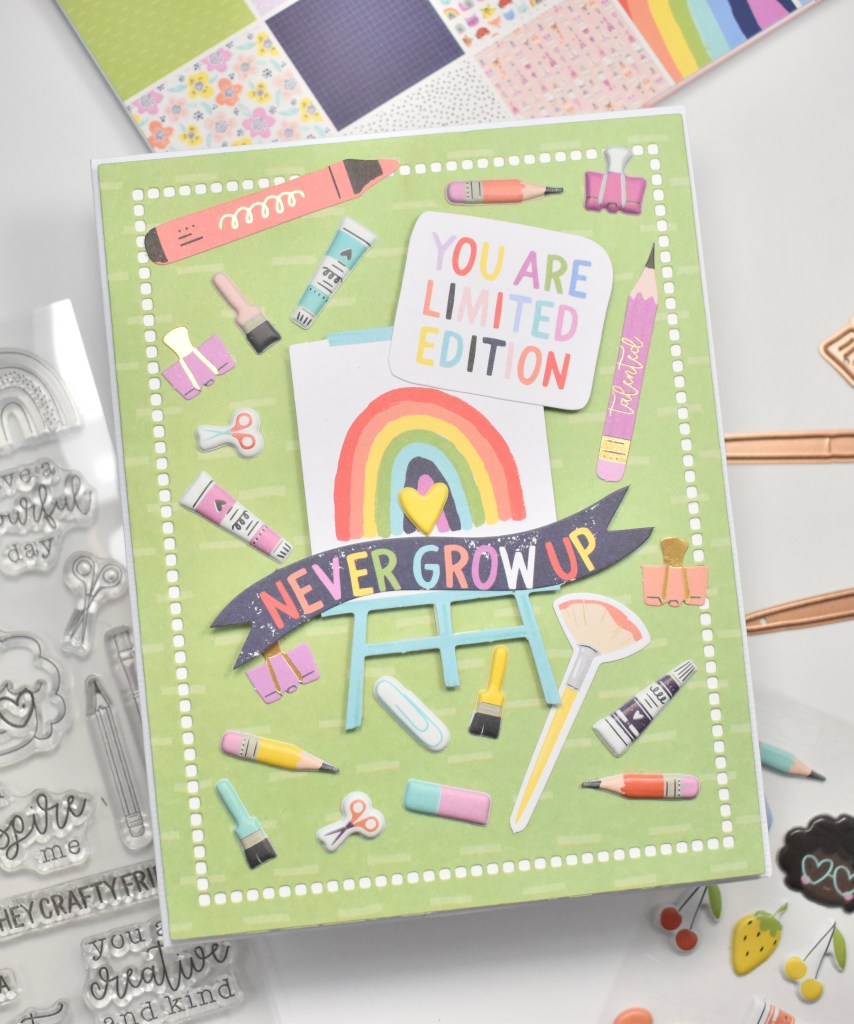
For my second card, I once again used the Hemstitch Rectangles to trim out a piece of the patterned paper. There are tons of adorable puffy stickers in this kit, and I wanted to create a card that used tons of the art related stickers. The focal point of this card ended up being a few of the ephemera pieces that I adhered using foam tape.

I positioned all of the art related stickers around the focal point, adding in some other art related ephemera that I had to adhere using glue. The panel was then adhered to the card base with foam tape.

For the third card, I opted for more ephemera pieces! I adhered these with a combination of glue and foam tape. I also die cut three flowers, using the included die cuts, with mirror gold cardstock, which is also included, and added those around the other flowers.

I felt the card needed something, so I cut a couple of strips from the mirror gold cardstock, and adhered those to two of the corners, just for some added interest, along with a few gems. The panel was then adhered to another color coordinating panel, and then to the card base.

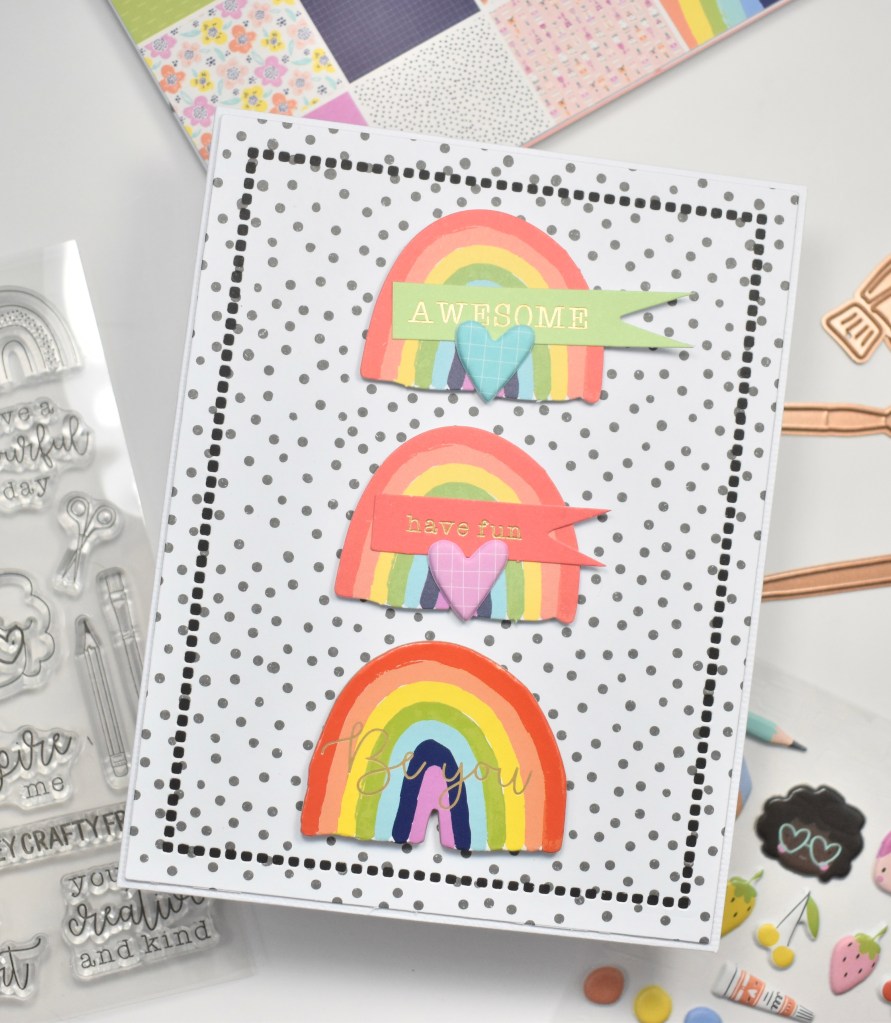
The fourth card was made using the Hemstitch Rectangles yet again to cut a piece of the patterned paper. This was then adhered to a black cardstock panel. The bottom rainbow is a chipboard sticker that I adhered using foam tape for dimension, along with the other two ephemera rainbows.

I pulled out two of the flags and adhered those to the rainbows using some of the puffy heart stickers. Everything was then added to the card base.

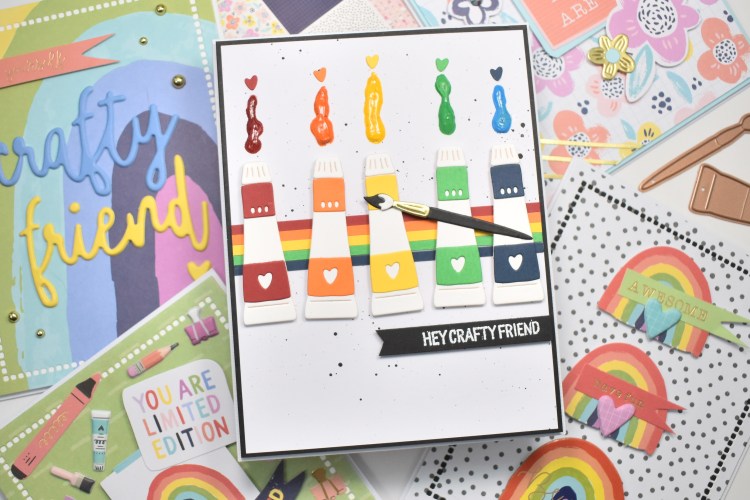
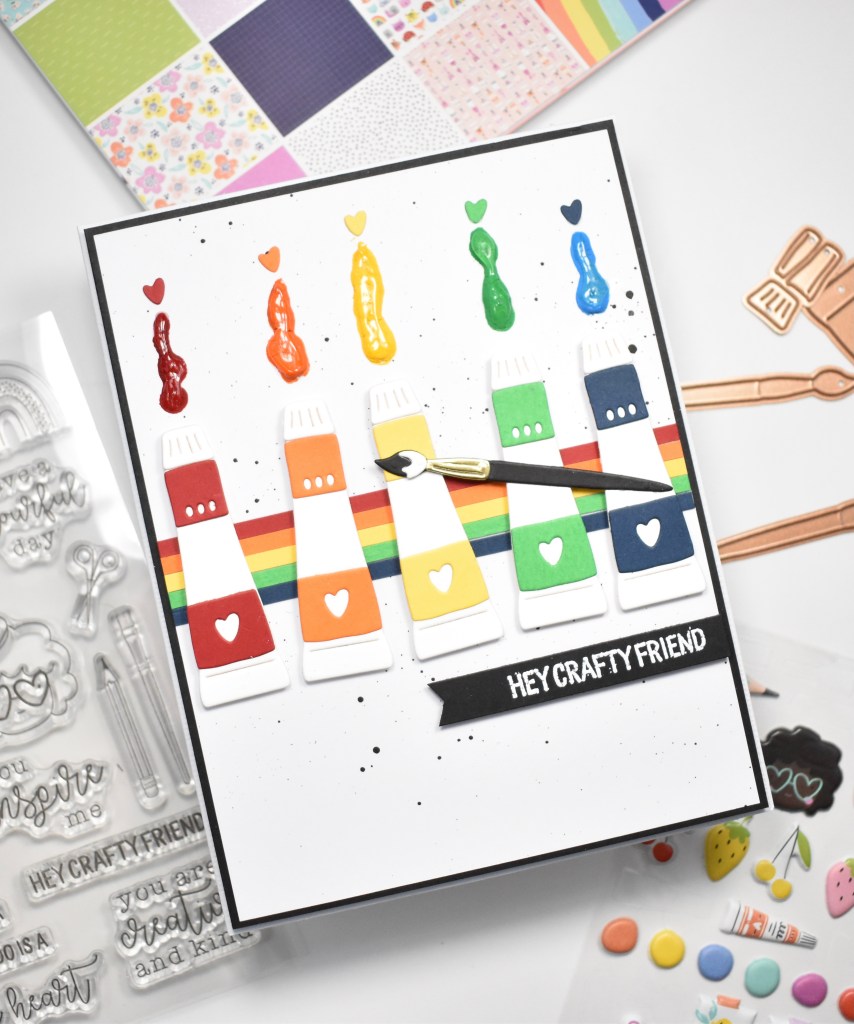
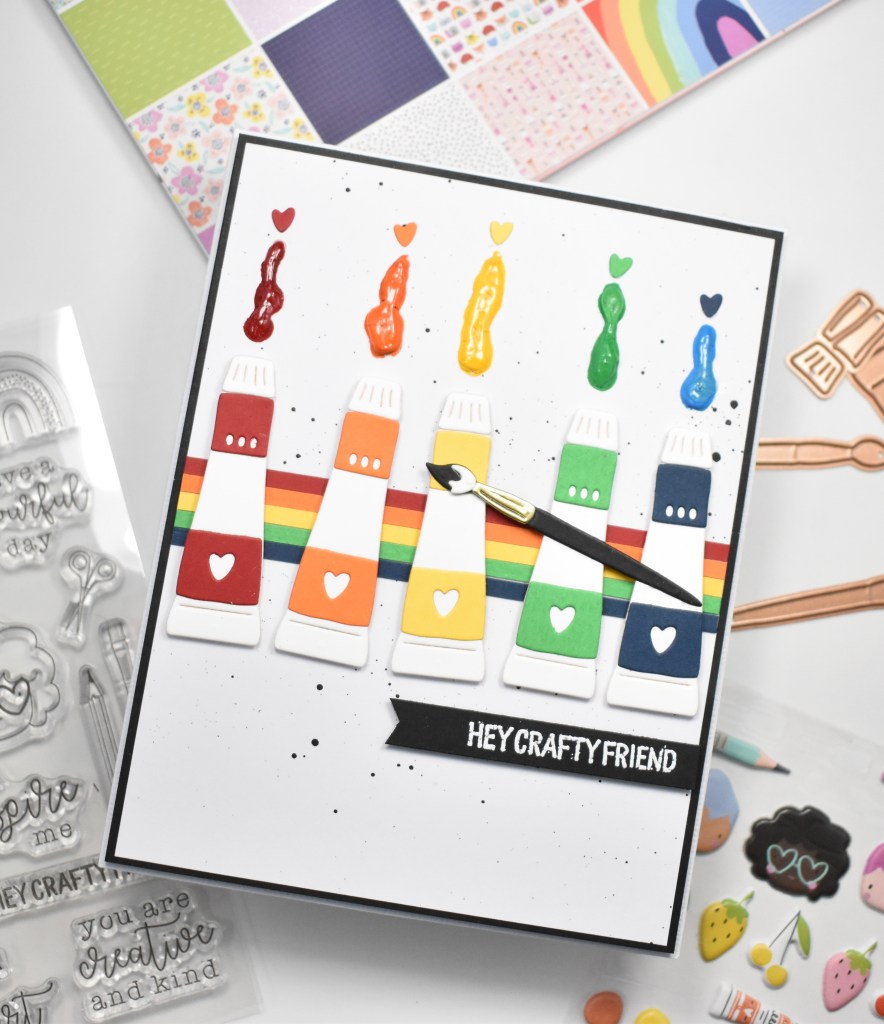
For the fifth and final card, I used the included die cuts along with the included cardstock to cut the paint tubes and paint brush. I cut strips of the colored cardstock and adhered those to a black splattered panel. I assembled the paint tubes and paint brush using liquid glue and adhered them to the panel using foam tape.

I used the included stamp set to stamp the sentiment on black cardstock using VersaMark Ink and heat embossed it using SSS Detail White Embossing Powder. I trimmed that out and adhered it the panel using foam tape as well. Everything was then adhered to a black cardstock panel before adhering to the card base.

But .. I felt the card still needed something, so I pulled out some gouache from my stash and squeezed some of the paint onto the card with it’s coordinating color. Once that dried, I did add some Glossy Accents on top of the paint to give it a shiny finish.

That finishes my projects using the Spellbinders August Card Kit of the Month! I had a lot of fun making these, and as you can see, some of these cards come together so quickly because everything is already cut for you! Plus, I still have a ton of stuff left over to keep making cards using this kit! Stop by the Spellbinders website to check out all of the Club Kits! There are so many to choose from and you an combine Clubs for better pricing!

Thanks so much for stopping by and don’t forget to stay awesome!

Supply List:

*Affiliate links used at no cost to you. Thank you so much for your support!

Latest Instagram Posts

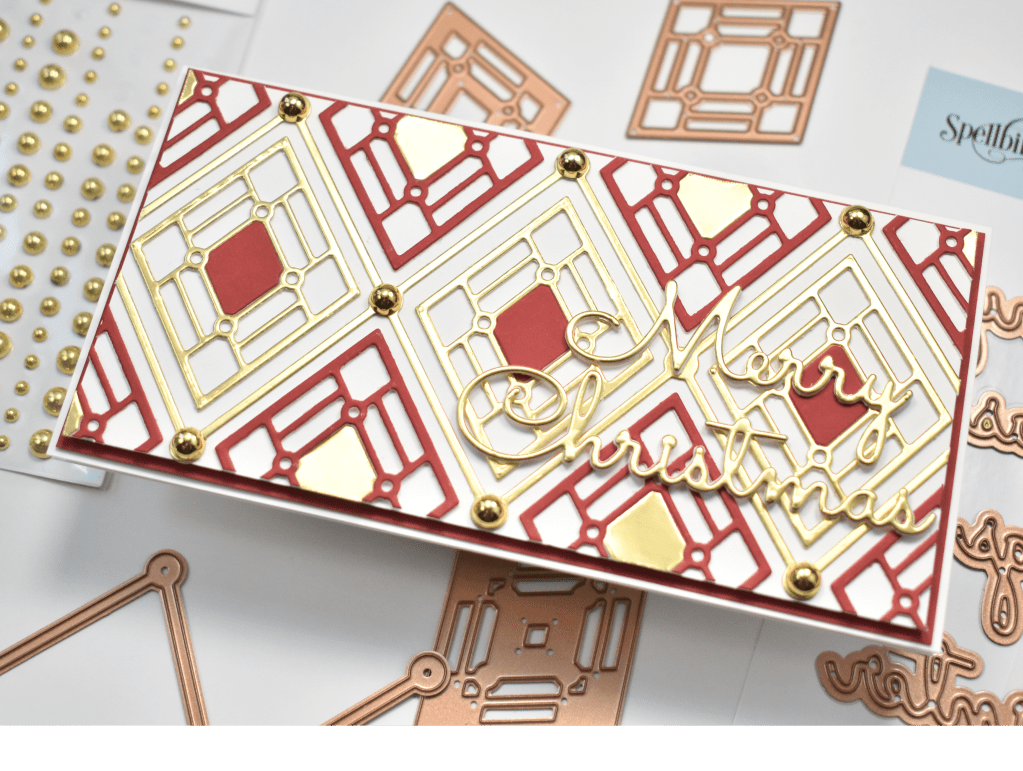
Spellbinders Christmas Argyle

Hello Crafty Friends! Hope you’re having a wonderful day! There are tons of new Christmas and holiday releases over on the Spellbinders website, and I’m super excited to be featuring the new Kaleidoscope Argyle dies from the Slimline Collection! This was such a fun set to work with, so let’s go ahead and get into the details!

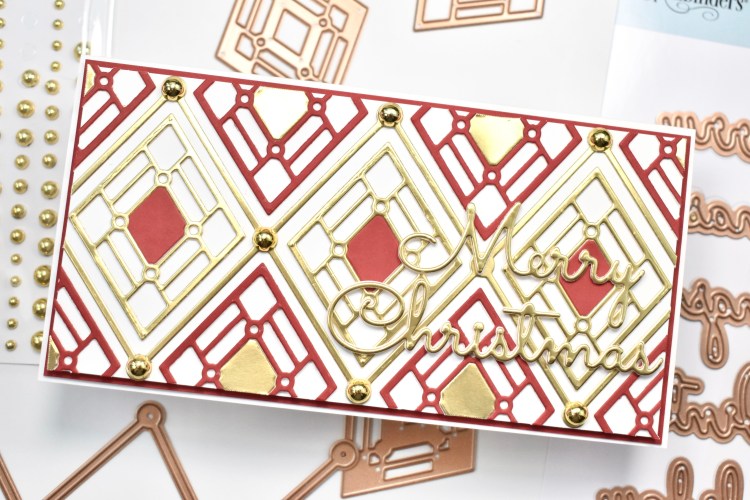
I began this project by cutting the main triangle grid element from this set twice from Spellbinders Mirror Gold cardstock. I chose one of the three triangle elements from the set and cut that maybe six times from Spellbinders Cranberry Bliss cardstock. I decided that I wanted some dimension to the triangles, so I cut a bunch from Neenah Classic Crest 110lb cardstock and adhered one layer to each of the triangles using liquid glue.

I reserved the center pieces from the gold and red triangles, because I wanted to inlay those on the opposite triangles on the finished project. I cut a mini slim line panel of Neenah 110lb and adhered the gold grid element overlapping in one section for better symmetry on the card. I then adhered the gold triangles in the center first.

Then, I moved on to adhering all of the red triangles, trimming off the excess. I glued the inlay pieces in the center of the triangles as well. I added some of the larger Spellbinders Fashion Gold Embellishments to the edges of the grid element for added dimension and interest. I adhered the panel to a panel of the Cranberry Bliss cardstock using foam tape for some contrast as well.

I used the Spellbinders Christmas Mix & Match Sentiments for my sentiment. I cut it once from the same Mirror Gold cardstock and twice from Neenah 110lb and adhered those together using liquid glue. That was then adhered directly to the card panel before adhering everything to the card base.

That finishes up this project! I hope you enjoyed it! Even though this set was used to make a Christmas card, it can certainly be used year round using different colors! Head on over to the Spellbinders website to check out all of the new releases! Thanks for stopping by and don’t forget to stay awesome!

Supply List:

*Affiliate links used at no cost to you. Thank you so much for your support!

Latest Instagram Posts

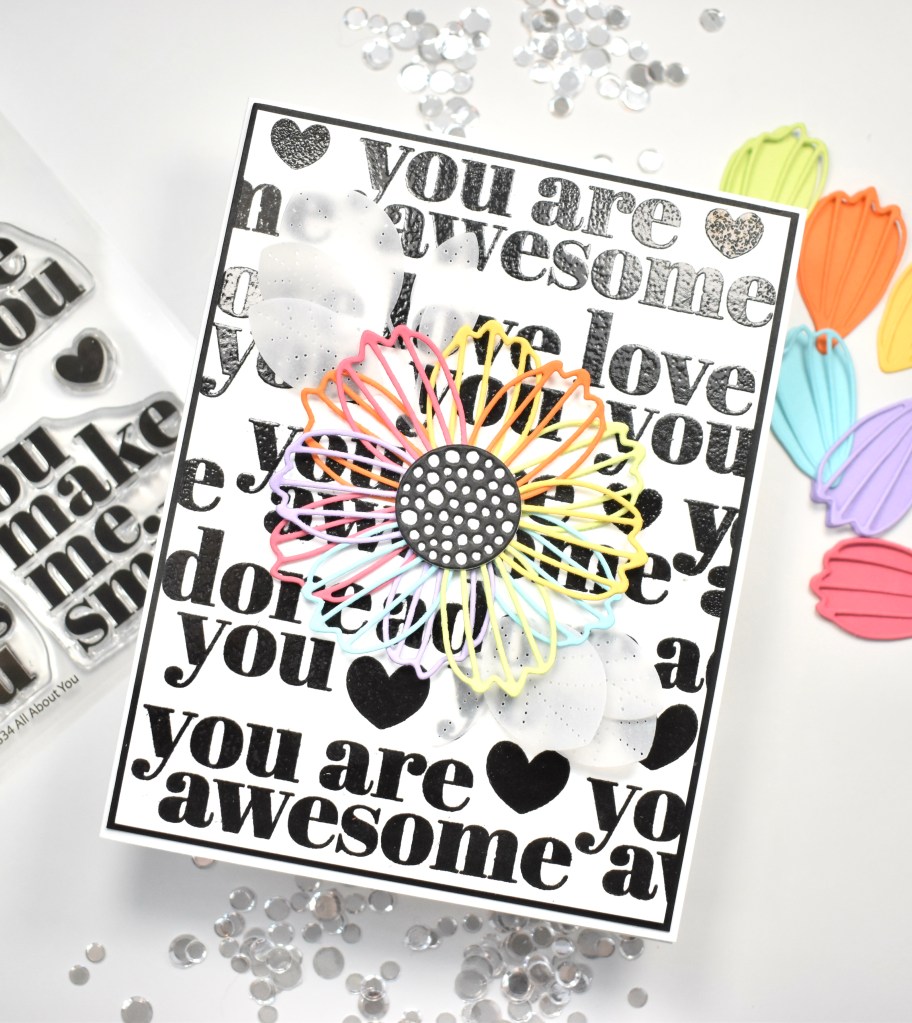
Simon Says Stamp All About You Rainbow Floral

Hello Friends! Hope you’re doing well and having a wonderful day! I’m super excited because I’m participating in a Simon Says Stamp Instagram hop to celebrate the new Make Magic release! You’ll definitely want to check that out because there are gift certificates to be won!! More details below. I just can’t even with this release! There’s so many awesome things to choose from! I wish that I didn’t have to choose, ya know, and could just buy the whole dang release! I’m a huge lover of stand alone sentiment dies, so of course I had to buy some of those! Anyhoo, today’s card is featuring the all new All About You stamp set, along with a couple of older favorites of mine. So let’s get into the deets!

I began this card by trimming a panel of Neenah Classic Crest 110lb cardstock just smaller than an A2 card base, and popping it in the Misti. I chose three of the sentiments from the All About You stamp set, and proceeded to do some repeat stamping using VersaFine Onyx Black ink. Not going to lie, this took a little bit of time! Mainly because I was being careful and trying to get the placement right and stamp straight all at the same time! I really need to get one of those acetate grids to put down! After each set of stamping, I was heat embossing the sentiments using Ranger Clear Embossing Powder.

Once all of the sentiments were stamped, I filled in the gaps with the hearts that are included in this set. Next, I pulled out the SSS Cosmo Flower Petals die and cut the detailed petals from various colored cardstock. I believe most of the colored cardstock is from The Stamp Market, but not 100% sure. I ended up cutting enough petals to make two flowers. I cut the detailed center from black cardstock twice and the solid center from white cardstock twice. I adhered the centers together using liquid glue, and began gluing the flower petals to the back of that for each flower separately. So when I was done, I had two completed flowers.

I ended up adhering both of those flowers together, turning the top one slightly to get a fuller flower. The card still needed something, and of course, I thought of leaves, so I used the SSS Detail Elm Leaves for this. I cut a few leaves from vellum because I didn’t want to take away from the flower. I glued the leaves to the stamped panel before gluing the flower down.

I adhered the panel to a black cardstock panel using foam tape, because that’s my jam! Black cardstock and foam tape! Then I adhered that to the card base, which is also Neenah 110lb.

That finishes up this project! I had fun making this one! I love the bold sentiments with the rainbow flower! I hope you enjoyed this card, and I hope it inspires you to get crafty! Hop over to Instagram to check out the hop that I mentioned earlier. SSS is giving away a $25 gift certificate to a lucky commenter at each stop on the hop! That’s twelve chances to win!!! You don’t want to miss that! Check out the entire Make Magic release and let me know your favorites, and don’t forget to stay awesome!

Supply List:

*Affiliate links used at no cost to you. Thank you so much for your support!

Latest Instagram Posts

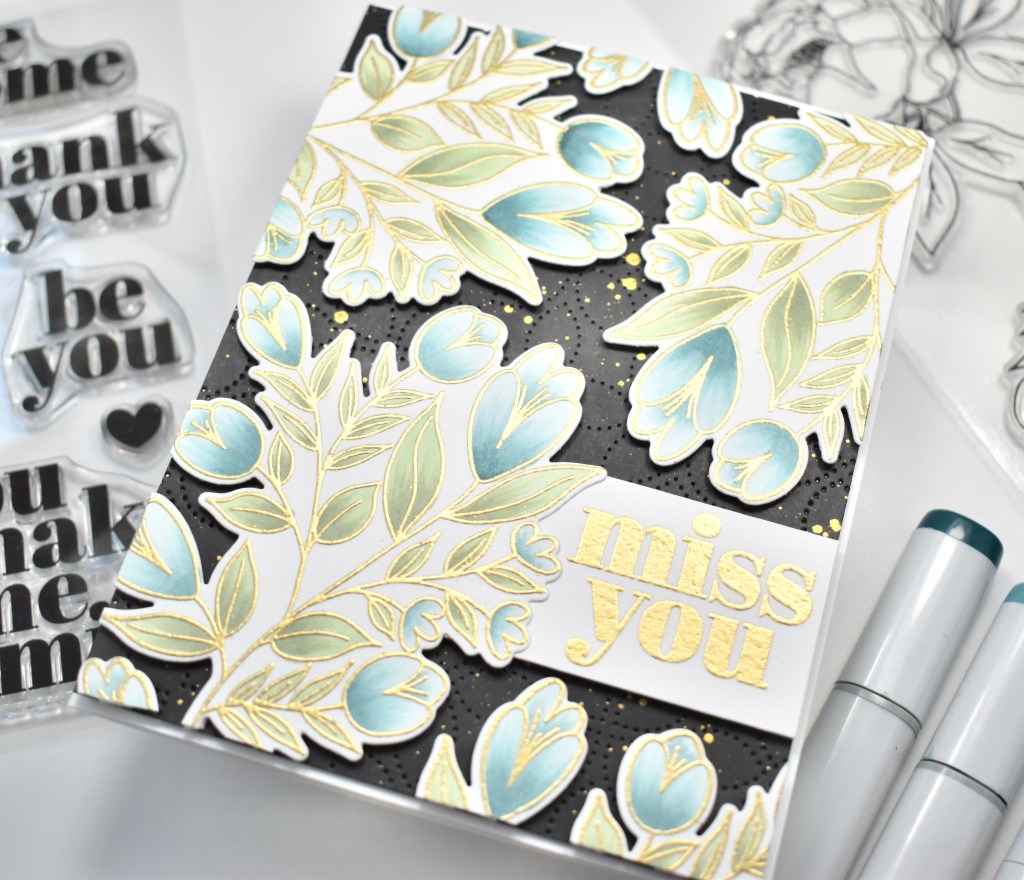
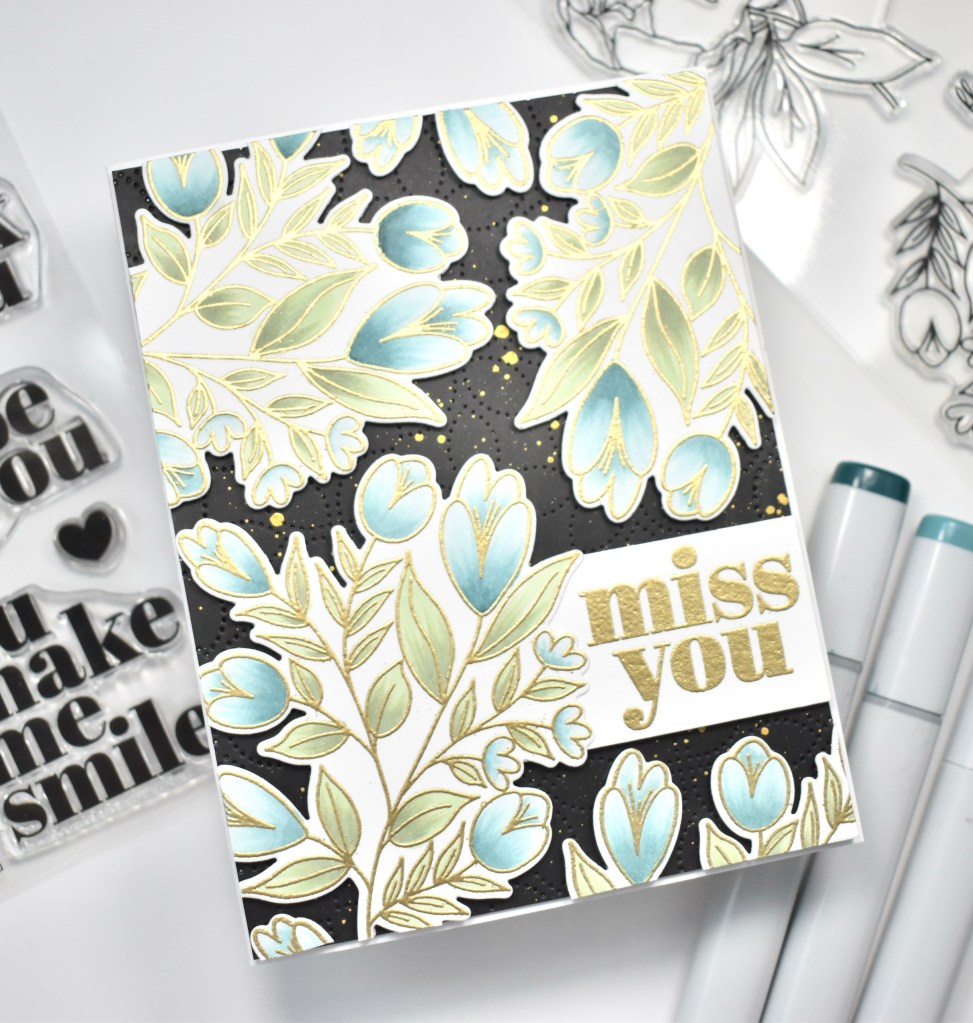
Simon says stamp floral miss you

Hello! Hello! Hello! I hope you’re having a fabulous day! Thanks so much for stopping by today to take a peek at today’s card featuring the All About You Stamp set from the newest Simon Says Stamp release, Make Magic! This has been such a fun release to work with, and so many wonderful things in the release! Let’s get into the details of the project!

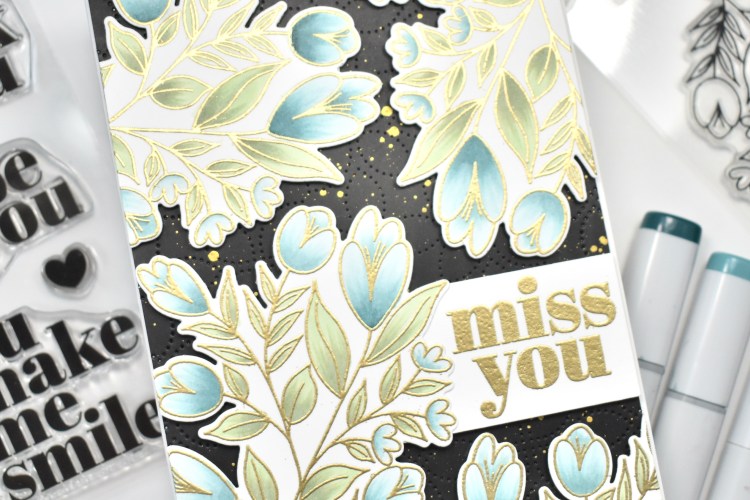
I paired the sentiment with a favorite floral set of mine, Best Friend Ever Stamp set, also from Simon! I began by stamping one of the floral images from the Best Friend Ever set several times on Neenah Classic Crest 110lb cardstock using VersaMark ink and heat setting them using Ranger Princess Gold Embossing Powder. I used Copic Markers BG70, BG72, BG75, BG93 and YG61 to color the images.

Once those were colored, I used the coordinating die to cut them out. I set those aside while I worked on the rest of the card. I chose the Miss You sentiment from the SSS All About You set and stamped it on Neenah 110lb using the same ink and embossing powder. I wanted a dramatic backdrop for the flowers, so I chose black! I used the SSS Detail Petal Plate and cut the black panel. It’s very hard to see, but there is some added detail under the flowers.

It still needed something, so I gold splattered the black panel using Royal Talens Amsterdam Light Gold Acrylic Ink, and that did the trick! I played around with the placement of the sentiment and flowers until I decided what I liked.

Once placement was decided, I adhered the sentiment and florals to the black panel using a combination of liquid glue and foam tape, trimming the excess. The black panel was then adhered to my card base, also Neenah 110lb, using SSS Dot Tape Runner.

That does it for this project! I love the blue flowers against the black backdrop! I hope you’ll stop by and check out the entire Make Magic release! Like i said earlier, there’s so many fun things to check out! Have a wonderful day and don’t forget to stay awesome!

Supply List:

*Affiliate links used at no cost to you. Thank you so much for your support!

Latest Instagram Posts

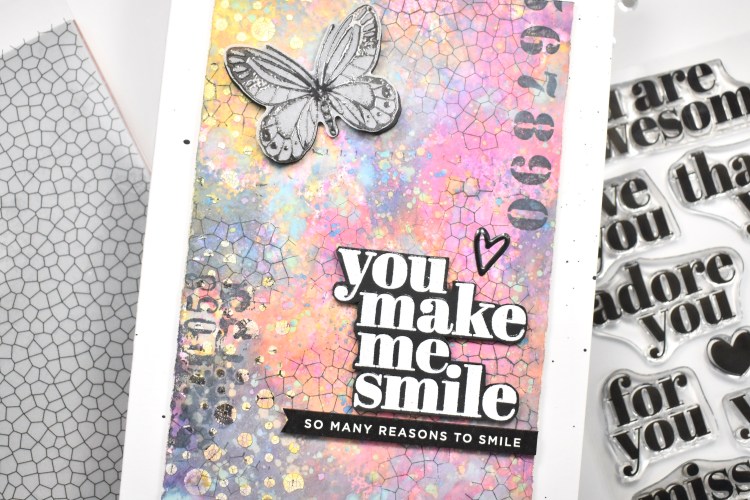
Simon Says Stamp You Make Me smile

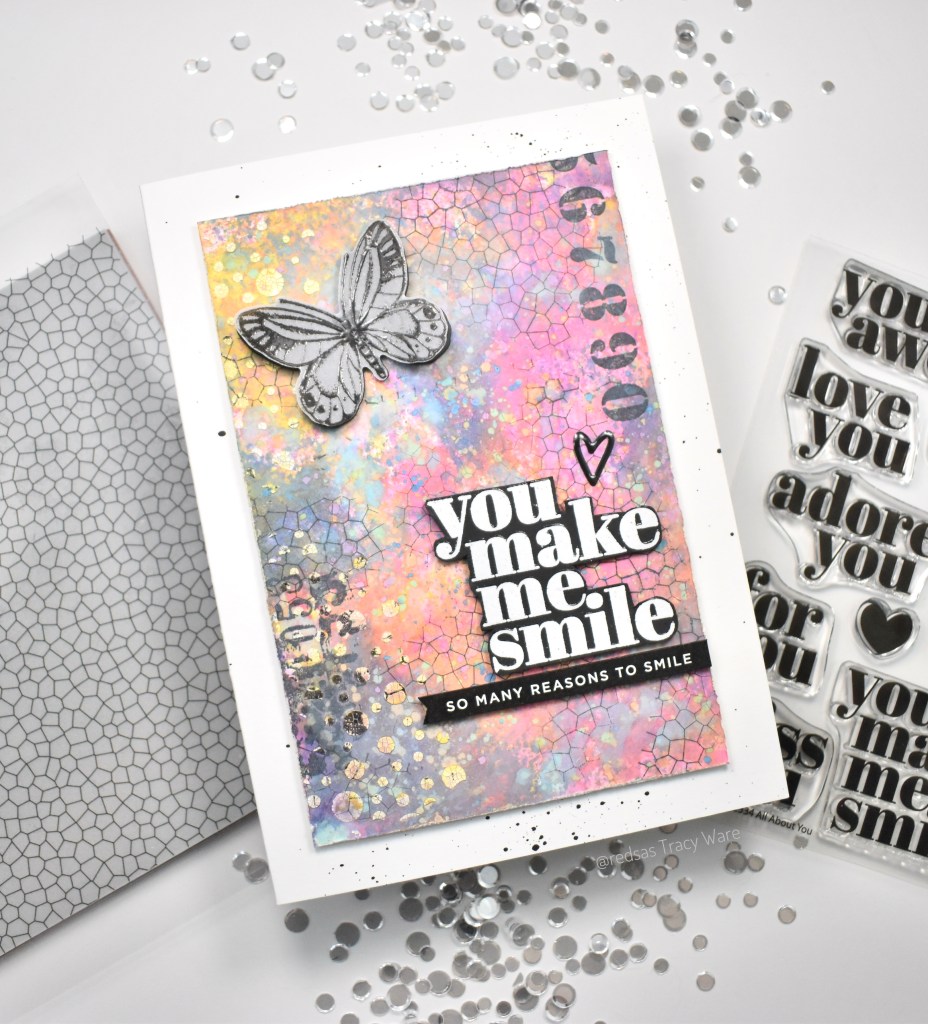
Hello Crafty Friends! Thanks for stopping by today! I’m still playing with products from the new SSS release, Make Magic! Have you checked it out yet? I’m loving all of the fun things this release has to offer! For today’s project, I’m featuring the new SSS Stained Glass Background stamp and the All About You stamp set! So let’s get right into the details!

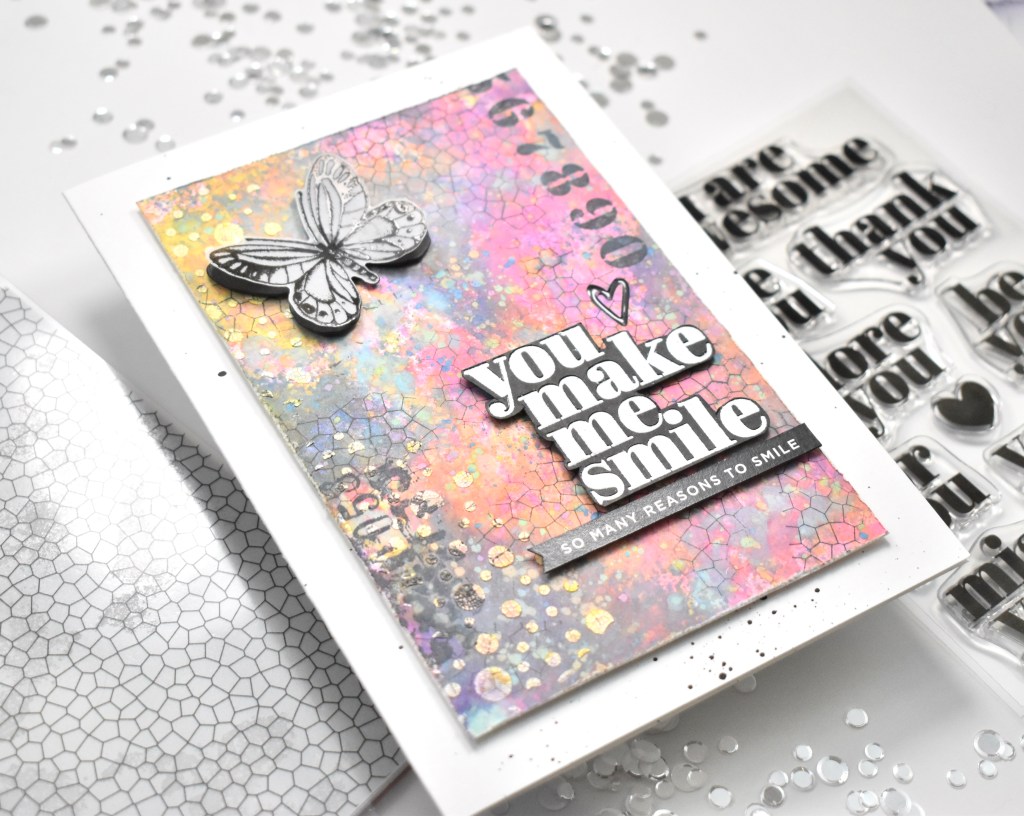
I love mixed media, but it is so far out of my comfort zone! But .. I still like to give it a whirl from time to time, which is what I did with this project! I began by pulling out a piece of Fluid Hot Press Watercolor paper. I decided to use this, because it’s what I had on hand, and I prefer to use cold press for actual watercoloring. Anyhoo, I began with some ink smooshing on the panel using a combination of inks. The inks used were Distress Oxide Sprays in Picked Raspberry, Twisted Citron, Faded Jeans and Spiced Marmalade.

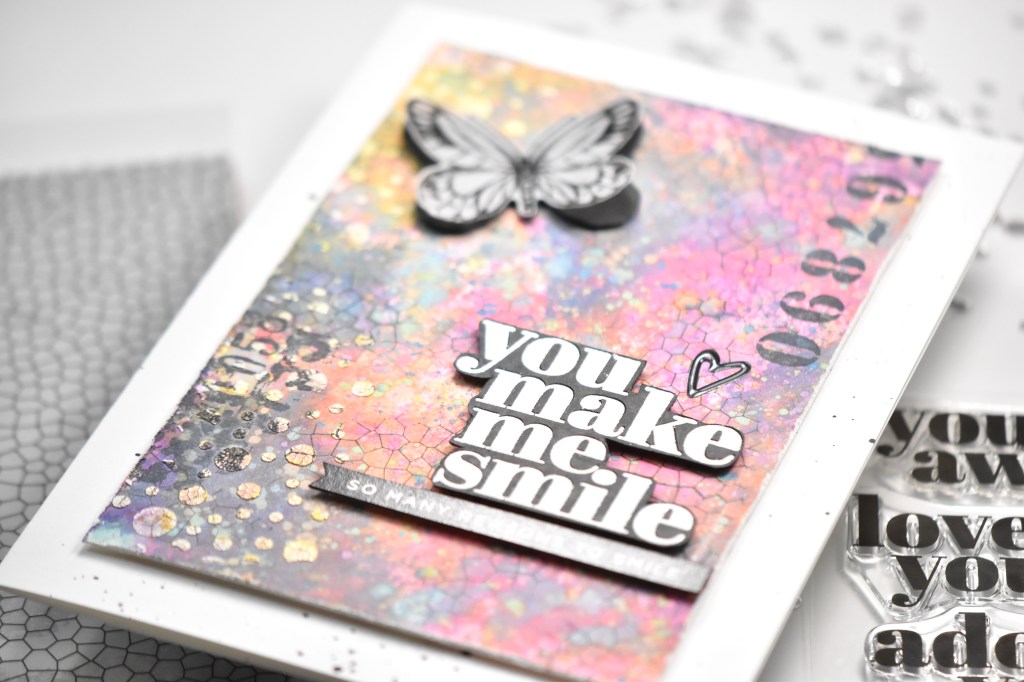
In addition to those inks, I used a few Distress Ink cubes in Picked Raspberry and Wilted Violet. I added those because I wanted a little bit more vibrant colors and the Distress inks seem to give that. I also used a little bit of Salvaged Patina in Distress Oxide. I did add a bit of splatter to the panel using the wand of the sprays as well. Once the colors were added and dried, I added some Ranger Crackle Paste using the SSS Fading Tiny Dots Stencil. When the paste was dried, I popped the panel in the Misti for some stamping.

For the stamping, I used the SSS Stained Glass Background stamp, along with some elements from the Tim Holtz Ultimate Grunge set, and a small set called Grunge. This small set was found eons ago at a Tuesday Morning store, and I’m not sure it’s even available for purchase any longer. The ink used on the panel itself was Memento Tuxedo Black. I also stamped the sentiment from the SSS All About You Stamp set using VersaMark Ink on black cardstock and heat embossed using SSS Detail White Embossing Powder. Once the sentiment was stamped, I fussy cut around the edges.

I used the Tim Holtz Paper Distresser Tool to rough up the edges of the panel and attached the sentiment using foam tape. The card still needed something, so I pulled out the SSS Beautiful Butterflies Stamp set and stamped a butterfly on vellum using VersaFine Onyx Black ink and heat embossed it using Ranger Clear Embossing Powder. I used the coordinating die to trim that out, along with a solid black butterfly to give it some contrast and definition. I adhered those together using liquid glue and then glued it directly to the panel.

I wanted a sub-sentiment, so I rifled through my SSS Reverse Sentiment Strips to find one that matched. That was adhered under the main sentiment using foam tape. I also added a glossy heart sticker from my stash for added interest. I cut an A7 card base from Neenah Classic Crest 110lb cardstock, and splattered it using Royal Talens Amsterdam Oxide Black Acrylic Ink before attaching the panel using foam tape again.

That finishes this project. Like I said, mixed media is out of my comfort zone, but I really do enjoy it when I try it! I hope this project inspires you to get crafty and possibly step out of your comfort zone as well. Stop by and check out the entire Make Magic release, you won’t be disappointed! Thanks for stopping by, and don’t forget to stay awesome!

Supply List:

*Affiliate links used at no cost to you. Thank you for your support!

Latest Instagram Posts

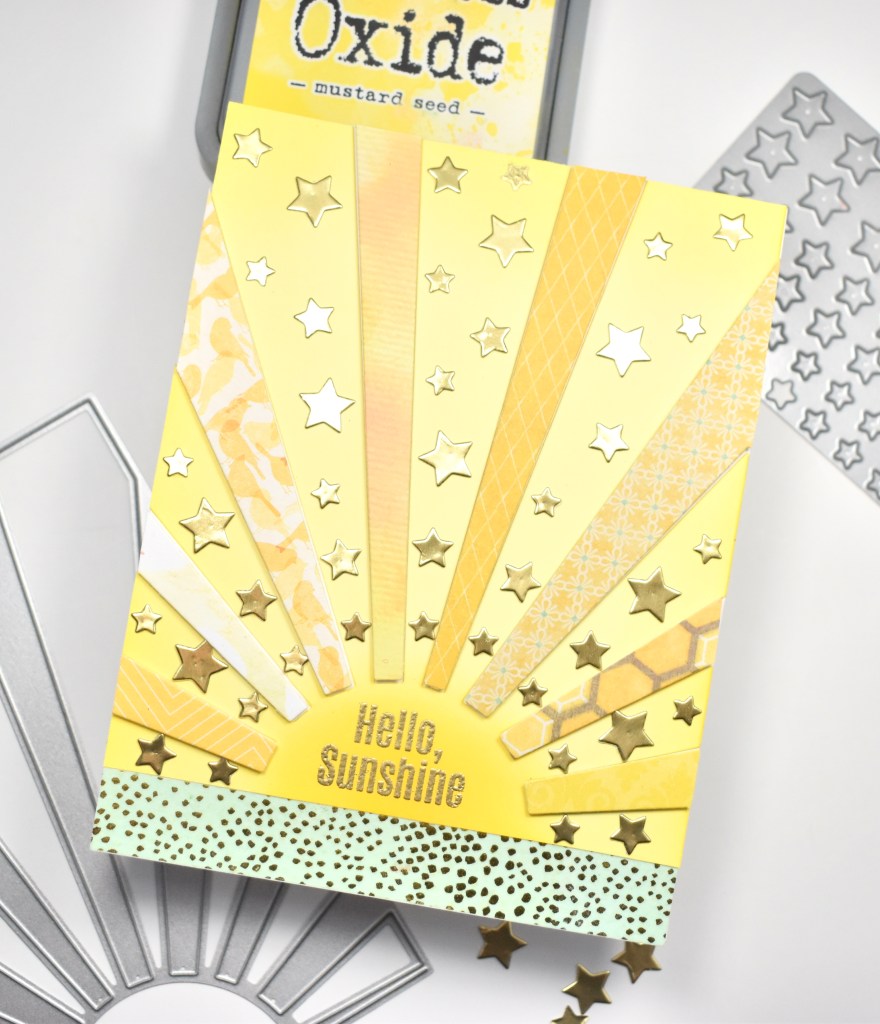
Simon Says Stamp Hello Sunshine

Hello Friends! Thanks for stopping by today! The new SSS Make Magic release is awesome! I’ve had a lot of fun playing with some of the items from this release, including the new SSS Sunburst Die! So, let’s hop right into the details, shall we?

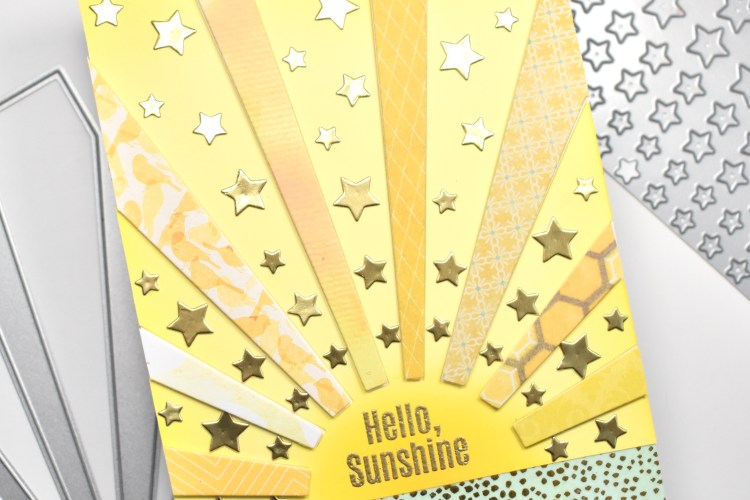
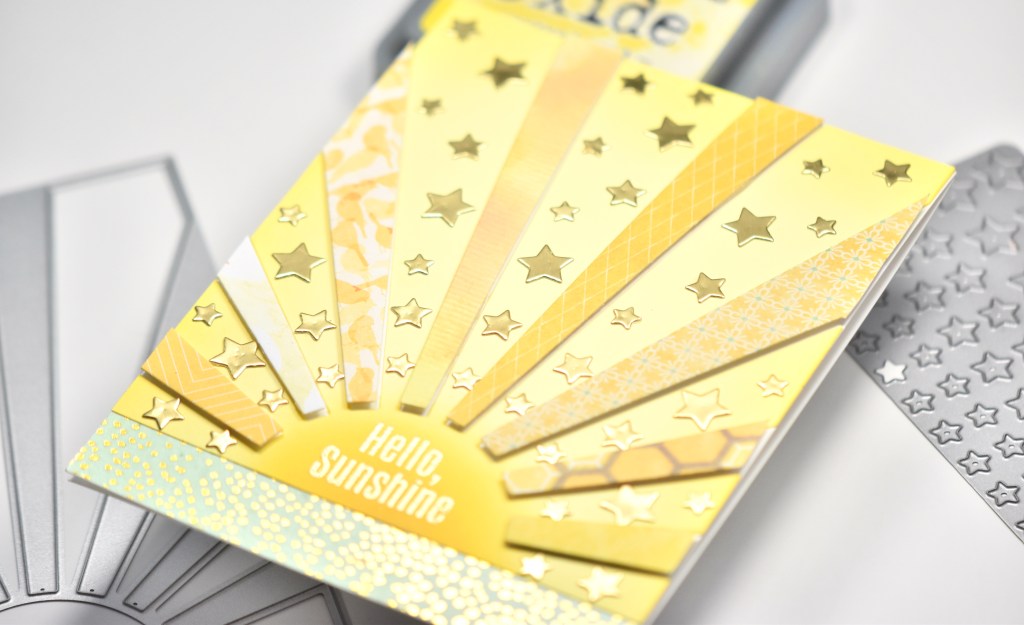
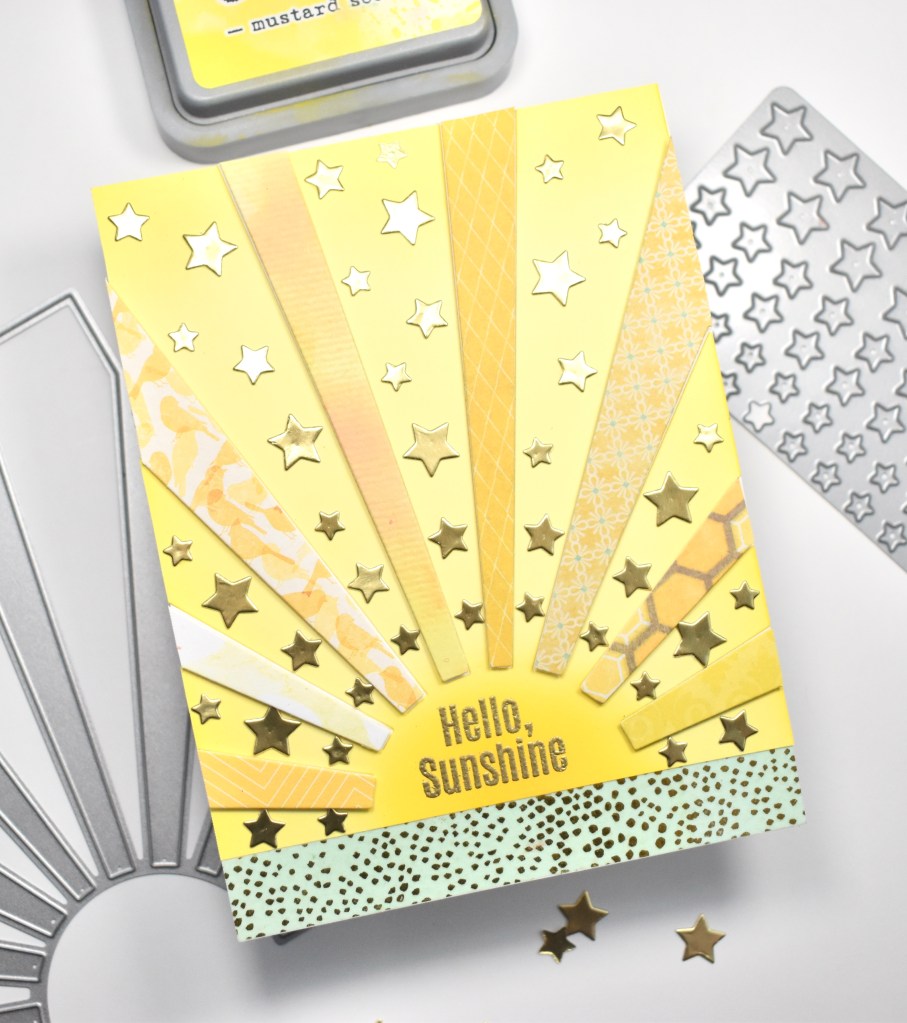
I started this project by die cutting the SSS Sunburst die from eight different sheets of patterned papers from my stash, as well as, cutting it from a piece of yellow cardstock. I ended up trimming off some of the bottom of the yellow die cut piece. I added a strip of complimentary washi tape, from Paper Source, along the bottom of my card base, which is Neenah Classic Crest 110lb cardstock.

I adhered the yellow sunburst die cut directly to my card base using liquid glue, just above the strip of washi tape, and did some ink blending in the sun area using Distress Oxide Mustard Seed. I then popped that into the Misti and stamped the Hello Sunshine sentiment, which is from the SSS Hello Sunshine stamp set, using VersaMark Ink and heat embossed it using Ranger Princess Gold Embossing Powder. Then, I trimmed out the pieces from the patterned papers that I was going to need for my card.

Once those were trimmed, I inlaid those on my card using foam tape, because dimension is life! I felt like it was missing something though! This is when I dorked around for quite a while trying to figure out what it needed! Do you ever do that too? Anyhoo, after much deliberation, I settled on some gold stars, thank goodness! I pulled out the SSS Mini Stars Party Die and cut that from some gold cardstock. I adhered the stars using glue and finally called it quits on this one! I love card making, but I get on my own nerves hem hawing around trying to figure stuff out sometimes!

Well, that finishes this project up! I hope you enjoyed it, and I really hope you’ll stop by and take a look at the entire Make Magic release! So many awesome things! Thanks for stopping by today, and don’t forget to stay awesome!

Supply List:

*Affiliate links used at no cost to you. Thank you so much for your support!

Latest Instagram Posts

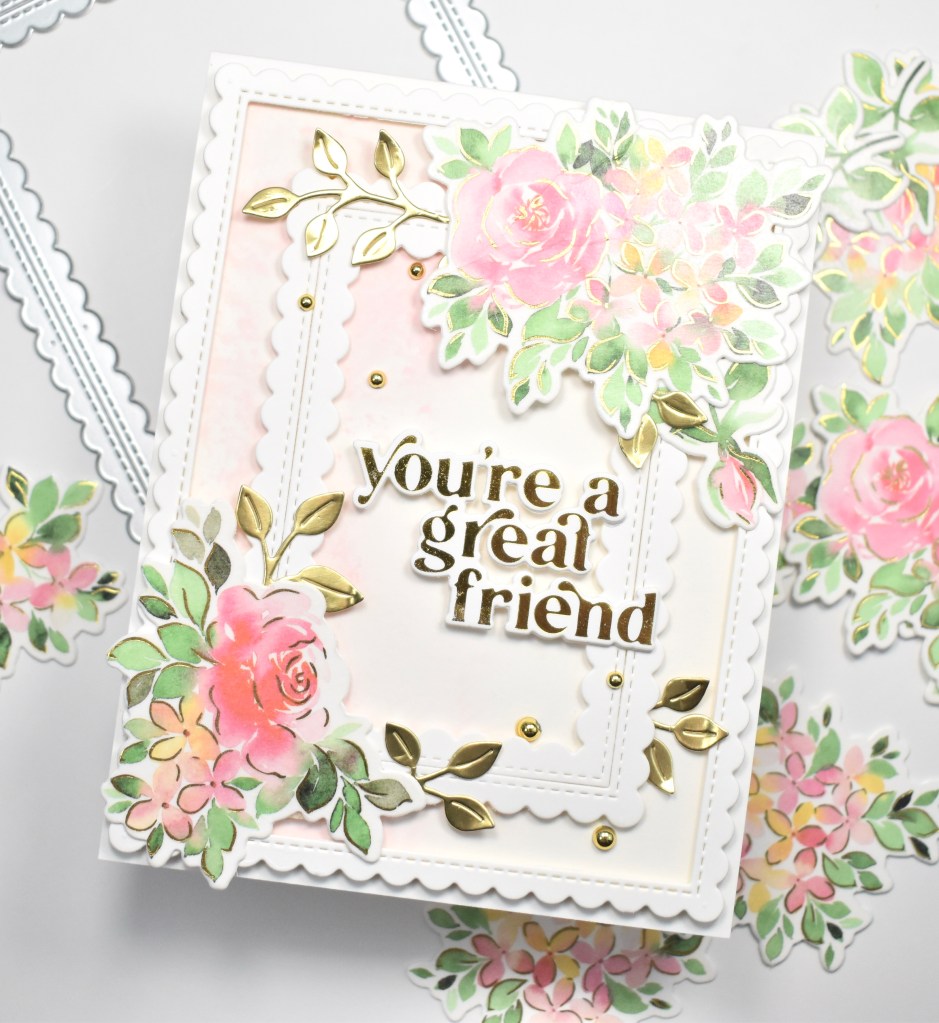
Pinkfresh studio great friend

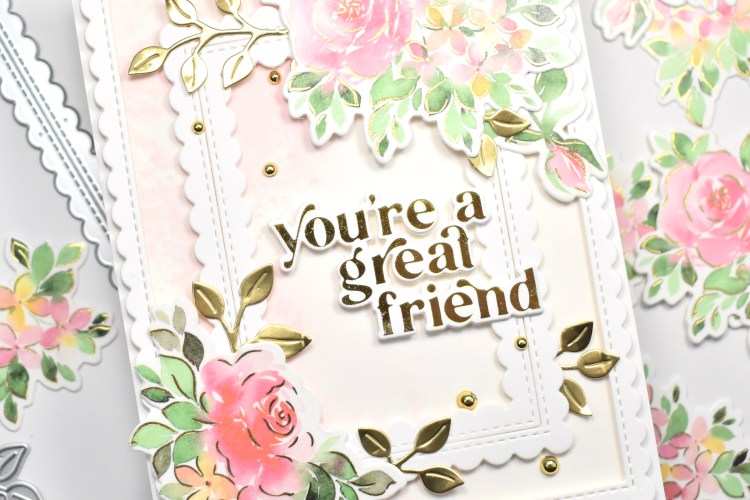
Hello Crafty Friends and welcome back to my blog! I hope you are doing well and having a beautiful day! Today’s project is featuring a favorite product of mine, PinkFresh Studio washi tape! I just can’t get enough! I recently HAD to order three more sets, including this one, Hydrangea and Rose! It’s just so beautiful! All of the washi sets are absolutely gorgeous, and really make for quick, easy and beautiful cards! So let’s get into the details!

I began this project by grabbing a piece of Fluid Hot Press Watercolor paper. This is just the paper that I have on hand. I did some very light ink smooshing using Distress Oxide Spray Spun Sugar, and set it aside to dry.

I went ahead and die cut both of the PinkFresh Stitched Scalloped Rectangles from Neenah Classic Crest 110lb cardstock. I separated the larger of the frames and adhered foam tape to the back of it, as well as, adhering some to the smaller frame. I had already gotten my PinkFresh Hydrangea and Rose washi tape ready to go. I usually do four or five sets at a time and put them all in a baggie so that they are ready when I want to use them. And to do this, I cut a sheet of Neenah 110lb in half lengthwise, adhere the washi and use the coordinating die to cut them.

I trimmed the watercolor panel just smaller than the larger frame and went ahead and adhered those together, and then I adhered the smaller frame in the center. I die cut the PinkFresh Leafy Branch from gold cardstock, because I love adding those extra pops of gold to bring out the gold from the washi tape. I also gold foiled the sentiment using the PinkFresh Perfect Sentiments Hot Foil Plate, along with the coordinating die. When cutting the sentiment, I also cut extra from additional cardstock for stacking purposes.

I adhered the pieces of the sentiment together using liquid glue and began playing around with the placement of everything. I glued the gold leaves first and then arranged everything else atop the leaves and frames using a combination of glue and foam tape. To finish up, I added some PinkFresh Gold Metallic Pearls and adhered everything to my card base, which is Neenah 110lb.

That finishes up this project for today! I hope you enjoyed it, and I hope you’ll check out the PinkFresh Studio washi tapes. Very easy to use and oh so great for quick, yet beautiful cards! Have an awesome day and don’t forget to stay awesome!

Supply List:

*Affiliate links used at no cost to you. Thank you so much for your support!

Latest Instagram Posts

Simon Says Stamp Floral Friends

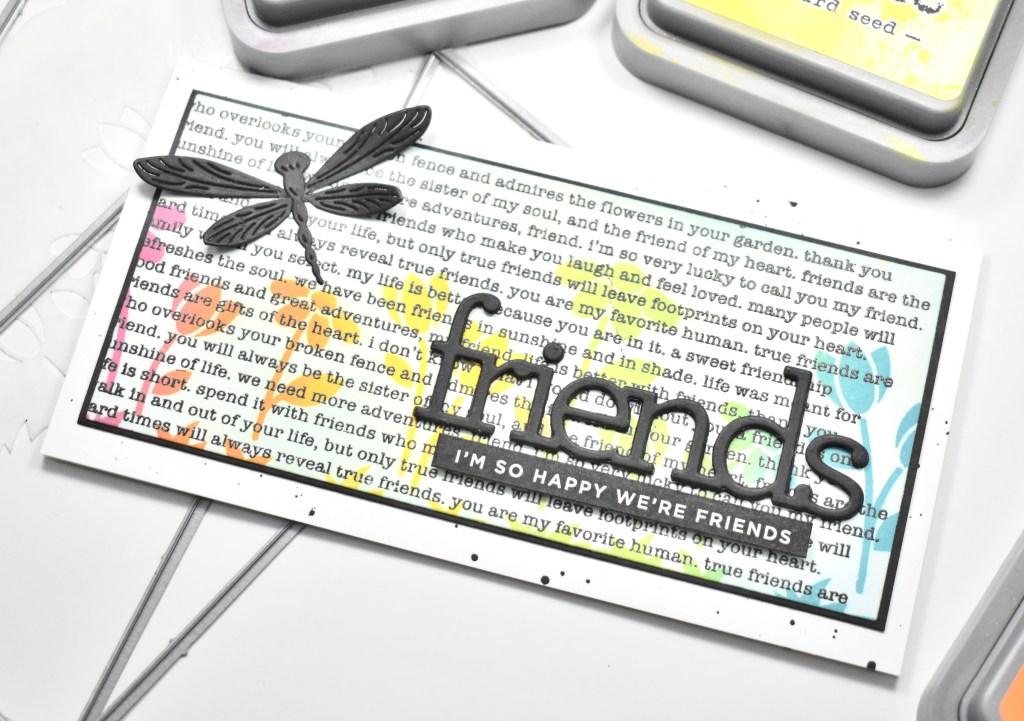
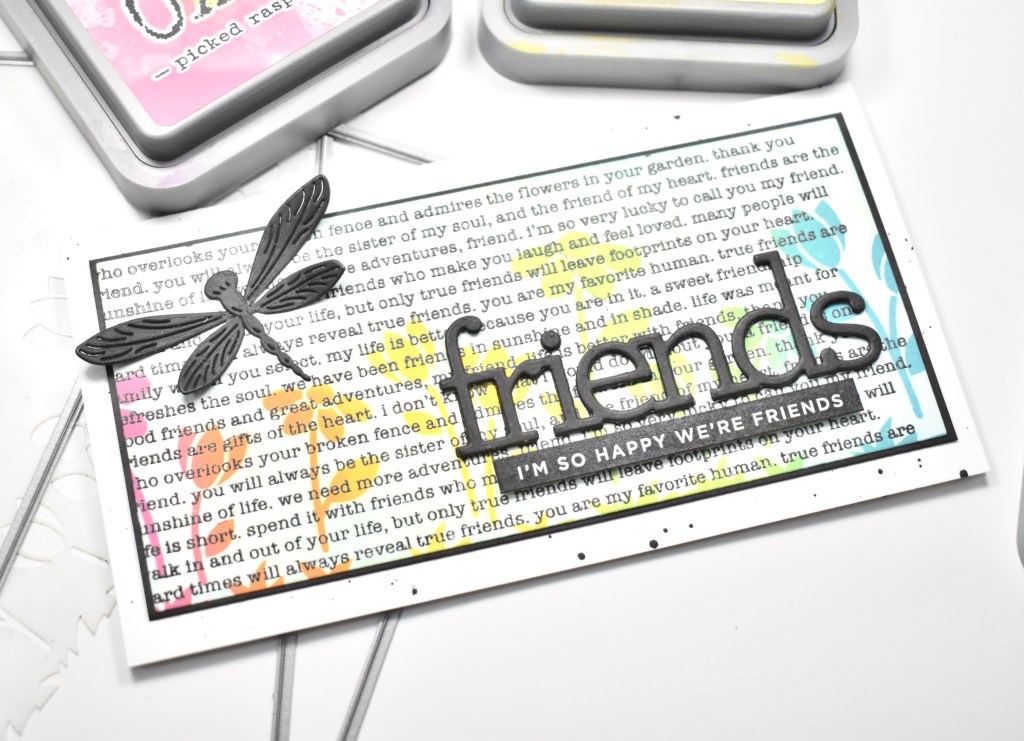
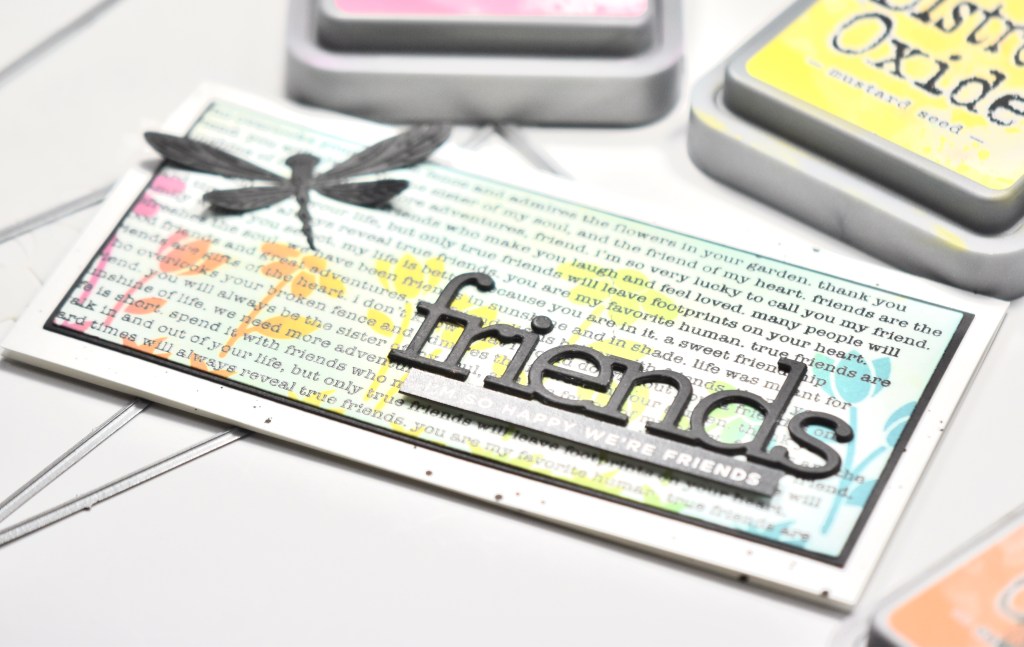
Hey there Friends! Thanks for joining me again today, as I’m featuring a product from the new Simon Says Stamp Make Magic release! This has been a super fun release to work with! Who am I kidding?! All of their releases are awesome and super fun to work with! Anyhoo, today’s project is featuring the Slimline Floral Builder Stencil, so let’s get into the details!

To begin my project, I stamped the SSS Friendship Text Background on a panel of Neenah Classic Crest 110lb cardstock, using VersaFine Onyx Black ink, and then heat set that using Ranger Clear Embossing Powder. I used the SSS Mini Slimline Rectangles to trim out a panel of the stamped background.

I adhered the SSS Floral Builder Stencil to the panel using masking tape, and proceeded to do some rainbow ink blending using Distress Oxide Ink in Picked Raspberry, Spiced Marmalade, Mustard Seed, Twisted Citron and Broken China. I used the SSS Friends die to cut that three times from black cardstock, and adhered those together using liquid glue. I also went ahead and cut the SSS Etched Dragonfly once from black as well.

I wanted a sub-sentiment, so I rifled through my SSS Reverse Sentiment Strips to find one that related to friends and trimmed that out using the SSS Sentiment Labels Die. I went ahead and glued the Friends sentiment directly to my panel, while adding the sub-sentiment using foam tape. I then adhered this panel to another black cardstock panel for contrast using the SSS Dot Tape Runner.

I cut a mini slimline card base using Neenah 110lb and splattered that with Royal Talens Amsterdam Oxide Black Acrylic Ink. I attached the panel to my card base using foam tape for dimension, because dimension is life! Now that I had everything assembled, I could adhere the dragonfly just hanging off the panel, but not hanging off the card base, and that was done using glue as well.

Super simple card today, but I love the black elements paired with the rainbow ink blending! I hope you’ll stop by and check out the entire Make Magic release from SSS! Thanks for stopping by and don’t forget to stay awesome!

Supply List:

*Affiliate links used at no cost to you. Thank you so much for your support!

Latest Instagram Posts