Simon Says Stamp Sunburst Sentiments

Hello Crafty Friends! Hope you are doing well! I’m still playing with goodies from the new Simon Says Stamp release, Make Magic! For today’s project, I’m featuring the new Sunburst die. How fun is this die?!?! What are your favorites from the release? Let’s jump right in to the deets on this card.

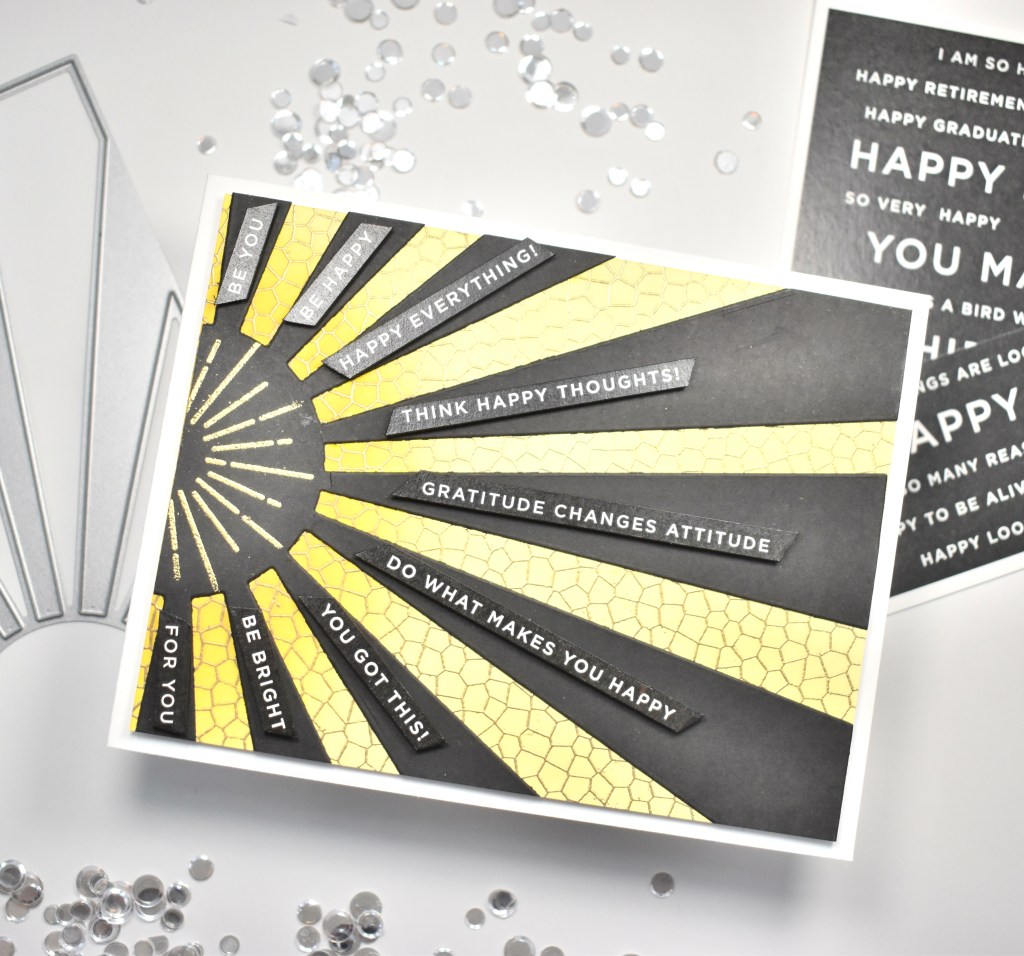
I began this project by stamping the new SSS Stained Glass Background on a panel of Neenah Classic Crest 110lb cardstock, using VersaMark ink and heat embossing it using Ranger Princess Gold Embossing Powder. I went ahead and trimmed it down to just smaller than an A2 card, as well. I then added some ink blending with Distress Oxide Mustard Seed over that, with darker concentration on the end where the “sun” was going to be.

I die cut the SSS Sunburst from black cardstock, and adhered it to my stamped panel using liquid glue, trimming off the excess. I popped the panel in the Misti and stamped some detail on the “sun” portion using the SSS Hello Sunshine Stamp set and VersaMark ink. I embossed that using the same Princess Gold Embossing Powder.
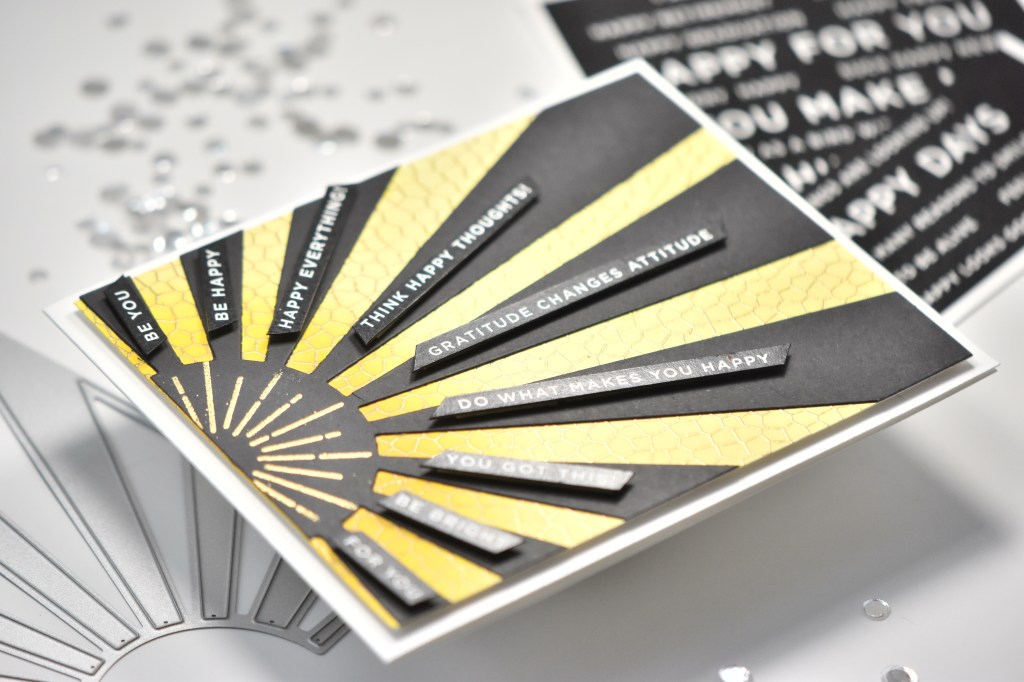
I rifled through all of my SSS Reverse Sentiment Strips to find ones that I liked and that would fit on the black rays of the sun. Once I had enough trimmed, I used a black Copic marker to black the edges of the sentiment strips and adhered them using foam tape.

The panel was then adhered to the card base, which is Neenah 110lb, using foam tape as well. Lots of dimension, because dimension is life!
That wraps up this project! I hope you enjoyed it, and I hope it sparks your creativity! Don’t forget to check out the entire Make Magic release, and don’t forget to stay awesome! Have a fabulous day!

Supply List:

*Affiliate links used at no cost to you. Thank you so much for your support!

Latest Instagram Posts

Simon Says Stamp You are Awesome

Hello and welcome back crafty friends! I’m back with another card featuring the all new All About You stamp set from the newest Simon Says Stamp Make Magic release! I love large sentiments and this set is perfect! Have you checked out the new release yet? What are some of your favorites? Let’s get into today’s project!

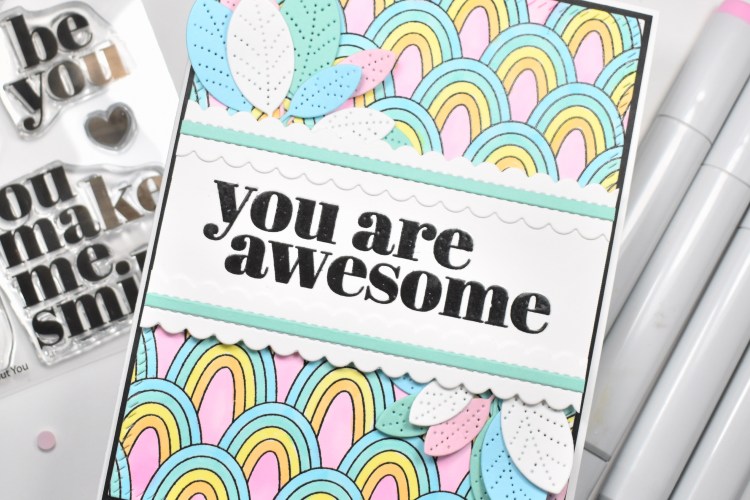
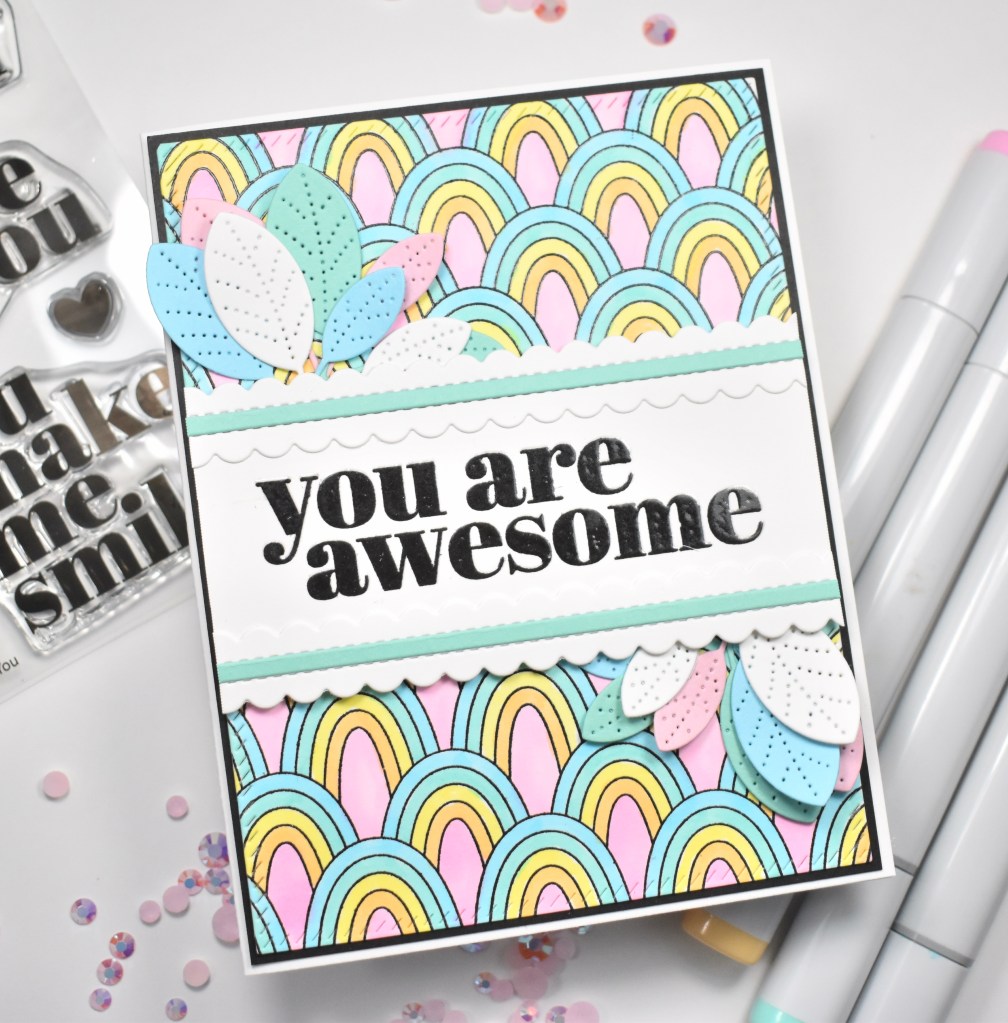
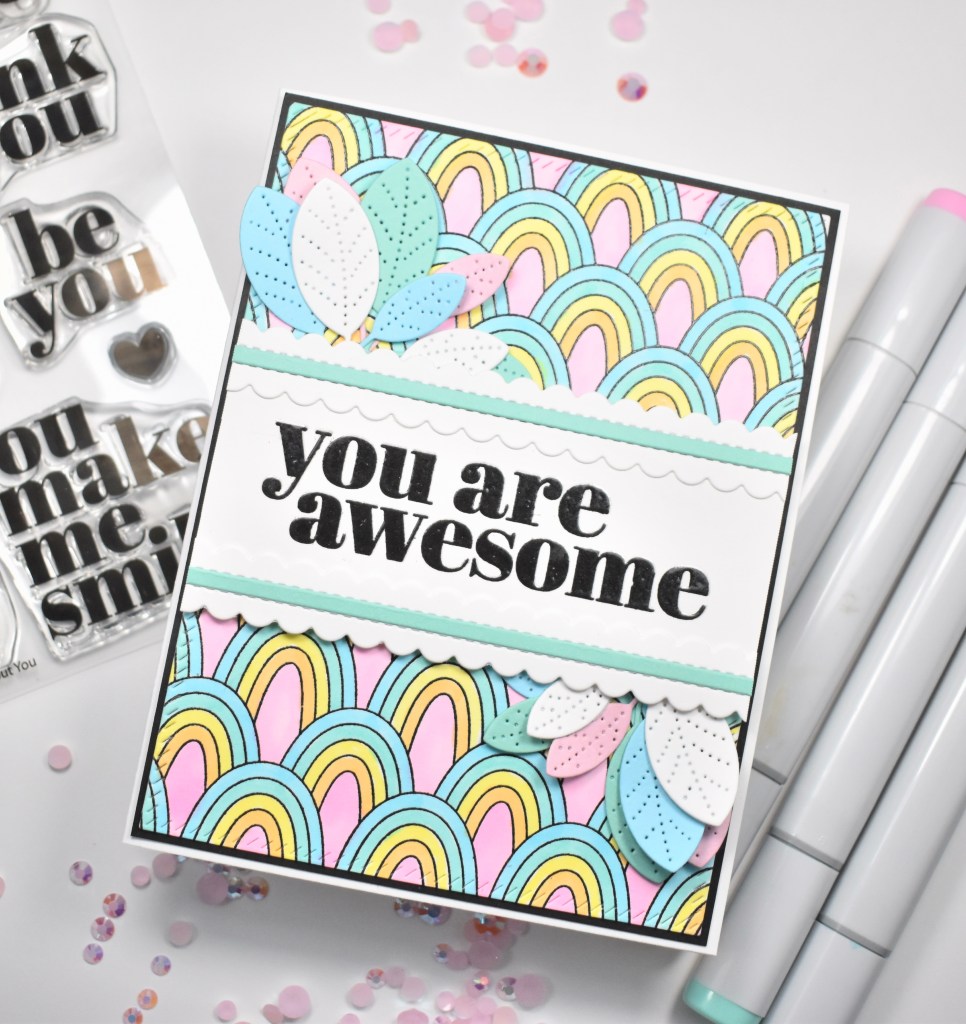
I began by stamping the SSS Repeating Rainbows Background stamp on a panel of Neenah Classic Crest 110lb cardstock, using VersaFine Onyx Black ink and heat embossing it afterwards using Ranger Clear Embossing Powder. I then trimmed it using the PinkFresh Studio Diagonal Stitched Rectangles. I knew I was going to color the image and didn’t want to waste time coloring portions that I wasn’t going to use.

The Copic markers that I used for coloring were RV02, YR21, BG32 and BG01. I stamped the You are Awesome sentiment from the SSS All About You stamp set on Neenah 110lb using the same black ink and embossing powder. I repeated the stamping and embossing process one more time, stamping with VersaMark ink the second time. By double embossing, it gives it a smoother finish.

I pulled out some cardstock from The Stamp Market and die cut the SSS Detail Elm Leaves a few times from three different colors along with white. I also used the PinkFresh Studio Slim Stitched Scalloped Rectangles to cut a white frame. I cut that up to use as a decorative border on either side of the sentiment, adhering with liquid glue. It needed something else so I used the PinkFresh Studio Slim Stripes Die to cut a strip of coordinating cardstock and glued that along the stitch on the frame.

I positioned the sentiment atop the colored panel and glued the elm leaves under it before adhering with foam tape. I adhered the panel to black cardstock using foam tape as well, and then adhered the whole thing to my card base, which is also Neenah 110, using the SSS Dot Tape Runner.

That’s it for this card! I hope you enjoyed it and I hope it inspires you to get crafty! Stop by and check out the entire Make Magic release, and let me know your favorites! Have a wonderful day and stay awesome!

Supply List:

*Affiliate links used at no cost to you. Thank you so much for your support!

Latest Instagram Posts

Simon Says Stamp Be You Simple Stem

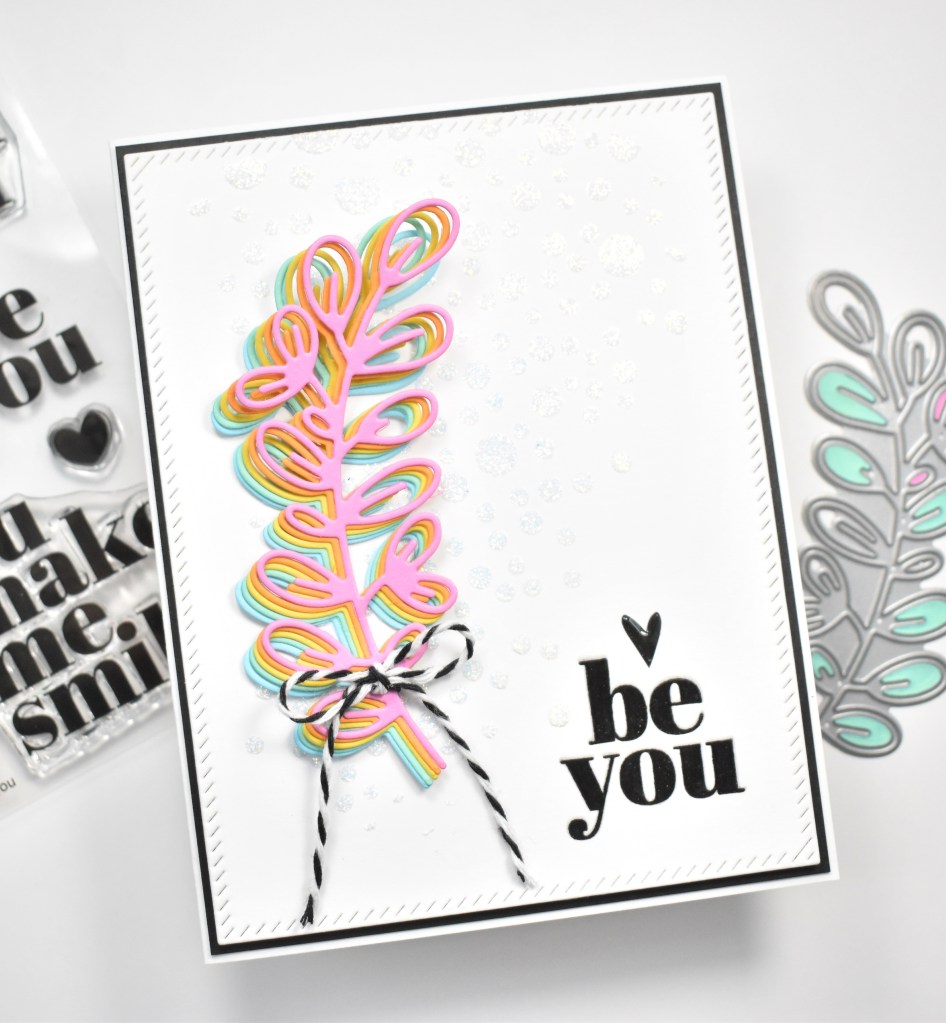
Hey there! How’s it going today? I’m super excited about the new SSS Make Magic release! Have you checked it out? There are so many awesome things! I know, I know, I say that about every release, but it’s true! There’s an amazing new sentiment set called All About You, and today’s card is featuring a sentiment from that set along with an older leaf favorite of mine!

I started this project by trimming a panel of Neenah Classic Crest 110lb cardstock using the PinkFresh Studio Diagonal Stitched Rectangles. I then adhered the SSS Fading Tiny Dots Stencil using masking tape and ran some Iridescent Gina K Glitz Glitter Gel through it. I set that aside to dry while I did some die cutting.

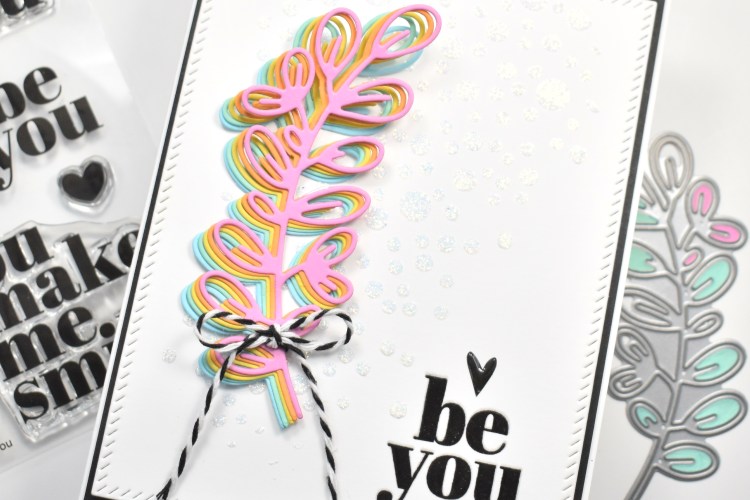
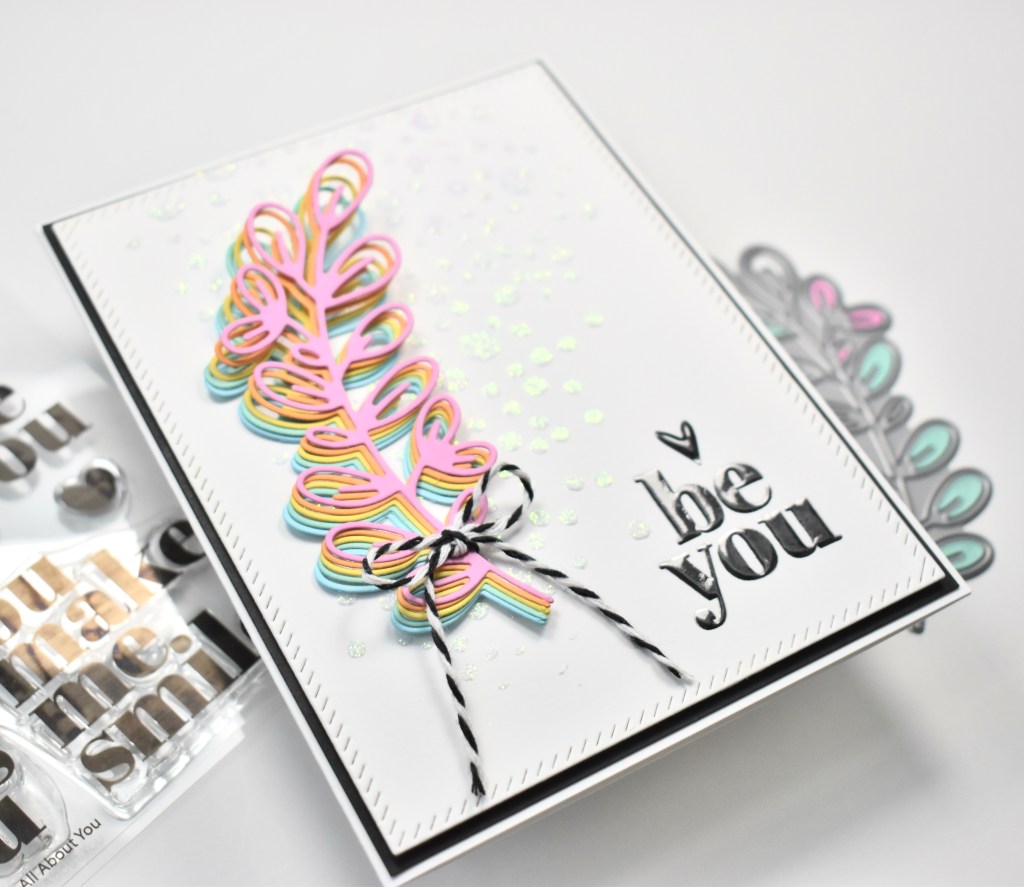
I pulled out five colors from my pack of The Stamp Market cardstock, and die cut the SSS Simple Stem from those, and then adhered them together using liquid glue, but slightly off center for each color. I tied some black and white twine around the stem for some added interest.

I took the gelled panel and popped it in the Misti and stamped my sentiment the first time using VersaFine Onyx Black ink and heat setting it using Ranger Clear Embossing Powder. I then stamped it again using VersaMark ink and heat embossed it for a second time. And .. I repeated that once more, for a total of three heat embossings. It gives it a really nice, smooth, glossy finish. You might be wondering why I don’t just stamp it all three times using the black ink .. without fail, my paper warps while heating and then it never lines up exactly the second time, so by stamping it with the clear ink, it doesn’t really show. Might be a silly way to do things, but it works for me!

I adhered my leaf bundle to the panel using glue and adhered that panel to a black panel using foam tape for dimension. This was then adhered to my card base, which is also Neenah 110lb, using the SSS Dot Runner. For the last detail, I added a black glossy heart sticker from my stash.

That finishes up this project! Super simple, but I love the impact of the rainbow leaves, and I always LOVE large sentiment sets like this one! I hope it inspires you to get crafty in your space! Head over to SSS to check out the entire Make Magic release. You don’t want to miss it! Thanks for stopping by today and don’t forget to stay awesome!

Supply List:

*Affiliate links used at no cost to you. Thank you so much for your support!

Latest Instagram Posts

Simon Says Stamp Slimline Rainbow Hello

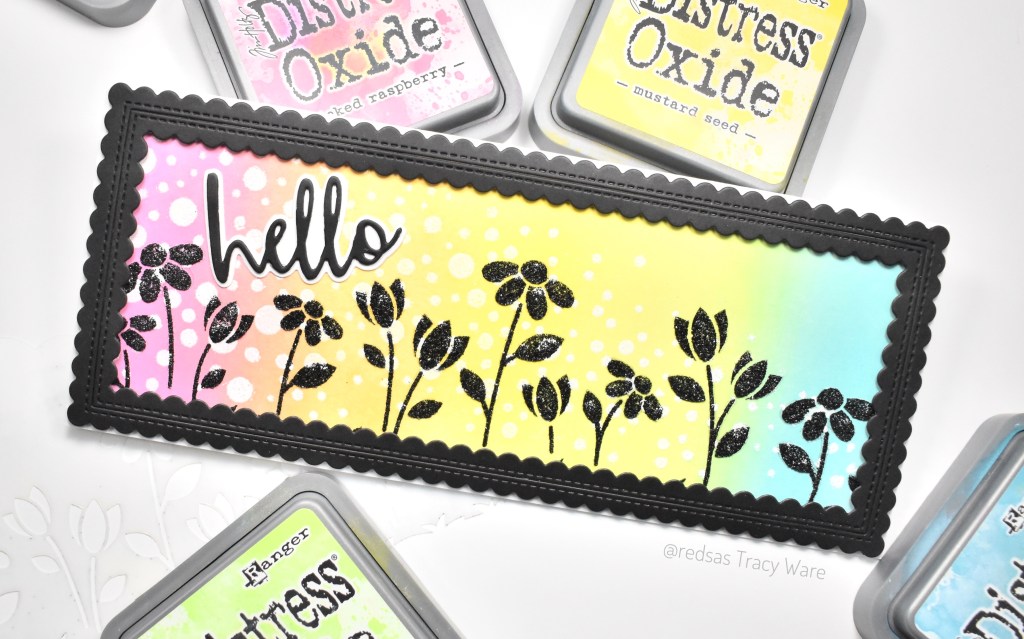
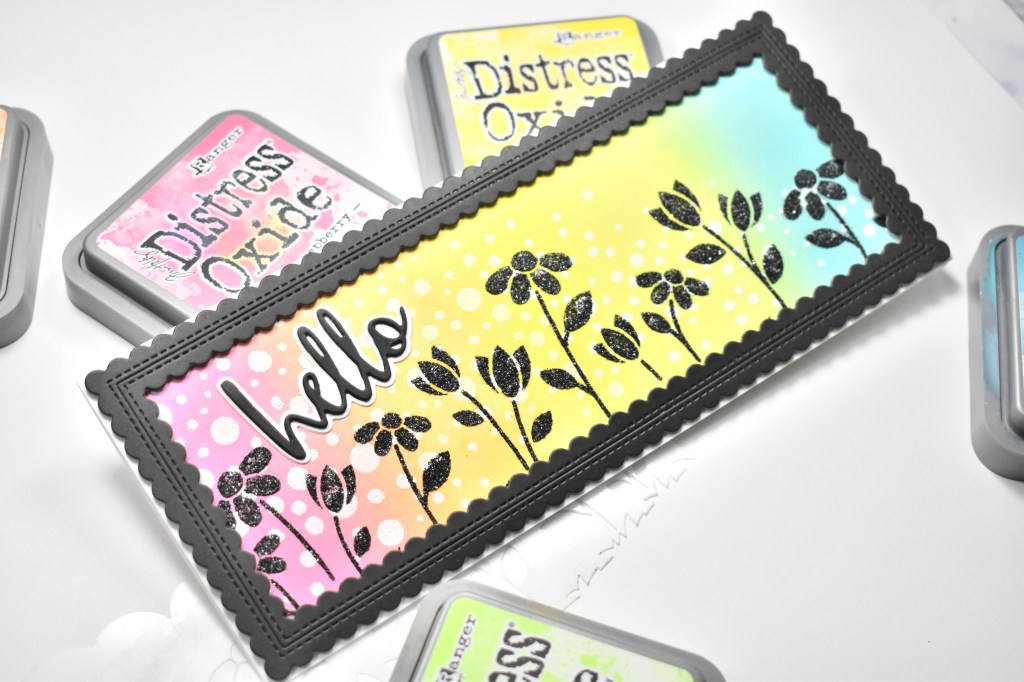
Hello Friends and welcome back to my blog! The new release from Simon Says Stamp, Make Magic, is live today!! Have you checked it out? Oh my word, SO many awesome things! For today’s project, I’m featuring a double stenciling technique using the new SSS Slimline Floral Builder Stencil! So let’s get right into it, shall we?

To be honest, the first attempt at this card was not a success! And, sometimes that happens! It’s unfortunate when it does happen, but sometimes it does! I didn’t get a good impression with the stencil using the gel. To tackle this situation, I opted for using the trusty Pixie Spray! Ok, now that you know the back story, I’ll tell ya how I created the card!

I began by trimming a panel of Neenah Classic Crest 110lb cardstock and adhering the SSS Fading Tiny Dots Stencil to it using masking tape. I smooshed and smeared the VersaMark Ink pad over that, getting a good coating. Once the stencil was removed, I sprinkled SSS Detail White Embossing Powder over it, and heat set it. The next step was the rainbow ink blending, and I used Distress Oxide inks Picked Raspberry, Carved Pumpkin, Mustard Seed, Twisted Citron and Broken China.

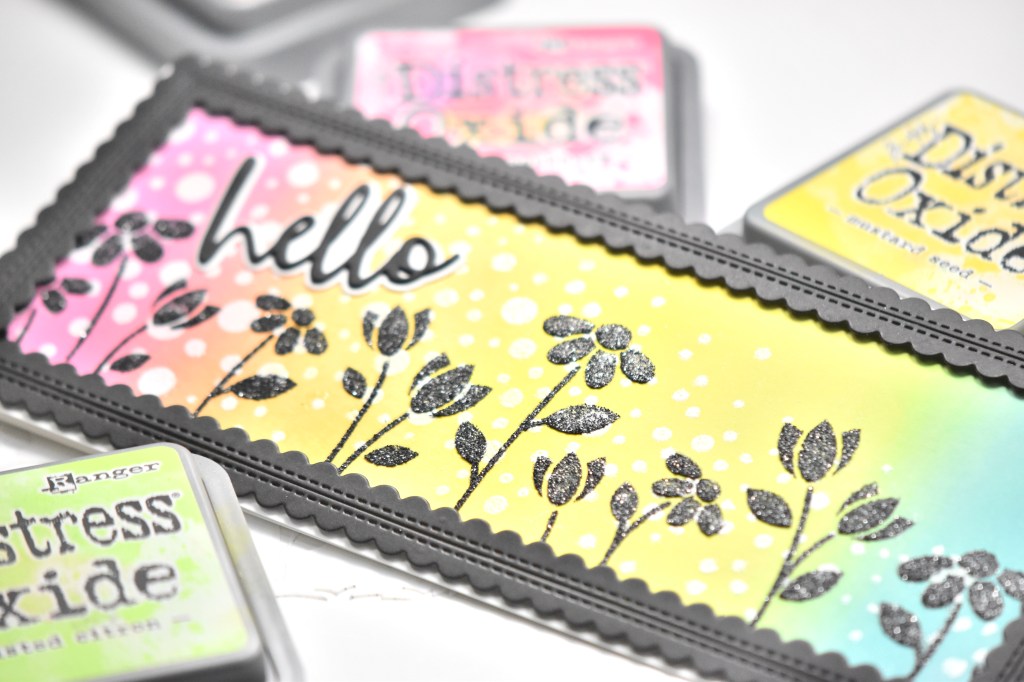
This is where the error in my ways surfaced the first time, as I only adhered the SSS Slimline Floral Builder Stencil with masking tape. To correct on my second attempt, I gave that stencil a good spray of Pixie Spray and positioned it atop my rainbow panel, securing it with masking tape, just to be sure! I then, added black Gina K Glitz Glitter Gel, because I was going for a silhouette look against my rainbow background.

I wanted to add a black frame, so I opted for the PinkFresh Studio Slim Stitched Scalloped Rectangles to achieve that. I cut the SSS Script Hello sentiment twice from black cardstock and cut the shadow portion once from Neenah 110, adhering all of those together using liquid glue.

I added the frame to my rainbow panel using foam tape for dimension, and I added the sentiment using glue. This was then adhered to my card base, which is Neenah 110lb as well, using the new SSS Dot Tape Runner.

That finishes this project! It was a super fun one to make, except for the mishap stenciling my first time! Live and learn! I hope you’ll stop by and check out the entire Make Magic release! Have a wonderful and stay awesome!

Supply List:

*Affiliate links used at no cost to you. Thank you so much for your support!

Latest Instagram Posts

Reverse Confetti I appreciate you

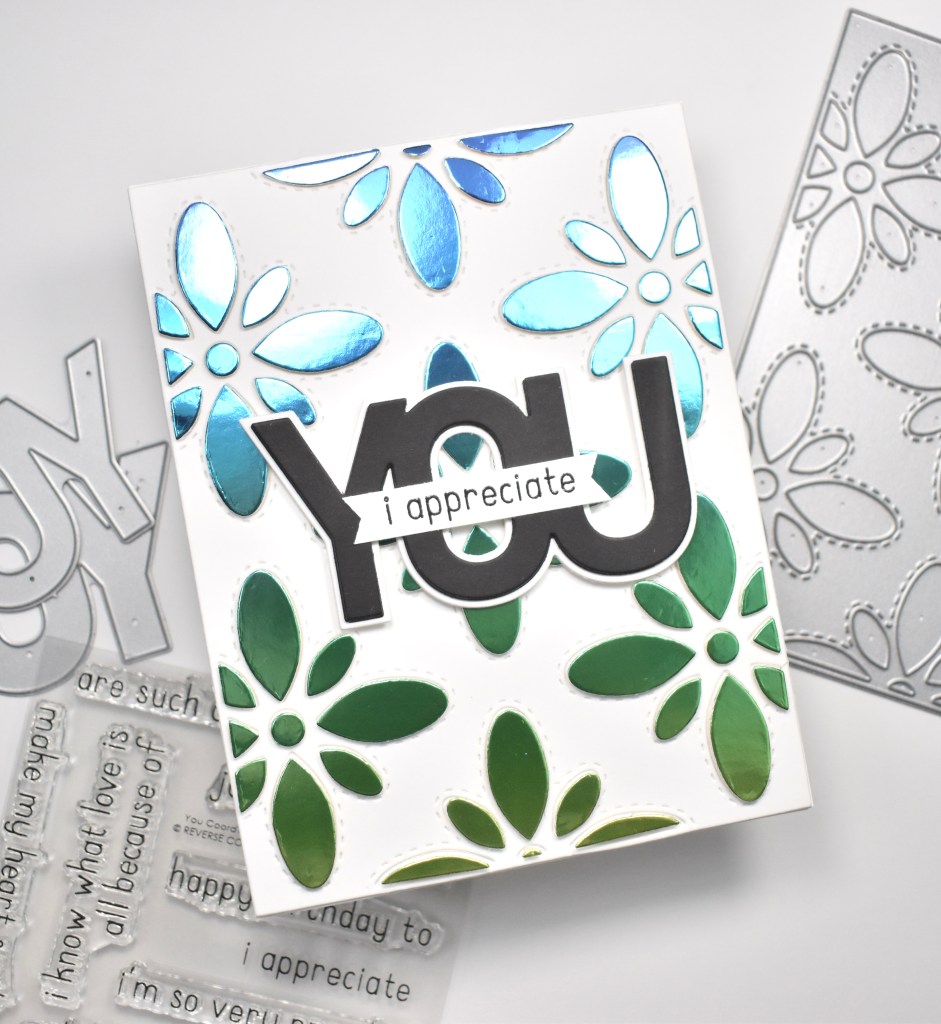
Hello Friends! Thanks for joining me today! I’m back with another card using Reverse Confetti products. I recently purchased the You Coordinates, Confetti Cuts and the Big Flower Cover Panel Confetti Cuts, and wanted to use those together to make a card. Let’s get into the details!

I started this project by using the Big Flower Cover Panel to cut a panel from Neenah Classic Crest 110lb cardstock. I also went ahead and cut another panel from SSS Holographic Rainbows cardstock. I removed the white negative pieces from the panel and adhered that to a Neenah 110lb card base, using liquid glue.

I placed foam tape on the back of the negative pieces from the holographic panel and inlaid those atop the white panel. I die cut the You shadow twice from white cardstock, and die cut the main You piece twice from black cardstock, adhering those together with glue. That was then glued in the center of the panel.

I stamped the I Appreciate sentiment, from the You Coordinates, using VersaFine Onyx Black ink and heat embossed that using Ranger Clear Embossing Powder. I then trimmed it out and glued it atop the You.

Super simple card for today, but I love both of these sets so much! I love the flowers using holographic cardstock as well. I think it gives it a lot of interest and catches the light really well. Thanks for stopping by today, and don’t forget to stay awesome!

Supply List:

*Affiliate links used at no cost to you. Thank you so much for your support!

Latest Instagram Posts

Reverse Confetti Special Delivery

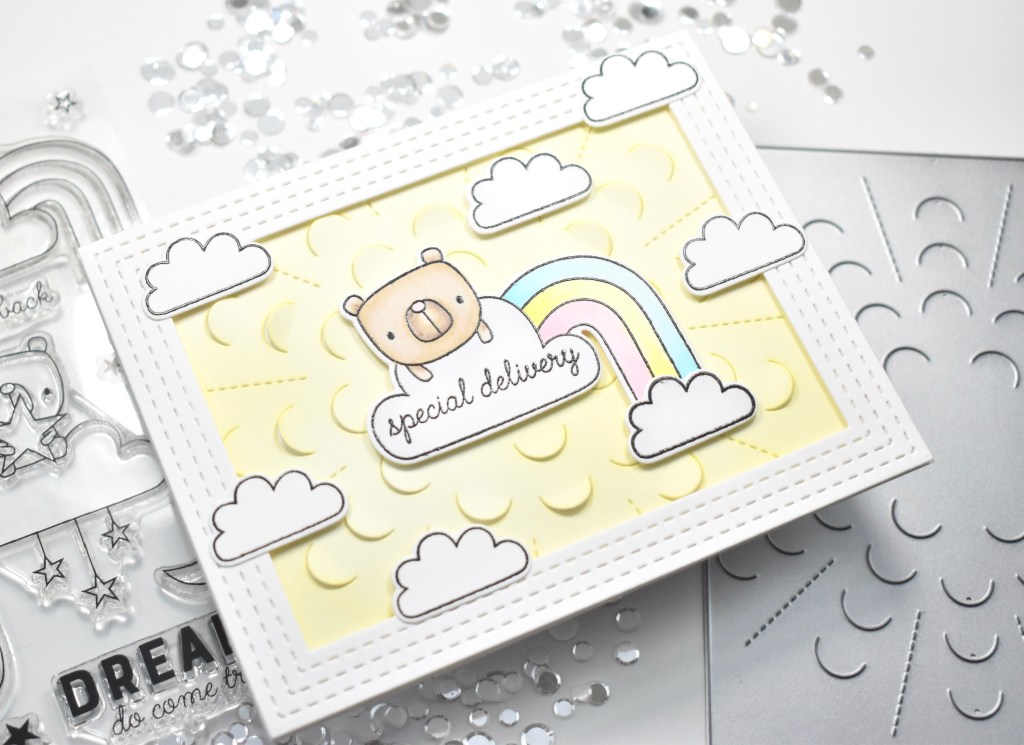
Hey! Hey! Hey! Thanks for joining me today! For this post, I’m sharing a project for the Reverse Confetti Stock Your Stash Challenge! This month’s card making theme is, Oh Baby! I hope that you’ll play along for your chance to win a $20 gift certificate to the Reverse Confetti store! More details to follow! For my project, I had to use The Bear Up There set, because it’s just too darn cute! Let’s get into the details.

To begin, I used Neenah Classic Crest 110lb cardstock and cut a panel using the new Peekaboo Cover Panel Confetti Cuts die. I then did some light ink blending on the panel, using leftover ink on my brush, which happened to be Distress Oxide Mustard Seed. I also used the Stitched Note and Frames Confetti Cuts die to cut a frame for the panel. I adhered the frame to the panel using foam tape for dimension.

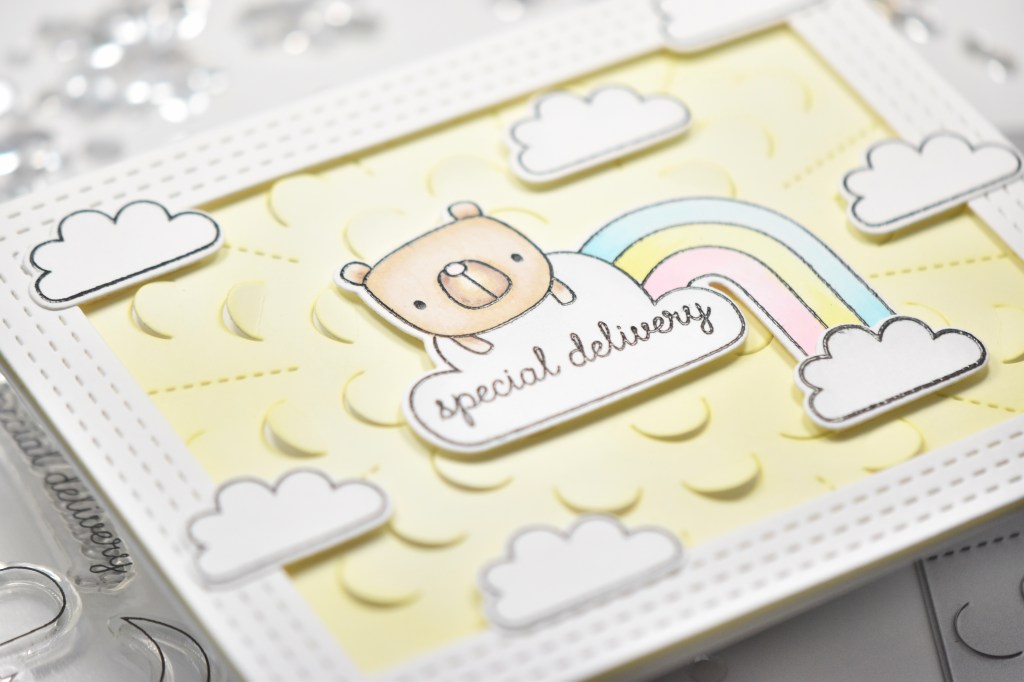
I stamped the rainbow bear and cloud from The Bear Up There set using VersaFine Onyx Black ink and heat embossed them using Ranger Clear Embossing Powder. I stamped and embossed a few more clouds as well. I used Copic markers RV00, RV10, Y00, Y02, BG000, BG01, C00, E00, E40, E42, E43 and E70 to color the images. Once those were done, I used the coordinating Confetti Cuts to run them through the die cutting machine.

I adhered the bear and a cloud directly in the center of the Peekaboo Panel using foam tape, and positioned the remaining clouds around the panel and frame, adhering those with a combination of liquid glue and foam tape. I then slightly bent the peekaboo areas so that they would pop up, if you will. This was then adhered to my card base, which is also Neenah 110lb.

That finishes this project! I hope you enjoyed it, and I hope you’ll join our Stock Your Stash Challenge this month! You can head to the Reverse Confetti Blog for more details and the link to join in on the challenge! And a chance to win a $20 gift certificate!

Stay awesome sweet friend!

Supply List:

*Affiliate links used at no cost to you. Thank you so much for your support!

Latest Instagram Posts

Spellbinders July Clubs Blog Hop

Hello and welcome back to my blog! Today, the Spellbinders team is spotlighting the July Clubs with an awesome blog hop! Comment along the hop for your chance to win a $50 gift certificate to Spellbinders! Details below. I’m showcasing a card that I created using the July Card Kit of the Month, so let’s jump right in!

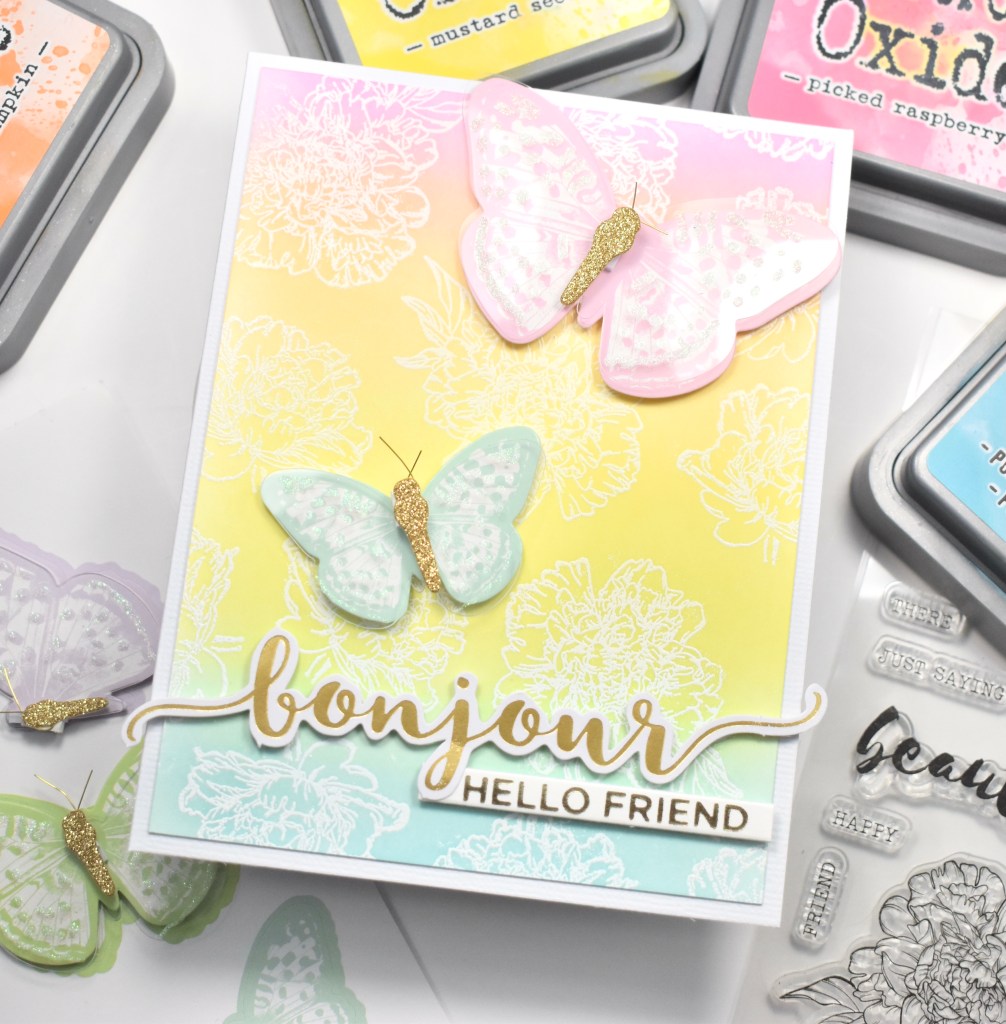
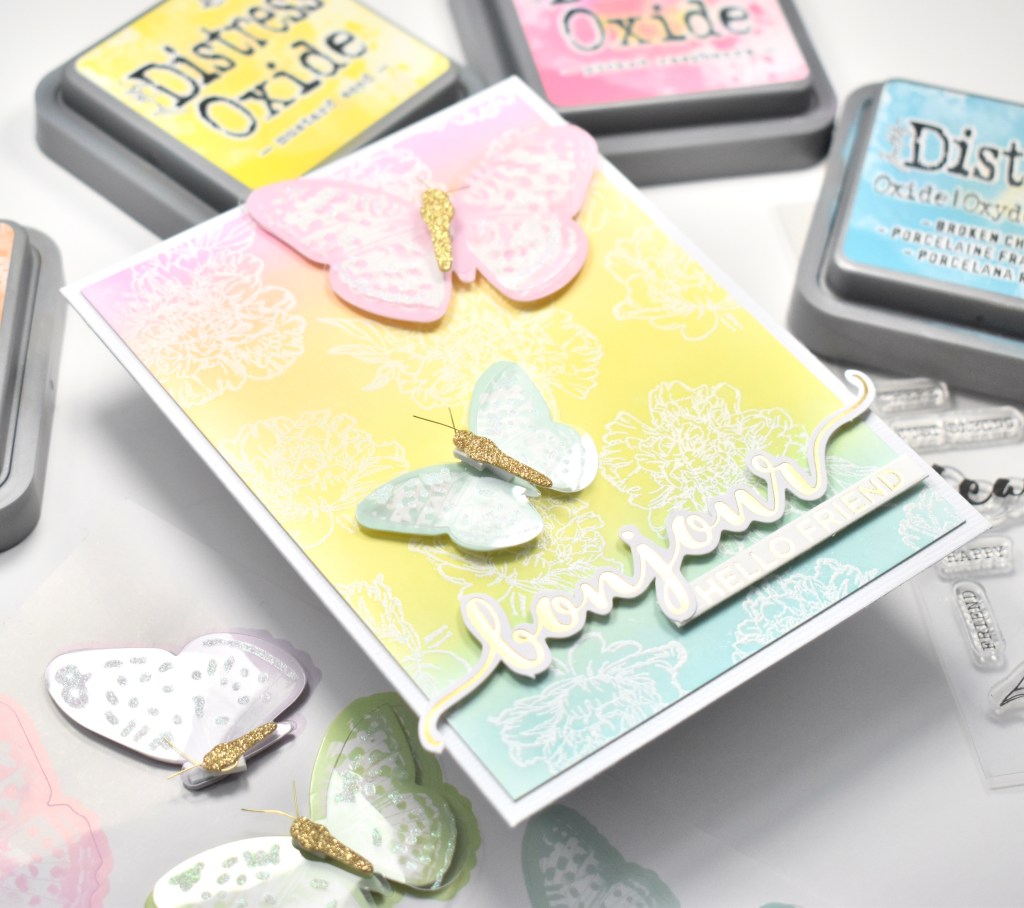
I began this project by trimming a panel of Neenah Classic Crest 110lb cardstock just smaller than an A2 card. I popped the panel in the Misti and repeatedly stamped the two larger flowers from the included stamp set with VersaMark ink, and white heat embossed those using SSS Detail White Embossing Powder.

I did some light ink blending over the panel using Distress Oxide inks Picked Raspberry, Carved Pumpkin, Mustard Seed, Twisted Citron and Broken China. Once the ink blending was complete, I adhered the panel to a card base, which is also included in the card kit.

I loved the Bonjour sentiment in the ephemera pack, so I placed foam tape on the back of that and adhered it towards the bottom of my card. I wanted a sub-sentiment, so I foiled the Hello Friend sentiment, which is from the Spellbinders Everyday Sentiments II set, using Champagne foil. I adhered that under the main sentiment using foam tape as well.

To finish up the project, I adhered two of the included dimensional butterflies for added interest. I hope you enjoyed this project, and I hope it inspires you to get crafty! Head over to Spellbinders to check out all of the clubs they have to offer!
As I mentioned above, to celebrate the release of the July clubs, we are having an awesome blog hop! We are giving away a $50 gift certificate to three lucky blog readers, so hop along for your chance to win! Giveaway closes on Sunday, July 18th, 11:59 pm MST. The winner will be announced in this blog hop post the following Tuesday. Winners are responsible for shipping costs, duties and taxes. Please note, gift certificates cannot be applied to Club Subscriptions. They can be applied to shop past Club products, Club extras and regular releases. The full hop list is below! Happy hopping!

Spellbinders Blog
Becca Feeken
Tina Smith
Bibi Cameron
Annie Williams
Becky Roberts
Yasmin Diaz
Jennifer Snyder
Kathy Clement
Hussena Calcuttawala
Marie Heiderscheit
Jill Hilliard
Laurie Willison
Ilina Crouse
Virginia Lu
Emily Midgett
Jean Manis
Sheri Holt
Sandra Nagel
Joy Baldwin
Rosemary Dennis
Henriëtte van Mierlo
Betty Wright
Melody Rupple
Jenny Colacicco
Emily Leiphart
Vera Yates
Tracy Ware (You are Here)
Gemma Campbell
Alanna Moses
Michelle Starcher
Deborah Jenkins
Erin Thompson
Birgit Norton
Michelle Sheler
Sandhya Iyer
Jennifer Kotas
Jessica Vasher
Olga Direktorenko
Karen Brown
Tanya Boser
Martha Lucia Gomez
Amy Kolling

Supply List:

* Compensated affiliate links used at no cost to you. Thank you so much for your support!

Latest Instagram Posts

Alex Syberia Sending Hugs

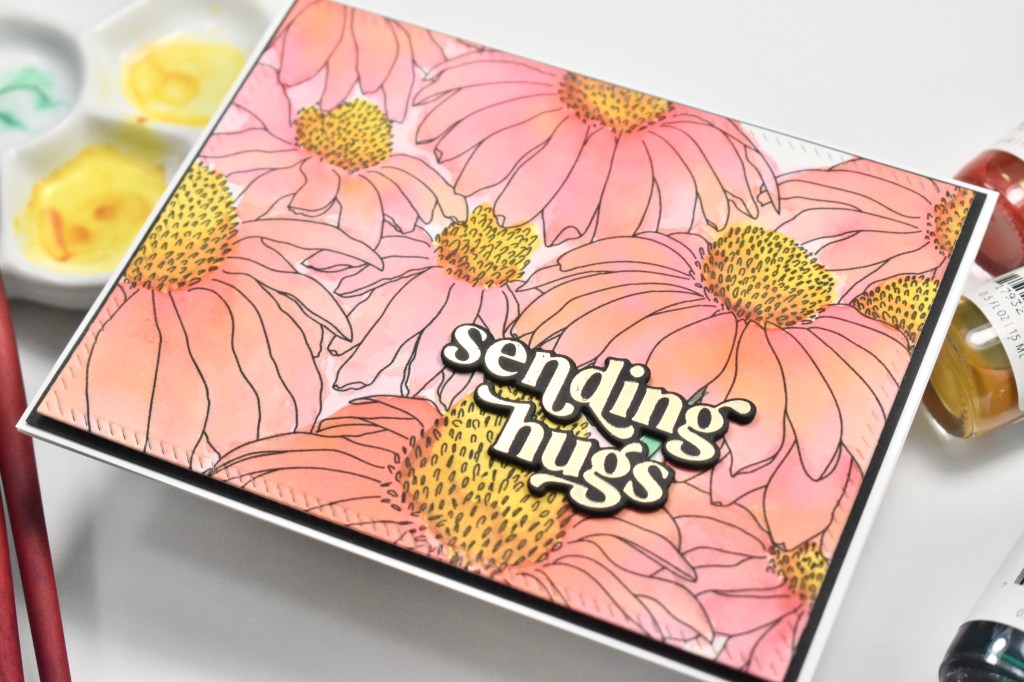
Hey! Hey! Hey! How’s it going? I’m back today with another project from Alex Syberia’s new July release. For this project, I’m featuring Tina’s Garden A2 Panel. What a great digi stamp this is! Perfect for coloring, whether you’re using markers, pencils or watercolors! So, let’s jump right into it!

I began by printing the image on Fluid Cold Press Watercolor Paper. I haven’t found a favorite watercolor paper yet, and this is just what I happen to have, so I used that. I recently attended the Concord and 9th summer camp, and we received some of their new liquid watercolors in a few shades in our kits. Since they were new, I wanted to pull them out and try them again. The colors that I used were Honeysuckle, Buttercup, Clover and Oceanside. I checked the C9 website to see if these watercolors are available for purchase, and I was unable to find them on their website. I’m not positive, but I think these will become available in the future. How awesome would it be to have liquid watercolors in all of their amazing colors?!?! With that being said, this is a beautiful digi stamp, and any watercolors that you have would be stunning on this!

Once the coloring was done, I used the PinkFresh Studio Diagonal Stitched Rectangles to trim the panel. I then used the PinkFresh Studio Perfect Sentiments Foil Plate to foil a sentiment from this set using Champagne foil on black cardstock. I used the coordinating die to cut the sentiments, and I ran it through again to cut blank sentiments so that I could stack them for dimension.

I adhered the sentiment directly to the panel using liquid glue and then adhered the watercolored panel to a panel of black cardstock, using foam tape, for contrast. This was then adhered to my card base, which is Neenah Classic Crest 110lb cardstock.

That finishes this project! I hope you’ll head to Alex’s Etsy shop to check out the new release! There are some super fun images that you don’t want to miss! Thanks for stopping by today, and don’t forget to stay awesome, because you are awesome!

Supply List:

*Some affiliate links used at no cost to you. Thank you so much for your support!

Latest Instagram Posts

Alex Syberia Design Coloring Therapy

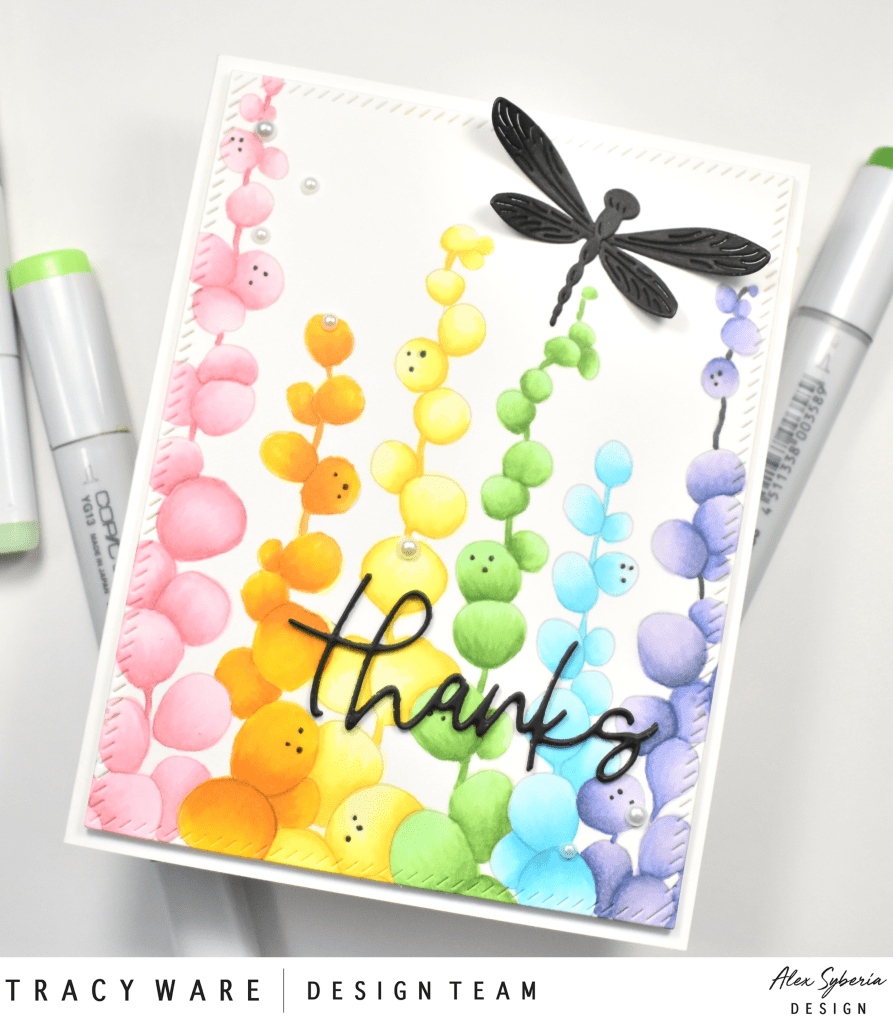
Hello Crafty Friends! Thanks for stopping by today to check out my project for the new July release from the awesome Alex Syberia! Lots of fun things in this release, and of course, some beautiful flowers for your coloring pleasure! To celebrate Alex’s new release, we are having a super fun Instagram Hop, with a chance to win a $20 gift certificate for her shop! You can check out her Instagram or my Instagram for all the details! For today’s project, I’m featuring the Coloring Therapy A2 Panel, so let’s get started!

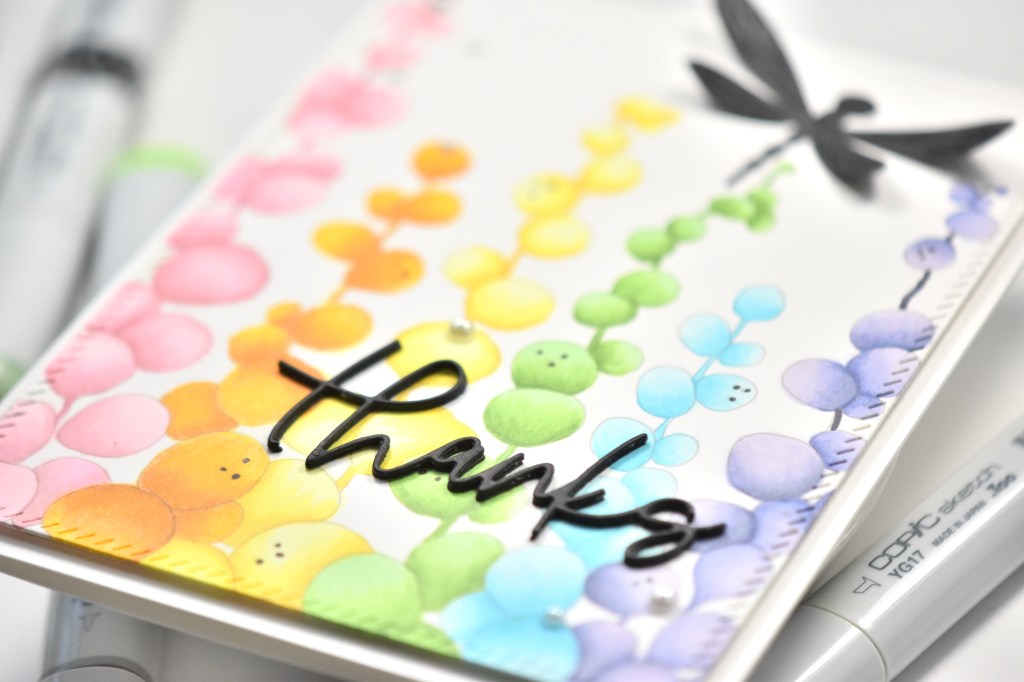
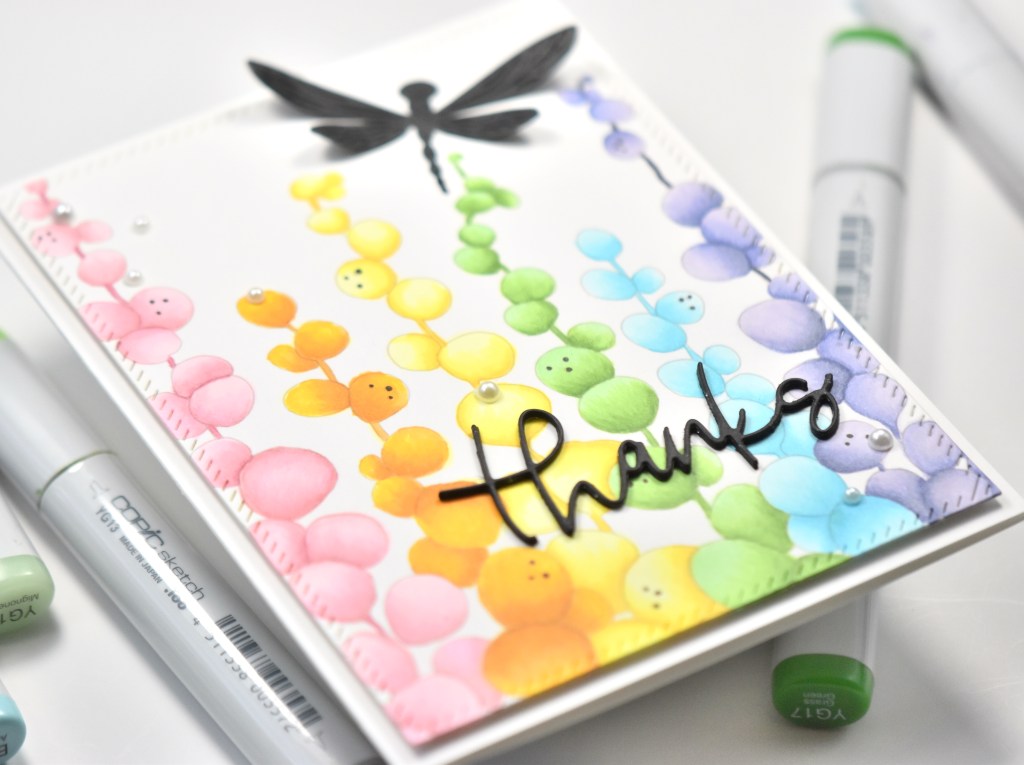
I began by printing the image on Neenah Classic Crest 110lb cardstock. When I printed the image, I did adjust the opacity down to about 30%. By doing this, you can get somewhat of a no-line look, especially when watercoloring. I then got busy coloring. I started with the purples, and thought that I was going to color the whole thing purple to resemble grapes, but then decided that it might be cool to do rainbow colors instead.

The Copic Markers that I used were BV000, BV00, BV01, BV02, BV04, BV23, BV29, Y00, Y06, Y08, Y11, Y13, Y15, Y17, RV00, RV02, RV11, RV32, R85, YR23, YR24, YG11, YG13, YG17, BG000, BG01 and BG02. Goodness gracious, that’s a lot of markers, right!?!? Anyhoo, once everything was colored, I used the PinkFresh Studio Diagonal Stitched Rectangles to trim the panel.

I also used a Copic Multiliner 0.3 to add back the black dots on the “berries” as they got lost during the coloring process. I opted for a Thanks sentiment using the Concord and 9th Scripted Thanks die cut. I cut it three times from black cardstock and adhered those together using liquid glue. I also cut the SSS Etched Dragonfly from black cardstock.

I adhered the sentiment and the dragonfly to the colored panel using glue, and adhered the panel to my card base, which is also Neenah 110lb, using foam tape for dimension. To finish up the project, I added some Soft Snowfall Pearls from Little Things from Lucy’s Cards. I thought the softness of them added a nice little touch!

I hope you enjoyed this project, and I hope you found some inspiration to get crafty in your space! Head on over to Alex’s Etsy shop to check out the full release! You don’t want to miss it. Stay awesome sweet friend!

Supply List:

*Affiliate links used at no cost to you. Thank you so much for your support!

Latest Instagram Posts

Reverse Confetti July Release Blog Hop

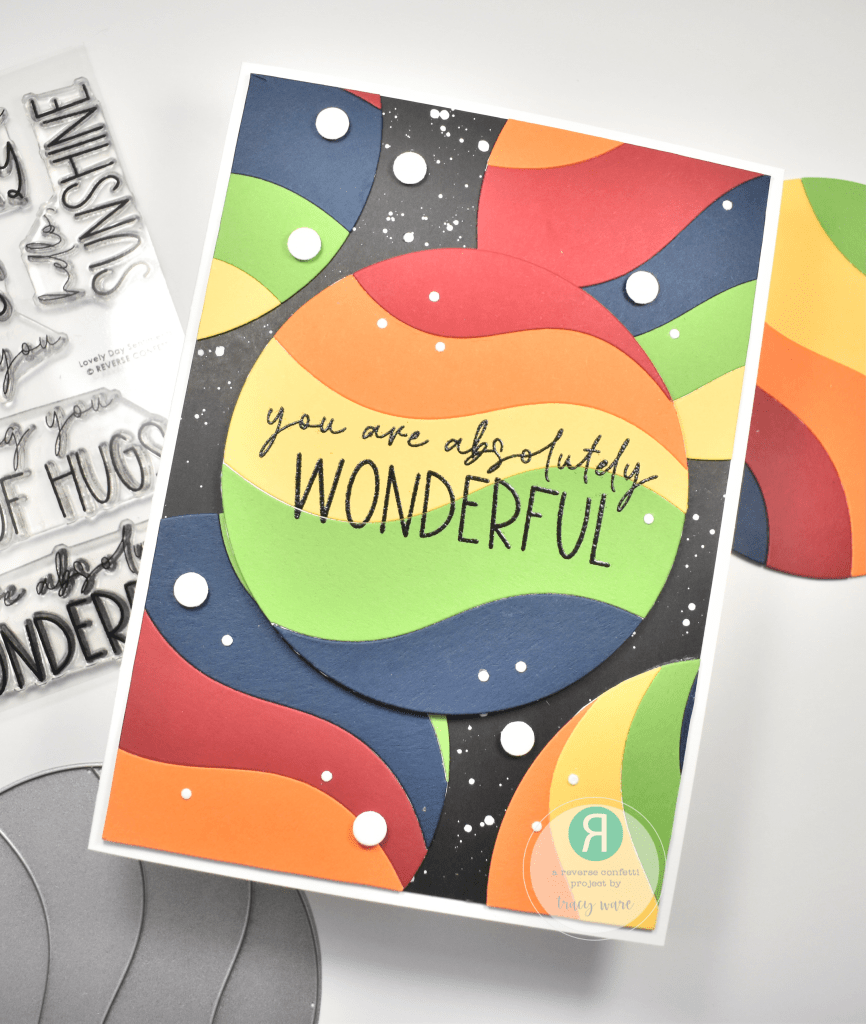
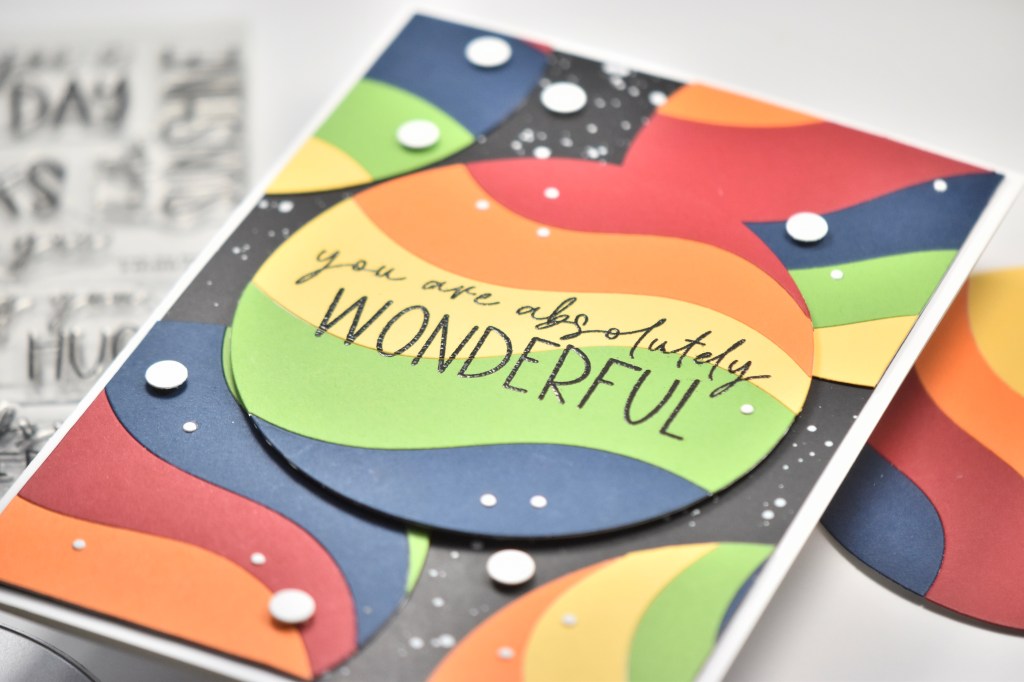
Hello Crafty Friends and welcome to the Reverse Confetti Blog Hop! The July release is live today!! The full hop list will be listed below for you to check out all my teamies projects! You don’t want to miss it! For today’s project, I revisited the Circle of Waves Cover Panel Confetti Cuts, along with the Lovely Day Sentiments! So, let’s jump right in!

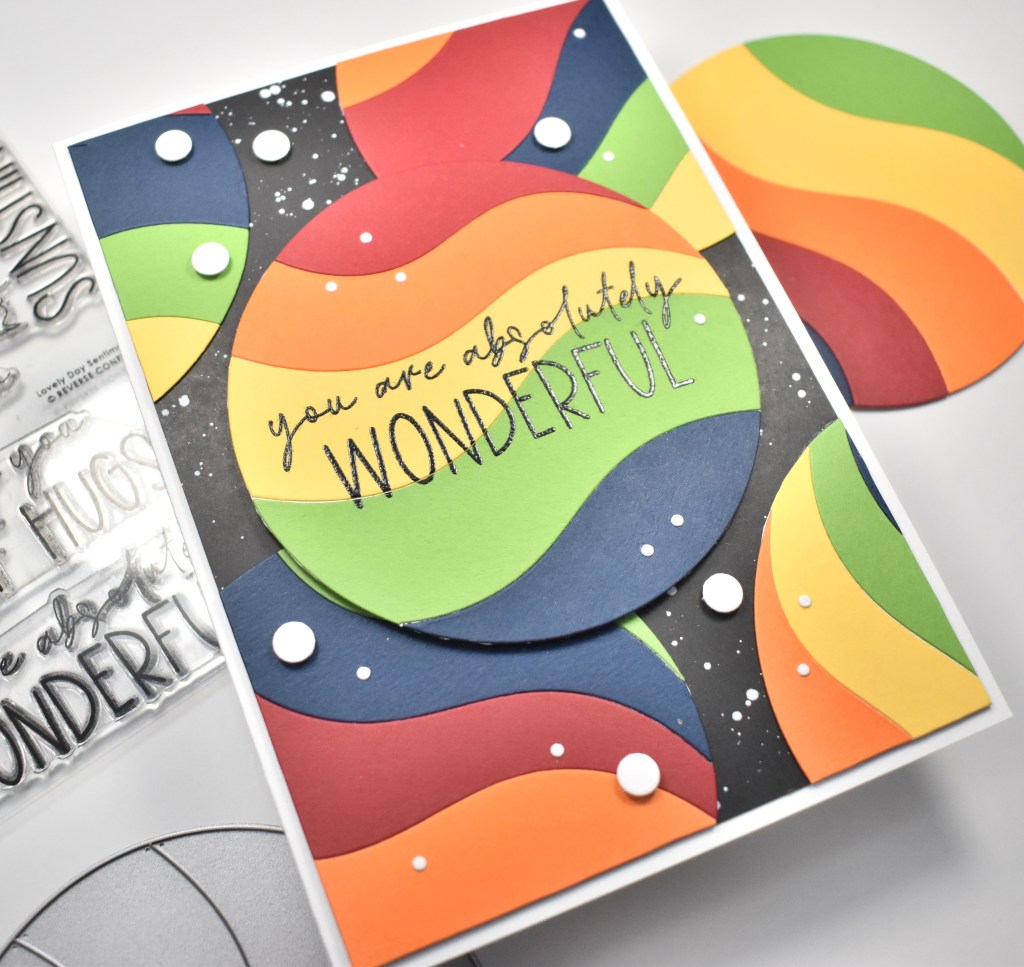
Today’s project was super fun! I really enjoyed making the rainbow circle of waves to adorn my card! To begin my project, I pulled out five rainbow colors from my Concord and 9th cardstock pile, and ran those through the die cutting machine using the Circle of Waves Cover Panel. I traced the die on piece of Neenah Classic Crest 110lb cardstock, and cut that out, using that as the base to glue my wave pieces.

I then took one of the rainbow circles and popped it in the Misti and stamped the You are Absolutely Wonderful sentiment, from the Lovely Day Sentiments, in the center using VersaFine Onyx Black ink and heat embossed it using Ranger Clear Embossing Powder. I cut a panel of black cardstock just smaller than an A7 card base, and splattered it, using Royal Talens Amsterdam Titanium White Acrylic Ink. This is my favorite splatter medium because it stays bright white, and it’s a great splatter consistency.

I positioned the rainbow circles atop the splattered panel, deciding on placement. I then adhered the outermost rainbow circles using liquid glue, trimmed the excess and adhered the main circle in the center using foam tape. I decided that I would add some additional circles, to mimic the splatter, using the Stitched Circles Cover Panel Confetti Cuts. I die cut a scrap of Neenah 110lb and added some of the larger circles using foam tape, and gluing the smaller circles.

That finished up this project! I hope you enjoyed it, and I hope it inspires you to get crafty in your space! I love how you can change up the feel of a die just by switching the colors used! Thanks so much for stopping by today!

As I mentioned earlier, there’s a bog hop today to celebrate the release! Hop around and check out all of the inspirations from my teammates! The full hop order is below!

Reverse Confetti Blog

Kelly Lunceford

Amy Kolling

Tricia Barber

Amy Rohl

Lisa Henke

Deanne Kuntz

Becky Roberts

Tracy Ware

Ali Farmer

Cheiron Brandon

Dilay Nacar

Jeanne Jachna

Heather Ruwe

Kelly Griglione

Audrey Tokach

Jenny Colacicco

Olga Moss

Candice Fisher

Michelle Short

Olga Matyushevskaya

Amy Tsuruta

Joe Sysavath

Supply List:

*Affiliate links used at no cost to you. Thank you so much for your support!

Latest Instagram Posts