Reverse Confetti Countdown to Confetti Day Three

Hello Crafters and welcome back to day three of the Reverse Confetti Countdown to Confetti! The release will be going live tomorrow, woohoooo! Please note that new product links will not be active until then. To celebrate the countdown, we are having a blog hop, with a gift certificate up for grabs! Details below! For today’s projects, we are featuring the Oceans of Love and Hummingbirds sets! So, let’s jump right in to the projects!

For my first project, Oceans of Love, I began by grabbing the new Circle of Waves Confetti Cuts and cutting five different colors of blue cardstocks. Most of the blue cardstock is from Concord and 9th, and one is from Simon Says Stamp. I traced the circular die and fussy cut a solid circle and glued the “waves” to that.

I used the Oceans of Love set to stamp some of the elements using VersaFine Onyx Black Ink on Neenah Classic Crest 110lb cardstock, and heat embossed them using Ranger Clear Embossing Powder. Before cutting those out using the coordinating die, I used Copic Markers BG70, BG72 and BG75 to color the images. I took the “waves” circle and stamped the sentiment on it using VersaMark Ink and heat embossed that using SSS Detail White Embossing Powder.
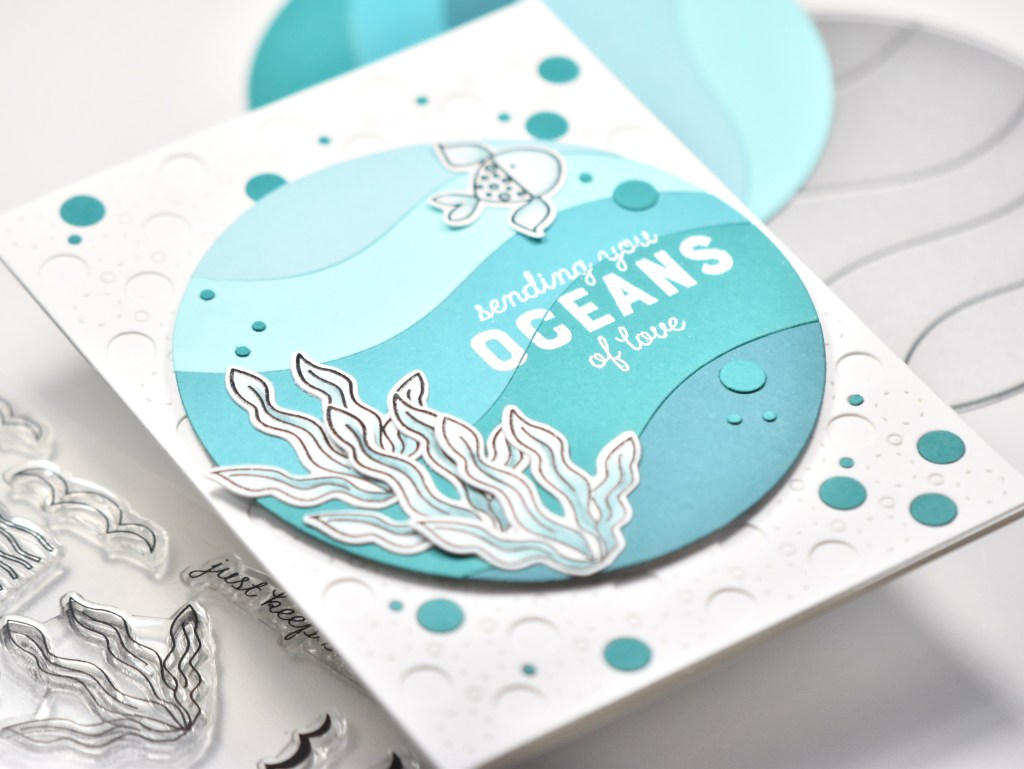
I cut a panel of Neenah Classic Crest 110lb using the Reverse Confetti Stitched Circles Cover Panel Confetti Cuts and poked out all of the larger circles and a few of the smaller circles. I used a scrap of the blue cardstock to run that through using that same cover panel, because I wanted these to be the “bubbles” on the card. I adhered the Stitched Circles panel to my card base, which is also Neenah 110lb using liquid glue.

Then, I inlaid some of the blue “bubbles” for interest. I adhered the circular waves panel using foam tape and adhered the colored underwater elements using glue, adding some of the “bubbles” atop that as well. That finishes up this project!

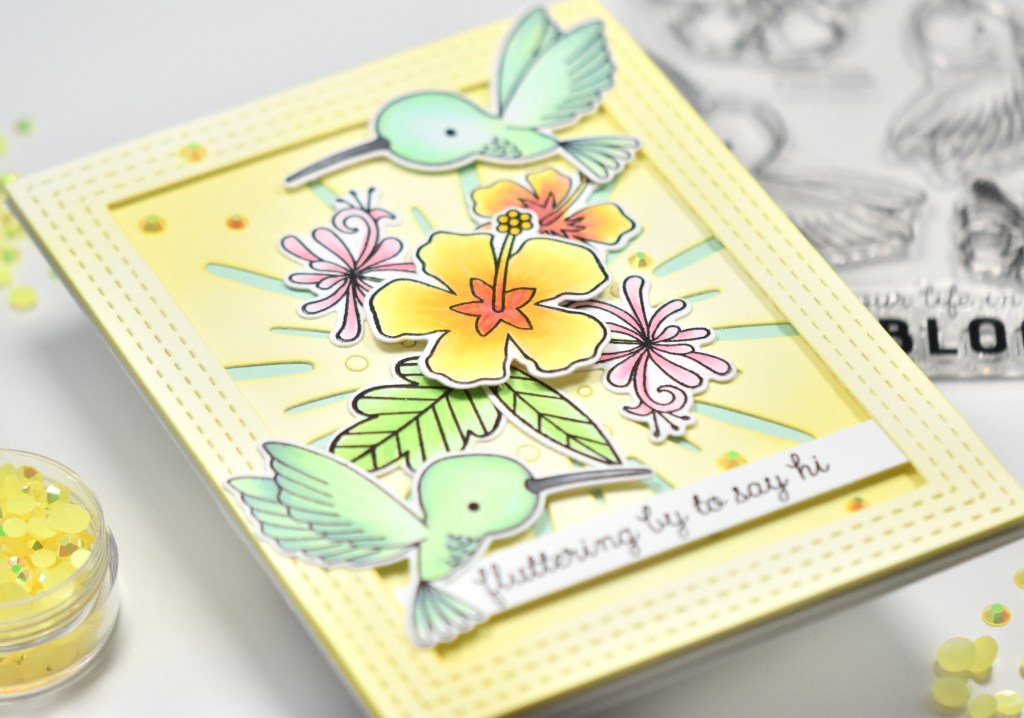
For my second project, I’m featuring the Hummingbird set along with the new Circle Element! To begin this project, I stamped the Hummingbird set using VersaFine Onyx Black Ink on Neenah 110lb and heat embossed those using Ranger Clear Embossing Powder. I colored the images using Copic Markers Y08, Y11, Y13, Y15, RV10, RV11, RV13, RV32, RV34, RV66, YG11, YG13, N4, N6, G00, G20, BG70 and BG72.
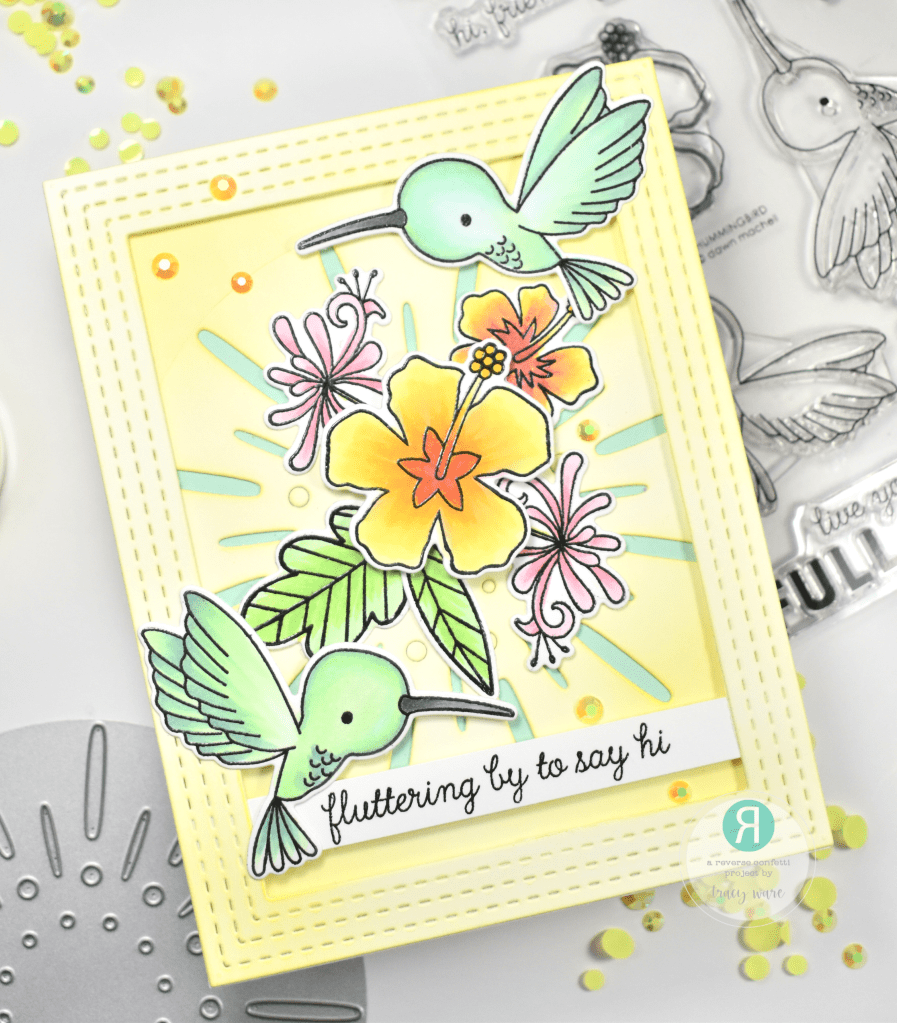
Once those were all colored, I used the coordinating die to cut them out. I used the Circle Element Cover Panel to cut a piece of Neenah Classic Crest 110lb, and I used another panel to cut a frame using the Stitched Note and Frames Confetti Cuts. I used PinkFresh Studio Sunshine ink to do some light ink blending on the panel and the frame.

I stamped the sentiment from the Hummingbird set using VersaFine Onyx Black Ink and heat embossed it using the same clear embossing powder. I trimmed that down and placed it behind the frame, and then added foam tape to the frame for dimension. I then adhered the frame to the Circle Element panel. I wanted a little added interest behind that Circle Element panel, so I cut piece of Concord and 9th Sea Glass cardstock and adhered that behind.

I then began adhering the Hummingbird elements to my framed panel using a combination of glue and foam tape. My panel was then adhered to my card base, which is also Neenah 110lb. To finish up this project, I added some PinkFresh Studio Jewels, because every project needs some bling in my opinion!
That does it for day three of the Countdown! I hope you enjoyed these projects, and I hope it inspires you to get crafty! Please note that the new product links will not be active until the release day and time.

As I mentioned earlier, to celebrate the countdown, we are having a blog hop! Leave comments along the hop for your chance to win a $15 gift certificate! You can also comment on Reverse Confetti’s Facebook page for another chance to win a gift certificate! Comments close at noon CST on July 7th and the winner will be announced at 5pm on July 7th over on the RC blog and FB page. The full hop list is below.

Reverse Confetti Blog

Amy Kolling

Tricia Barber

Lisa Henke

Deanne Kuntz

Tracy Ware

Ali Farmer

Dilay Nacar

Jeanne Jachna

Kelly Griglione

Audrey Tokach

Olga Moss

Candice Fisher

Olga Matyushevskaya

Amy Tsuruta

Joe Sysavath

Supply List:

*Affiliate links used at no cost to you. Thank you so much for your support!

Latest Instagram Posts

Reverse Confetti Lovely Day

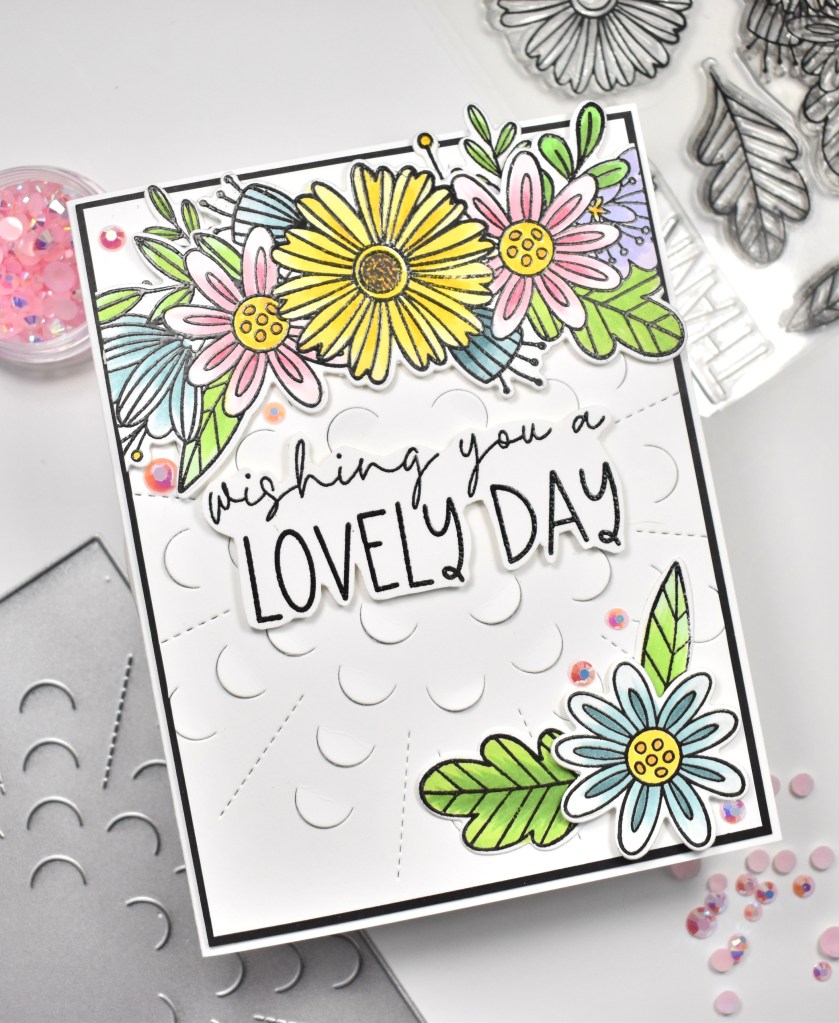
Hello Friends and welcome back to my blog! Thanks so much for stopping! It’s day two of the Reverse Confetti Countdown to Confetti! The release will go live on July 8th, so please note that new product links won’t be active until release day and time! To celebrate the Countdown, we are having a blog hop! I hope you’ll hop around and leave comments along the way for your chance to win a gift certificate! Details below! Today’s project is featuring the Lovely Day Sentiments stamp set along with the Bloom set, and Peekaboo Cover Panel Confetti Cuts from the new July release! I enjoy coloring, so this was a super fun card for me! Let’s jump right in!

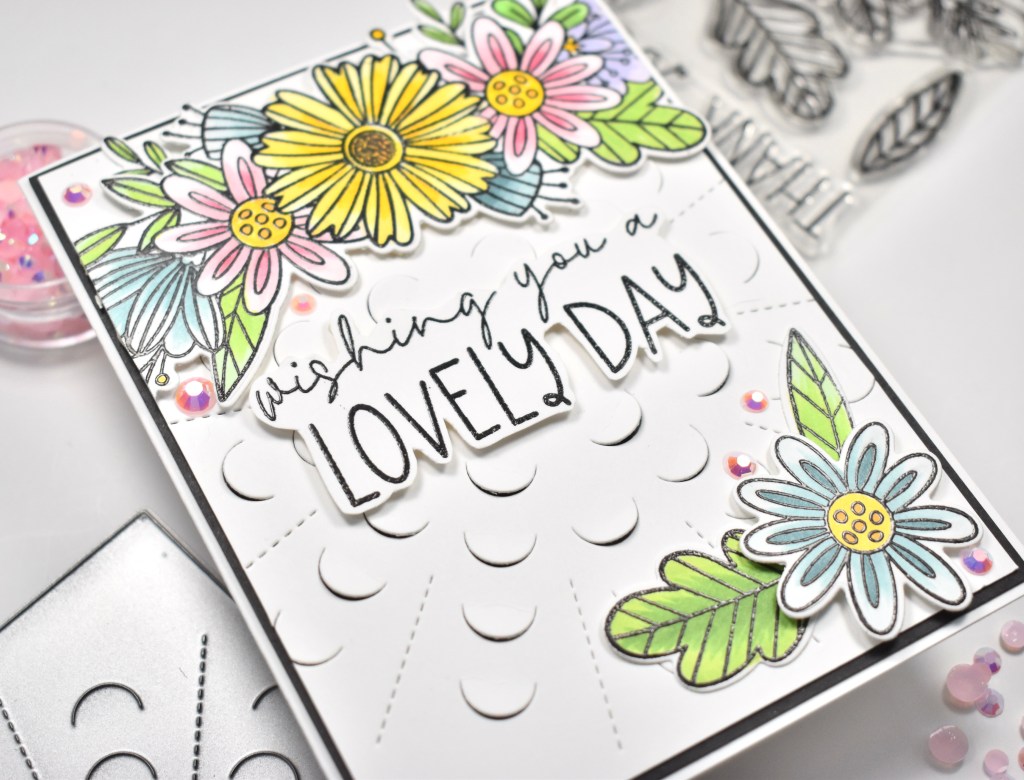
I began this project by stamping the elements from the Bloom stamp set using VersaFine Onyx Black ink and heat embossing those using Ranger Clear Embossing Powder, on Neenah Classic Crest 110lb cardstock. While I was already stamping, I went ahead and stamped my sentiment from the Lovely Day Sentiments set using the same ink and powder. I used Copic Markers Y08, Y11, Y13, Y15, YG07, YG11, YG13, YG17, YG61, RV00, RV10, RV11, RV32, RV34, BG70, BG72, BG75, BV00, BV01, BV02 and YR24 to color the flowers and leaves before using the Bloom Confetti Cuts to run those through my die cutting machine.

I cut a panel of Neenah 110lb cardstock using the Peekaboo Cover Panel Confetti Cuts and carefully pulled up some of the cut portions. Laura Bassen would have used the term “jooshed.” So yeah, I jooshed the little peekaboo areas on the panel. I applied foam tape to the back of the flowers and adhered those to my panel, tucking the leaves behind the single flower at the bottom and securing with glue. I trimmed off the excess and adhered this panel to a black cardstock panel.

I fussy cut my sentiment and popped it in the center of the card using foam tape again. I love foam tape, if you couldn’t tell! Anyhoo, my panels were then attached to my card base, which is also Neenah 110lb. To finish up the project, I added some PinkFresh Studio Jewels because you’ve gotta have bling!

That does it! I hope you enjoyed this project, and I hope it inspires you to get crafty! I hope you’ll hop over and check out the new July release from Reverse Confetti! It’s such a beautiful release!

As I mentioned earlier, we are celebrating this release with a blog hop! You can comment along the hop for your chance to win a $15 gift certificate. Comments close on July 7th at noon CST, and the winner will be announced at 5:00pm on the Reverse Confetti Blog and Facebook page. Speaking of Facebook, you can also leave a comment over there for another chance to win a gift certificate! You can head to the RC Blog for more details! Here is the full hop line-up!

Reverse Confetti Blog

Amy Kolling

Tricia Barber

Lisa Henke

Deanne Kuntz

Tracy Ware

Ali Farmer

Dilay Nacar

Jeanne Jachna

Kelly Griglione

Audrey Tokach

Olga Moss

Candice Fisher

Olga Matyushevskaya

Amy Tsuruta

Joe Sysavath

Supply List:

*Affiliate links used at no cost to you. Thank you so much for your support!

Latest Instagram Posts

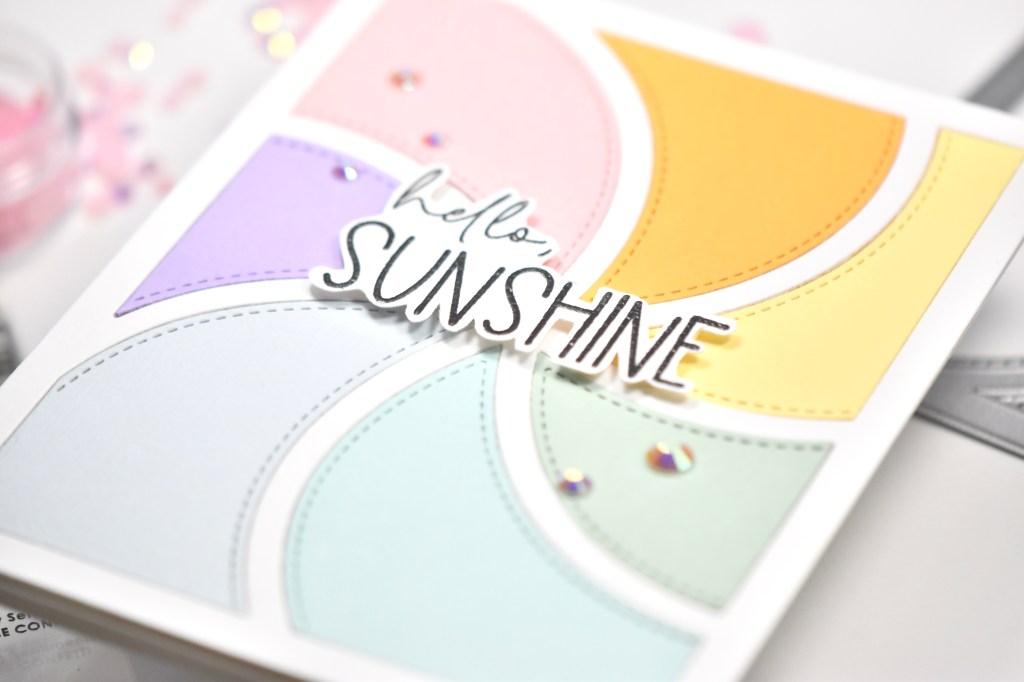
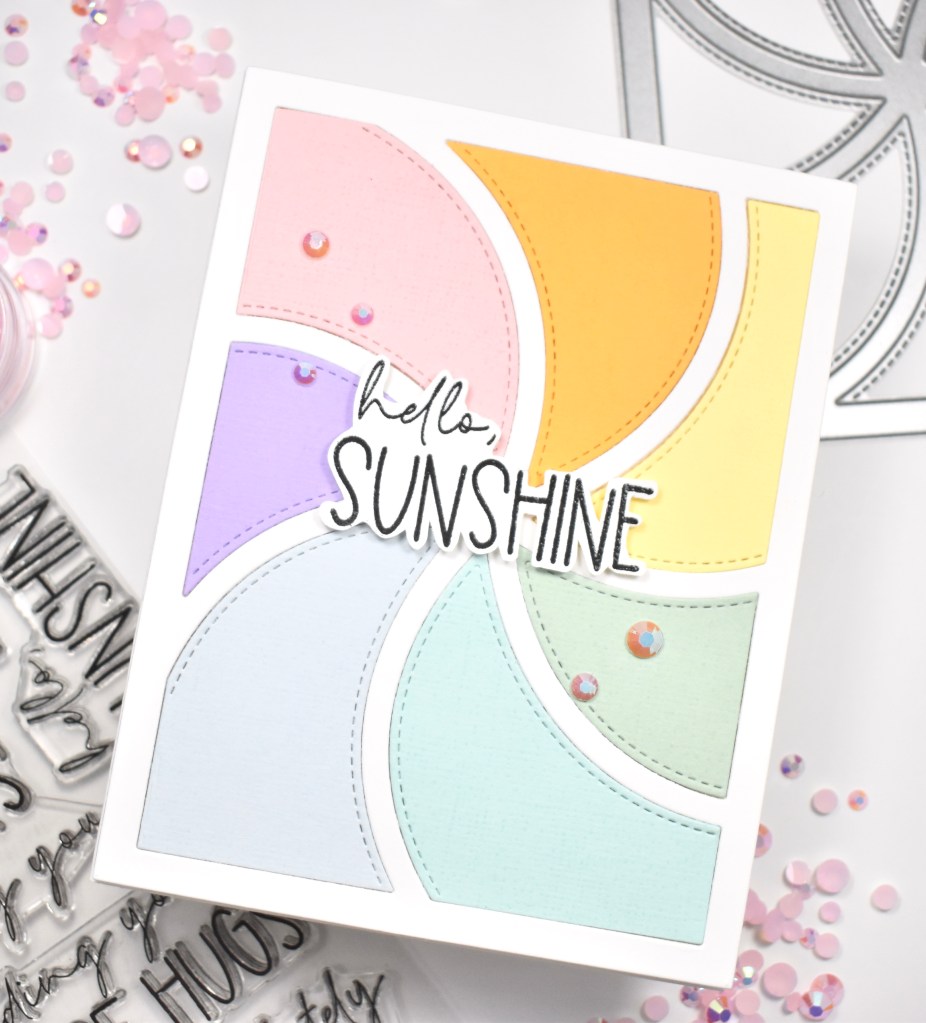
Reverse Confetti Hello Sunshine

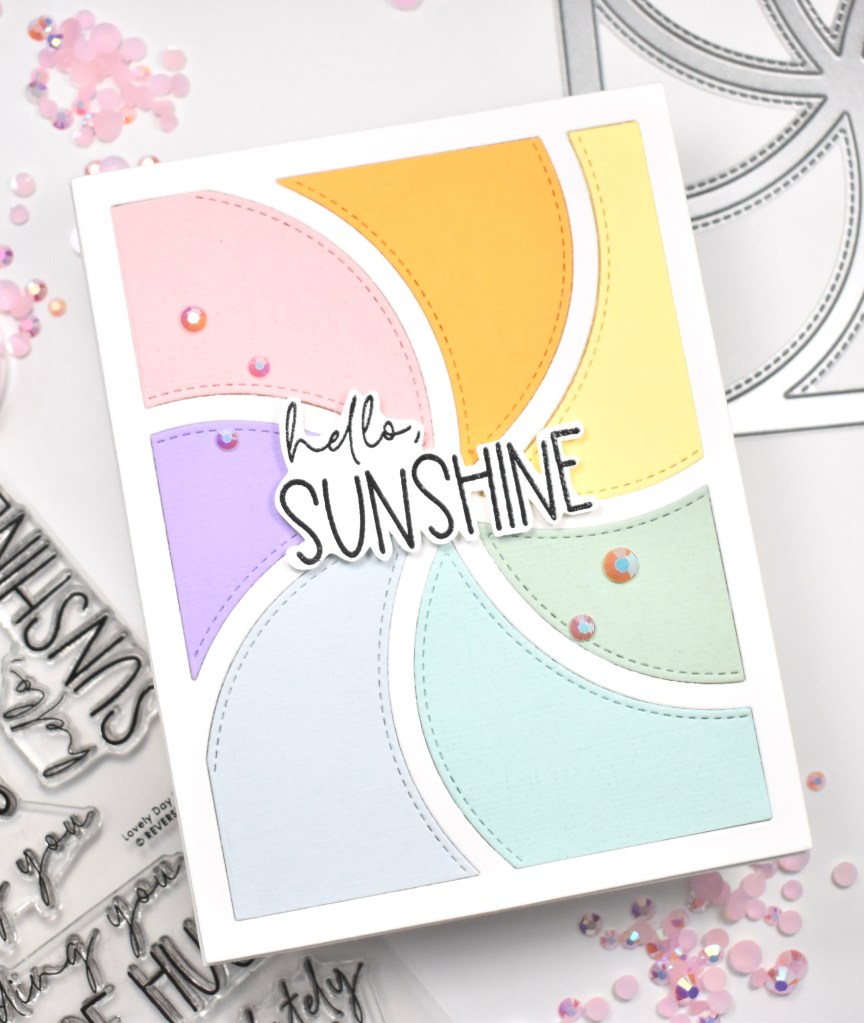
Hello! Hello! How’s it going? Thanks so much for stopping by! Here’s another card that I created for day one of the Reverse Confetti Countdown to Confetti! This awesome release will go live on July 8th! So, please note that the new product links will not be active until the release day and time. Hop around and check out what my teammates have created! Leave comments along the way for your chance to win a $15 gift certificate! Details below! There are tons of fun things in this release! You certainly don’t want to miss it! Today, I’m featuring the Lovely Day Sentiments and the Stitched Pinwheel Cover Panel Confetti Cuts. So, let’s jump right in!

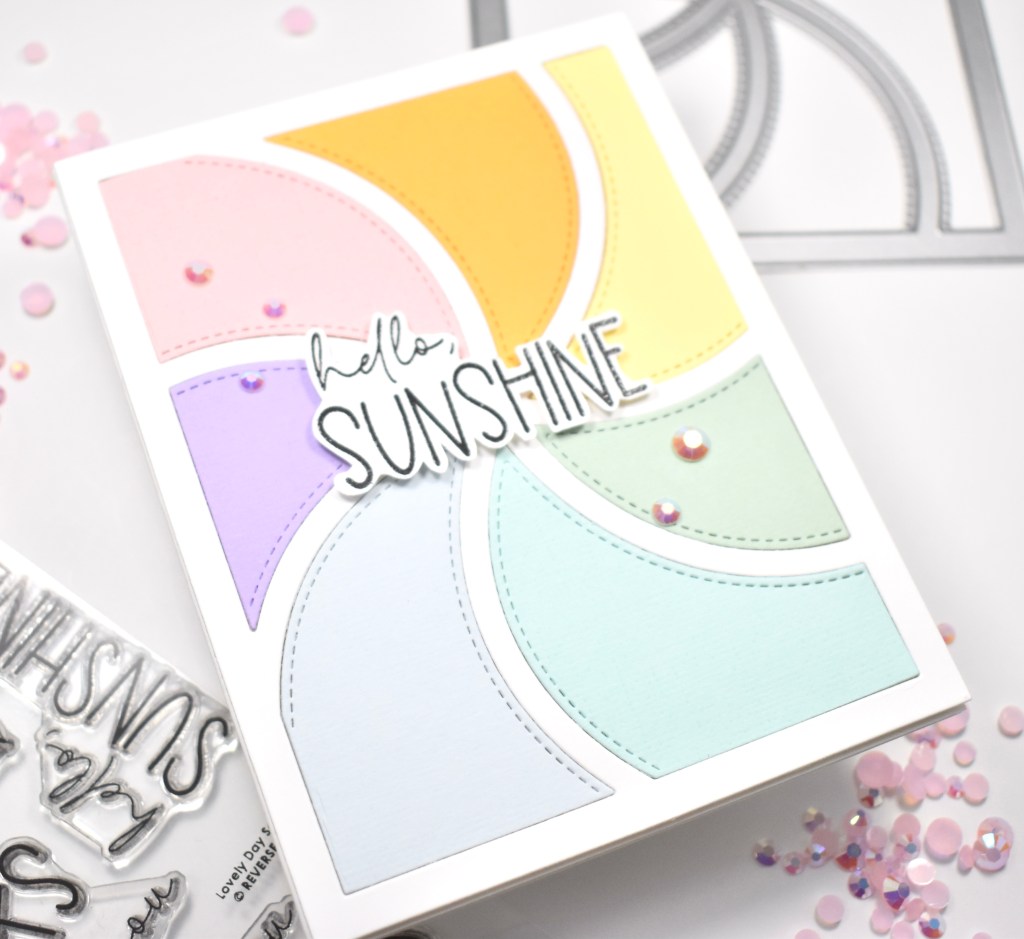
To begin this project, I pulled out seven different colors of Sizzix cardstock, and cut all of those using the Stitched Pinwheel Cover Panel, as well as, cutting it once from Neenah Classic Crest 110lb cardstock. I adhered the white frame portion to my card base, which is also Neenah 110, using foam tape.

I then inlayed the colored cardstock portions into the frame using foam tape as well. I stamped the Hello Sunshine sentiment from the Lovely Day Sentiments set using VersaFine Onyx Black ink and heat embossed it using Ranger Clear Embossing Powder. I fussy cut the sentiment and used foam tape again to pop it up in the center of my card.

To wrap up this project, I added some PinkFresh Studio Jewels for some added interest and bling. Every card needs bling in my opinion! Super simple card, but I love how it came out! The pastel colors are beautiful, but I’m also wanting to do another one in brighter rainbow colors! I hope you’ll stop by and check out the new July release from Reverse Confetti! Remember, the new product links won’t be active until the release day and time!

As I mentioned earlier, you can comment on the Countdown posts for a chance to win a $15 gift certificate! You can head to the Reverse Confetti blog for all of the details! And, you can also comment on their Facebook page for another chance to win! Here’s the full list of participants.

Reverse Confetti Blog

Amy Kolling

Tricia Barber

Lisa Henke

Deanne Kuntz

Tracy Ware

Ali Farmer

Dilay Nacar

Jeanne Jachna

Kelly Griglione

Audrey Tokach

Olga Moss

Candice Fisher

Olga Matyushevskaya

Amy Tsuruta

Joe Sysavath

Supply List:

*Affiliate links used at no cost to you. Thank you so much for your support!

Latest Instagram Posts

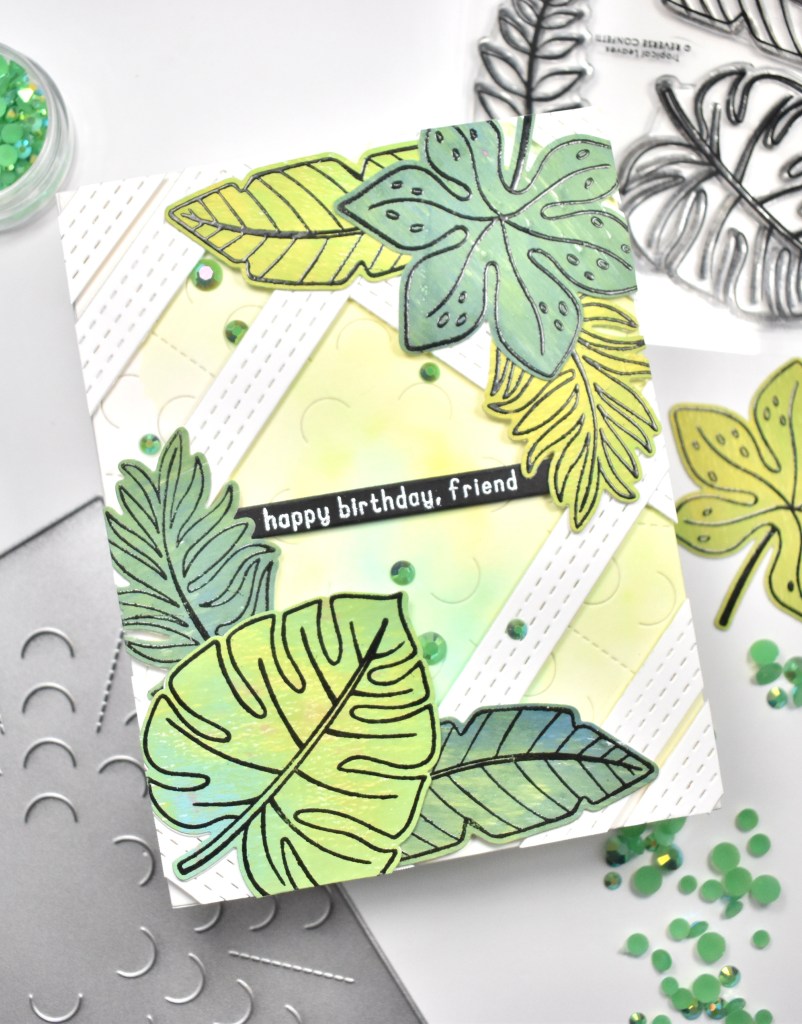
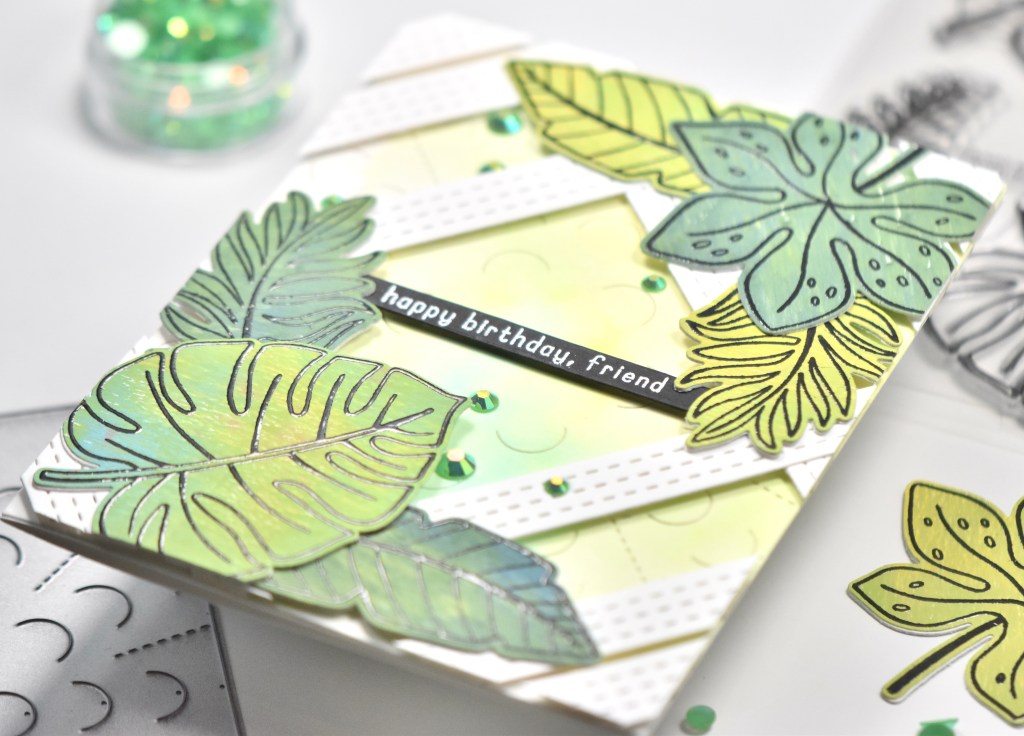
Reverse Confetti Tropical Leaves Birthday

Hello Crafty Friends and welcome back! It’s day one of the Reverse Confetti Countdown to Confetti! I’ve had so much fun guest designing for Reverse Confetti this month! Their new July release is awesome, with so many fun, cute and beautiful things to play with! To celebrate the sneak peeks, we are having a blog hop! You can hop around and leave comments along the way for your chance to win a $15 gift certificate! Details below! Today’s project is featuring the new Tropical Leaves! So let’s jump right in, shall we?! Please note that the new product links will not be active until the release day and time.

I’m going to preface this post by saying that the gel print, which I used for the Tropical Leaves, was created a REALLY long time ago! Like a really long time ago! It’s just been sitting in my stash. With that being said, the tools used for the gel print were inexpensive acrylic paints, a brayer, thin white paper and the gel press itself. Nothing fancy at all!

To begin this project, I stamped the Tropical Leaves on the gel print using VersaFine Onyx Black ink and heat embossed them with Ranger Clear Embossing Powder. I had two sheets of the gel prints, so I went ahead and repeated that process again. I then ran the stamped leaves through my die cutting machine using the Tropical Leaves Confetti Cuts. I ran the leaf die cuts through once more using Neenah 110lb and adhered those to my gel print leaves, only because my gel print leaves were on thin white paper and they needed some more stability. I pulled out a piece of watercolor paper and taped it to my board using masking tape. My board is an inexpensive clipboard from Target that I found a long time ago. I saturated my watercolor panel with water and added coordinating colors to it using my Karin Brushmarkers.

While that was drying, I used the Stitched Note and Frames Confetti Cuts to cut some frames from Neenah Classic Crest 110lb cardstock. I then used the Peekaboo Cover Panel Confetti Cuts to cut my dry watercolor panel, and adhered that to my card base, which is also Neenah 110lb. I fashioned the frames atop the watercolor panel making an X in the center of the card using foam tape. I trimmed off the excess frame portions and added those to the outer corners of my card.

I opted for a Happy Birthday sentiment from the Word Up set. I stamped that on black cardstock using VersaMark ink and heat embossed it using SSS Detail White Embossing Powder. I trimmed it down and mounted it to my card using foam tape as well. I then used a combination of foam tape and glue to position my leaves in the corners of the card around the sentiment.

To finish up, I added some PinkFresh Studio Jewels because every card needs bling in my opinion! I hope you enjoyed this project, and I hope it inspires you to get crafty in your space! Don’t forget to check out the July release from Reverse Confetti! Super fun and super cute! You don’t want to miss it! Keep in mind that the new product links won’t be active until the release goes live on July 8th.

As I mentioned earlier, to celebrate we are having a blog hop! Visit each of my teamies blogs and leave comments along the way for your chance to win a $15 gift certificate! All the details can be found on the Reverse Confetti blog. And .. you can also comment over on their Facebook page for yet another chance to win a gift certificate! The full hop list is below.

Reverse Confetti Blog

Amy Kolling

Tricia Barber

Lisa Henke

Deanne Kuntz

Tracy Ware

Ali Farmer

Dilay Nacar

Jeanne Jachna

Kelly Griglione

Audrey Tokach

Olga Moss

Candice Fisher

Olga Matyushevskaya

Amy Tsuruta

Joe Sysavath

Supply List:

*Affiliate links used at no cost to you. Thank you so much for your support!

Latest Instagram Posts

Spellbinders July Card Kit of the Month Inspiration

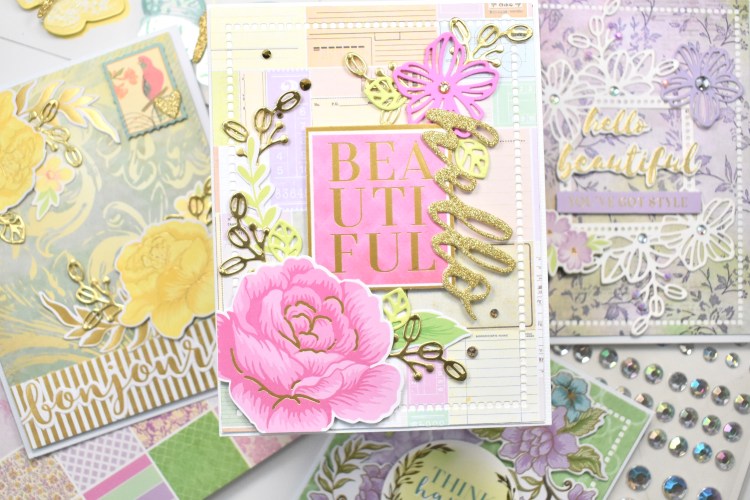
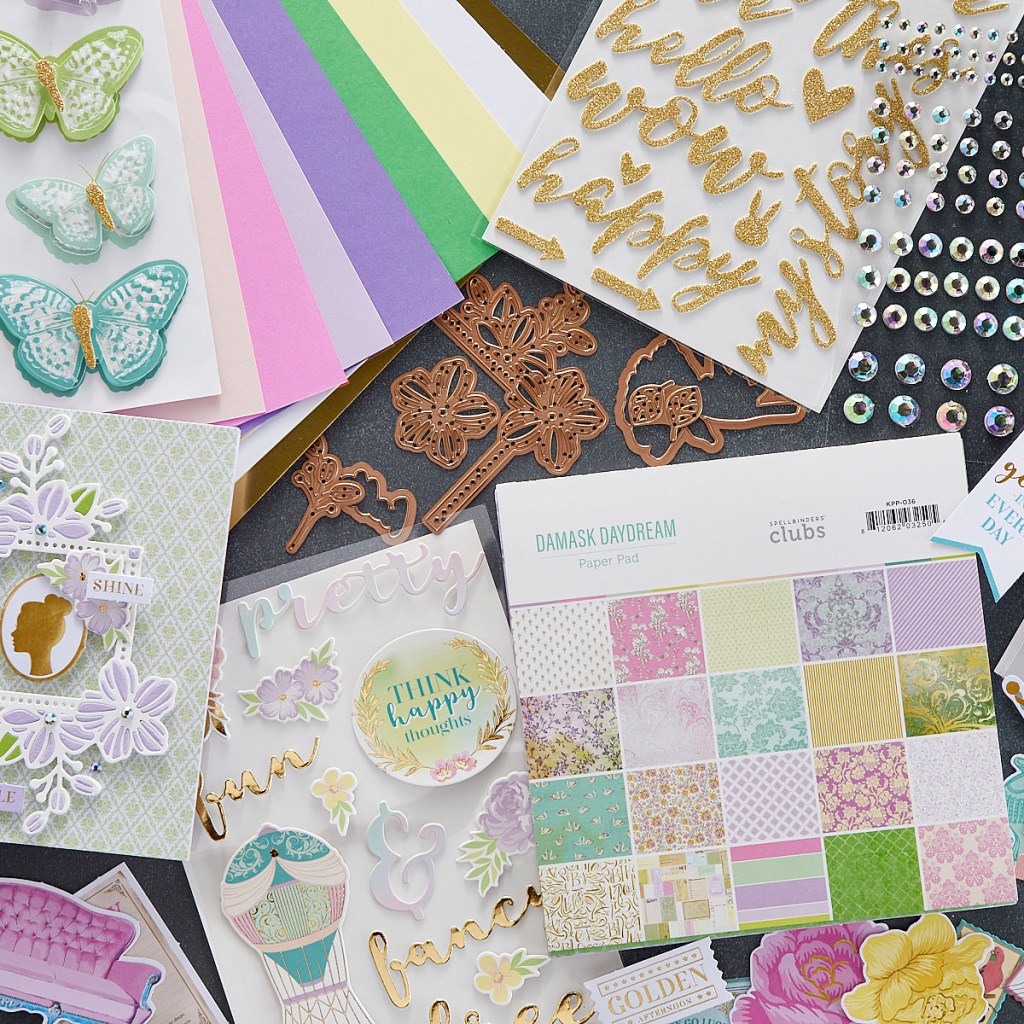
Hello Crafty Friends! Hope your weekend is off to a great start! The Spellbinders July Clubs are now available, and today I’m featuring the July Card Kit of the Month, Damask Daydream! You can join any of the Spellbinders Clubs now through July 24th to receive the current July kits! So let’s jump right in to today’s projects!

The Card Kits are so great, because you have everything included in the kit to make at least ten cards! There’s always super cute patterned papers, stamps, ephemera, dies and even more! For this post, I created four cards using the goodies from the kit. My favorite things to work with are always the papers and the ephemera pieces, which you’ll see from the pics!
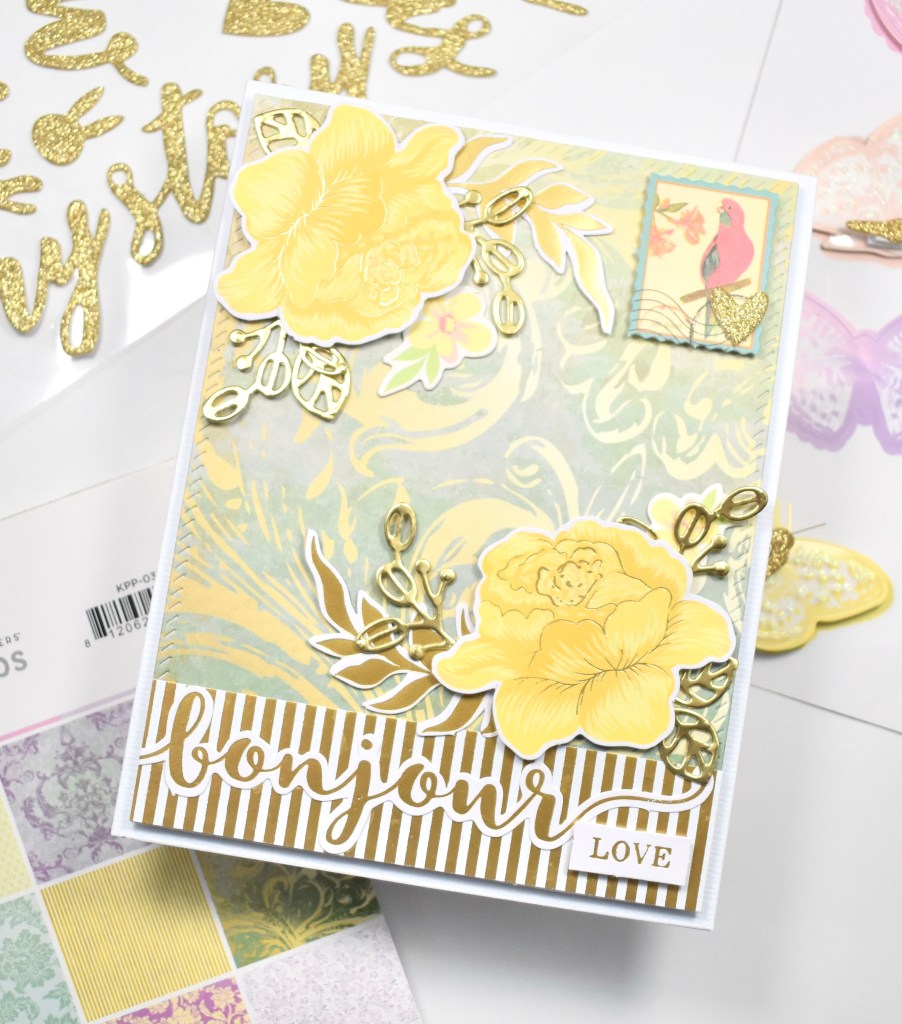
So for this first project, I trimmed a couple of the patterned papers to fit an A2 sized card. I also used the included leaf die cuts to cut some gold leaves to add to my project. I adhered the ephemera pieces using a combination of glue and foam tape and glued the gold leaves around those for that added interest and shine. I love all the shine from this gold cardstock!

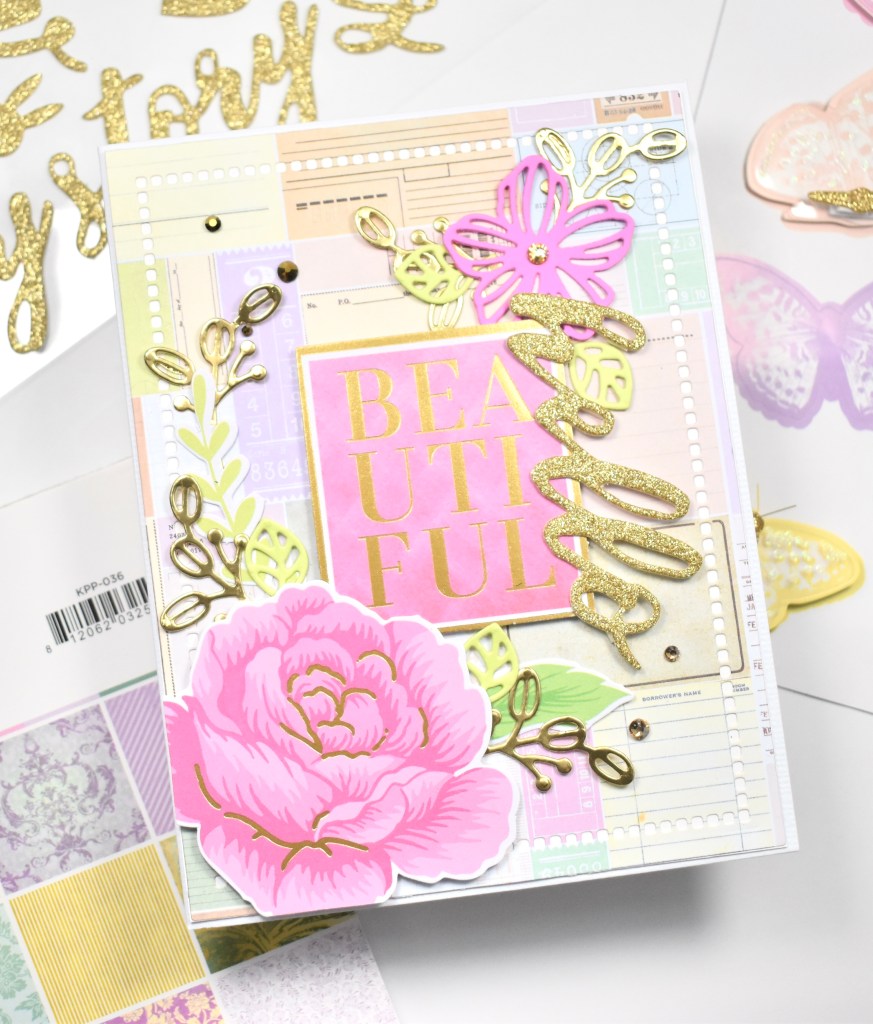
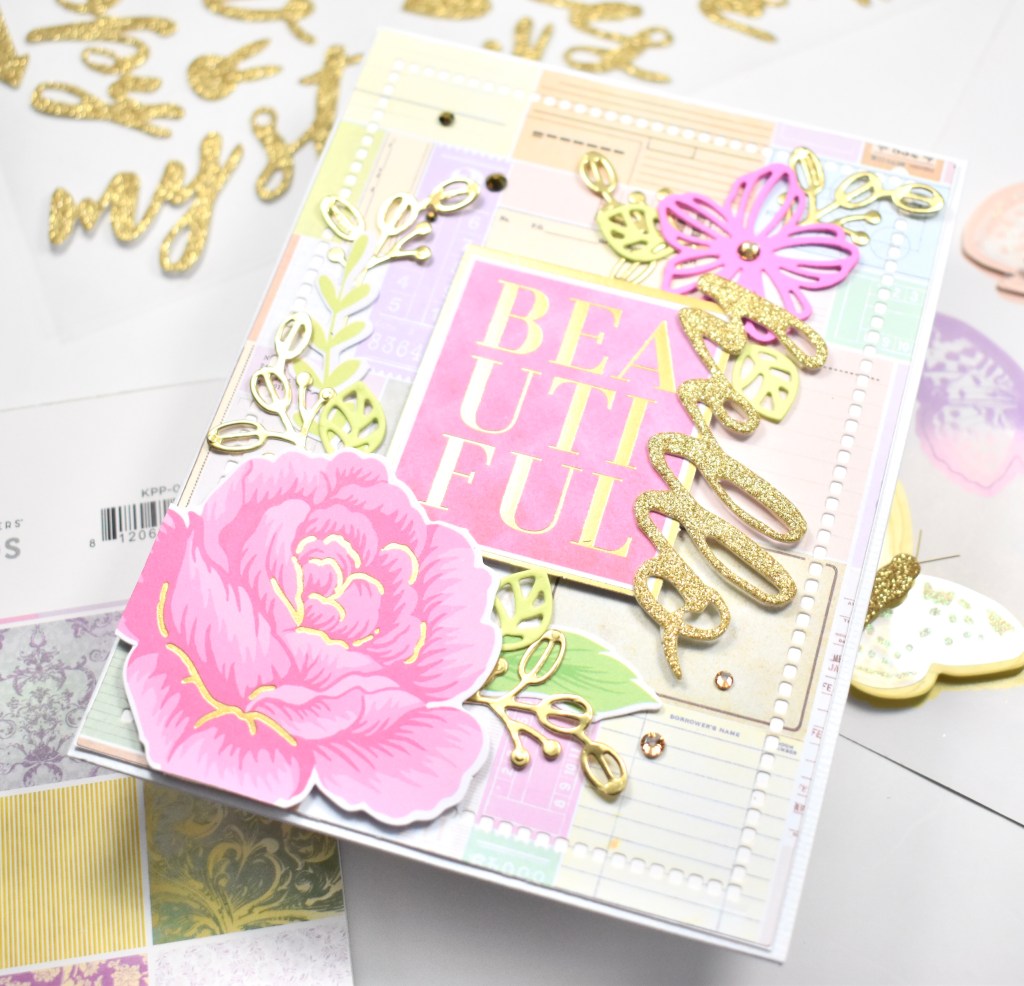
For my second project, I used the Spellbinders Hemstitch Rectangles to cut a piece of the patterned paper, and once again cut some leaves from gold cardstock. I positioned the pink ephemera Beautiful square in the center of my card and attached the glitter Hello along the side of it securing the overhang with foam tape. I cut two pink flowers using the included flower die and adhered those together.

I adhered the pink ephemera flower using foam tape, and adhered the die cut flower with liquid glue. I used glue to adhere the gold and green leaves under and around the flowers. I also added some Spellbinders Gold Mix Color Essentials Gems for a little more bling.

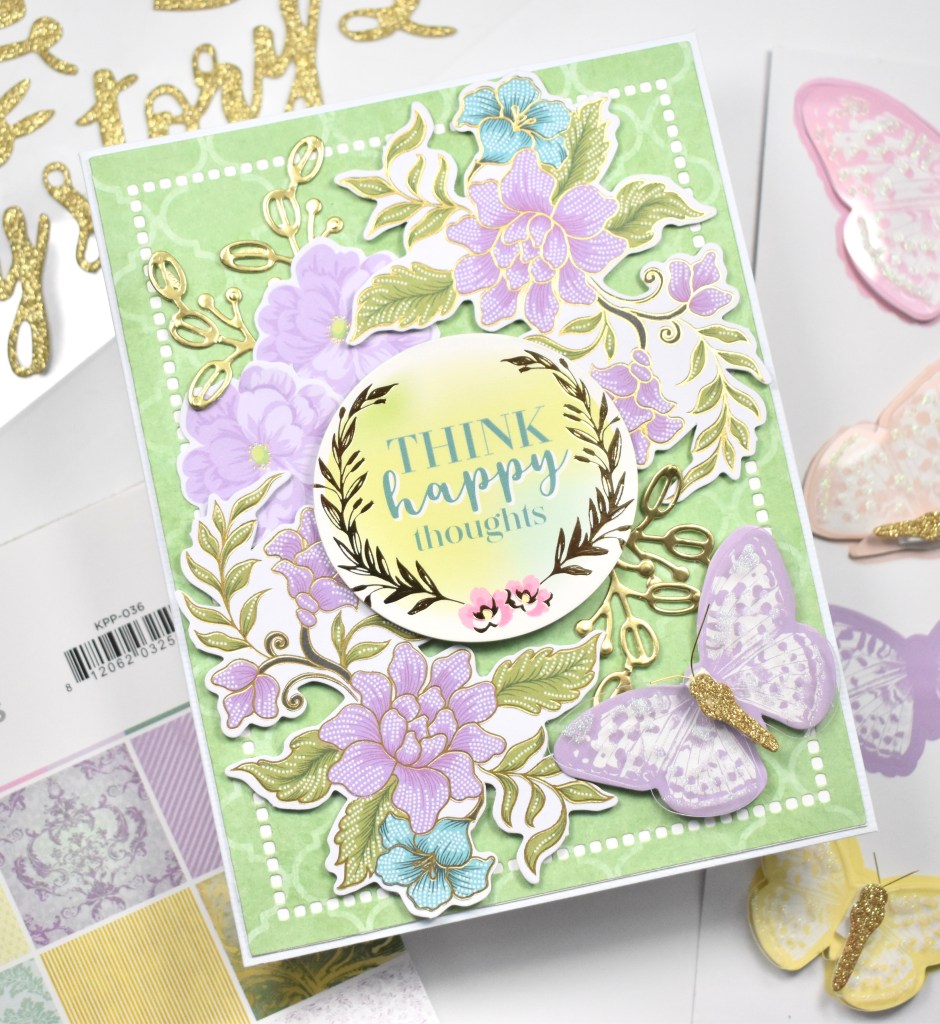
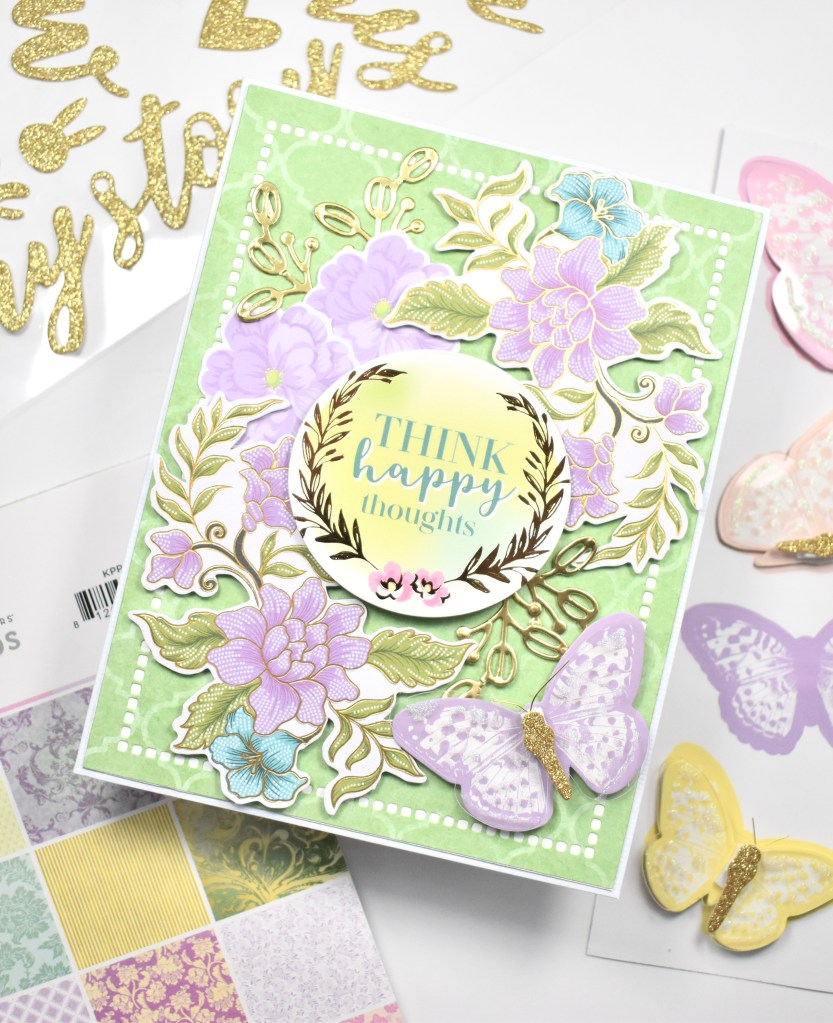
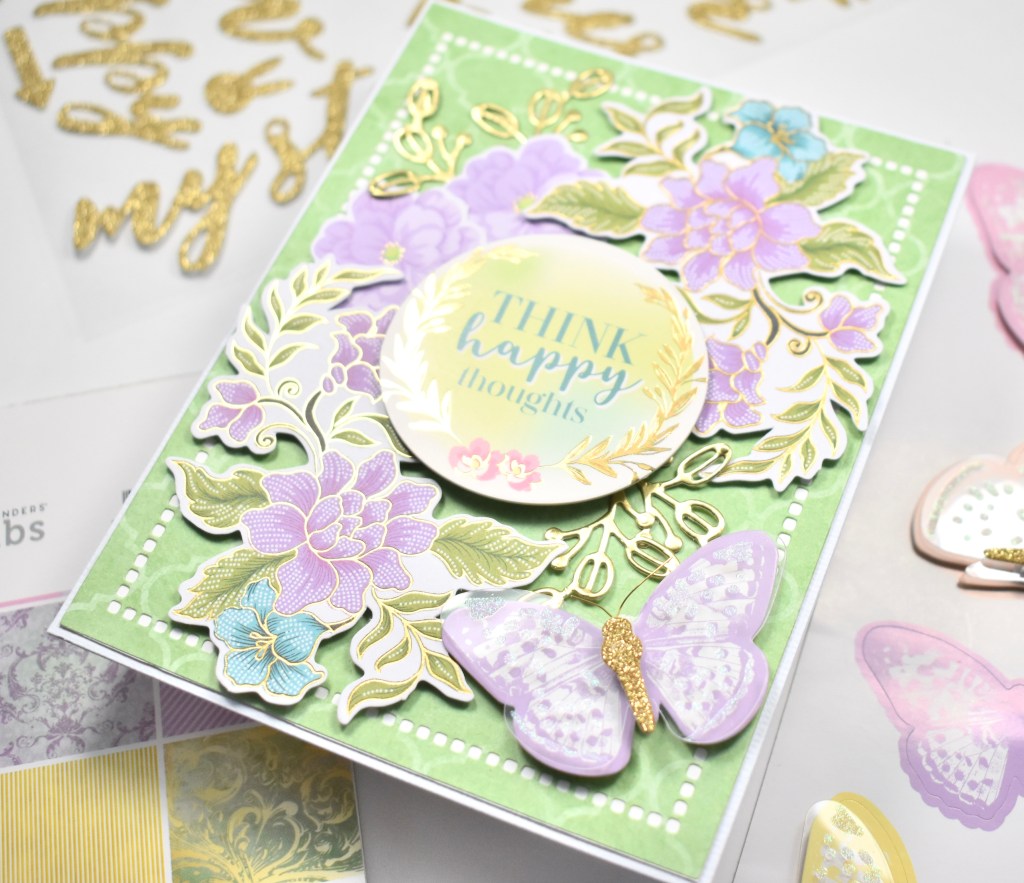
The third project once again uses the Hemstitch Rectangles along with lots of ephemera pieces and included stickers. I fell in love with the gold leaves, so of course, I had to cut some more of those. I centered the Think Happy Thoughts sticker in the center of my card and adhered the surrounding floral elements using foam tape. I tucked in some gold leaves using glue and added one of the included purple butterflies.

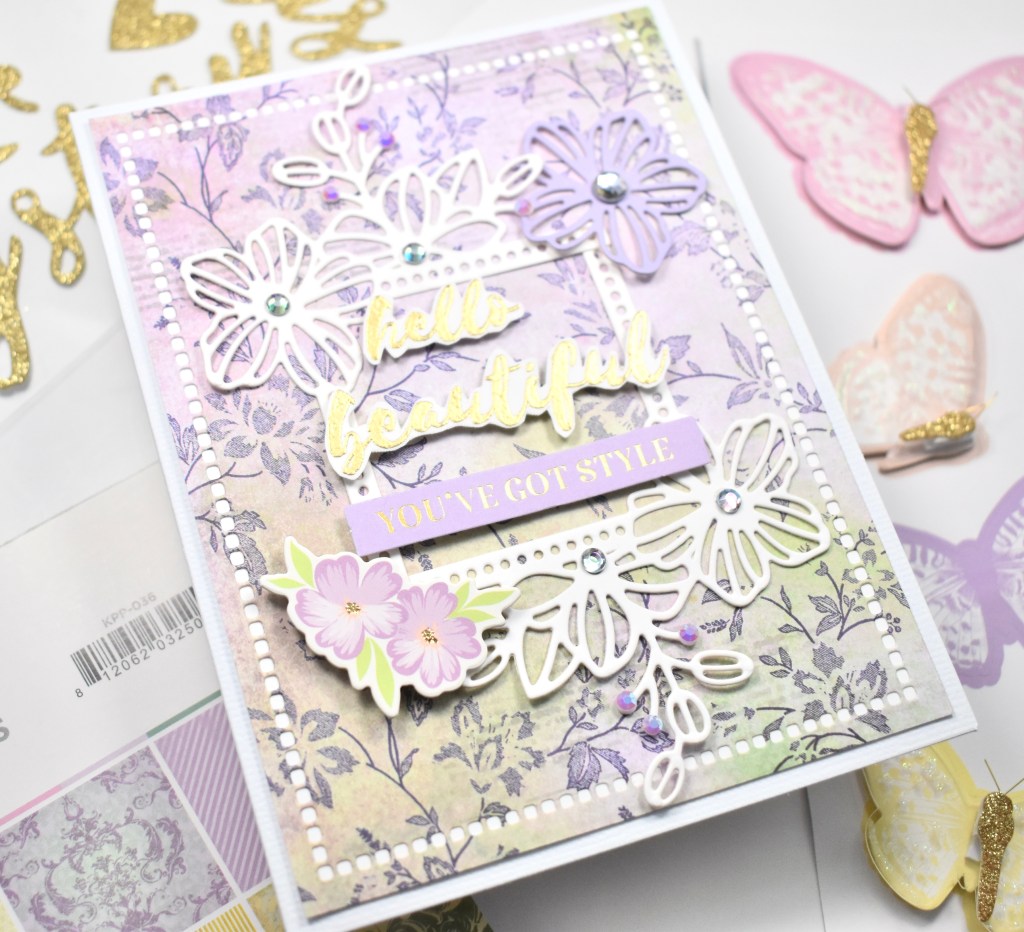
My last project actually utilizes the floral frame die cut, the flower die cut and the included stamp set! I stamped the Hello Beautiful sentiment from the stamp set using VersaMark Ink on Neenah Classic Crest 110lb and heat embossed it using Ranger Princess Gold Embossing Powder, trimming it afterwards. I used the Hemstitch Rectangles again to cut a panel of patterned paper and adhered the white floral frame to that.

I also cut a purple and white flower and glued those together and glued it to the corner of the floral frame. I added the sentiment pieces to the card using foam tape for dimension, as well as, one of the purple floral stickers. For added interest, I added some of the Damask Daydream Gems included in the kit.

Spellbinders July Card Kit of the Month

That does it for this post! I hope you enjoyed these projects, and I hope you’ll stop by and check out all of the clubs that Spellbinders has to offer! There’s Die Clubs, a Stamp Club, a Glimmer Club … so many to choose from and you can even combine clubs for an even bigger savings!

Thanks for stopping by today and don’t forget to stay awesome!

Supply List:

*Affiliate links used at no cost to you. Thank you so much for your support!

Latest Instagram Posts

PinkFresh Studio Miss You Butterflies

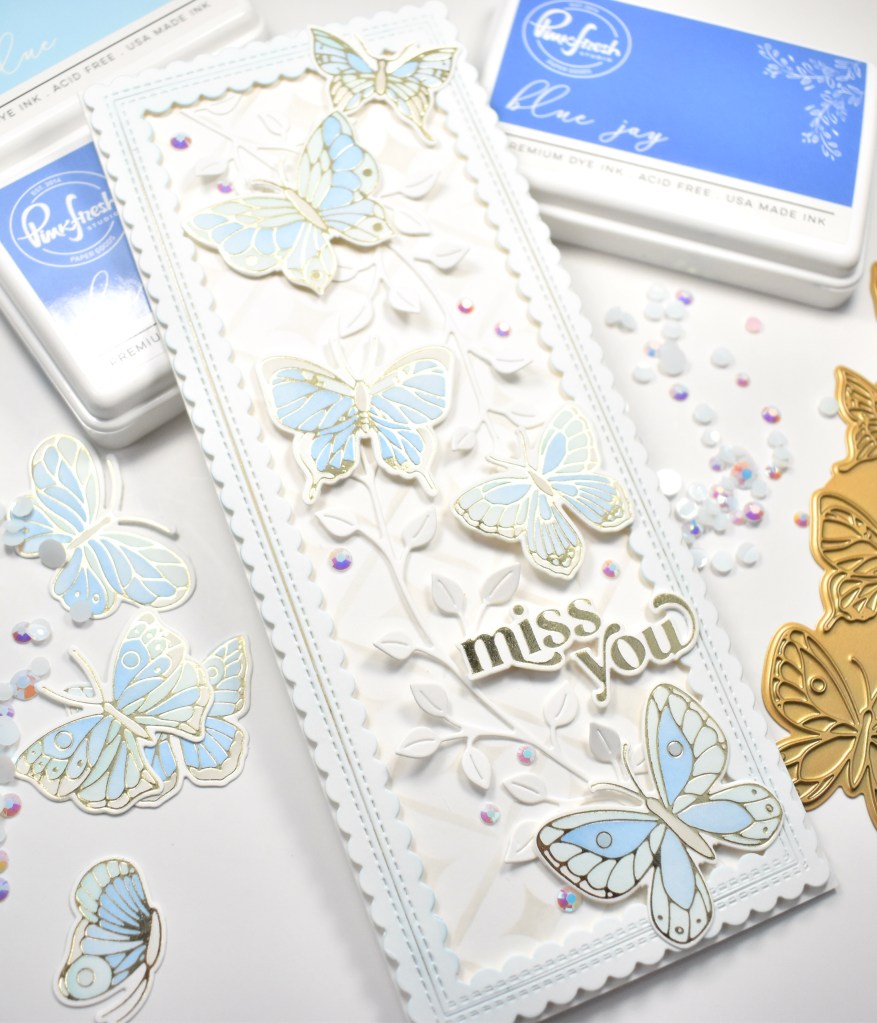
Hello Friends and Happy Friday! I hope you’ve had a great week! Thanks for stopping by to check out my new butterflies card featuring the new Small Butterflies combo from PinkFresh Studio! This is such a beautiful set! I can’t wait to try the butterflies again in different foil and ink combinations! Let’s jump right in, shall we?

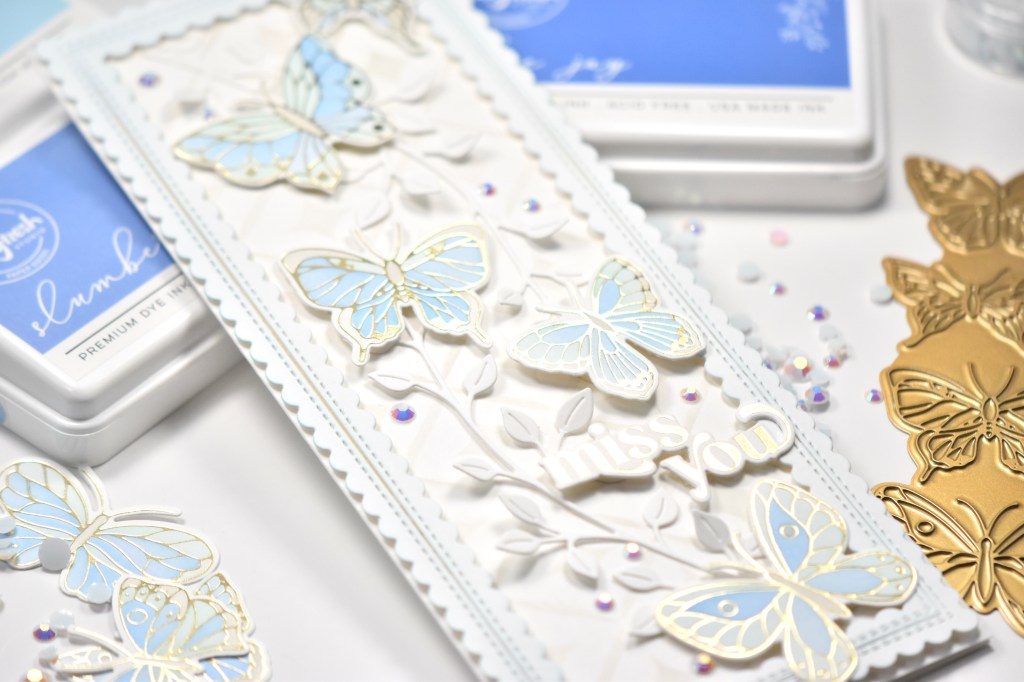
To begin the project, I cut a panel of Neenah Classic Crest 110lb cardstock and foiled the Small Butterflies using Spellbinders Champagne foil. Then I did some light ink blending on them with PinkFresh Studio inks, Sky Blue, Slumber, Blue Jay and Misty Coast, using the coordinating stencil set. Once the ink blending was done, I used the coordinating die to run them through the die cutting machine. I also foiled the Perfect Sentiments plate using the same Champagne foil and ran those through the machine using the coordinating die for those as well.

While die cutting, I went ahead and cut a frame using the Slim Stitched Scalloped Rectangles, and also did a little ink blending on that as well, using the same Sky Blue ink. I cut another panel of Neenah 110lb and pulled out the Diamond Motif stencil and lightly ink blended some Misty Coast ink on that. I put foam tape on the back of the frame and adhered it to the Diamond Motif panel. I also cut a couple pieces of the Leafy Branch to add to the panel as well.

I glued only the base of the stems of the Leafy Branch to the Motif panel and added the butterflies using foam tape for dimension. I adhered this to my card base, which is also Neenah 110lb. To finish up the project, I added my Miss You sentiment from the Perfect Sentiments set using a combination of glue and foam tape. And .. no project is complete without some bling, so I added some PinkFresh Studio Jewels

That does it for this project! I might actually be in love with these butterflies! So much so, that I might have to order the larger ones! I hope you enjoyed this project and I hope you’re inspired to get crafty too! Stay awesome sweet friend!

Supply List:

*Affiliate links used at no cost to you. Thank you so much for your support!

Latest Instagram Posts

PinkFresh Studio Folk Art Birds Congrats

Hey there Crafty Friend! Woohoo for Friday, right?!? I hate to admit, but I have a huge bin of products that I just haven’t gotten around to using yet. Do you have a bin or pile that you haven’t gotten around to yet? So for this project, I pulled out some of the PinkFresh products in there and got to work!

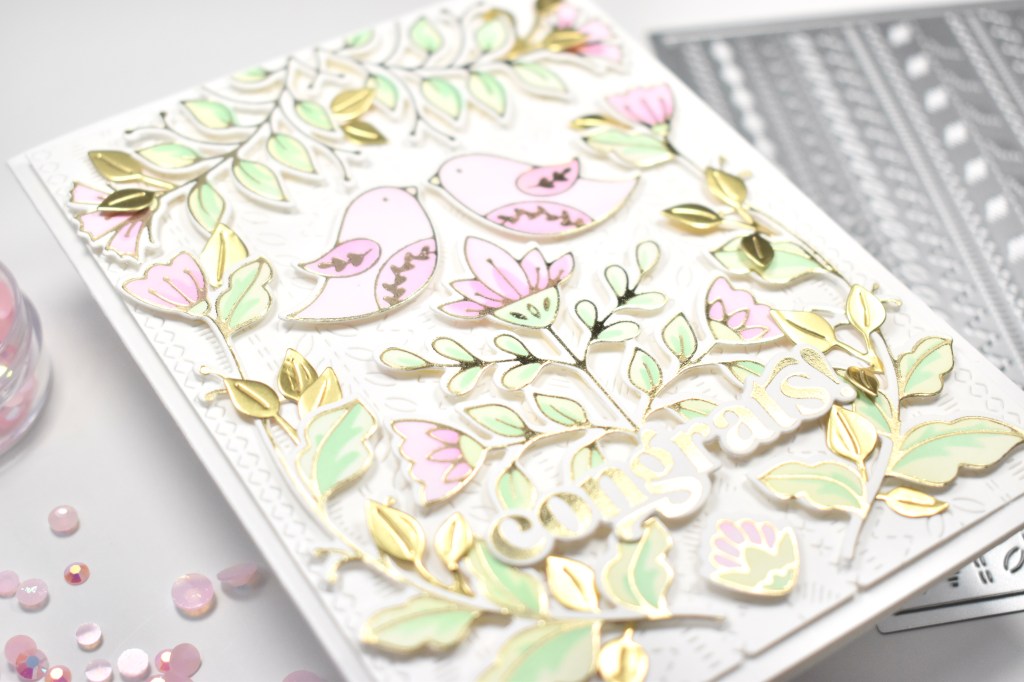
To begin this project, I hot foiled the PFS Folk Art Birds using Spellbinders Champagne foil on Neenah Classic Crest 110lb cardstock, and then did some ink blending using the coordinating stencils and PFS inks Mint, Raspberry Bliss and Sparkling Rose. Then, I used the coordinating PFS Folk Art Birds die, and ran it through my die cutting machine.

I also ran a panel of Neenah 110lb through the die cutting machine using the PFS Stitches Background, because I wanted some interest and that subtle hint of texture behind my birds. I placed foam tape on the back of all of the Folk Art Bird pieces and adhered those to my stitched panel. I used the PFS Leafy Branch Die to cut one piece from gold cardstock and trimmed that into pieces so that I could tuck them around the leaves from the foiled pieces with glue.

I foiled the PFS Perfect Sentiments Foil Plate using the same Champagne foil and cut those out using the coordinating die. I cut the sentiments two more times from Neenah 110lb so that I could glue those to the corresponding sentiments for dimension. I chose the Congrats sentiment from this set, because this card kinda seems wedding-ish, and glued that directly atop the Folk Art Bird pieces.

To finish up, I adhered the panel to my card base, which is also Neenah 110lb cardstock. I debated on whether to add jewels, but decided against it since there was so much shine as it was. I hope you enjoyed this project, and I hope it inspires you to get crafty!

Have a wonderful weekend and don’t forget to stay awesome!

Supply List:

*Affiliate links used at no cost to you. Thank you so much for your support!

Latest Instagram Posts

Spellbinders Heartfelt Thanks from the Beautiful Sentiment Vignettes Collection

Hello Crafters and welcome back! I was super excited when asked to play with products from the Spellbinders Beautiful Sentiment Vignettes Collection by Becca Feeken! What a beautiful collection this is! Today’s project is featuring the Heartfelt Thanks Vignette, so let’s get into the project!

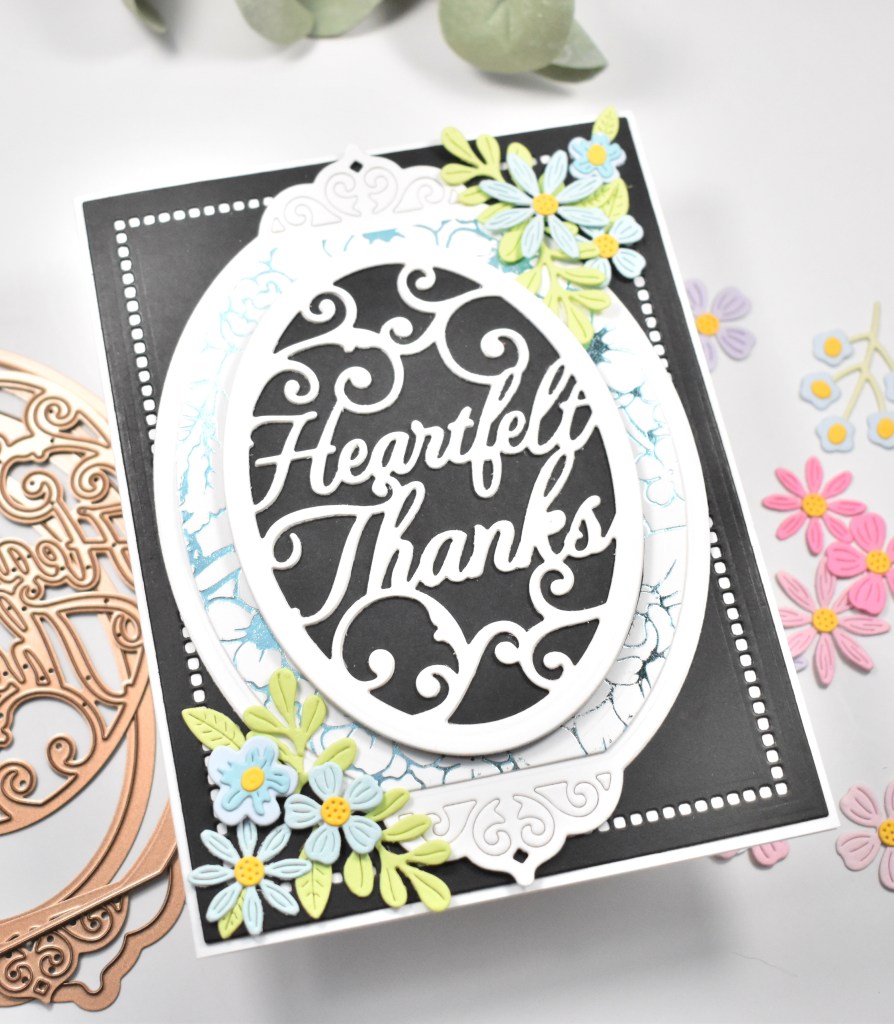
To begin, I cut all of the die elements from Neenah Classic Crest Solar White 110lb cardstock. I also cut the backing die for the sentiment panel once from black cardstock. I adhered the Heartfelt Thanks panel to that black panel using Craft Tacky Glue. I took the trimmed oval insert portion and used the Flower Pattern Glimmer Hot Foil plate to add Sky Bright foil for some added interest.

I adhered all of the oval sections together using a combination of glue and foam tape. I used the Hemstitch Rectangles to cut a panel of black cardstock, and adhered that to my card base, which is also Neenah 110lb. I then glued the oval panels atop that. For more added interest, I used the Mini Blooms and Sprigs Die set to cut some matching blue flowers, yellow centers and green leaves and adhered those to the card using glue and foam tape as well.

Super simple card today! Die cutting is my jam, and I love solely die cut cards! I hope you enjoyed this project and I hope it inspires you to get crafty! What’s your favorite technique on cards? I’d love to know in the comments! Hop over and check out the entire Beautiful Sentiment Vignettes Collection from Spellbinders!

Have a wonderful day and don’t forget to stay awesome!

Supply List:

*Affiliate links used at no cost to you. Thank you so much for your support!

Latest Instagram Posts

Simon Says Stamp July Card Kit Inspiration

Hello Crafty Friends!  How’s your week going?  So far, mine is going pretty well.  I just received my SSS July Card Kit in the mail the other day and had to jump right in to make a card because it’s such a beautiful kit!

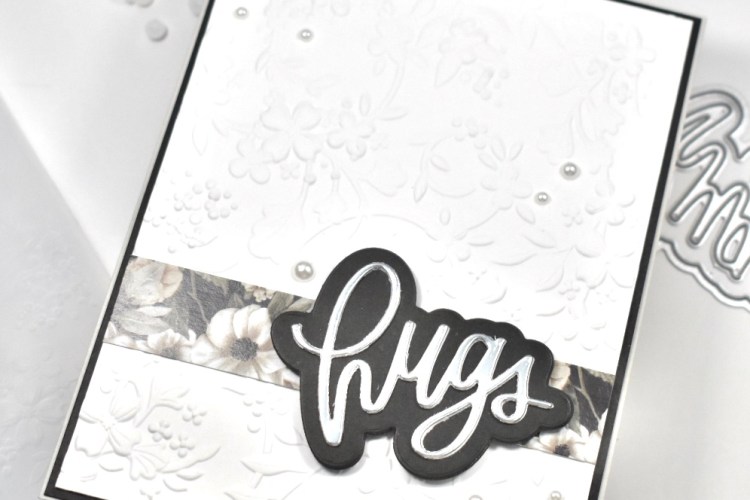
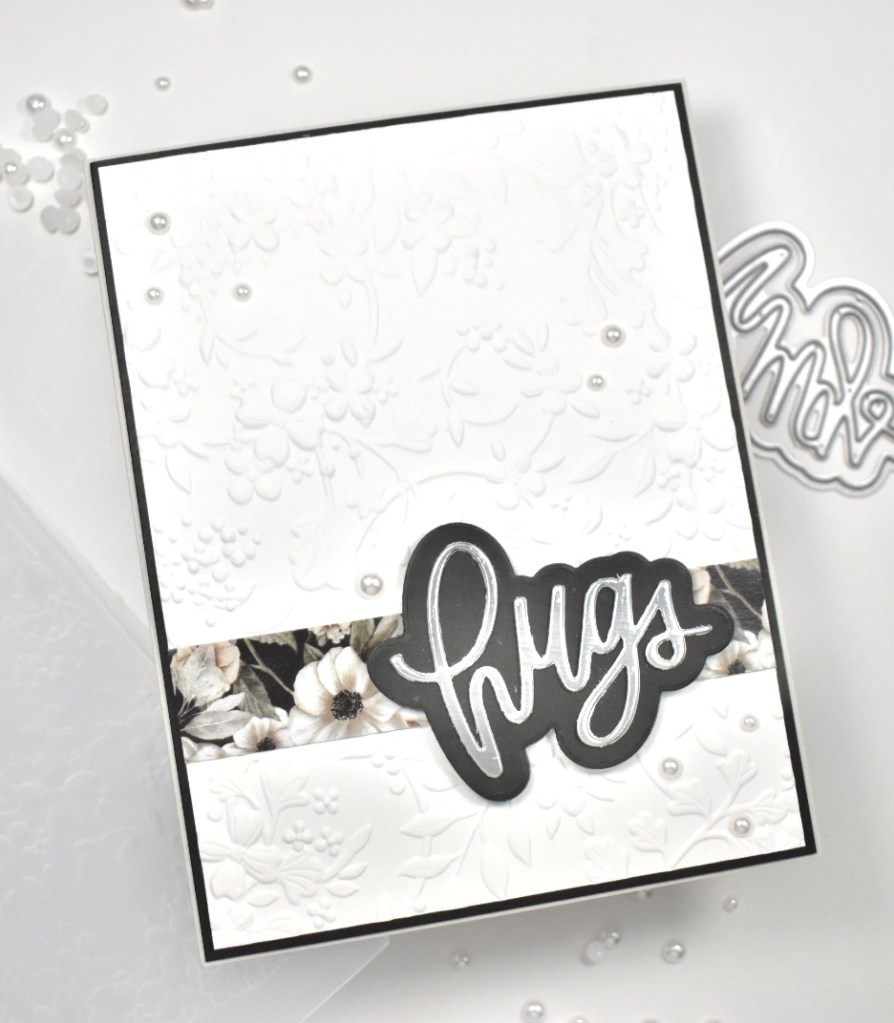
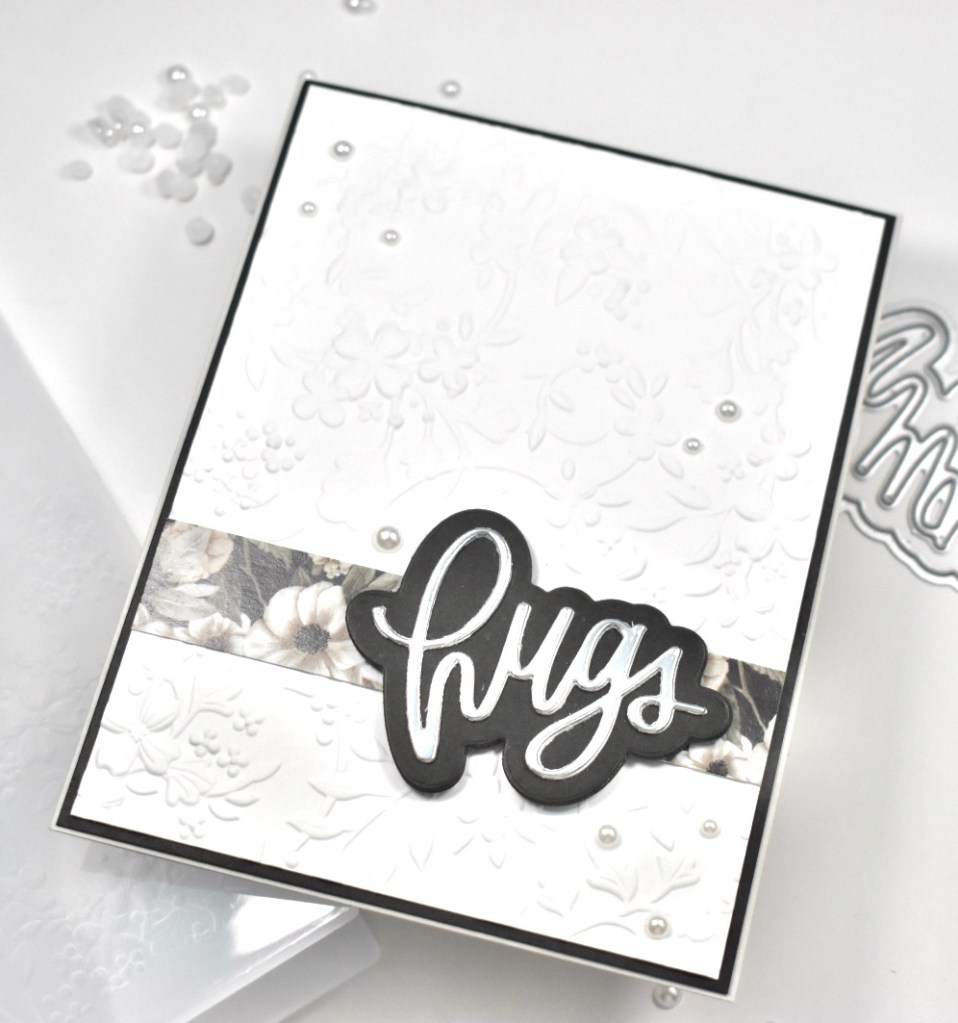
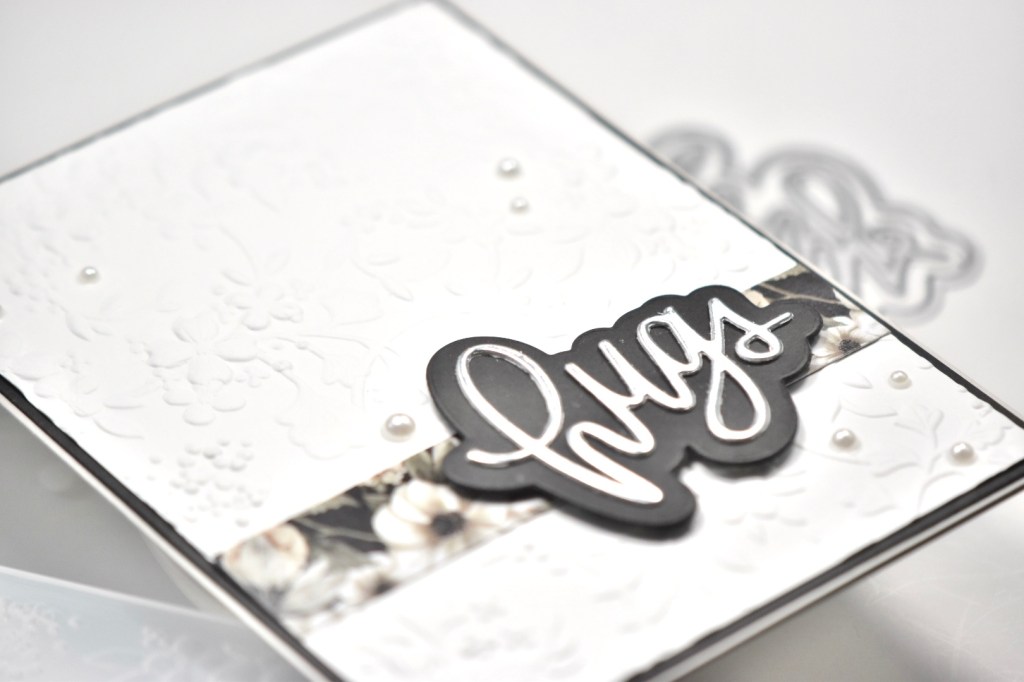
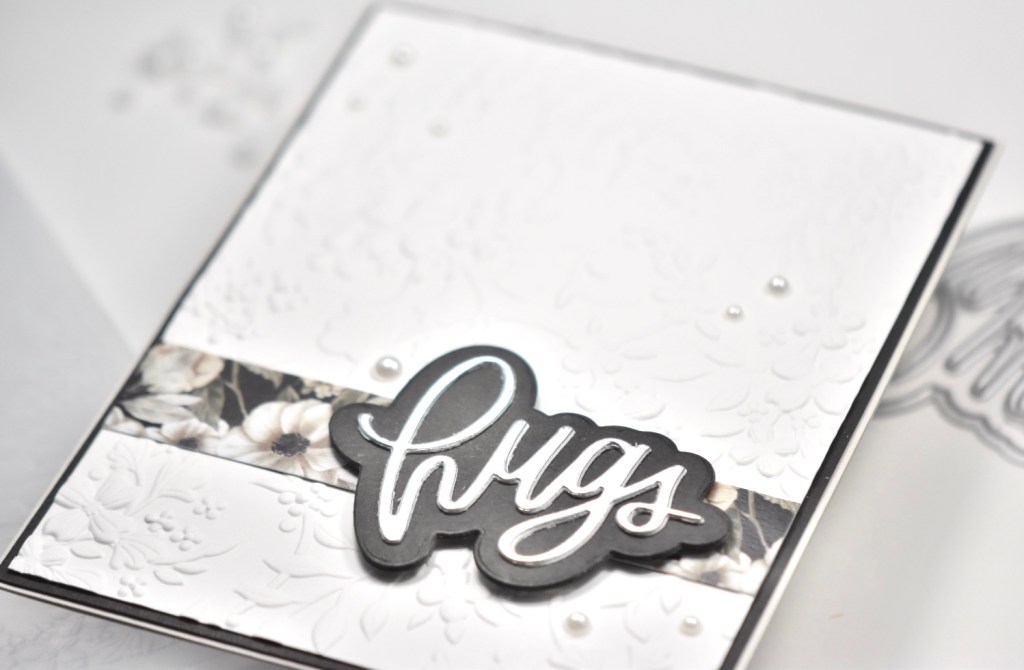
For today’s project, I’m going with less is more!  Sometimes you just need a super quick card, and that’s exactly what this card is!  I began this project by cutting a panel of Neenah Classic Crest 110lb cardstock, placing it in the SSS Blossom Field embossing folder and running it through my die cutting machine.  I then trimmed it down to 4 x 5.25”.  This is my preferred size, because I almost always will mat my panels on black cardstock.

I chose a piece of patterned paper from the Paper Rose Forever set that’s included in the kit, trimmed a strip that measures 3/4” and glued it to my embossed panel using Craft Tacky Glue.  I then cut the included Big Scripty Hugs sentiment once from Neenah 110lb, once from SSS Holographic cardstock, and I cut the shadow twice from black cardstock, adhering all of those together using the same glue.

I adhered the hugs sentiment atop the patterned paper strip using foam tape, and then adhered my panel to some black cardstock.  Those were then adhered to my card base, which is also Neenah 110lb.

To finish this project, I added some Soft Snowball Pearls from Little Things From Lucy’s Cards.  Super simple and quick project today!  That’s the wonderful thing about embossing folders, they provide a nice background or focal point, depending on what you’re going for, with minimal effort!

I hope you enjoyed this project, and I hope it inspires you to get crafty .. and to possibly drag out some of your long forgotten embossing folders!

Have a wonderful day and don’t forget to stay awesome!

Supply List:

* Affiliate links used at no cost to you. Thank you so much for your support!

Latest Instagram Posts

Spellbinders Beautiful Sentiment Vignettes

Hey Friends! So glad you stopped by today! I was super excited to play with products from the new Beautiful Sentiment Vignettes Collection by Becca Feeken from Spellbinders! Have you checked it out yet? For today’s project, I’m playing with the Beautiful Inside and Out Sentiments Stamp set! Let’s get into it!

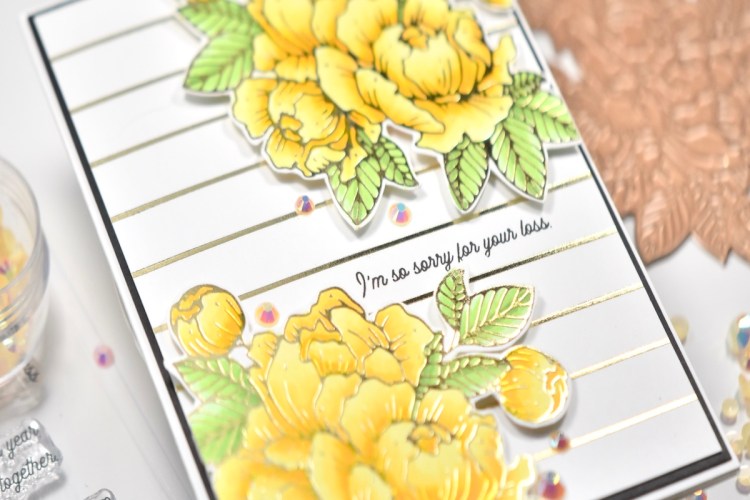
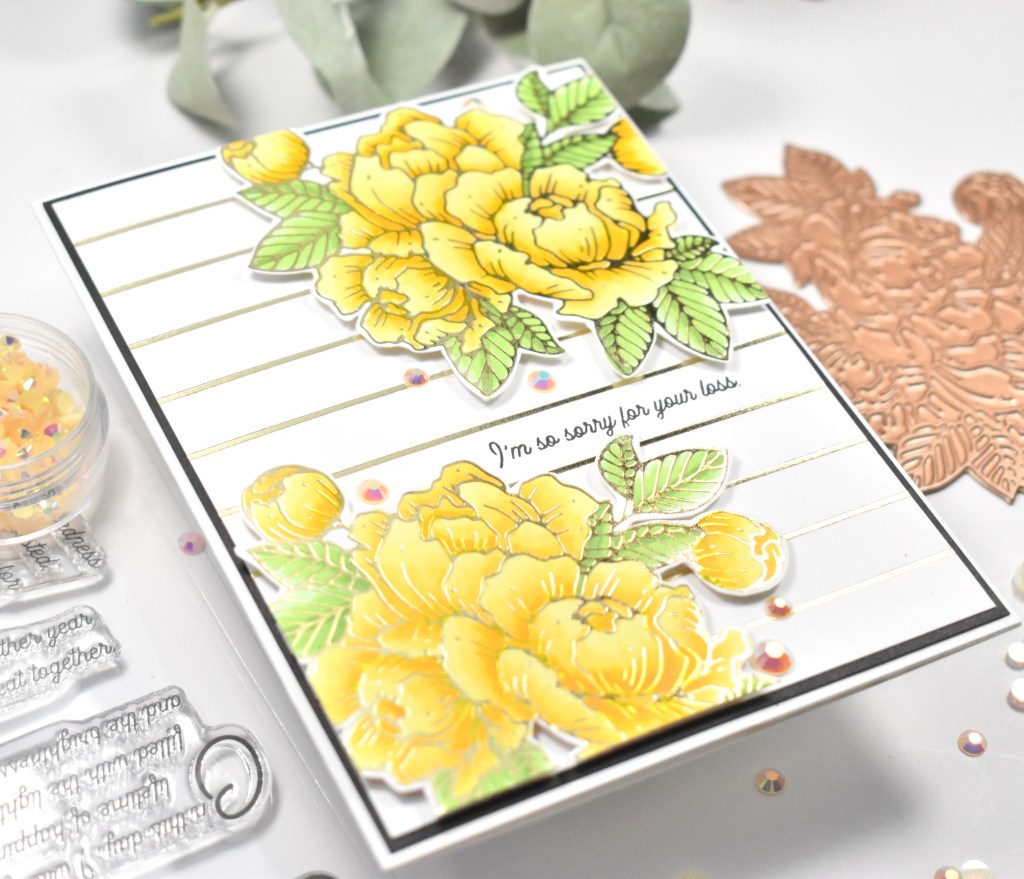
To begin this project, I cut two pieces of Neenah Classic Crest 110lb cardstock and foiled the Spellbinders Glimmering Peony Hot Foil Plate using Champagne Foil. Champagne is my go-to color for foil! I just ordered a bunch of new to me colors, so I may find a new favorite in those, but who knows! While I already had the Glimmer machine going, I went ahead and foiled the Skinny Stripe Background using the same foil on another panel of Neenah 110. Anyhoo, I went to town coloring the foiled peonies using Copic Markers Y00, Y08, Y11, Y13, Y15, Y17, YG11, YG13 and YG17.

Once those were colored, I fussy cut them and placed foam tape on the back of both. I took the Skinny Stripe panel, trimmed it down and popped it in the Misti and stamped my sentiment from the Beautiful Inside and Out Sentiments, using VersaFine Onyx Black Ink. I removed the backing from the foam tape on the flowers and adhered those to my striped panel and trimmed off the excess.

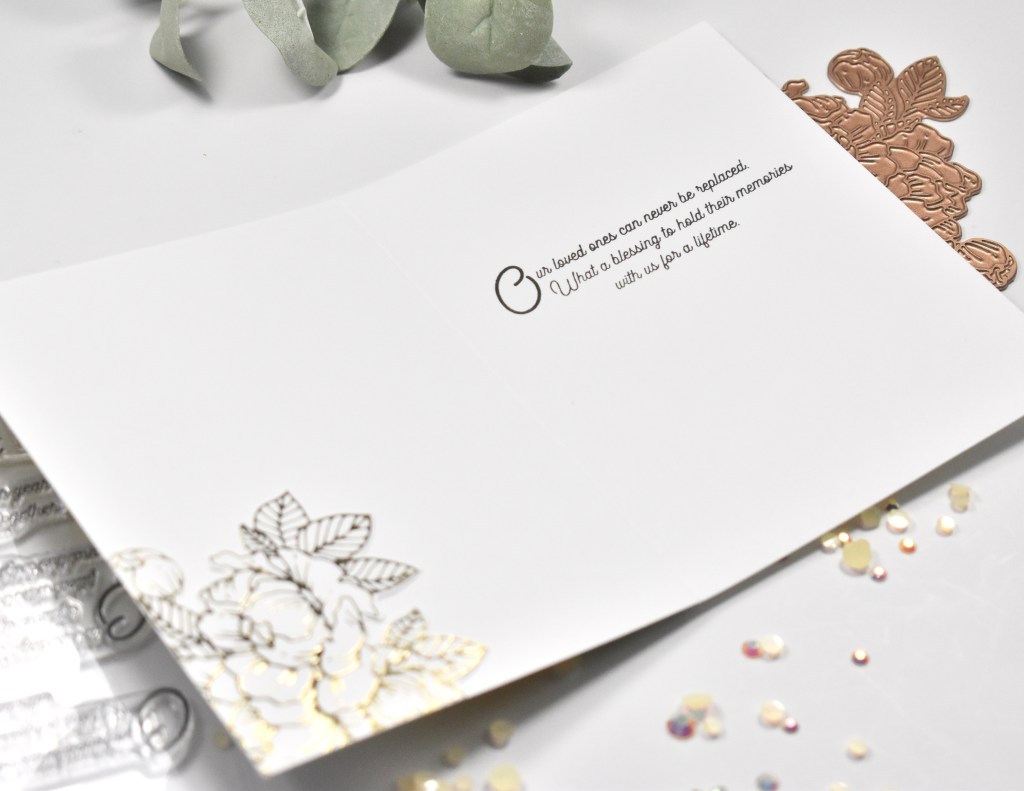
I adhered the striped panel to a black cardstock panel for some contrast and then adhered those to my card base, which is also Neenah 110lb. I decided to foil another peony and fussy cut that to adhere on the inside of the card where I stamped the other sentiment using the same VersaFine ink. To finish up the card, I added some PinkFresh Studio Jewels for some bling.

That does it for this card! I hope you like it, and I hope it inspires you to get crafty in your space! Hop over and check out the entire Beautiful Sentiment Vignettes Collection! Lots of fun things to look at!

Stay awesome my crafty friend!

Supply List:

*Affiliate links used at no cost to you. Thank you so much for your support!

Latest Instagram Posts