PinkFresh Studio Framed Sunflowers

Hello Friends and thanks for stopping by! I’m so glad that you joined me for my project today, which features the newly released Sunflowers Washi from PinkFresh Studio. I am in love with all of PinkFresh’s washi tapes! They make for such easy, yet beautiful projects! If you haven’t tried them, I highly recommend them! So, let’s go through the details for this project!

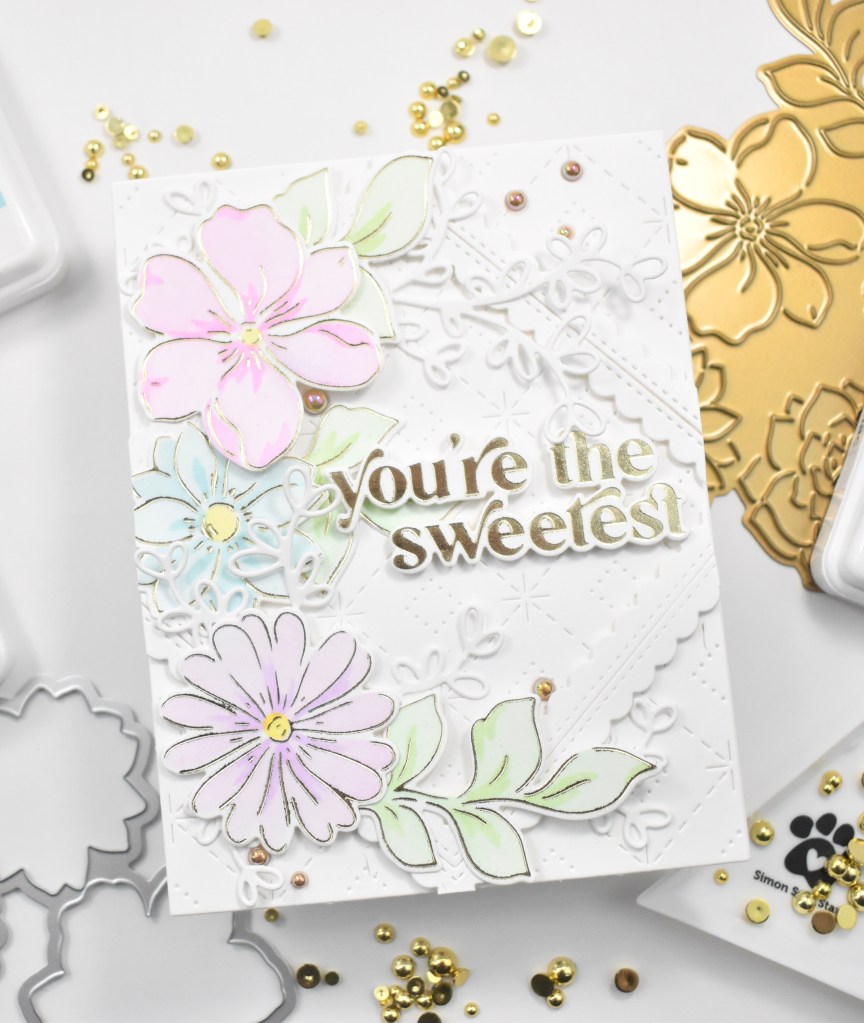
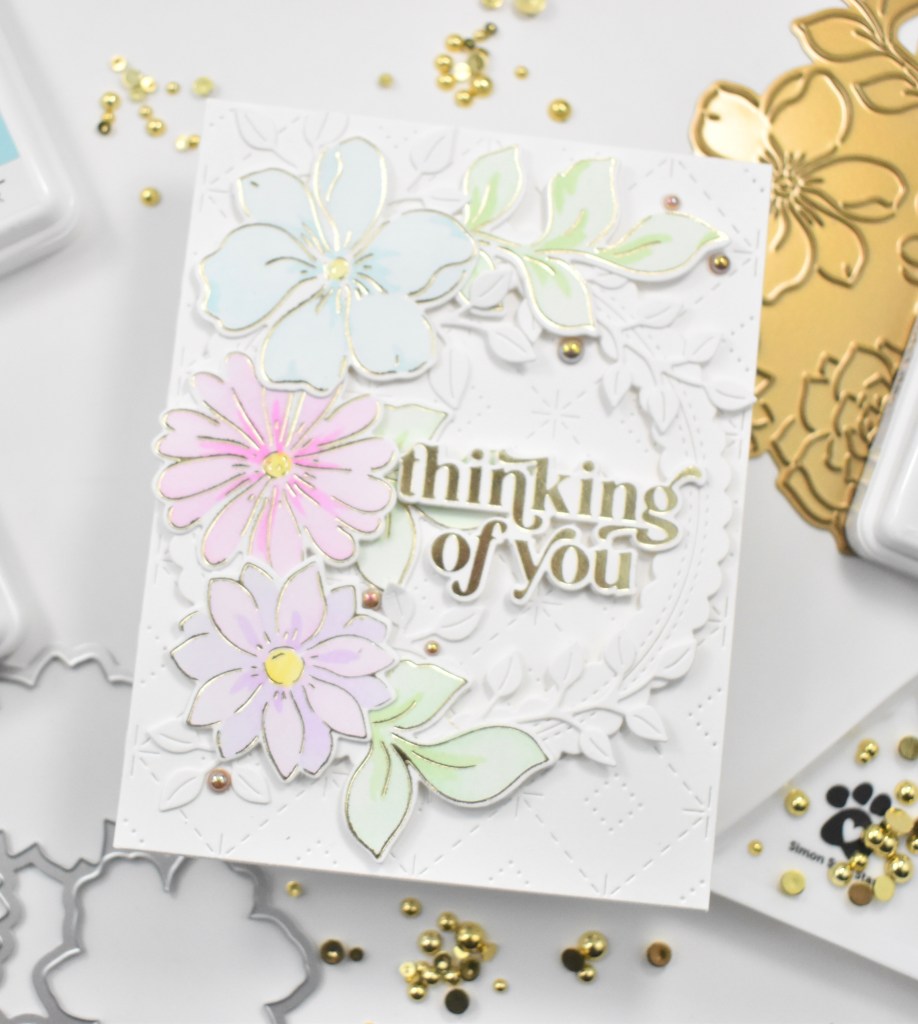
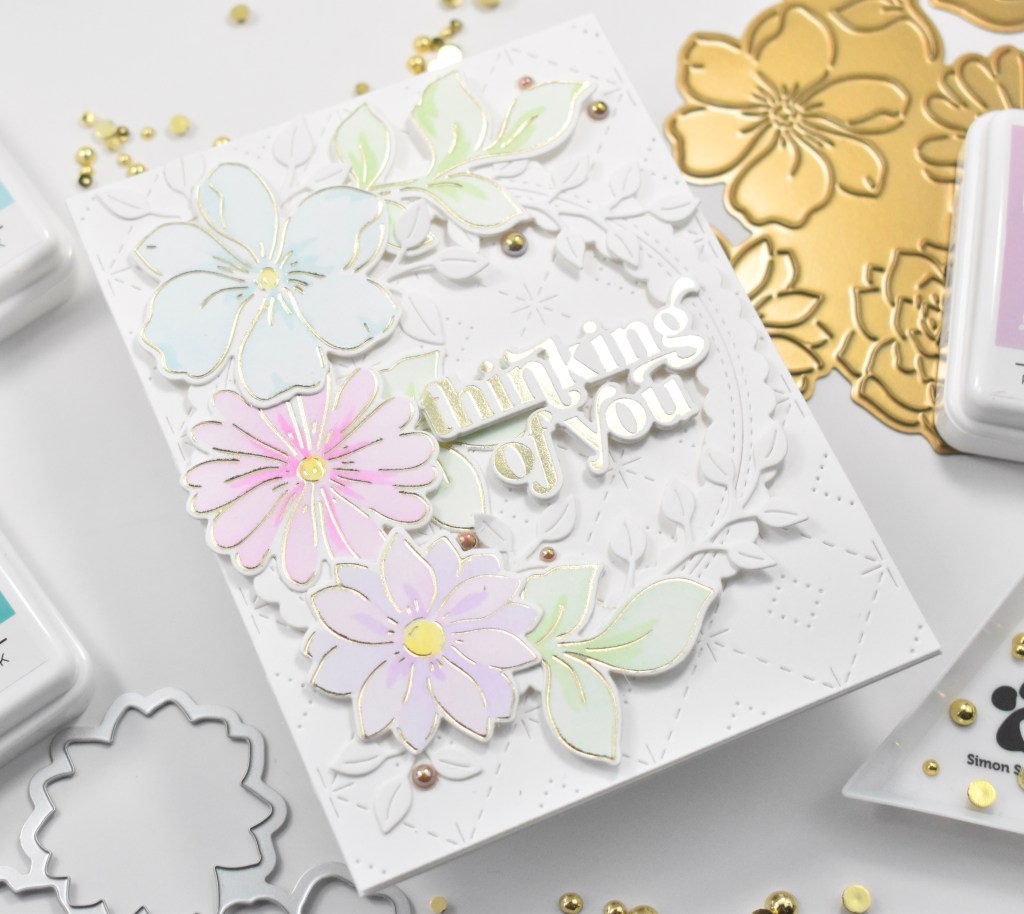
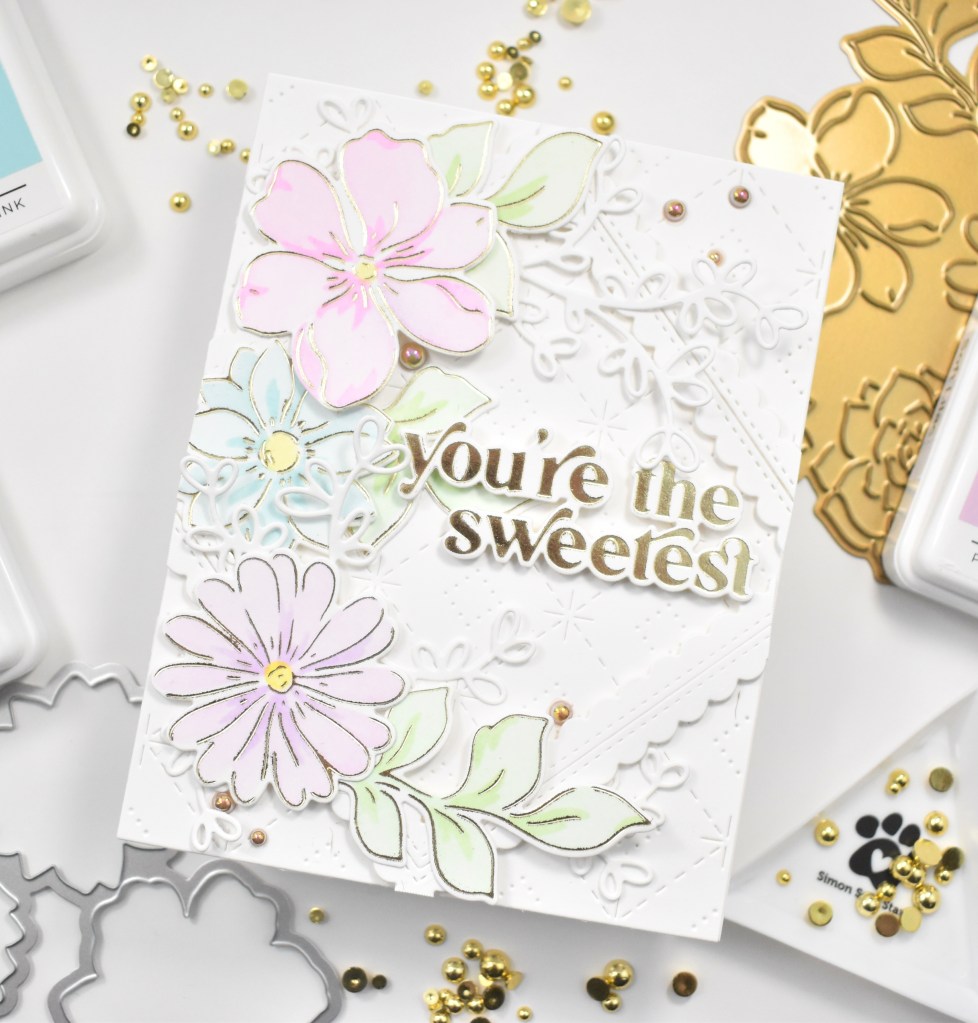
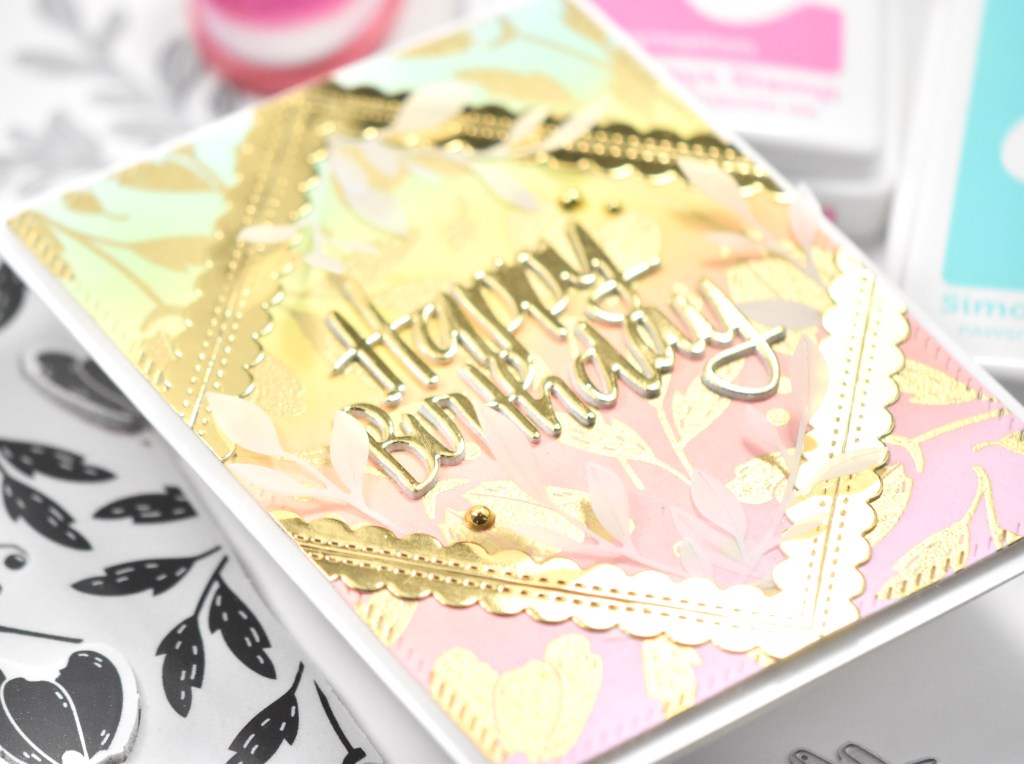
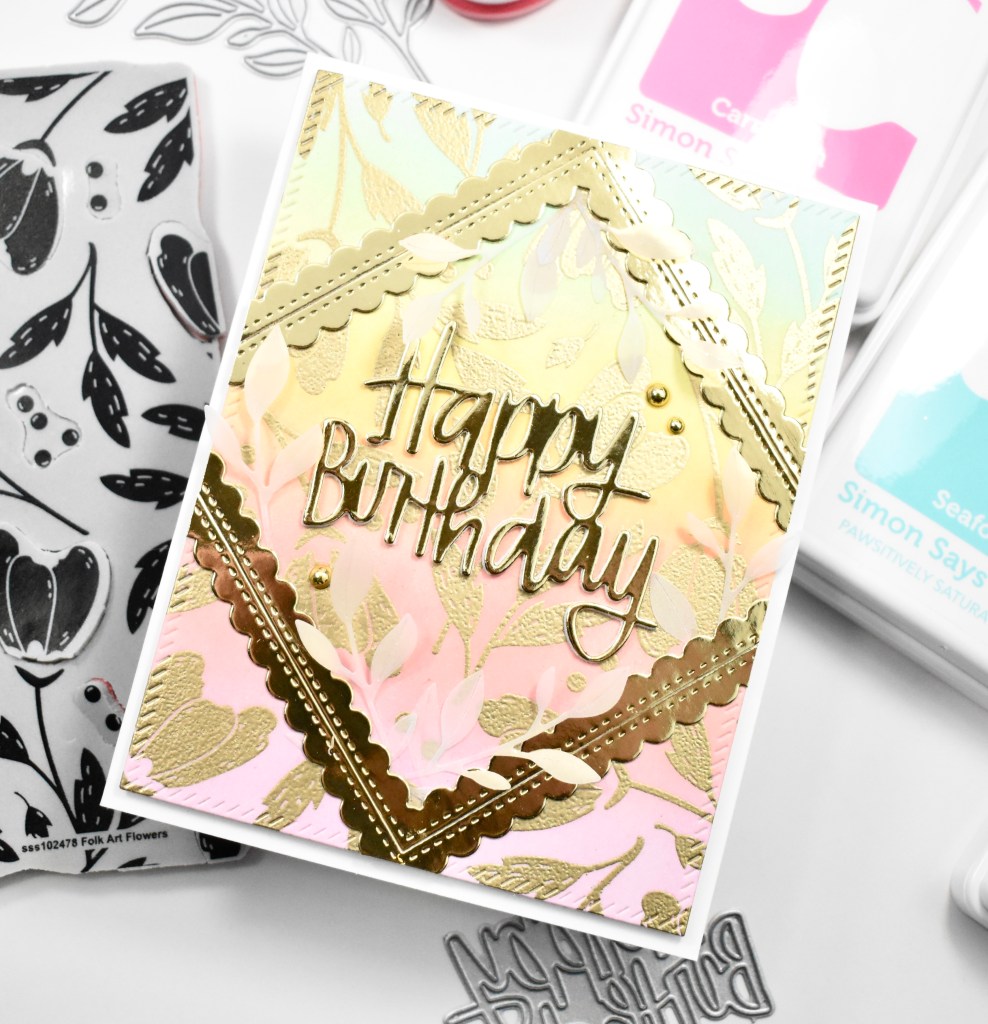
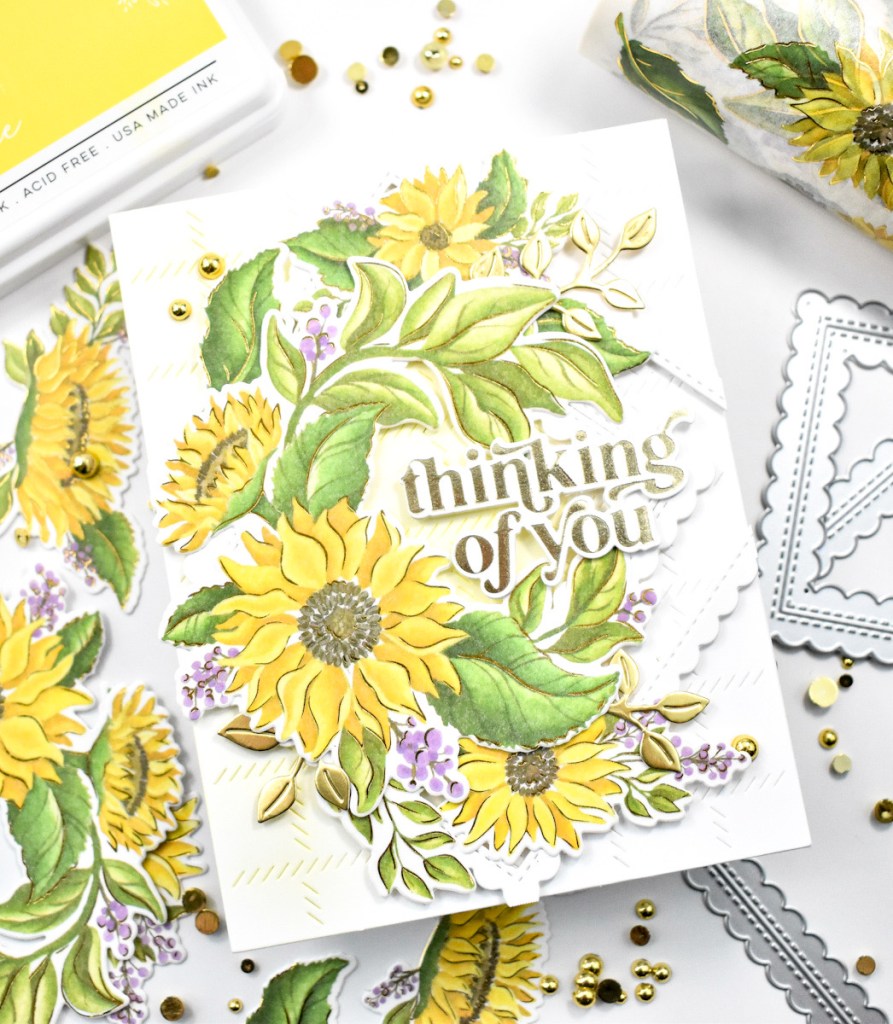
To begin, I rolled out the PFS Sunflowers Washi onto a panel of Neenah Classic Crest 110lb cardstock and ran it through to die cut it using the coordinating die. Once I had all of the pieces, I began working on the design of the card. I used the PFS Diagonal Stitched Plaid to cut a panel of Neenah 110lb, and I used the PFS Stitched Scallop Square to cut those from the same cardstock.

I did some light ink blending on the stitched plaid background using PFS Sunshine ink before adhering the stitched frames using foam tape. I set out to arrange the pieces of washi atop the frames to figure out the placement. Upon doing so, I decided that I needed some gold leaves, so I used the PFS Leafy Branch die to cut that from polished gold cardstock.

I arranged the flowers and leaves and adhered those using a combination of liquid glue and foam tape, tucking pieces under to fill in the gaps. Once everything was assembled, I adhered the sentiment, which is from the PFS Celebrating You product suite. I already had this sentiment made in my stash, but to make it, I used Spellbinders Champagne Foil to foil the thinking of you sentiment, and trimmed it using the coordinating die. I also cut it two additional times and glued all of those together. The sentiment was then adhered to my project using the same combination of glue and foam tape for support.
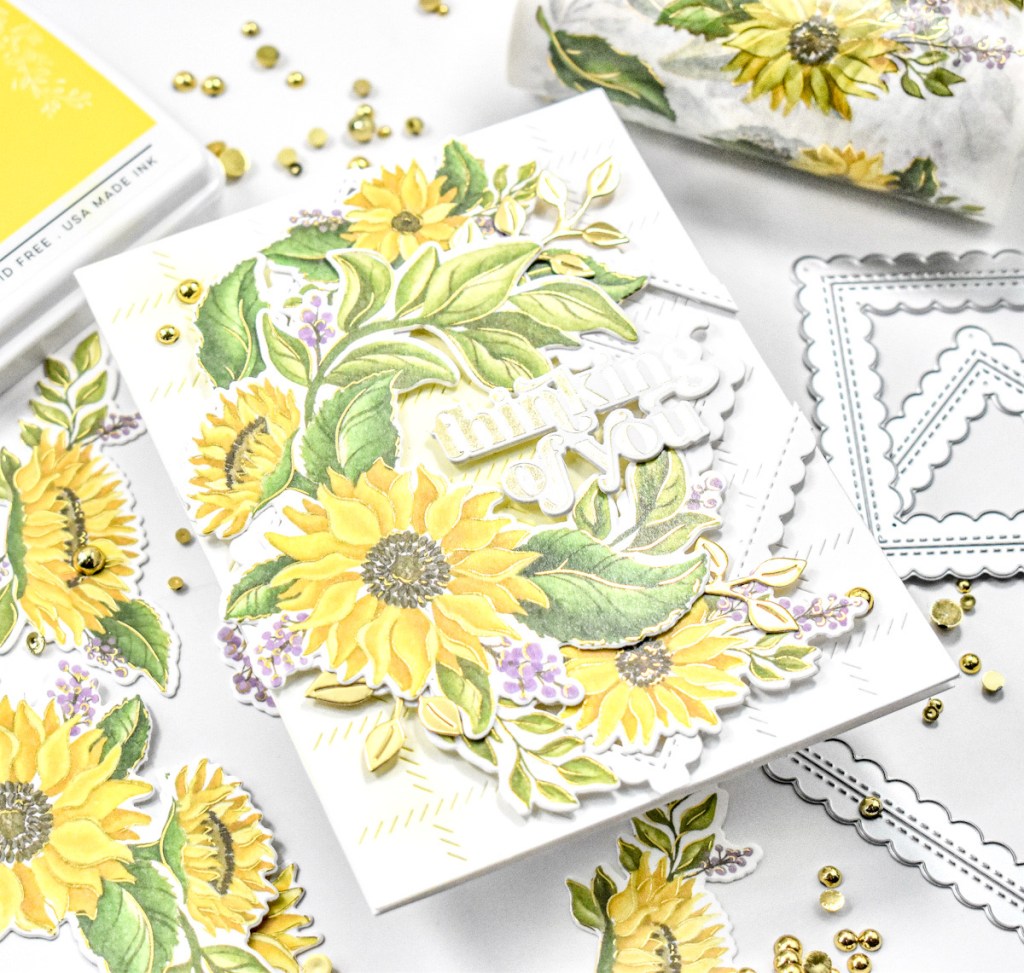
The panel was then attached to the card base using SSS Dot Tape Runner, and PFS Gold Metallic Pearls were added for that additional pop of bling!
That finishes up this project! I hope you enjoyed it and I hope it inspires you to get crafty in your space! Have yourself a wonderful day and don’t forget to stay awesome!
Supply List:
- PFS Sunflowers Washi and Die (Not affiliate links)
- PFS Stitched Scallop Square
- PFS Diagonal Stitched Plaid
- PFS Leafy Branch
- PFS Celebrating You: Hot Foil Plate, Die, Stamp
- PFS Ink: Sunshine
- PFS Gold Metallic Pearls
- SSS Blender Brushes
- SSS Dot Tape Runner
- Spellbinder Champagne Foil
- Spellbinders Glimmer Hot Foil System
- Spellbinders Platinum 6
- Neenah Classic Crest Solar White 110lb Cardstock
- Bearly Art Glue
- 3M Foam Tape
- Tim Holtz Scissors
- Tonic Studio Polished Gold Cardstock
- Studio Katia Embellishment Wand
* Affiliate links used at no cost to you. Thank you so much for your support!
Latest Posts
- Spellbinders Trailside Birthday Raccoon

- Simon Says Stamp Grateful Heart

- Simon Says Stamp Braided Greetings

- Together By Design Color Cube Floral

- Simon Says Stamp Cute Duckling