Simon Says Stamp Leafy Hello

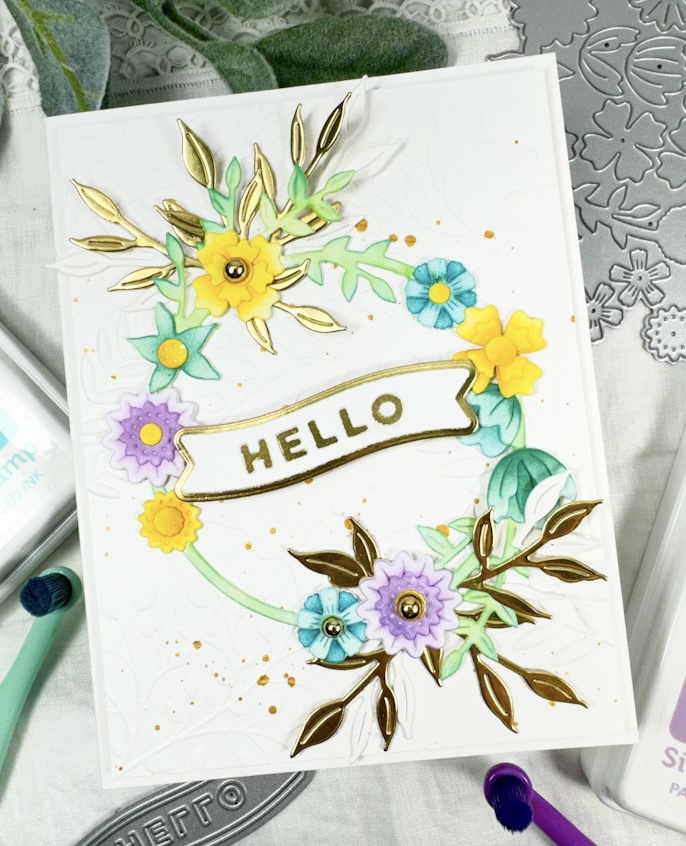
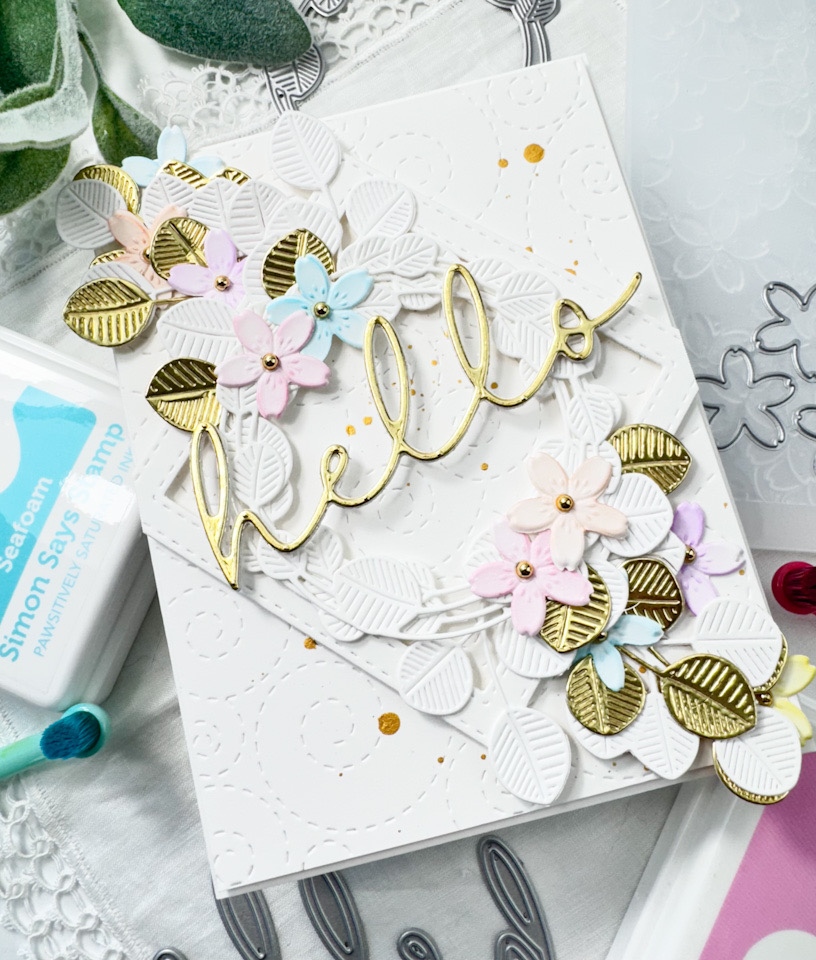
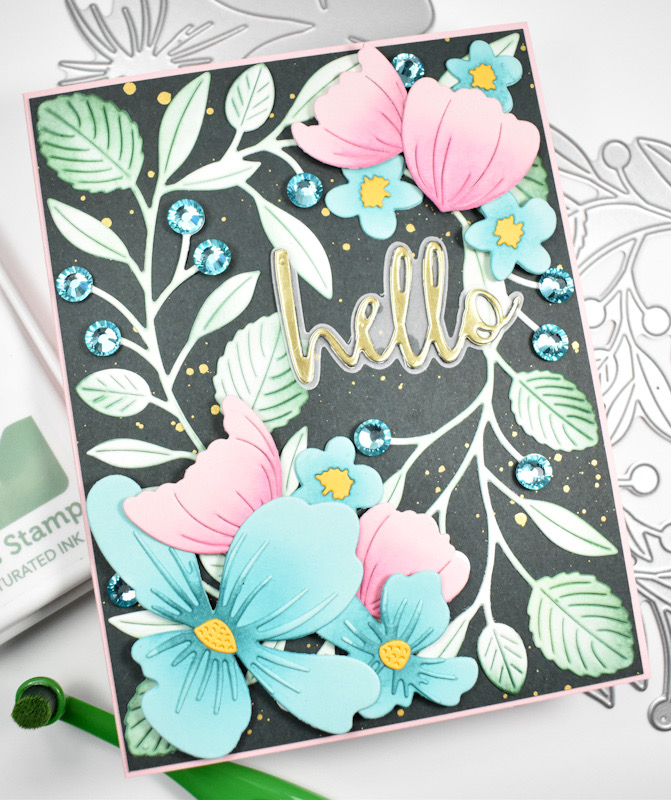
Hello Crafty Friends! I’m so glad that you stopped by to check out today’s project featuring the new Abundant Leaf Background from Simon’s latest release, Festive Fun. Let’s get right into the details, shall we?

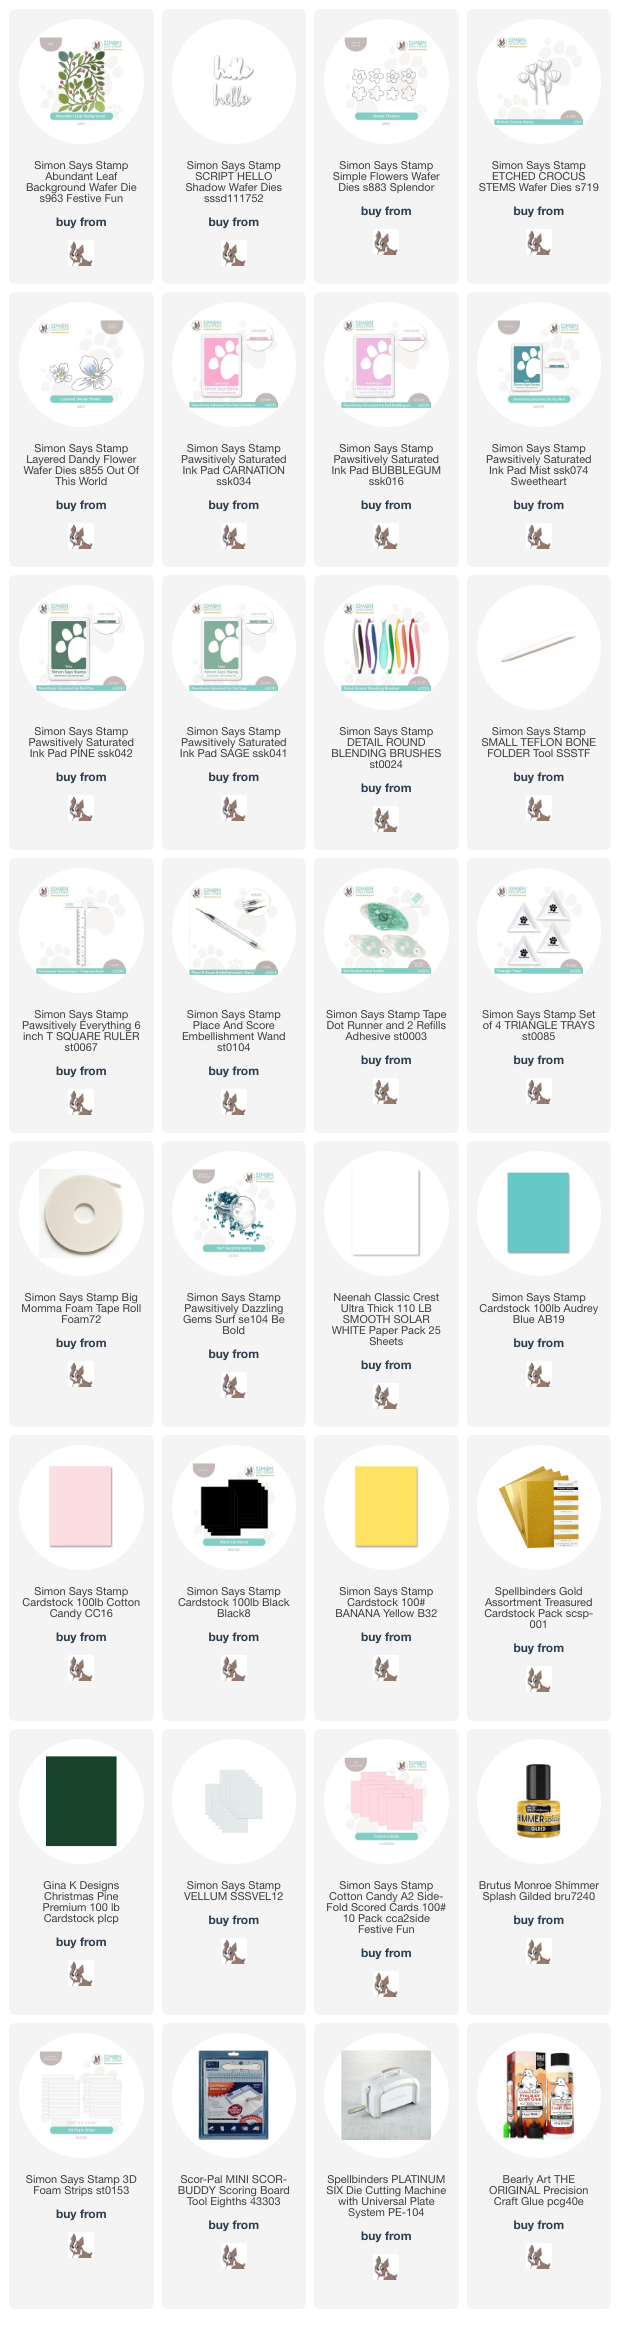
NOTE: all supplies are linked in the thumbnails at the end of this blog post.

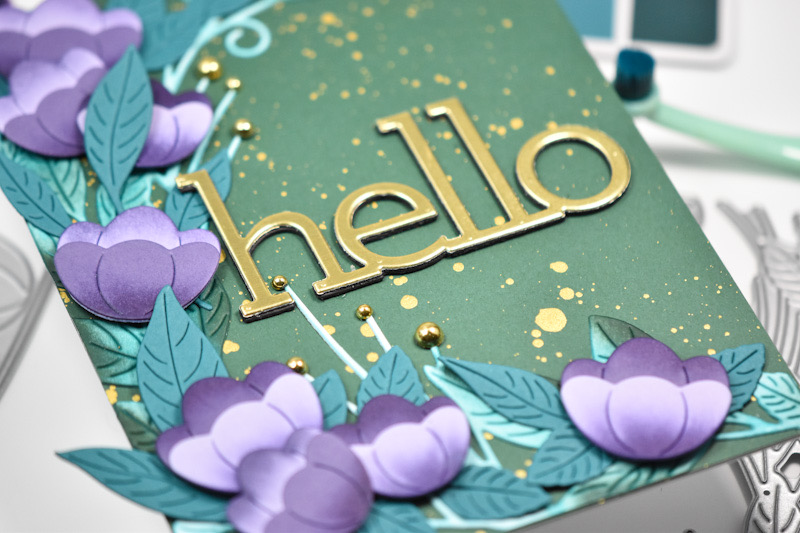
I began this project by die cutting the Abundant Leaf Background from a panel of Neenah 110lb cardstock. While the die cut was still in the panel, I did some light ink blending using Pine and Sage inks for some added depth. I knew that I wanted a floral card, so I pulled some flowers and went to work on those.

The flowers that I used for this card were the Layered Dandy Flower, Etched Crocus Stems and the Simple Flowers. I cut those from aqua and pink cardstock and did some ink blending on those as well using Bubblegum, Carnation and Mist inks. I should mention that I cut the centers of the flowers from yellow cardstock. Once my ink blending was complete, I assembled the flowers that needed it using liquid glue.

My background was created using a forest green cardstock with gold splatter, and I glued my leaf background to that. Most of the flowers were adhered using foam strips, while a few were glued directly atop the leaves. The hello sentiment was cut once from gold cardstock and twice from black cardstock, while the shadow portion was cut once from vellum. All of those pieces were adhered together and then glued directly to the panel. The panel was added to a Cotton Candy Pre-Scored card base, which is also from the Festive Fun release, and some Surf Dazzling Gems were added to finish up.

That does it for this one! I hope you enjoyed it! I always love making floral cards, so I had to sneak one in for this release! Don’t forget to head over to Simon’s website to check out the entire Festive Fun release. Thanks again for stopping by, and have a wonderful day!
Supply List
Affiliate links used at no cost to you. What does this mean? If you use the links within this post to make a purchase, I receive a small commission, which allows me to continue to post crafty content for your enjoyment. I truly appreciate your support!
Latest Posts
- Simon Says Stamp Braided Greetings

- Together By Design Color Cube Floral

- Simon Says Stamp Cute Duckling

- Simon Says Stamp Watercolor Wild Rose

- Simon Says Stamp Striped Missing You