Alex Syberia Design Lotus Hugs

Hello Lovelies! I hope you’re doing well and having a wonderful day! It’s release day for Alex Syberia Design, and she’s got some beauties this month! I hope you’ll stop by her Etsy shop and take a peek at the whole collection. Today’s card is featuring the White Lotus digi stamp, and it happens to be my favorite from this release! So, let’s get right to it!
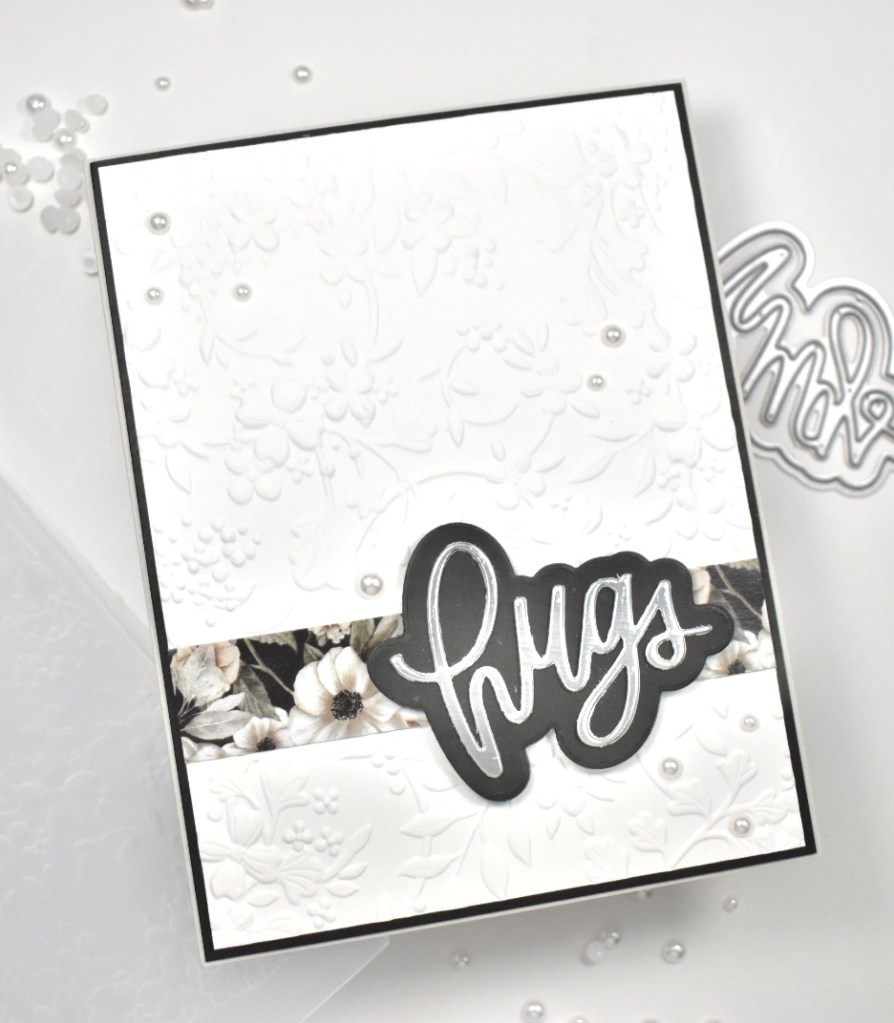
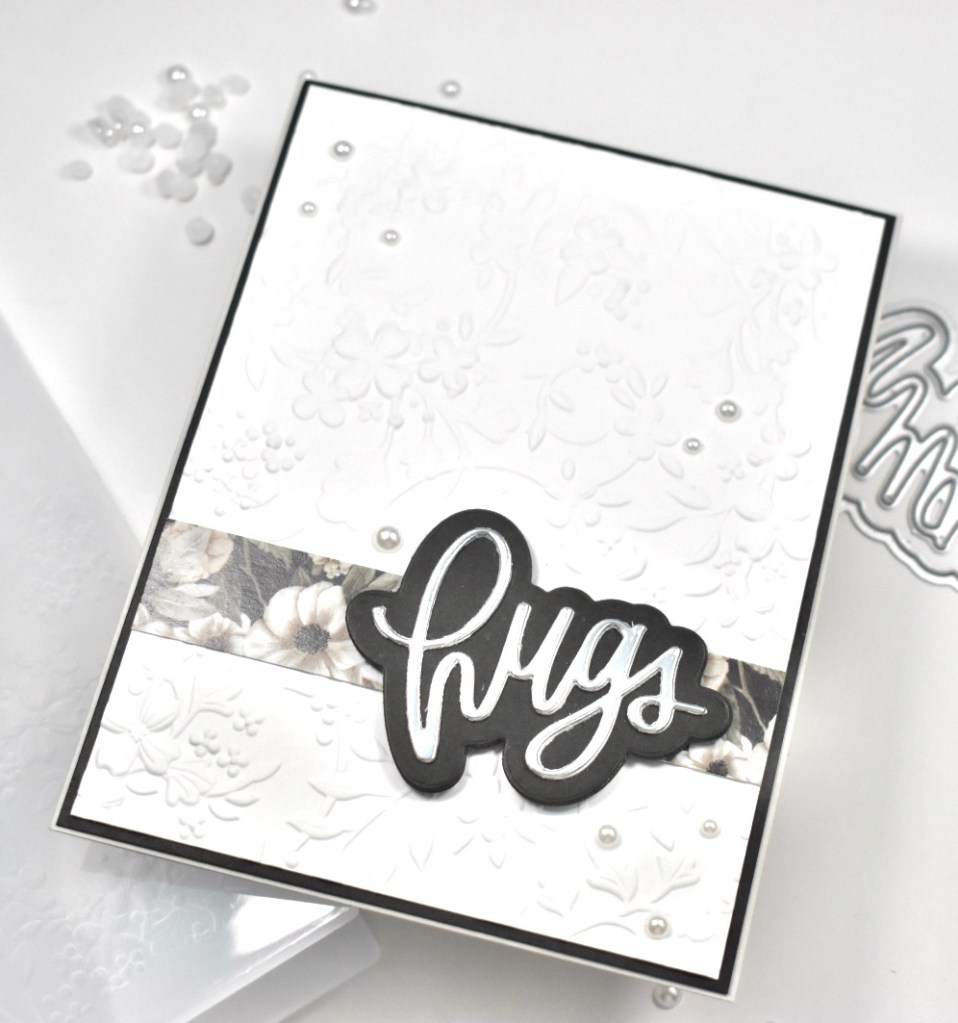
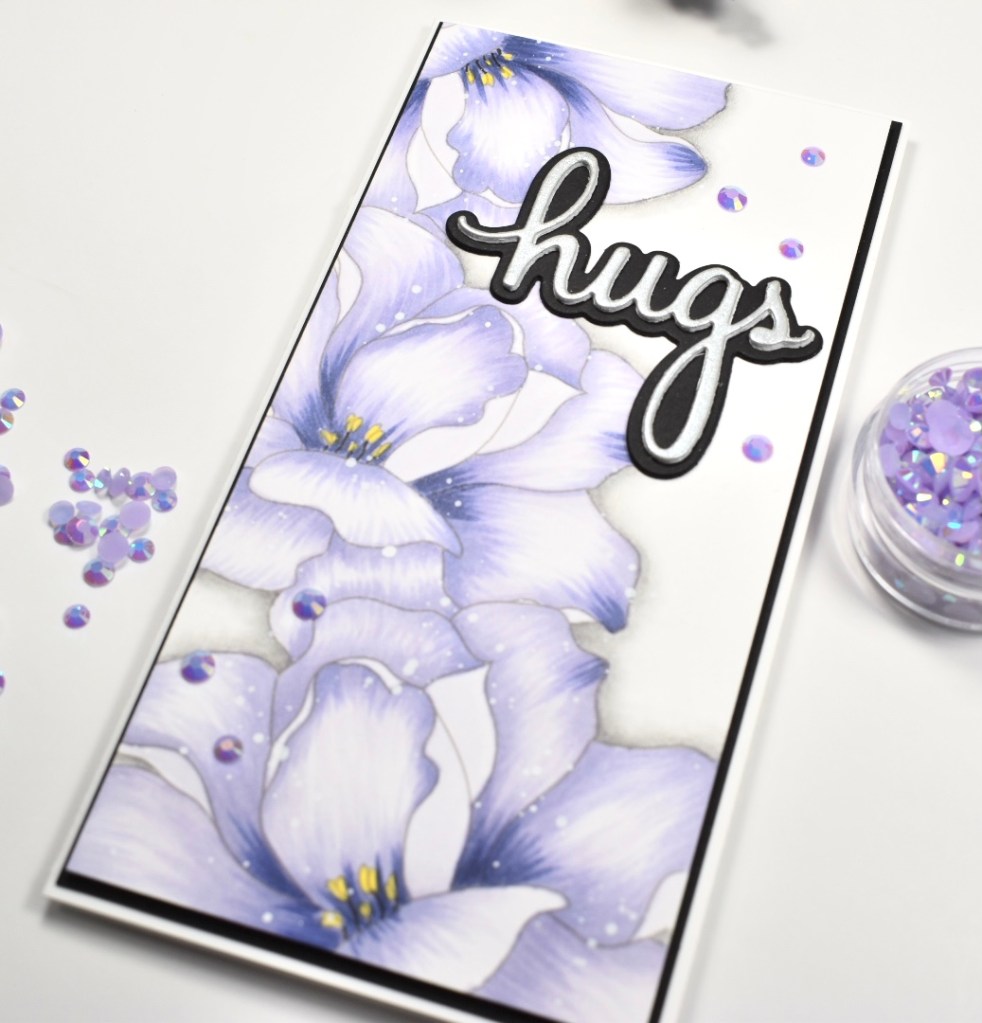
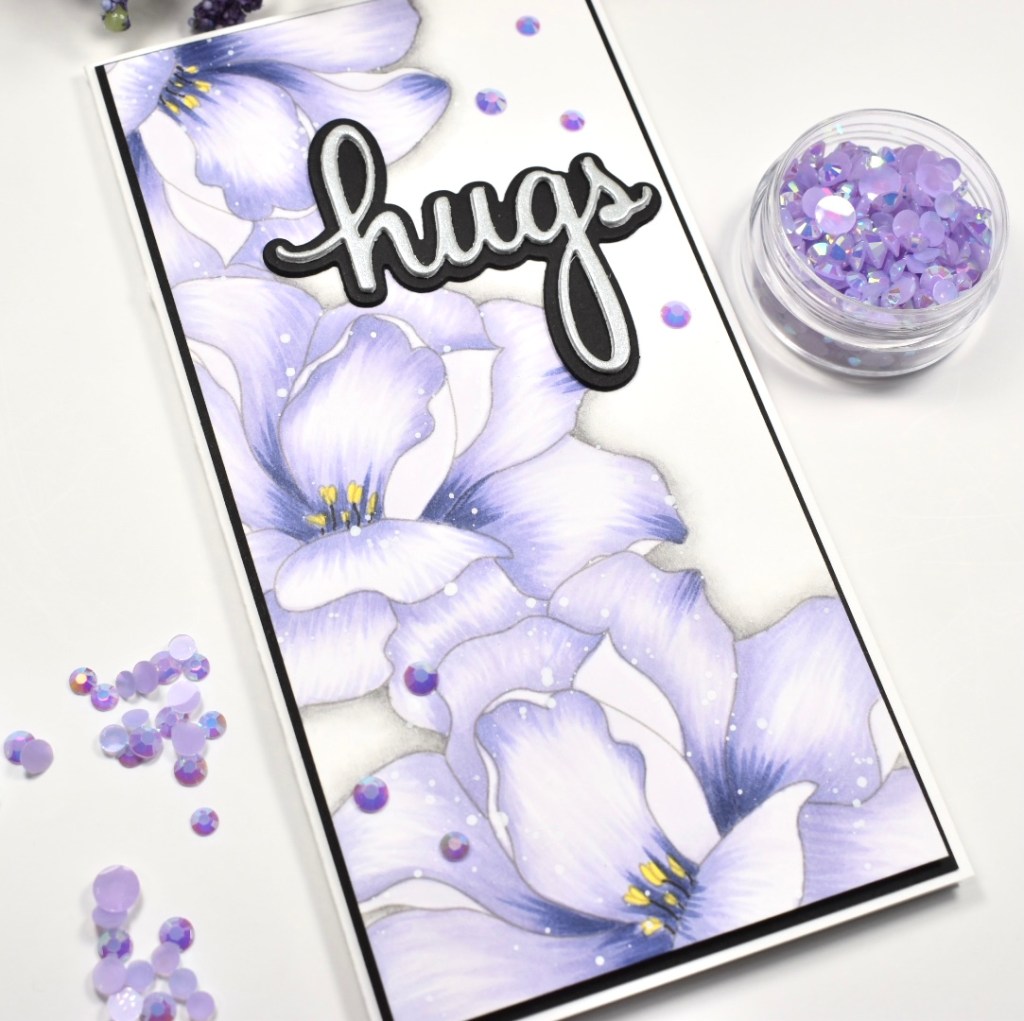
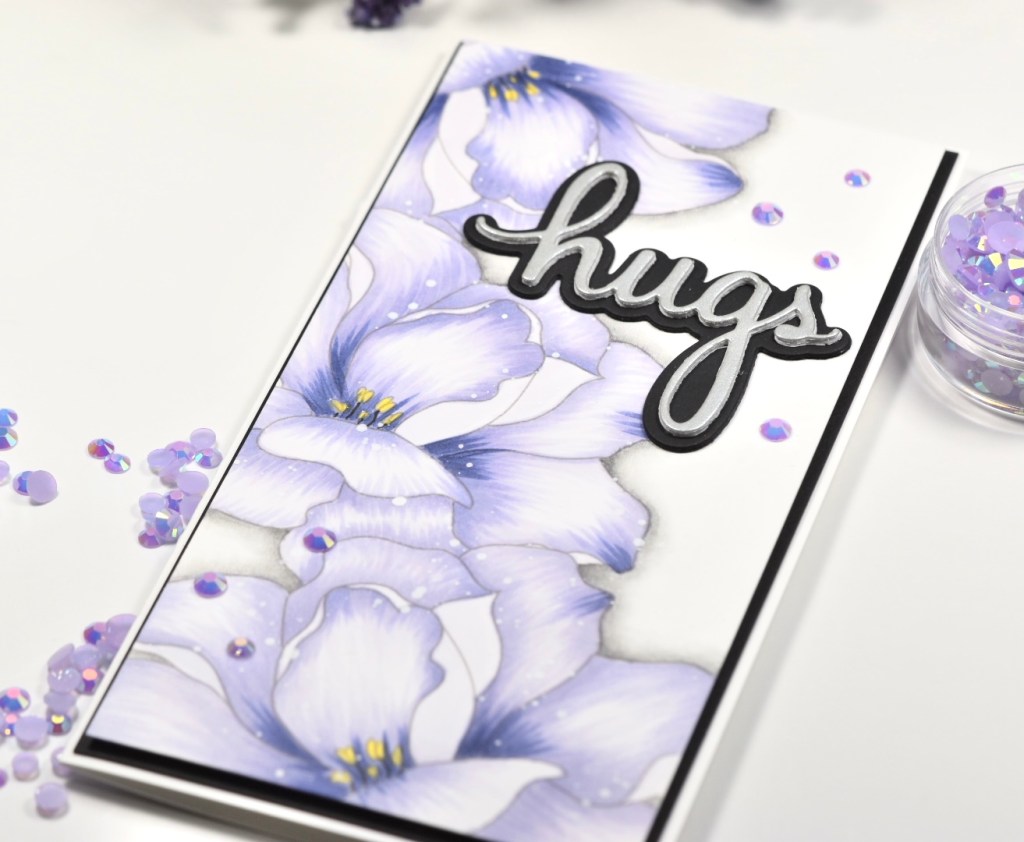
I began by printing the image on a panel of Neenah Classic Crest 110lb cardstock. I don’t use any fancy software at my house. I work on a MacBook, and I just insert the image into a Pages document and resize it. I’m not tech savvy and simple gets the job done around here. However, I will say that I discovered this time that I can print the image with that shadow around it. I was pretty exited about that!

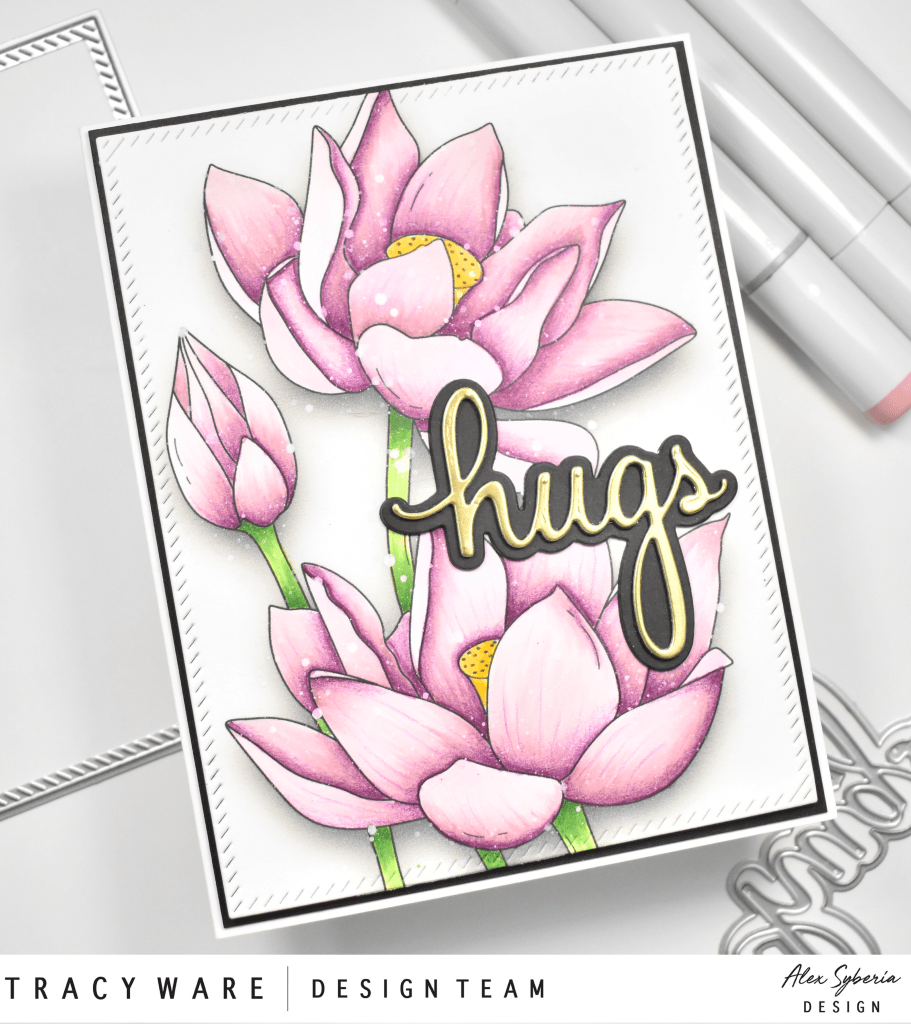
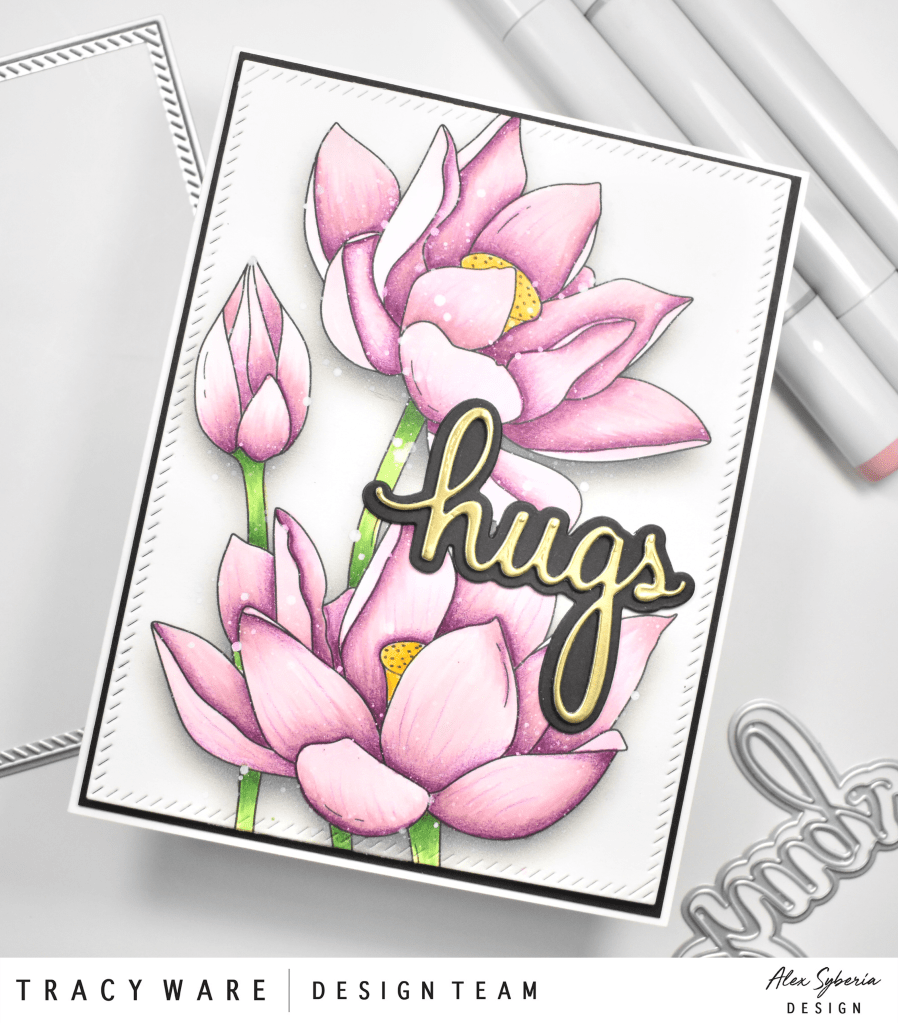
Anyhoo, I realize this is supposed to be a white lotus, but in all honesty, I forgot that part and started coloring with pink! Oops! I’m just going with, it’s art and I can make it any color that I want! Am I right?! The Copic markers used on this image were RV00, RV91, RV93, RV95, Y08, Y15, YG13 and YG17. That combo of pinks might be my new favorite!

Once I was done with the markers, I did go back in with some PrismaColor pencils in the nooks and crannies to deepen those shadows. I trimmed the panel using the PinkFresh Studio Diagonal Stitched Rectangles and splattered it using Royal Talens Amsterdam Titanium White Acrylic Ink.

Once that was dry, I mounted it to a black panel using foam tape, because dimension! I wanted a small sentiment, because I didn’t want to cover up too much of the coloring, so I opted for this hugs sentiment from the PinkFresh Studio Sending Phrase Builder set. I cut it once from Mirror Gold cardstock and twice from black cardstock. I also cut the shadow twice from black as well. All of these were then adhered together using liquid glue, and glued to the panel. Everything was then mounted to the card base, which is also Neenah 110lb.
That finishes up this project! I really enjoyed coloring this digi from Alex, but I guess for my next one, I really should color it white, or at least try! I hope you’ll stop by and check out the full release over in Alex’s Etsy shop! Have a wonderful day and don’t forget to stay awesome!
Supply List:
- Alex Syberia Design White Lotus Digital Stamp
- PinkFresh Studio Diagonal Stitched Rectangles
- PinkFresh Studio Sending Phrase Builder
- PrismaColor Colored Pencils
- Copic Markers: RV00, RV91, RV93, RV95, Y08, Y15, YG13, YG17
- Neenah Classic Crest Solar White 110lb Cardstock
- Mirror Gold Cardstock
- Black Cardstock
- Royal Talens Amsterdam Titanium White Acrylic Ink
- Bearly Art Glue
- 3M Foam Tape
- Gemini Jr.
- Brother Printer
* Affiliate links used at no cost to you. Thank you so much for your support!
- Simon Says Stamp Groovy Birthday

- Simon Says Stamp Amazing Scattered Leaves

- Simon Says Stamp Beautiful Friend Floral

- Together by Design Featuring Pinkfresh Studio

- Simon Says Stamp Basket Bunny