Simon Says Stamp Mother’s Day Peony

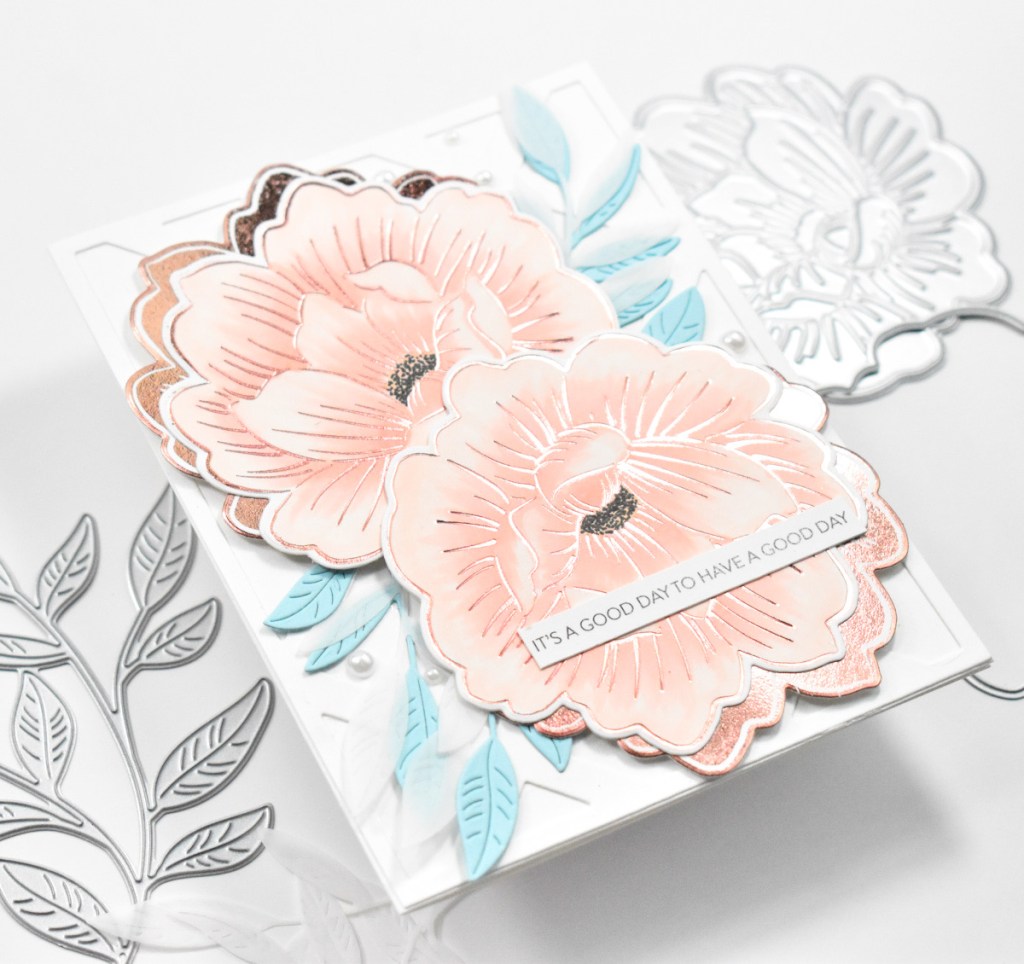
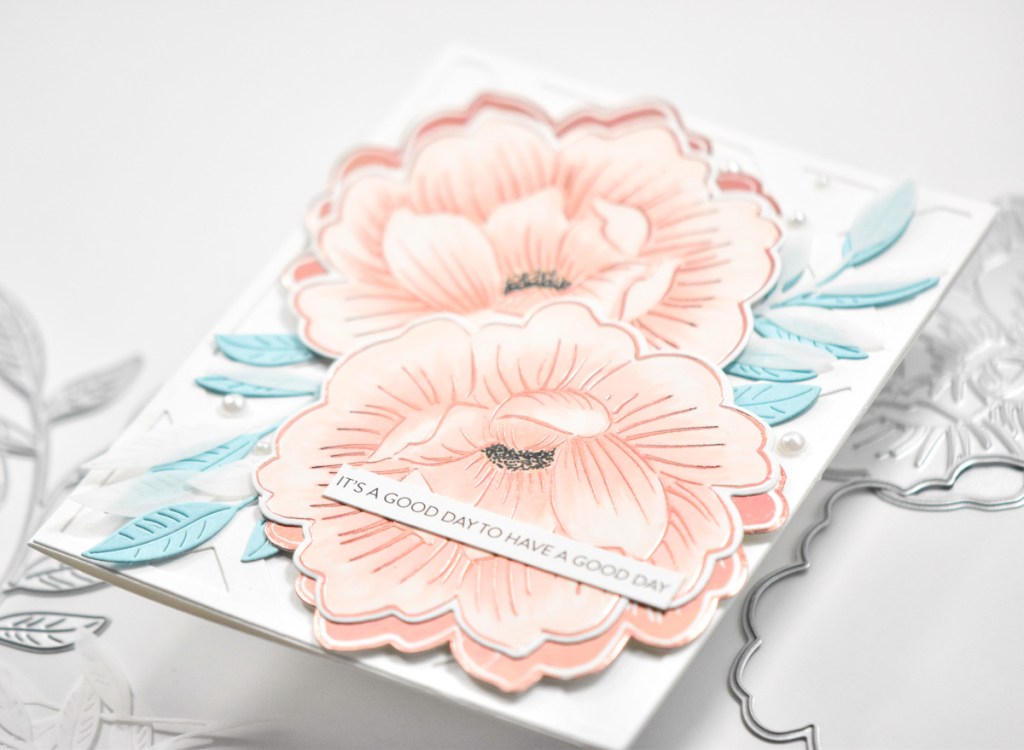
Hello Crafty Lovelies and thanks for stopping by! Have you checked out the newest Simon release, Yay You? What are your favorites? If you know me, I always love florals and sentiments! So, today I’m playing with the Sketched Peony Blossom Foil and Cut set. Let go through the details, shall we?

I ended up making this card for my Mom for Mother’s Day, and of course, she loved it! I began by foiling the Sketched Peony Blossom on a panel of hot press watercolor paper using Spellbinders Champagne Hot Foil. I always end up foiling a few, but only used one in this case, so I have some to use on another project in the future. While I had the machine hot, I also used the PinkFresh Studio Solid Hot Foil Plate to foil the negative of the flower as well.

Once the foiling was complete, I used Zig Markers in 025, 032 and 040 to do some watercoloring. I also used Copic Markers in Y00 and Y08 to add some yellow to the center of the flower. I then used the included, coordinating die to trim the flower out along with the solid foiled flower as well. Those were then adhered together, slightly off center, using liquid glue.
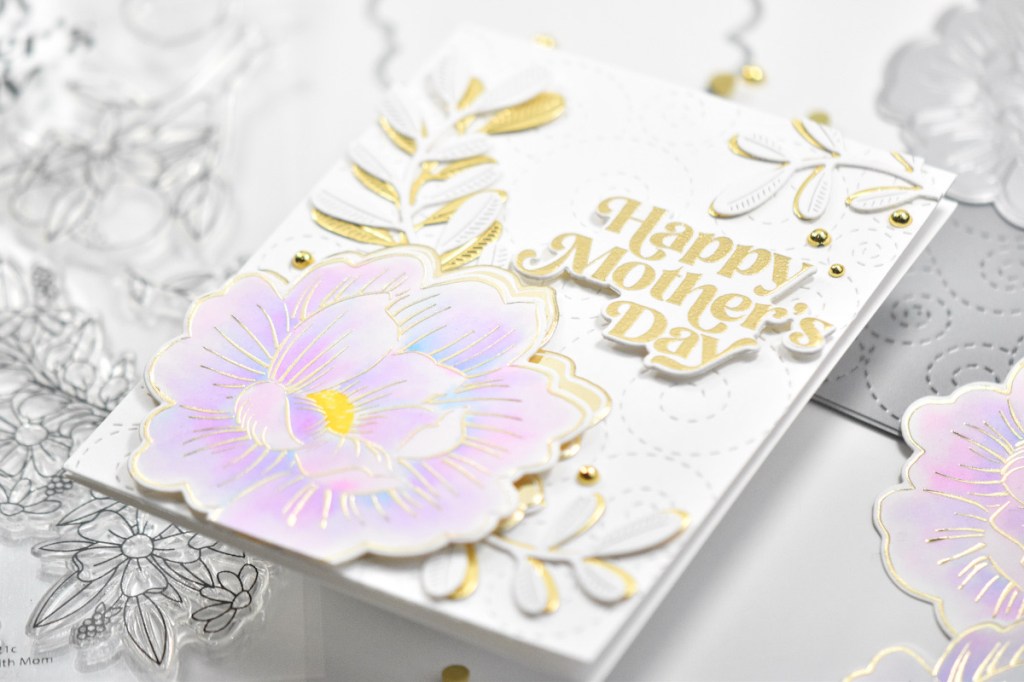
For the background, I used the SSS Stitched Whirl Background and trimmed that from a panel of Neenah Classic Crest 110lb cardstock. I also used the SSS Olive Leaves to cut a couple of those from Neenah 110lb, as well as some gold cardstock.

I went ahead and worked on the sentiment and use the Happy Mother’s Day sentiment, which is from the SSS Better With Mom set. I stamped the sentiment using VersaMark Ink on a scrap of Neenah 110lb and heat embossed it using Ranger Princess Gold Embossing Powder. When that was complete, I used the coordinating die to trim it out.
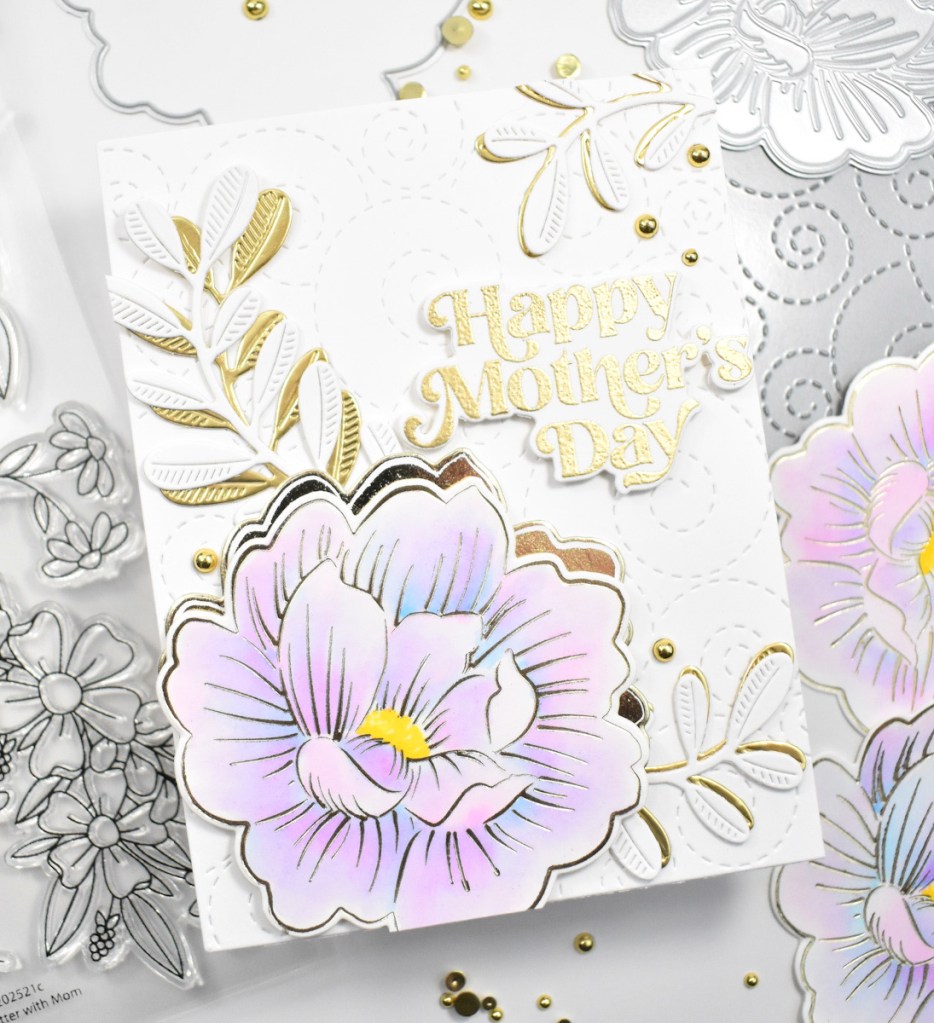
To assemble the card, I adhered the whirl background to the card base using SSS Dot Tape Runner and glued the leaves to the panel, while adhering the flower using foam tape for dimension. The sentiment was also adhered with foam tape. And, of course there has to be bling, so I used some PinkFresh Studio Gold Metallic Pearls for that.
That finishes this one up! I hope you enjoyed it and I hope it inspires you to get crafty! Have a wonderful day and don’t forget to stay awesome!
Supply List:
- SSS Sketched Peony Blossom Foil and Cut
- SSS Stitched Whirl Background
- SSS Olive Leaves
- SSS Better With Mom Stamp, Die, Bundle
- SSS Dot Tape Runner
- SSS Triangle Trays
- Spellbinders Champagne Hot Foil
- Spellbinders Mirror Gold Cardstock
- Spellbinders Glimmer Hot Foil System
- Spellbinders Platinum 6
- Spellbinders Quick Trimmer
- PinkFresh Studio Solid Hot Foil Plate
- PinkFresh Studio Gold Metallic Pearls
- Zig Markers: 025, 032, 040
- Copic Markers: Y00, Y08
- VersaMark Ink
- Ranger Princess Gold Embossing Powder
- Neenah Classic Crest Solar White 110lb Cardstock
- Fluid Hot Press Watercolor Paper
- Bearly Art Glue
- 3M Foam Tape
- Studio Katia Embellishment Wand
- Anti-Static Powder Tool
- Tim Holtz Scissors
- Misti
* Some affiliate links used at no cost to you. Thanks so much for your support!
Latest Posts
- Spellbinders Trailside Birthday Raccoon

- Simon Says Stamp Grateful Heart

- Simon Says Stamp Braided Greetings

- Together By Design Color Cube Floral

- Simon Says Stamp Cute Duckling