Simon Says Stamp Love You Peony

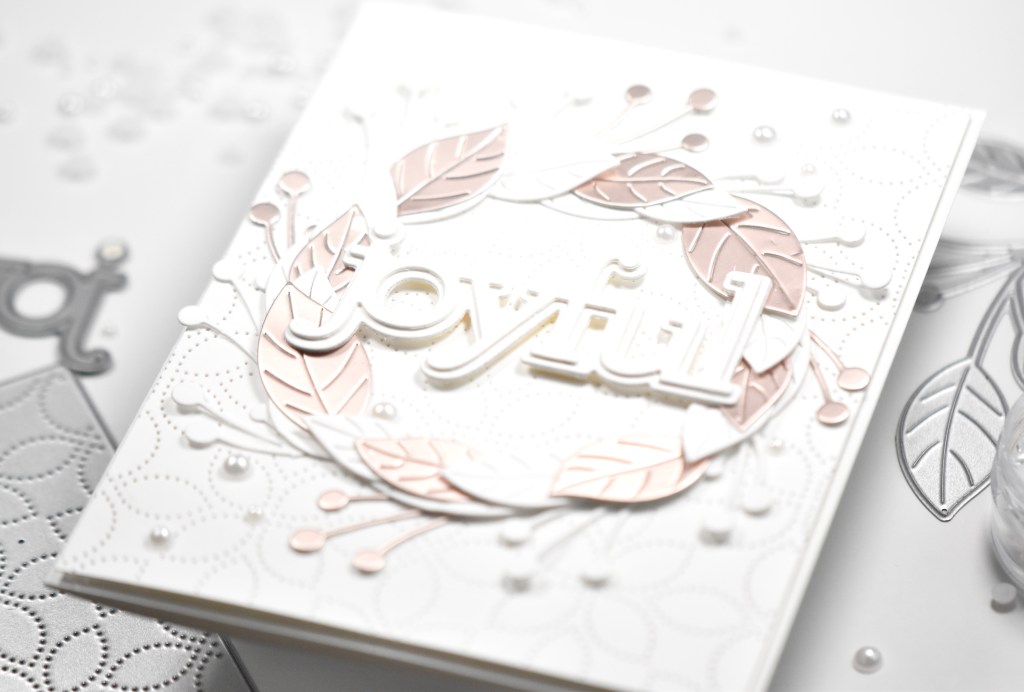
Hello Crafty Lovelies! Thanks for joining me for the brand new, To the Moon release from Simon Says Stamp! Today’s project is featuring the Peony and Leaves die cut. Let’s jump right into the details!

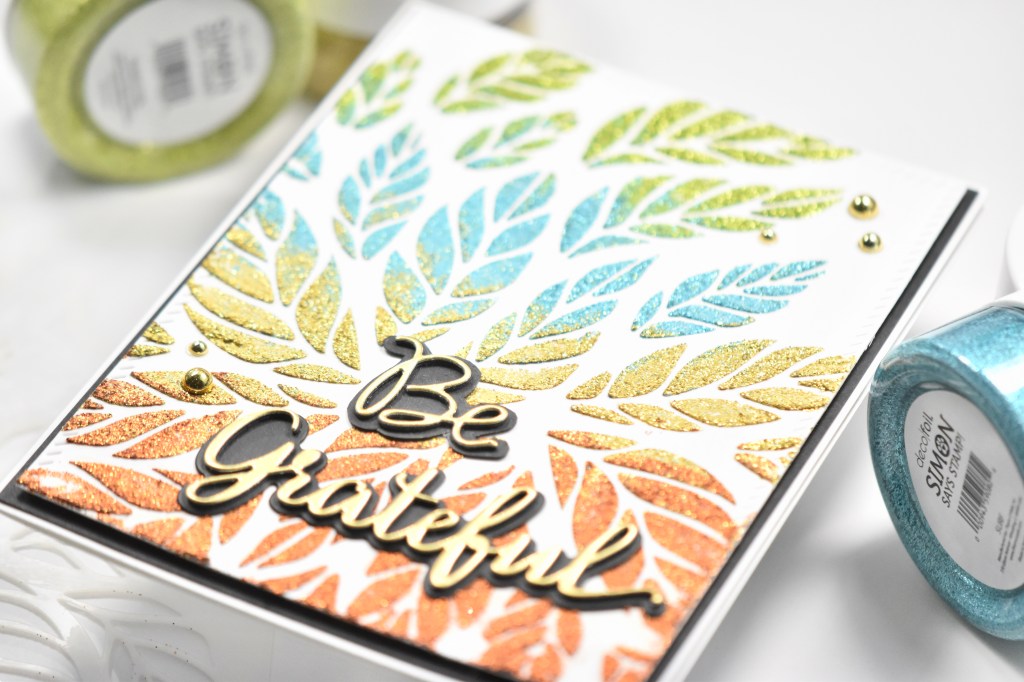
To begin this project, I cut the SSS Peony and Leaves four times. Once from Neenah Classic Crest 110lb cardstock, once from mirror gold cardstock, once from pink cardstock, and once from peacock cardstock. I cut it from the colors, because I was wanting to do an inlay technique.

For the background, I cut a panel with the SSS Stitched Whirl Background using Neenah 110lb. I also used the SSS Privet Branch for additional leaves. I cut those from Neenah 110lb, as well as, the mirror gold cardstock. I began by deciding the leaf placement under the flower and secured those using liquid glue. I offset the top gold leaf slightly so that both set of leaves would be visible.
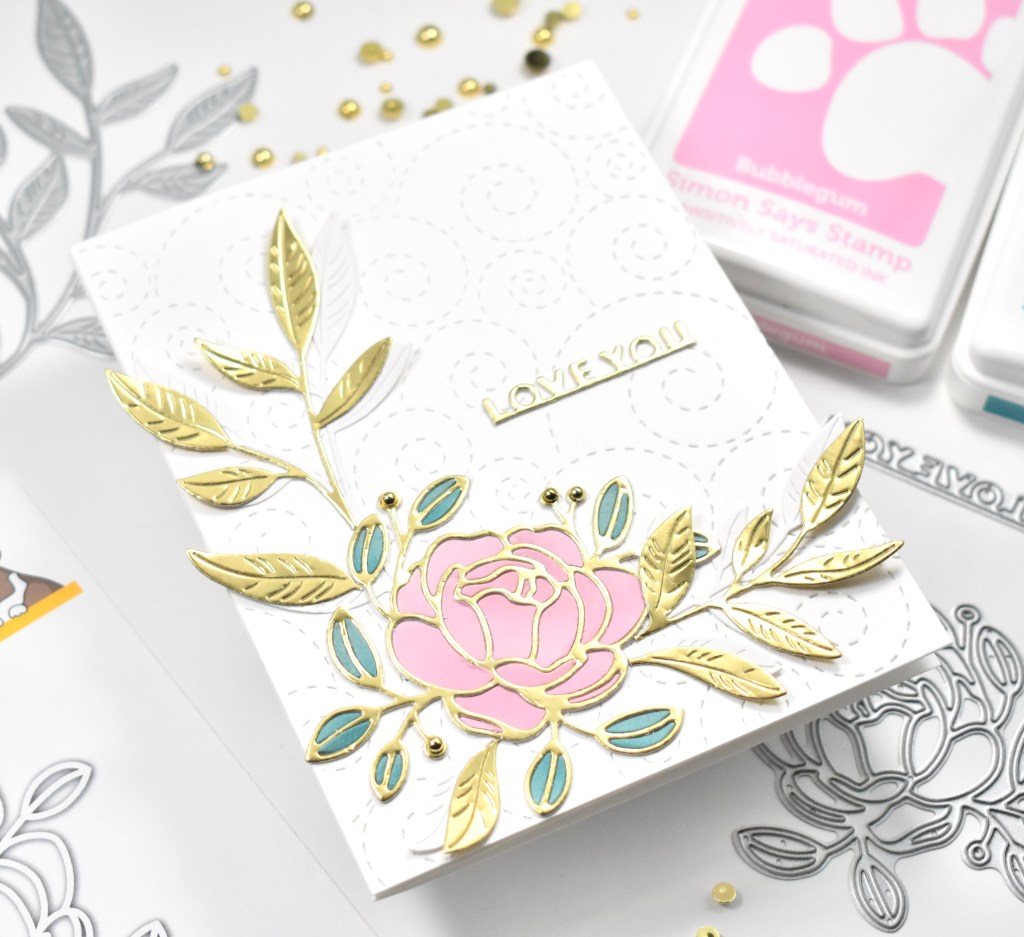
Once the leaves were secured, I glued the white and mirror gold flowers together, and then glued that directly over the larger leaves on the panel. I did some light ink blending on the colored cardstock using SSS Pawsitively Saturated Ink in Bubblegum and Ocean for a little shadowing on the flower and leaves.

I then began inlaying the pieces securing them with liquid glue. To simplify this process, after I die cut the flowers from the colored cardstock, I used some Press N Seal to hold them together in place. That was such a time saver! Once all of the pieces were adhered, I added some PinkFresh Studio Gold Metallic Pearls to the berry portion of the die.

For the sentiment, I opted for the SSS Everyday Words on a Line. I die cut the Love You once from Neenah 110lb and once from mirror gold and glued those together, trimming off the ends, and then glued that directly to my panel. To finish up, I adhered the panel to my card base using foam tape for added dimension.
That finishes up this project! I hope you enjoyed it, and I hope it inspires you to get crafty! Stop by and check out the entire To the Moon release, and let me know your favorites! Have a wonderful day and don’t forget to stay awesome!
Supply List:
- SSS Peony and Leaves
- SSS Privet Branch
- SSS Everyday Words on a Line
- SSS Stitched Whirl Background
- SSS Pawsitively Saturated Inks: Bubblegum, Ocean
- SSS Blender Brushes
- PinkFresh Studio Gold Metallic Pearls
- Neenah Classic Crest Solar White 110lb Cardstock
- Mirror Gold Cardstock
- Pink Cardstock
- Peacock Cardstock
- Bearly Art glue
- 3M Foam Tape
- Studio Katia Embellishment Wand
- Gemini Jr.
- Press N Seal
* Affiliate links used at no cost to you. Thanks so much for your support!
- Spellbinders Trailside Birthday Raccoon

- Simon Says Stamp Grateful Heart

- Simon Says Stamp Braided Greetings

- Together By Design Color Cube Floral

- Simon Says Stamp Cute Duckling