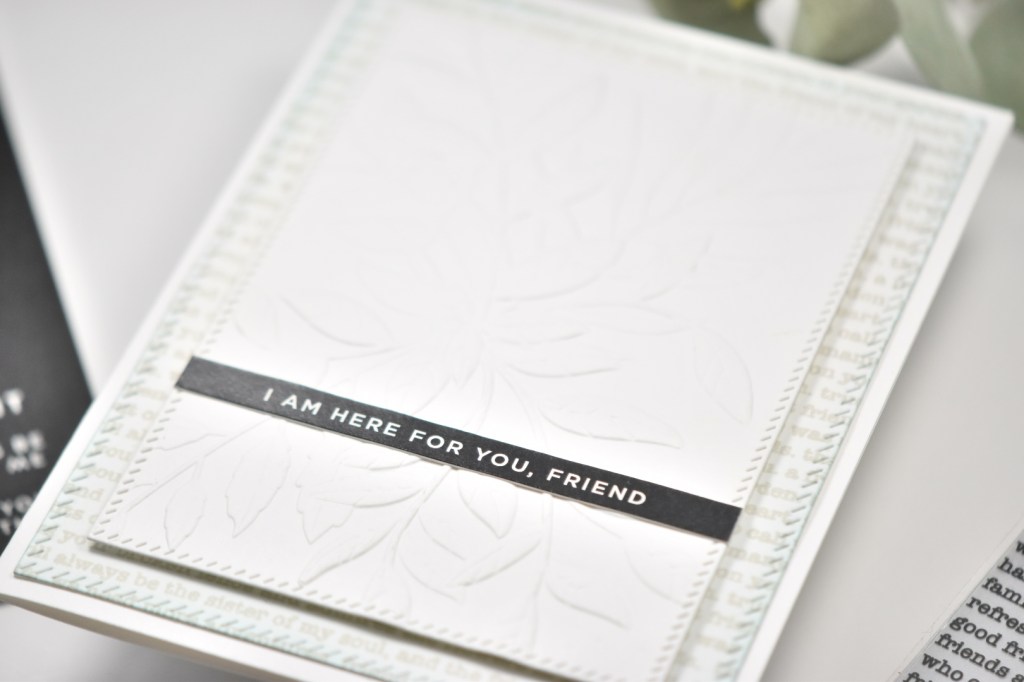
Welp, the new Rainbows release from Simon Says Stamp is pretty awesome! Have you checked it out yet? What were your favorite items? I always love their background stamps and there were some really cool ones in this release. So for today’s project, I’m featuring the Leaf Bundle Embossing Folder. There were some really gorgeous folders in this release too!
Super simple card today! I don’t know about you, but some days I just need simple! Sometimes I spend so much time overthinking designs, and simple is good from time to time. Thanks so much for stopping by today. I hope you’ll check out the entire Rainbows release. Lots of fun things in this release!
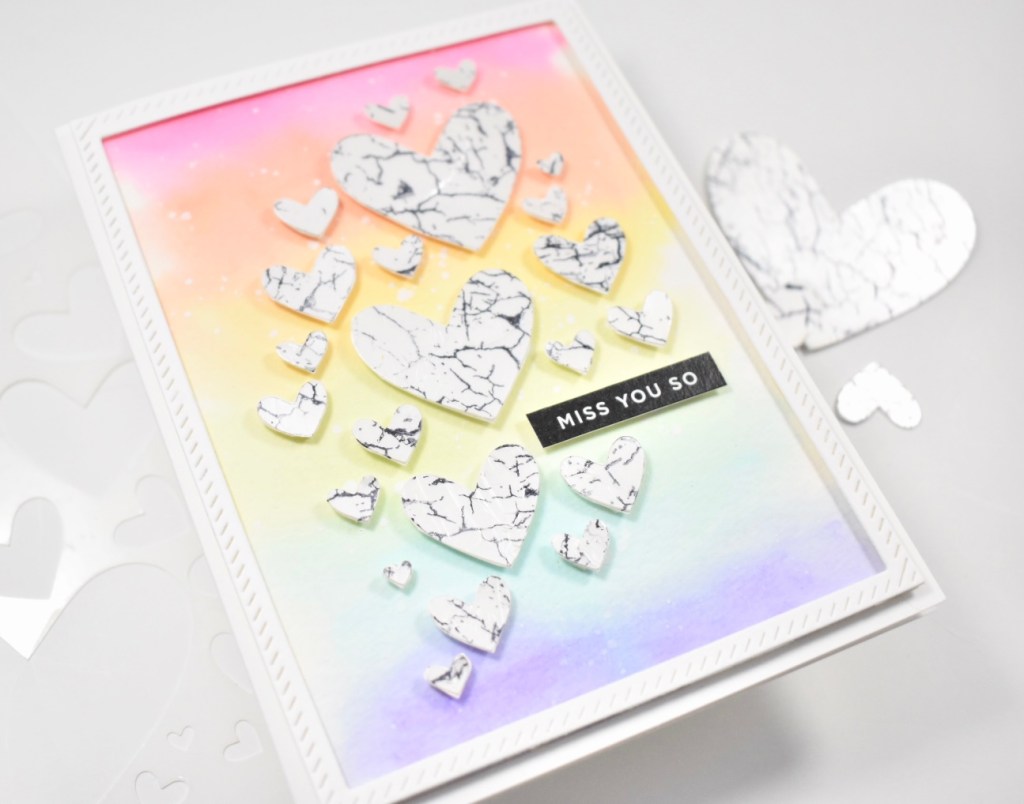
I’ve seriously had so much fun with the new Fading Hearts Stencil from the newest Rainbows release by Simon Says Stamp! This stencil has sparked a new love for stencils for me! The ink blending! The gels! The pastes! Oh my, so many awesome things to do with them! But .. for today’s project, I tried a little something different! Let’s take a look!
I’m loving this stencil so much, but I wanted to mix it up a bit and use it in an unexpected way! To begin my project, I pulled out a sheet of watercolor paper and taped it to my board using masking tape. My board happens to be a cheap clipboard from Target. But hey, it works like a charm! I also pulled out some rainbow colors from my set of Karin Brushmarkers. I started by saturating my watercolor panel with water and dropping in color using the markers. I moved the color around with my brush to get it just the way that I wanted it.
I set that panel aside to dry while I worked on the hearts. I began this portion of the project by adhering the stencil to a panel of Neenah Classic Crest 110lb cardstock using masking tape. I then used a palette knife to spread Picket Fence Studios Snowdrop Paper Glaze over the stencil. That also had to be set aside to dry. Don’t forget to wash your stencil and tools right away, so as not to ruin them. Once the watercolor panel was dry, I splattered it with some Royal Talens Amsterdam Titanium White Acrylic Ink. I love this ink because it’s the perfect consistency for splattering and it stays a nice bright white.
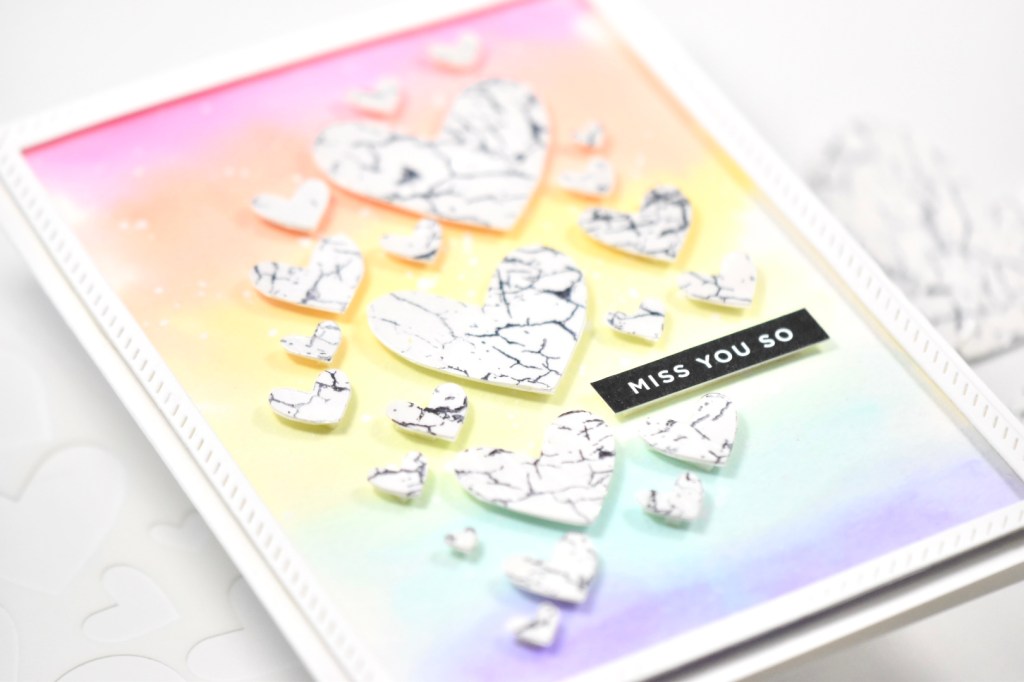
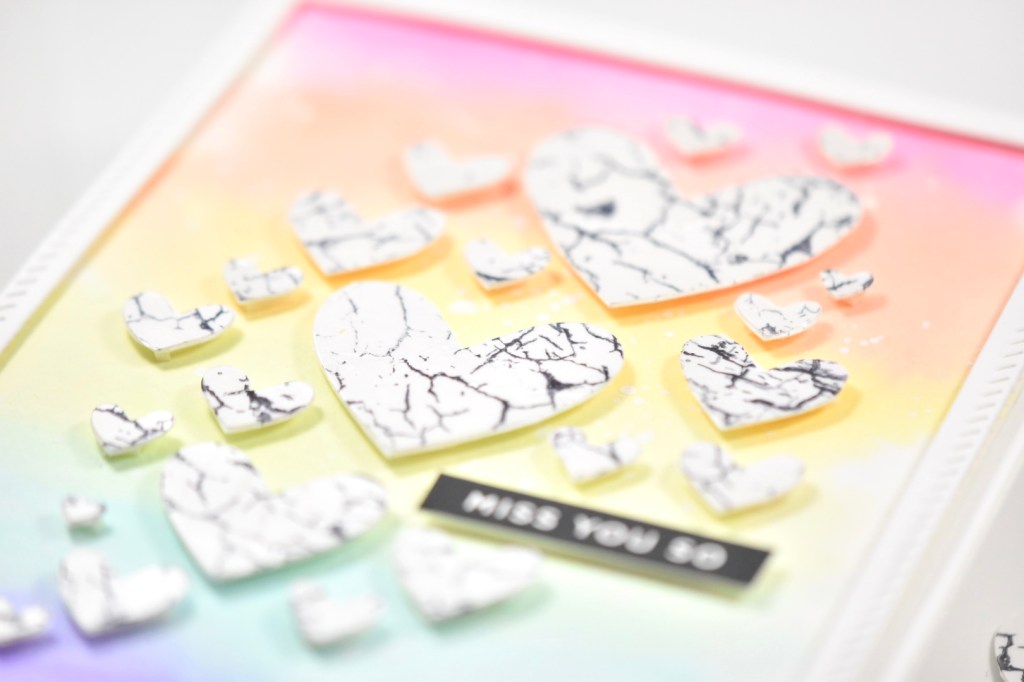
Now that the Paper Glaze panel was dry, I placed it in the Misti and proceeded to stamp the SSS Crackle Background over the glazed hearts using VersaFine Onyx Black Ink. I did run my heat tool over the stamped crackle just to heat set it so that it wouldn’t smear. Then … I fussy cut all of the hearts! Well, some were too tiny to cut, but I cut all the ones that I could, and put 3M Foam Tape on the back of them.
I used the PinkFresh Studio Stitched Rectangles Die to cut a frame and adhered that to my watercolor panel using foam tape as well. I then placed all of the hearts atop the watercolor panel along with the SSS Reverse Sentiment Strip Miss You So. This was then adhered to my card base, which is Neenah 110lb.
That finishes this project, and I love how it turned out! I love the idea of using your stencils in a different way by cutting the design out. It’s so unexpected! Anyhoo, I hope you enjoyed this project, and I hope it sparks some inspiration in you to look at your stencils in a new way! Don’t forget to check out the entire new Rainbows release from Simon Says Stamp!
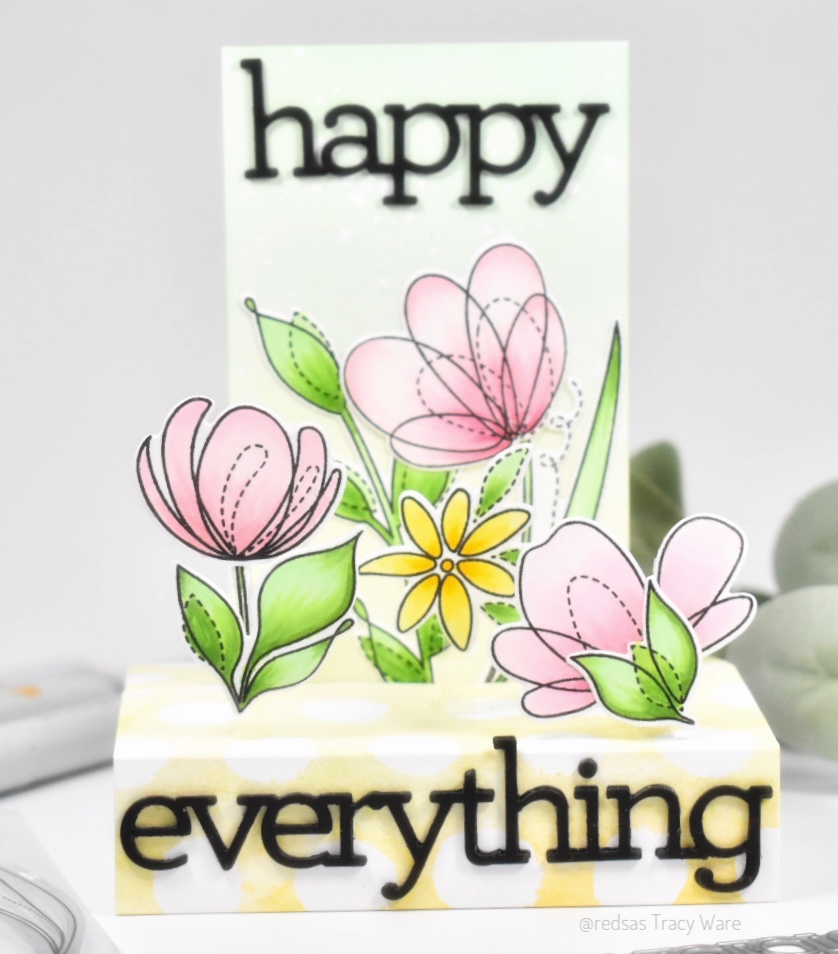
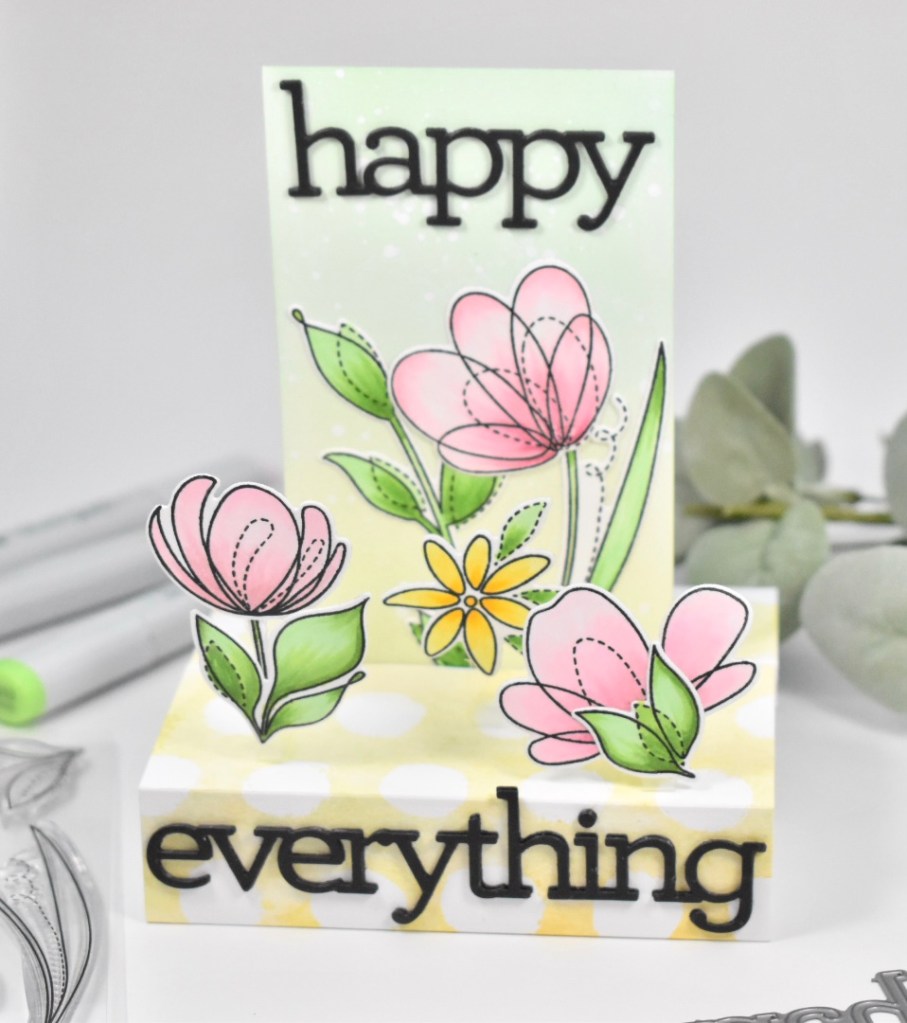
Hello Friends! Hope you’re having a fabulous day! Thanks for joining me today for this 3D card featuring the new 3D Card Die from the latest Rainbows release from Simon Says Stamp! These cards are just too dang cute! I’ve had so much fun making 3D cards using this die! So let’s take a look at the card!
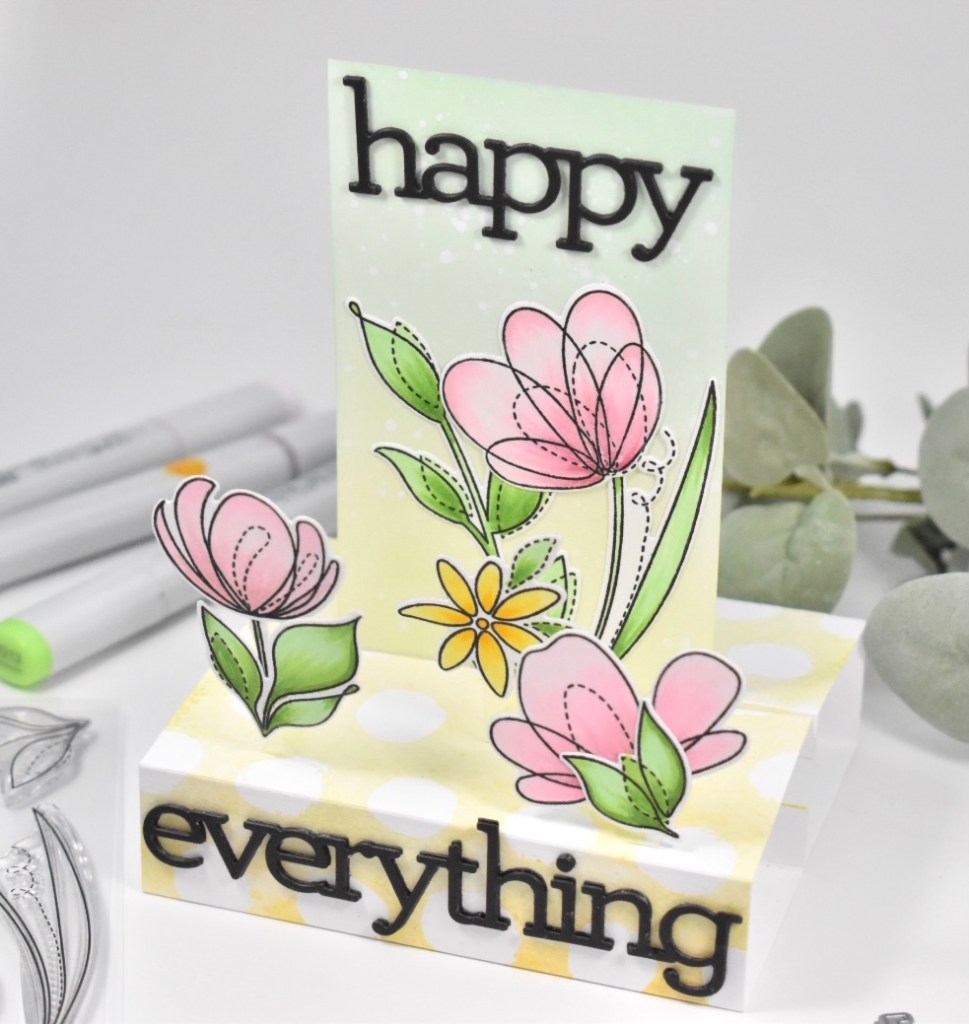
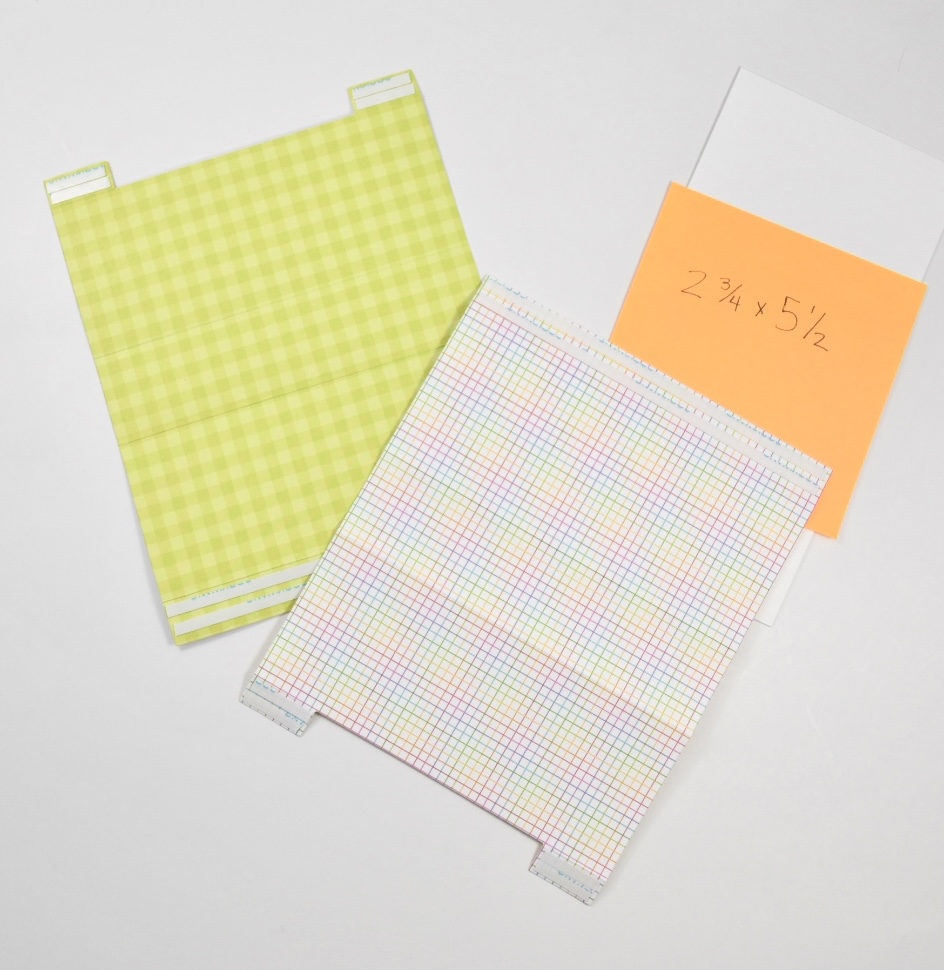
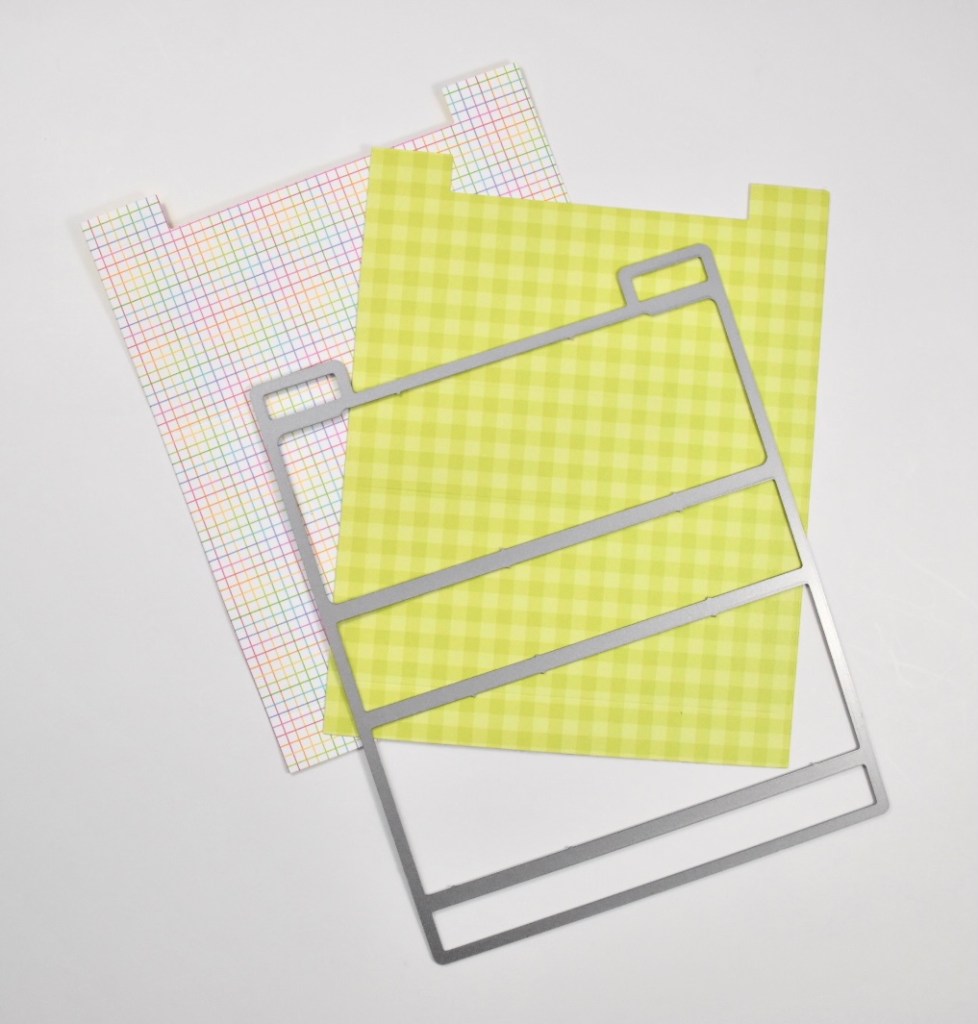
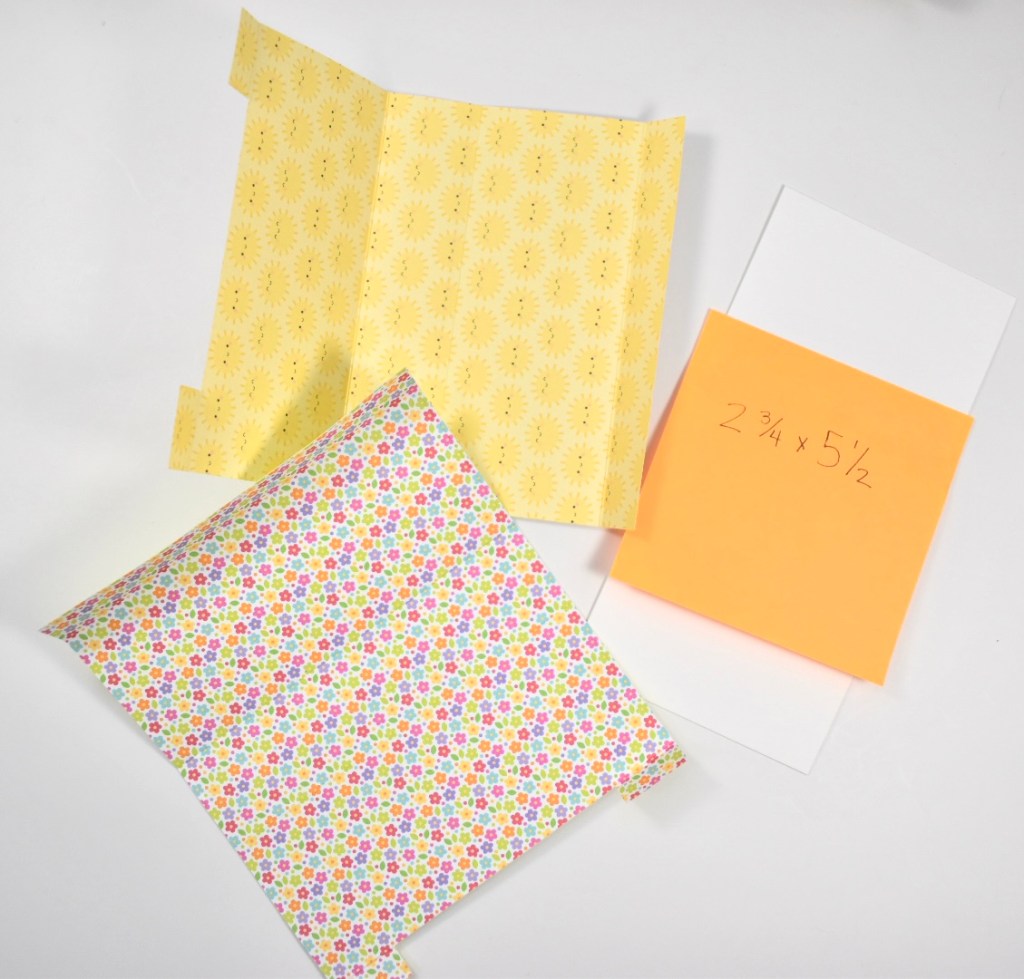
To begin this project, I die cut two sheets of patterned paper from the PinkFresh Studio Celebrate Collection using this new 3D Card Die from Simon Says Stamp. These two cut papers will make the box base for your card. You will also need to cut a piece of cardstock to 2 3/4″ x 5 1/2″. This piece will be the decorated piece that stands up from your box. I chose to use Neenah Classic Crest 110lb cardstock for the cardstock piece. Once this was cut, I used PinkFresh Studio Sky Blue and Fresh Pear inks to apply some light ink blending over the panel. I then added some white splatter using Royal Talens Amsterdam Titanium White Acrylic Ink.
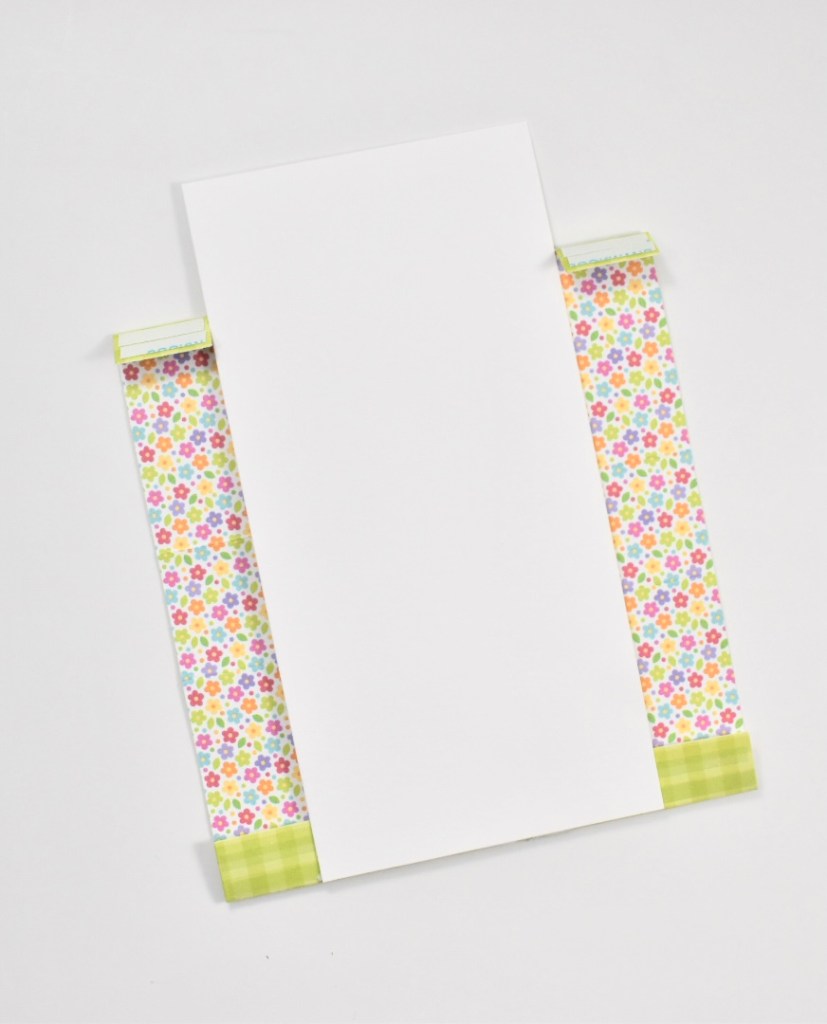
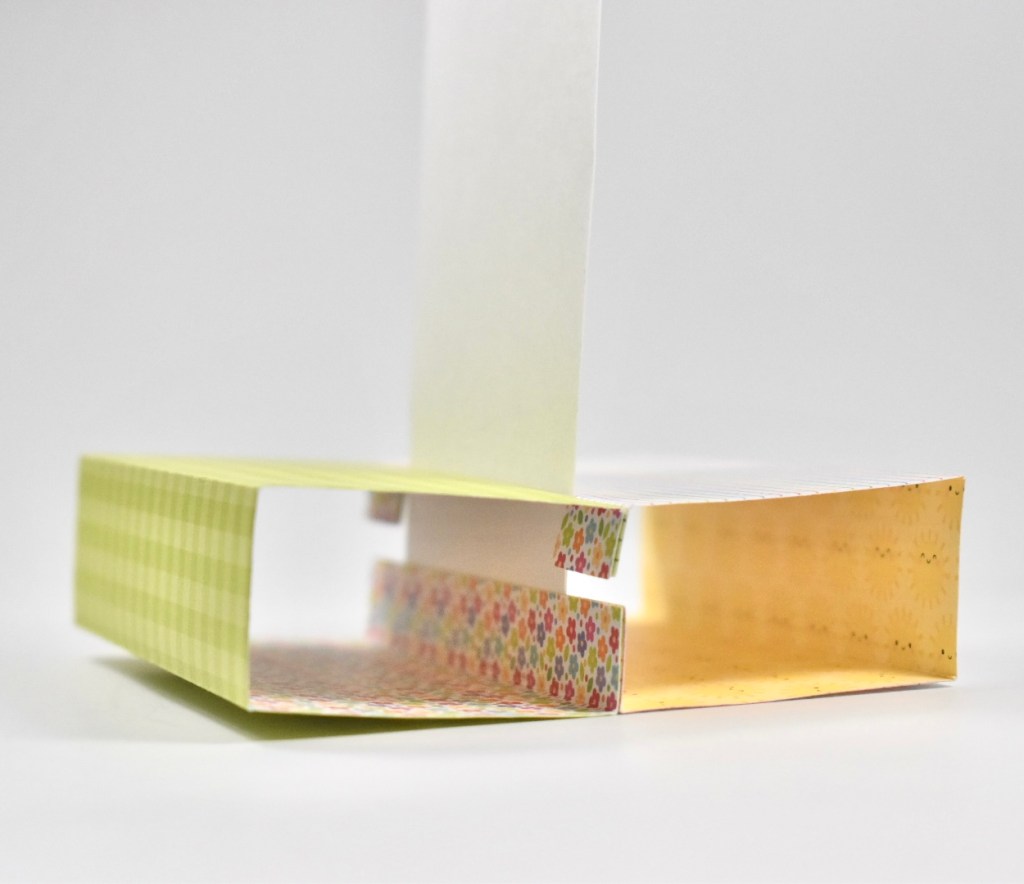
To assemble the 3D Card, you first need to fold the paper along all of the score lines that the die creates for you. See additional pics below for detailed assembly. You’ll then place 1/8″ Scor-Tape on the four small tabs (two on each panel) and also the smallest fold on the bottom of both panels. The Scor-Tape will be adhered to what will be the outside of your box. Pull the release tape on the bottom of one panel and fold it up so that you can line up the cardstock panel along the bottom edge and nestle it between the two notches. Remove the release tape on the other panel and line up the bottom edge of the panels securing the panel between them. You’ll then remove the release tape on the four tabs and fold those over to adhere them together. For a great detailed video on the card assembly, you can also check out this video from Simon Says Stamp.
Place Scor-Tape on the four tabs and the bottom fold. The tape will be placed on what will be the outside of your box.Fold up bottom flap and remove the release paper and adhere the cardstock panel as shown. Nestle it between the two top tabs.Remove the release paper on the bottom fold of the other panel and attach as shown. Remove release paper on the four tabs and adhere those together.Here is a visual of how the inside should look assembled. The Scor-Tape on the bottom folds holds the cardstock panel in place.
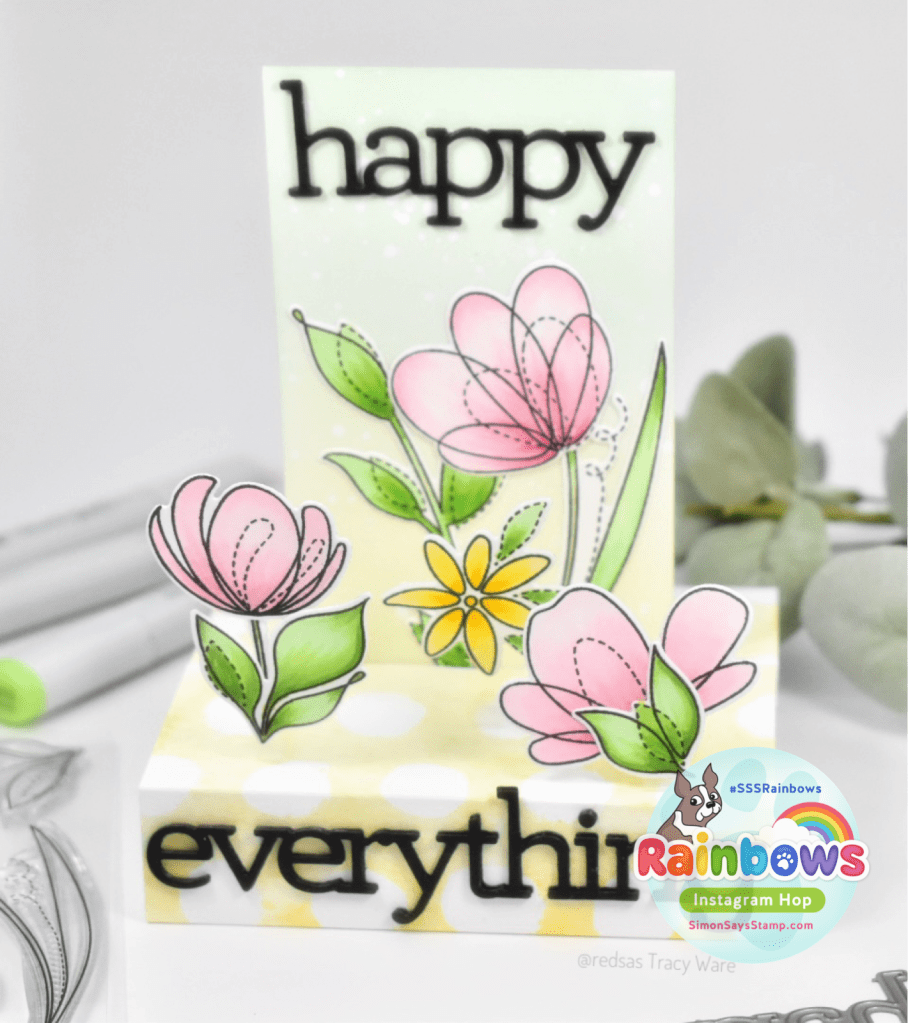
I adhered the larger pink flower and leaf to the decorated panel using Craft Tacky Glue. I then cut three thin strips of acetate, trimmed them down and folded them into an “L” shape. I adhered the other flowers to the top of the acetate using the same Scor-Tape and adhered the bottom the top of the “box” as shown. I really loved using the acetate because it took the idea of a 3D to a next level!
I chose the SSS Happy Everything sentiment for this card and die cut the outline portion three times from black cardstock and glued those together. I then glued the “happy” to the top of the decorated panel and the “everything” to the front of the 3D card.
That finishes this project for today! Thank you so much for stopping by, and I hope this card inspires you to get crafty in your space! Don’t forget to check out the entire Rainbows release from Simon Says Stamp! These 3D cards are super fun, and I hope you’ll give them a try! There’s a fun Instagram Hop going on over there, so stop by and check it out! There are prizes to be won! Who doesn’t love prizes right?!?
Hello there crafty friends! Hope you are doing well and enjoying your day! I’m seriously enjoying this new Fading Hearts Stencil from the latest SSS release, Rainbows! I’ve had so much fun using my pastes and gels with this one! So, let’s hop right into today’s project!
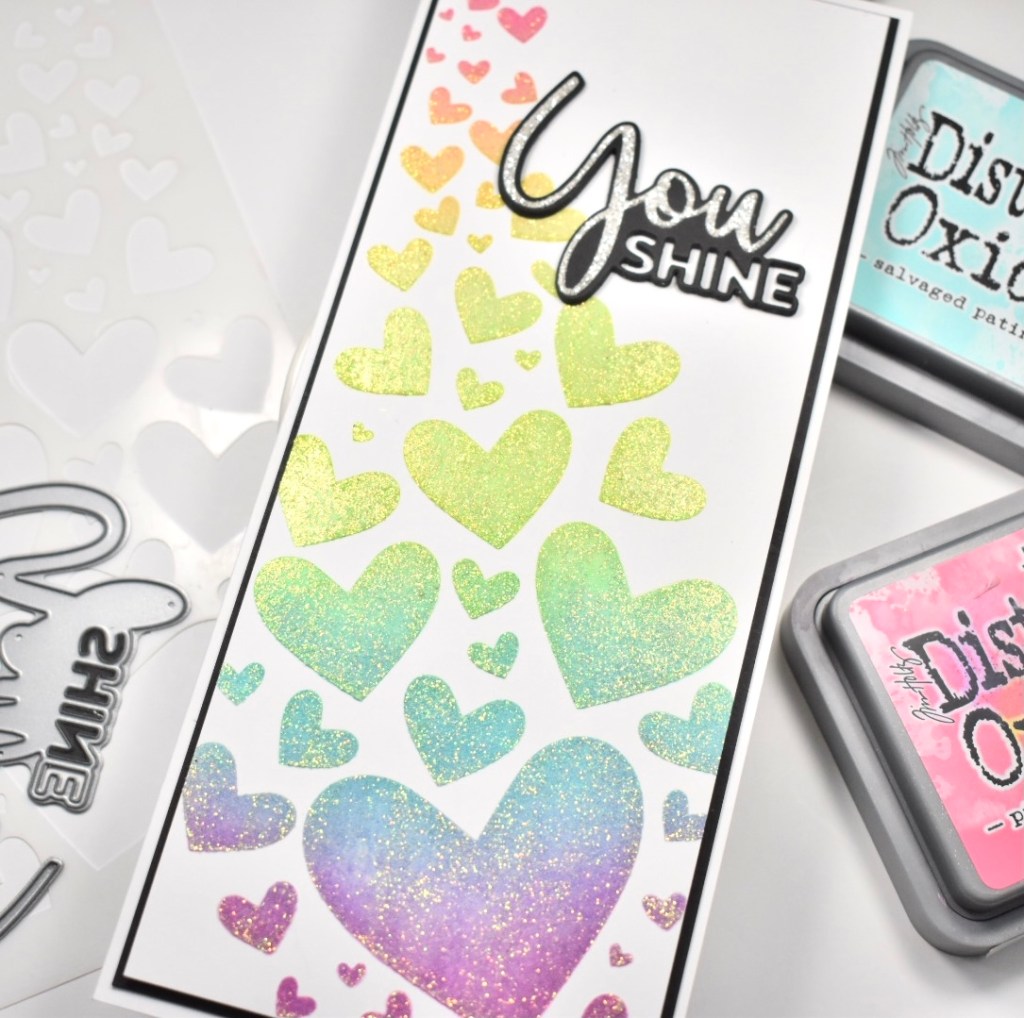
To begin, I cut a slimline panel of Neenah Classic Crest 110lb cardstock and adhered my stencil to it using masking tape. I then got to town ink blending over those hearts using Distress Oxide Picked Raspberry, Fossilized Amber, Twisted Citron, Peacock Feathers and Seedless Preserves. I think this combination of colors makes a super pretty rainbow! Anyhoo, moving on, I spread some iridescent Gina K Glitz Glitter Gel over my ink blended hearts and set that aside to dry. In hindsight, I should have let those inks dry before applying the gel, but live and learn, ya know!
While that was drying, I worked on my sentiment. I opted for the SSS You Shine die cut, because my hearts are glittery, shiny, sparkly and it just seemed fitting! I die cut the shadow portion of the sentiment three times from black cardstock, and die cut the you portion once from glitter cardstock and adhered all of those together using Craft Tacky Glue.
I glued my sentiment directly to my heart panel, and adhered that to a black panel using double-sided tape. That was then taped to my card, which is also Neenah 110lb, using 3M Foam Tape.
There you have it! A super simple, yet beautiful slimline card! I hope you’ll stop by and check out the entire Rainbows release! Let me know your favorite products in the comments! Have a wonderful day, and don’t forget to stay awesome!
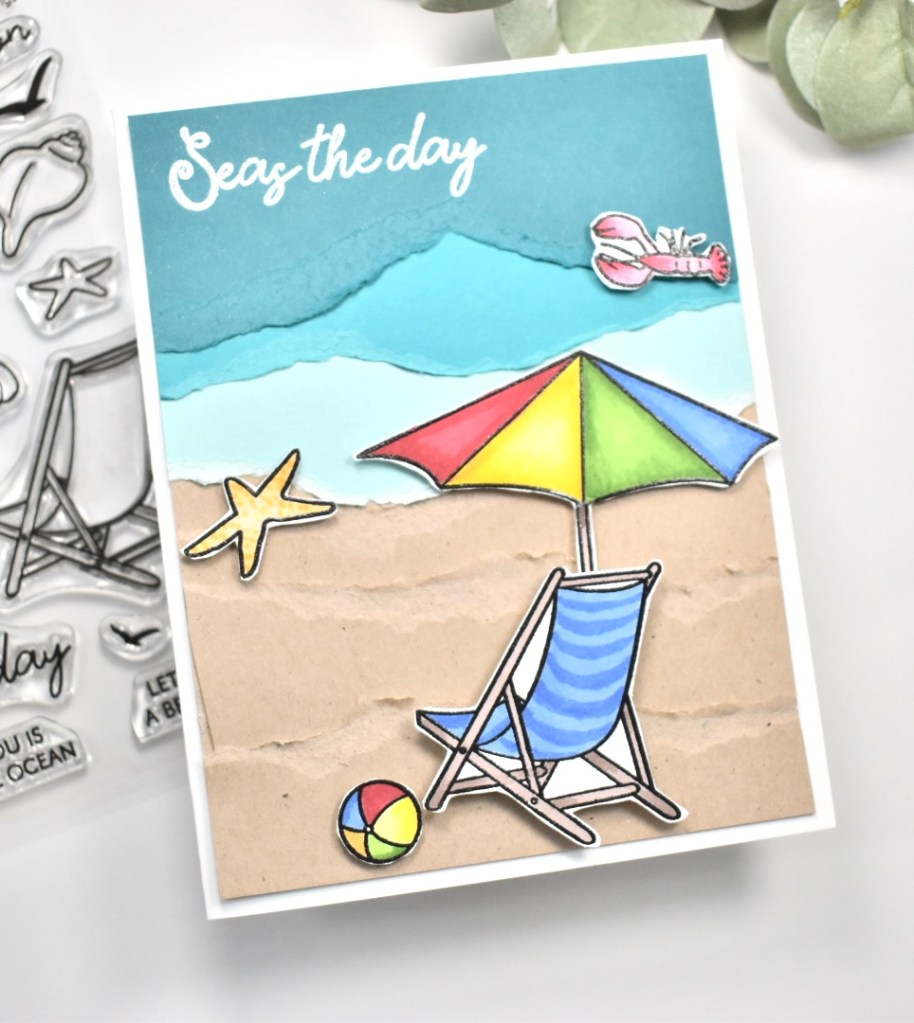
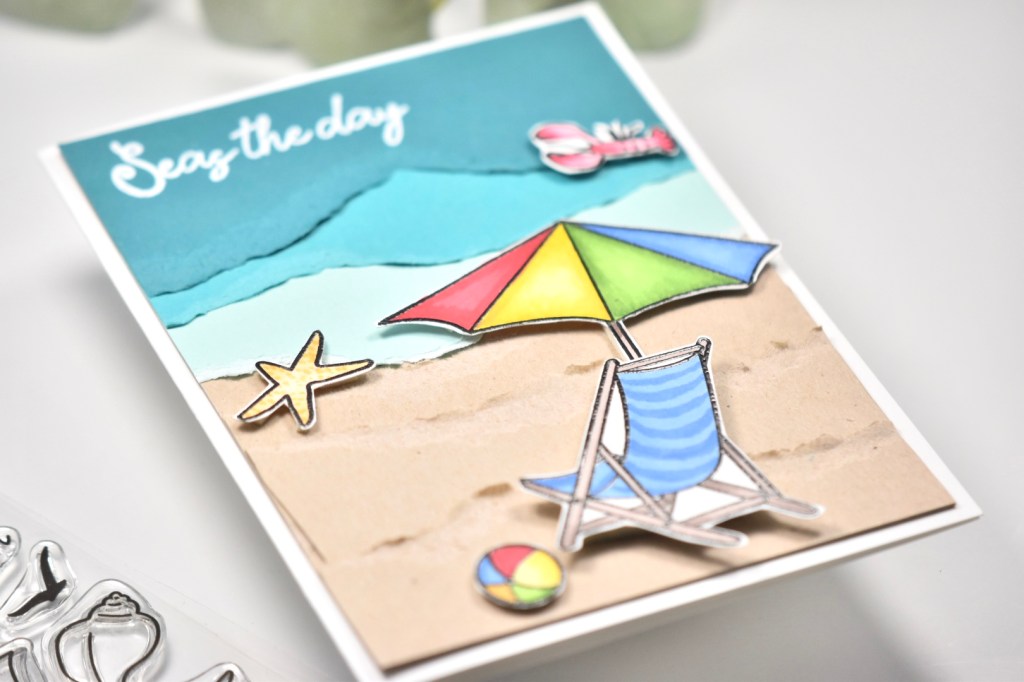
Hey there and welcome back! Who needs a beach day? Who needs to dig their toes in the sand? That sounds pretty awesome to me, to be honest! Whilst dreaming of the beach, I used the new Seas and Greetings stamp set from the latest Simon Says Stamp release, Rainbows.
As soon as I saw this set, I knew that I wanted a torn edge background to mimic the water and sand, so that’s exactly what I did! But before all of that, I needed to get my beach elements ready. I went ahead and stamped the chair, umbrella, ball, lobster and starfish using VersaFine Onyx Black Ink and heat embossed those using Ranger Clear Embossing Powder. I colored them all with Copic Markers B23, B26, R37, R46, YG13, YG17, E71, E74, E79, Y08, Y11, Y15, YR000, YR01, YR21, YR23, YR24, RV10, RV11, and RV29. Once all the coloring was finished, I fussy cut all of them out.
Moving onto my background, I cut a panel of Neenah Classic Crest 80lb cardstock and pulled out some blues, as well as some kraft cardstock. I’m pretty sure some of these blues are from Concord and 9th, and the other is from Simon. Anyhoo, I began tearing my papers and arranging them to get a good background. I adhered these strips to the panel of 80lb cardstock using Craft Tacky Glue.
That wraps up this cute beach scene card! I hope you enjoyed it, and I hope it inspires you to get crafty! Thanks for stopping by today, and don’t forget to check out the full Rainbows release from Simon Says Stamp!
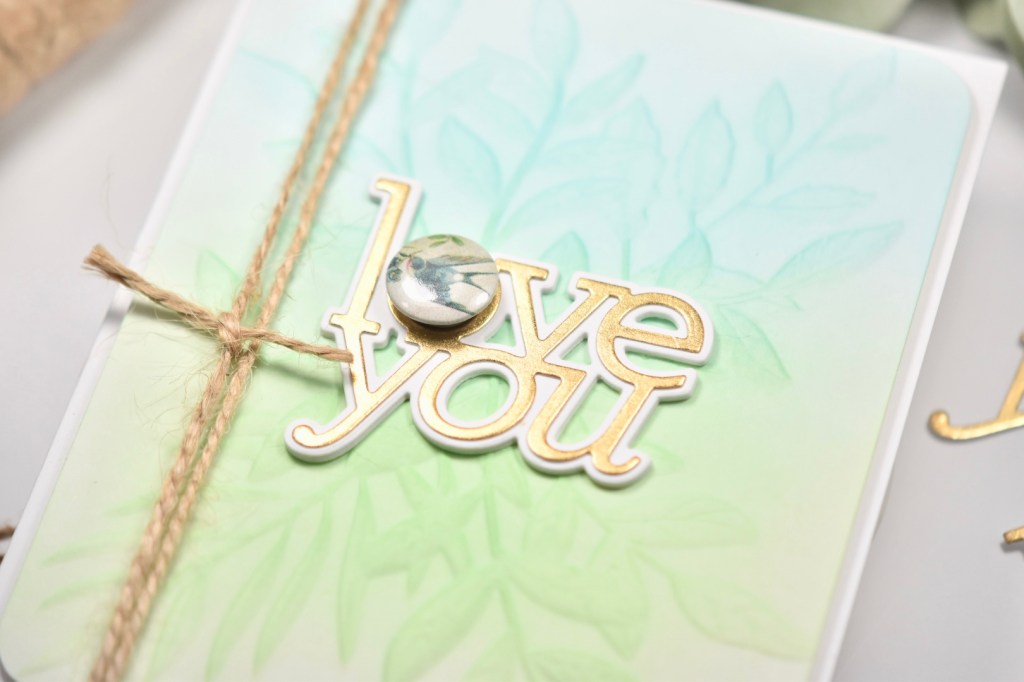
Hello friends and welcome back! Thanks for stopping by! I’m loving the new Rainbows release from Simon Says Stamp! Today’s project is featuring the Leaf Bundle Embossing Folder. Embossing folders are such an under used product, in my opinion, so I’m glad to see so many companies releasing awesome folders lately. Let’s get into today’s project.
I began my project by cutting a panel of Neenah Classic Crest 110lb cardstock and placing it inside the folder to run through my die cutting machine. I then used PinkFresh Studio Mint and Ocean Breeze inks to do some ink blending over the embossed panel. I used a corner rounder on the panel for something a little different and to add interest.
I cut the SSS Love You shadow portion of the die three times from Neenah 110lb and cut the sentiment once from gold cardstock and adhered all of those together using Craft Tacky Glue. This was then glued directly atop the embossed panel. I wrapped some twine around the panel for added interest, and also attached a piece of Tim Holtz Idea-ology in the center of the “O.”
I adhered 3M Foam Tape on the back of the panel around the twine, and attached that to my card base, which is Neenah 110lb.
That finishes this project. I appreciate you stopping by today! How often do you use embossing folders? What are your favorite ones? I would love to know in the comments. Don’t forget to check out the entire Rainbows release for some awesome new products!
Hello there crafty friends! I hope you are all doing well and enjoying your day! I’m still playing with goodies from the new Rainbows release from Simon Says Stamp! The Fading Hearts Stencil is one of my favorites from this release, so let’s jump right in!
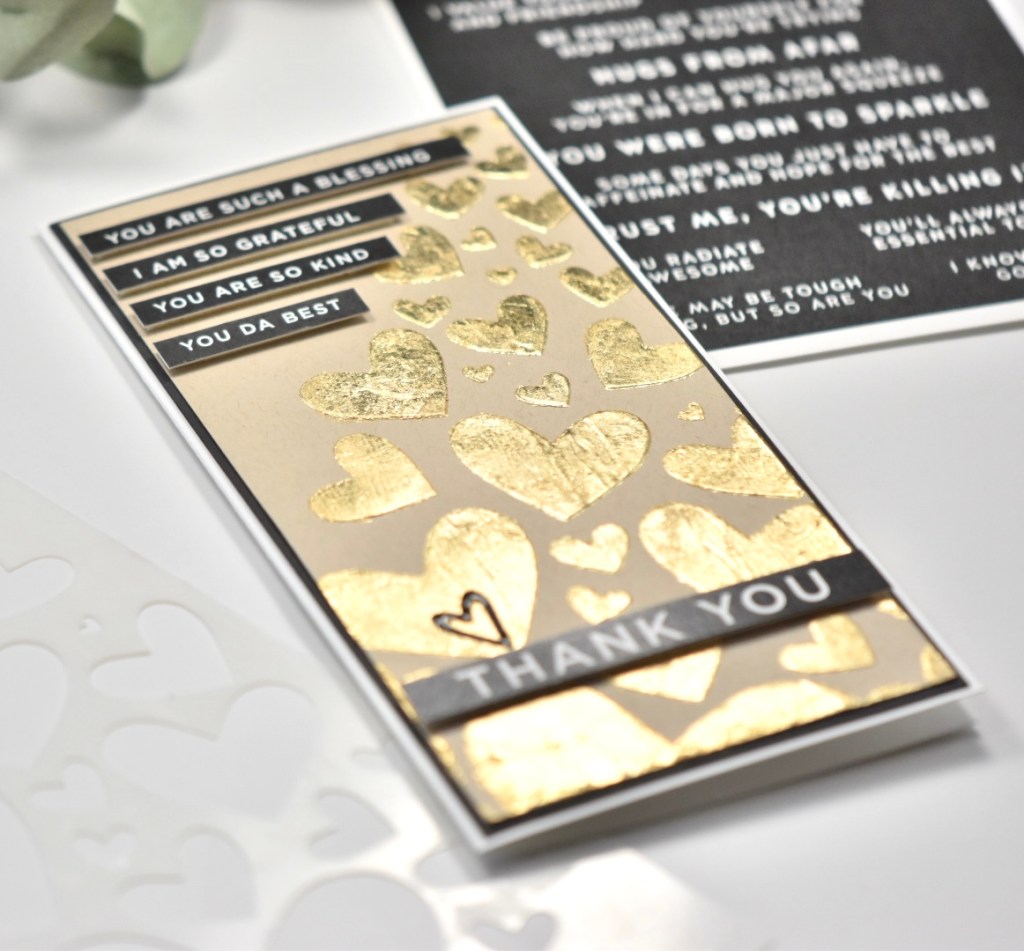
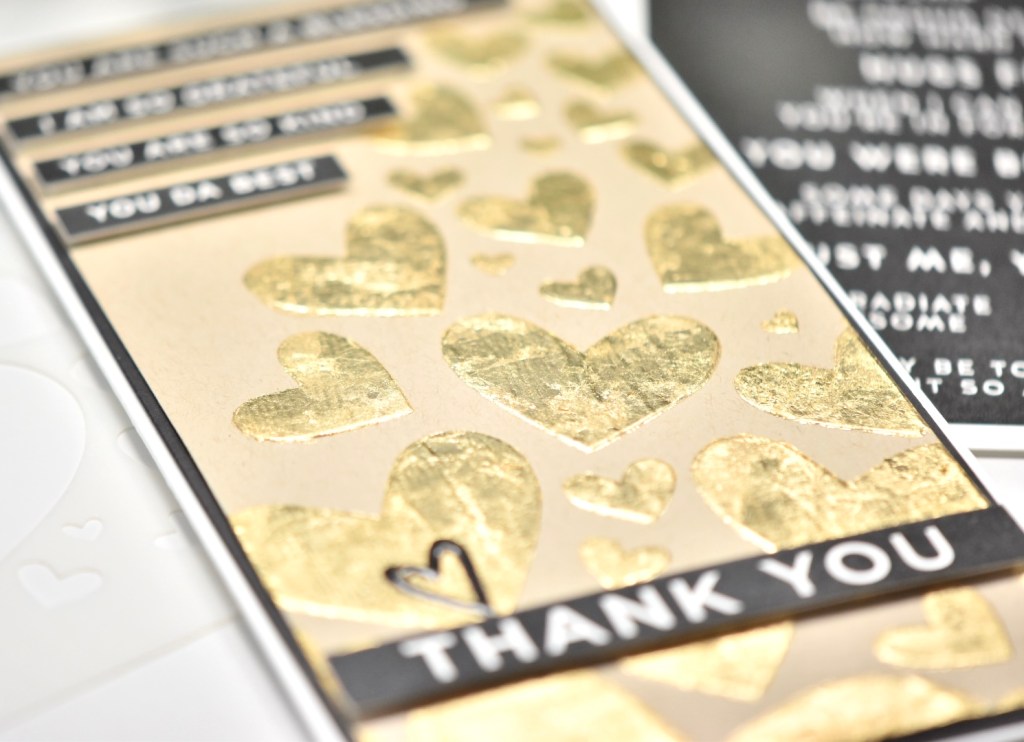
I always tend towards white cardstock, but decided to mix it up with this project by using kraft cardstock instead. I began this mini slimline card by cutting a panel of kraft and adhering my stencil to it using masking tape. I then used ThermoWeb Deco Foil Transfer Gel to get a good layer on my cardstock before removing the stencil. Don’t forget to wash your tools right away, so as not to ruin them. Did I sound like your mom there? I let the panel dry for a few hours while I continued to figure out my sentiment.
Once my panel was ready, I used Tonic Studios Nuvo Gold Gilding Flakes on the hearts. I just put some flakes on and rubbed them around with my finger until all of the hearts were covered, beautiful and shiny! I decided on some SSS Sentiment Strips to adorn this card, so I trimmed those down and adhered them to my panel using 3M Foam Tape. I also found a cute, black heart in my sticker stash to add as well.
I adhered my kraft panel to a larger black panel, because I love that contrast. I then adhered those to my card base, which is Neenah Classic Crest 110lb cardstock.
That does it! Super duper simple card with lots of shiny impact! Don’t forget to check out the new SSS Rainbows release! Lots of pretty things!
Thanks so much for stopping by, and don’t forget to stay awesome!
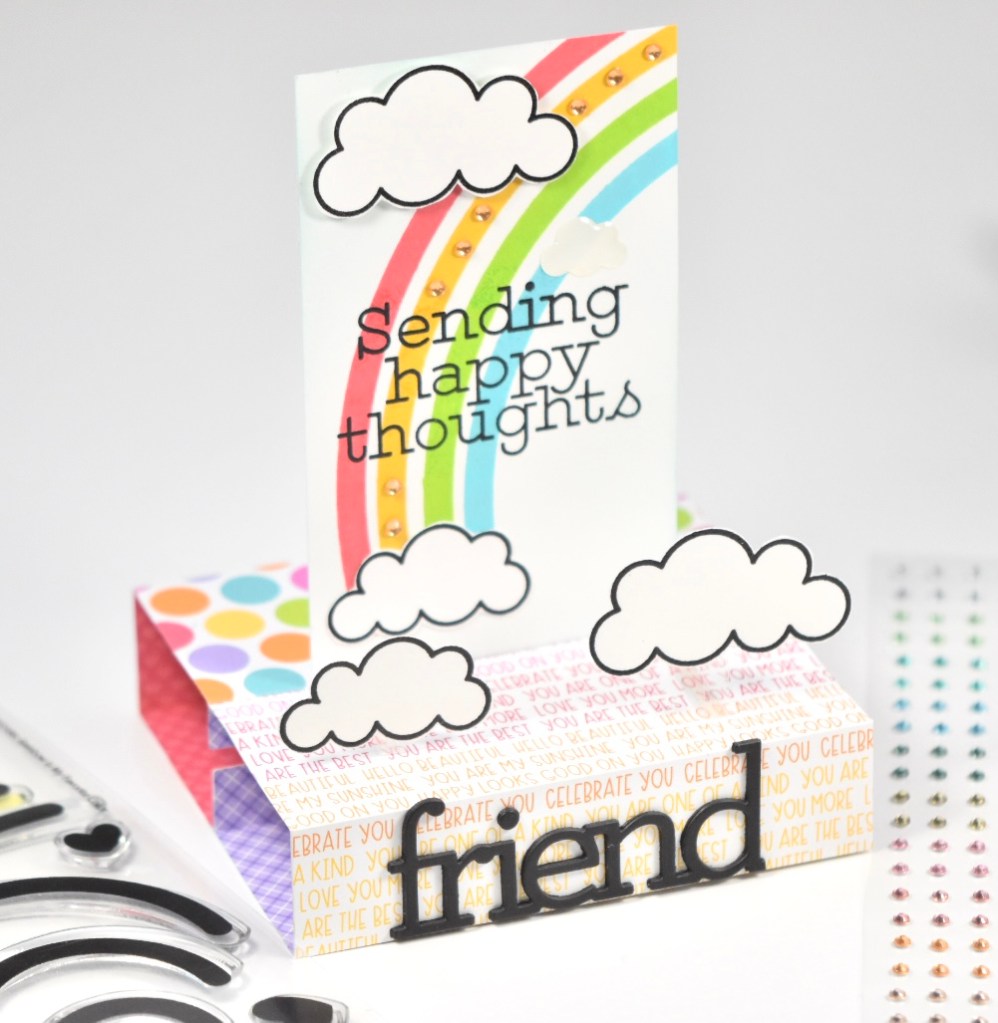
Hello, hello crafty friends! Hope you are doing well! Thank you for stopping by! Simon Says Stamp’s new Rainbows release is live! Have you checked it out yet? What are your favorites? Today, I’m sharing a card that I created using the new 3D Card Die, and I think that it turned out super cute! I don’t often say that about my own cards, by the way. Anyhoo, let’s get into today’s project.
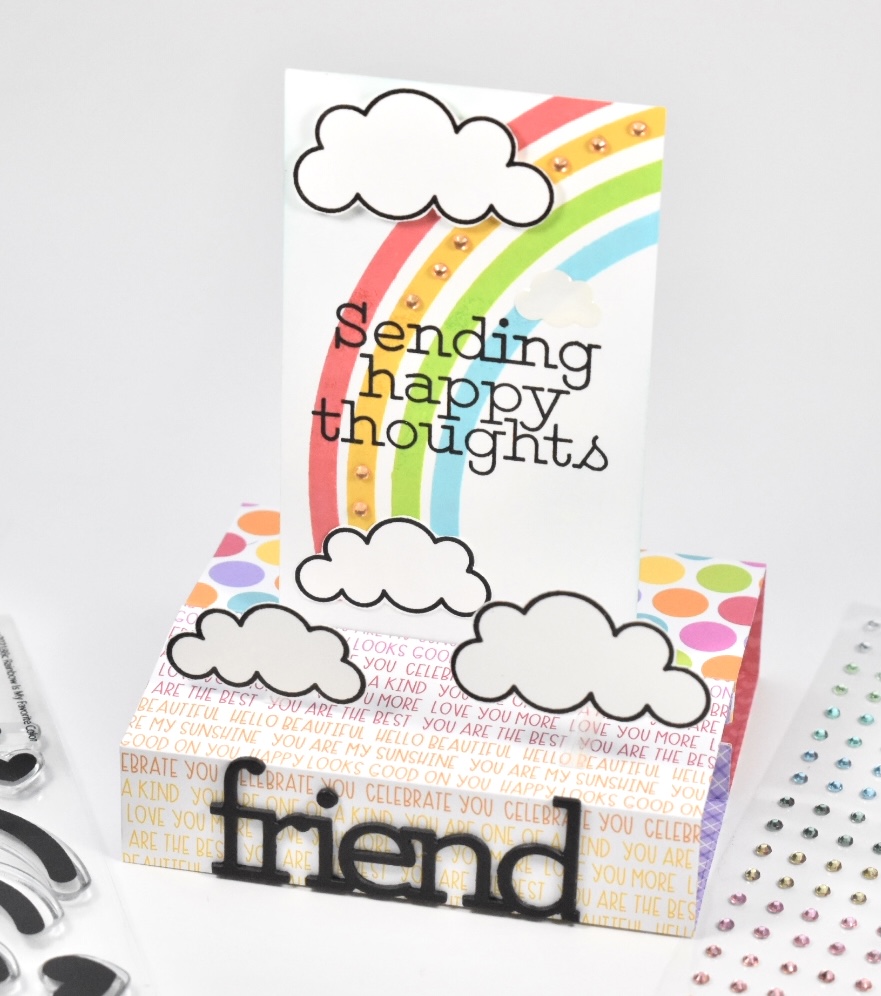
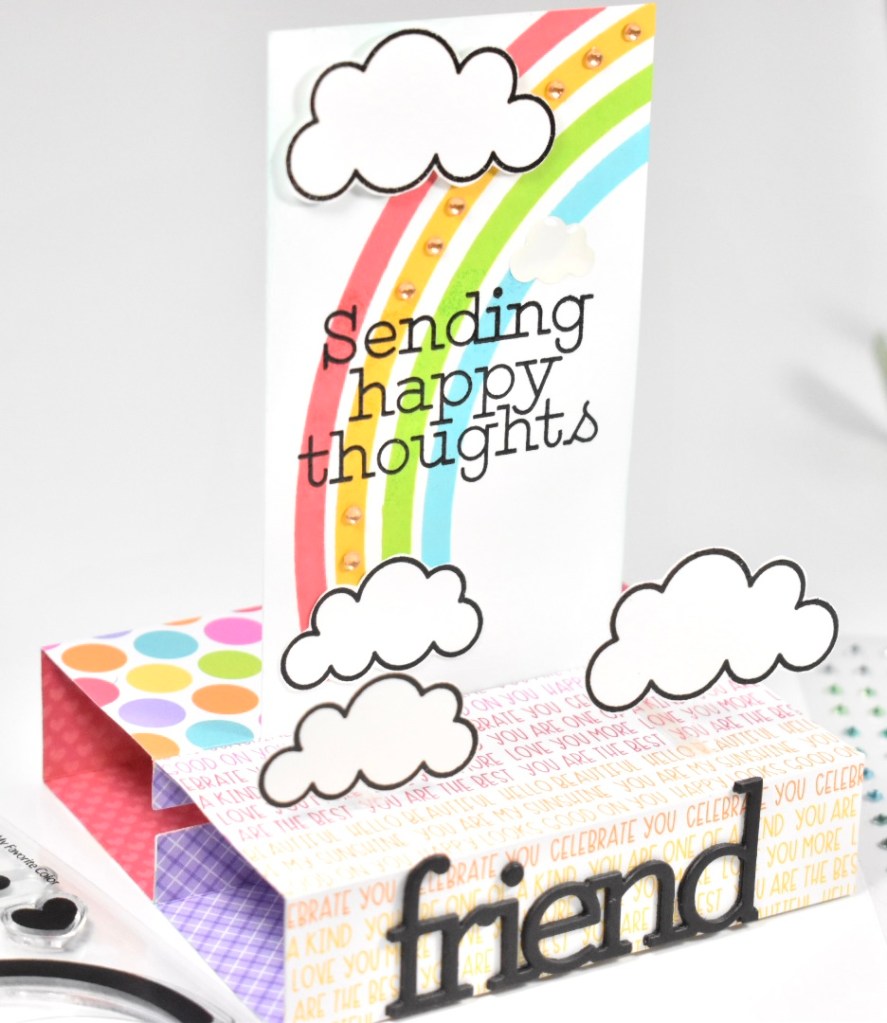
I also stamped some of the clouds from this same set in VersaFine Ink, heat embossed them using the same clear embossing powder, and fussy cut them. The top cloud is adhered with 3M Foam Tape. You have to be careful making anything on this type of card dimensional, because it could hinder the closing of the card. Hence, why this cloud was placed at the very top of the panel, with space available to tuck the closed card under it. My second cloud was adhered directly to the panel using Craft Tacky Glue. Be sure to measure an approximate area for the bottom cloud .. You don’t want to glue it too low, or you won’t be able to see it, as the very bottom of the panel will be inside the “box.” I’m going to include some process pics to help visualize the assembly of this card. You can also check out this video from SSS that is super helpful, https://www.youtube.com/watch?v=Qbe0xlfGC5I.
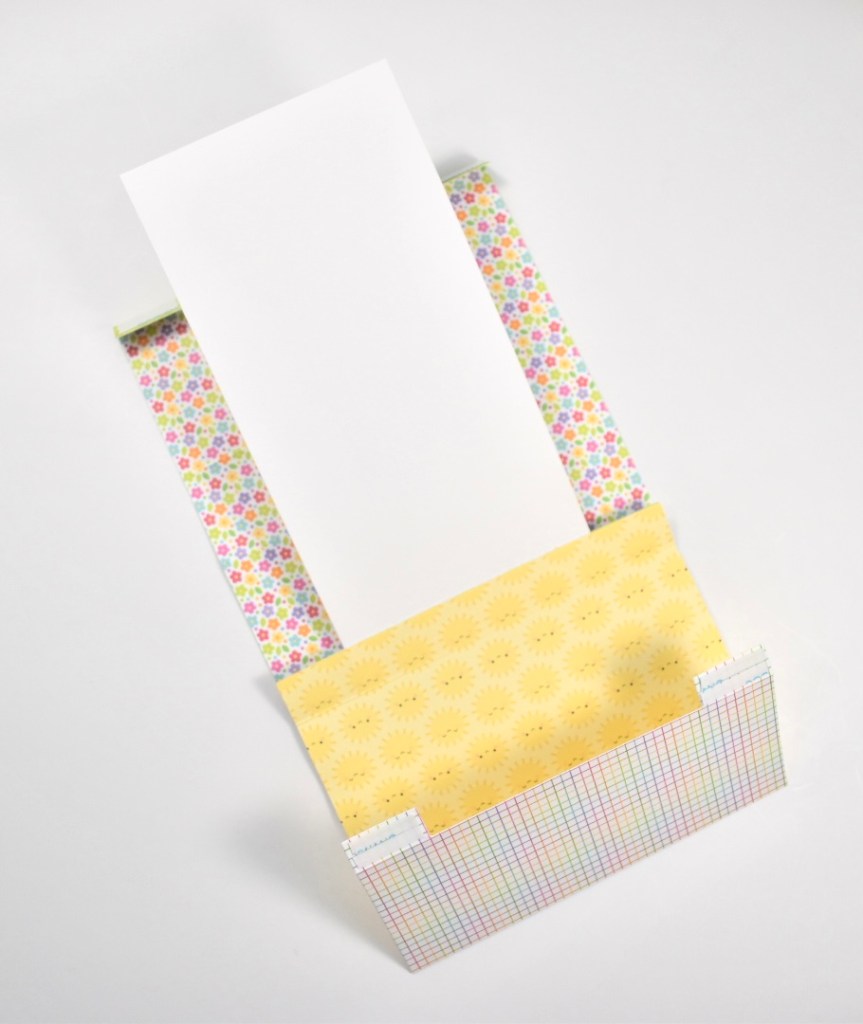
Die cut patterned paper panelsFold all score lines that the die creates for you
To assemble this card, fold all of the score lines that the die creates for you on the 3D Card Die. I used 1/8″ Scor-Tape to place on the flap of the smallest fold at the bottom of both panels, and on all four of the small tabs at the top. The Scor-Tape will be placed on the side that will be the OUTSIDE of your “box” so to speak. Remove the release tape on the bottom portion and fold the panel so that the decorated cardstock panel fits inside of the notched area and adhere it using that Scor Tape. Then place the other panel atop and the other side. Remove the release tape on the tabs and match those up.
Add Scar-Tape to four small flaps and small bottom flaps as shownFold up the bottom flap, remove release paper on the bottom flap of one panel and nestle the cardstock piece in the notches at the top as shownRemove the release paper on the other bottom flap and kiss those flaps together, nestling the cardstock piece in between them as shownRemove the release paper on the four small tabs and kiss those together as shown. This is how the inside looks assembled. The small tabs keep the cardstock piece from moving around, yet lets the card fold closed. The bottom of the cardstock piece is held in place with the Scor-Tape on those bottom flaps
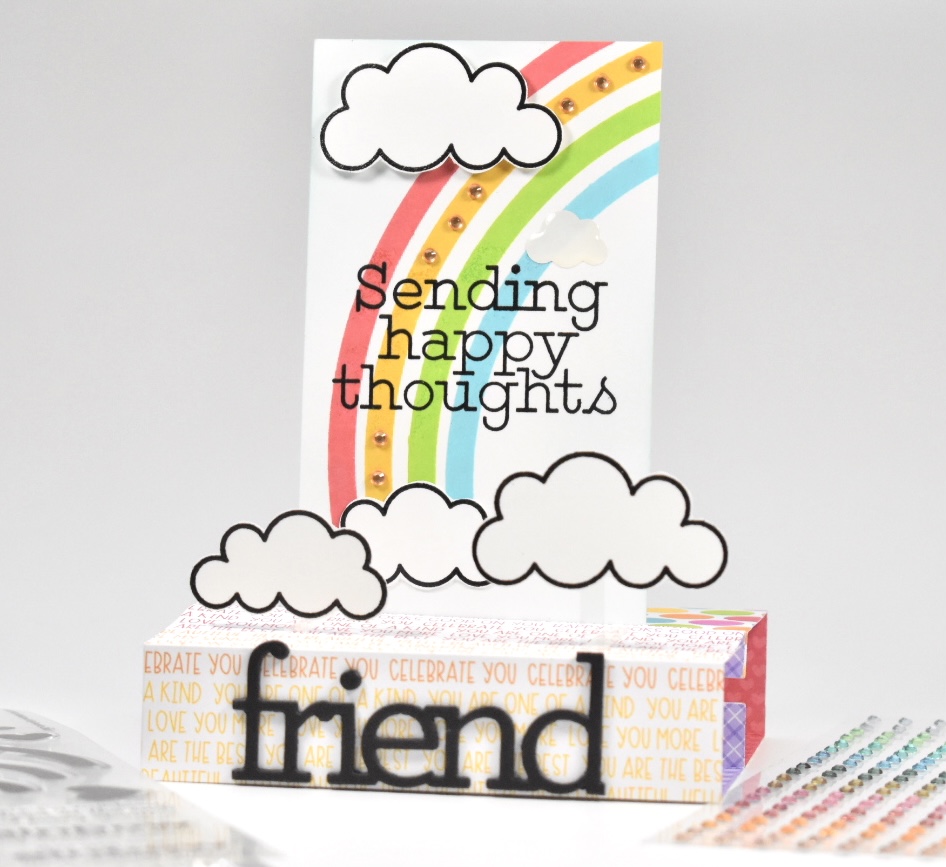
Once my card was assembled, I attached some orange gems from the Memory Box Fairy Jewels, which are also include in the June Card Kit. I also attached one of the clouds from the DoodleBug Design Chasing Rainbows Shape Sprinkles. I attached the last of my fussy cut clouds to the top of the card using acetate and Scor-Tape. Using the acetate to attach these clouds makes them appear to be floating, which I kinda liked. It added an interesting element to this card.
To finish up this card, I die cut the SSS Friends sentiment three times from black cardstock and adhered those together, trimmed off the “S”, and glued it to the front of the card as shown.
I hope you enjoyed this project, and I hope it inspires you to get crafty! I had so much fun making this card, and I love the unexpected clouds on the acetate to give it even more of a 3D feel. Don’t forget to check out the entire Rainbows release! There’s so much good stuff!
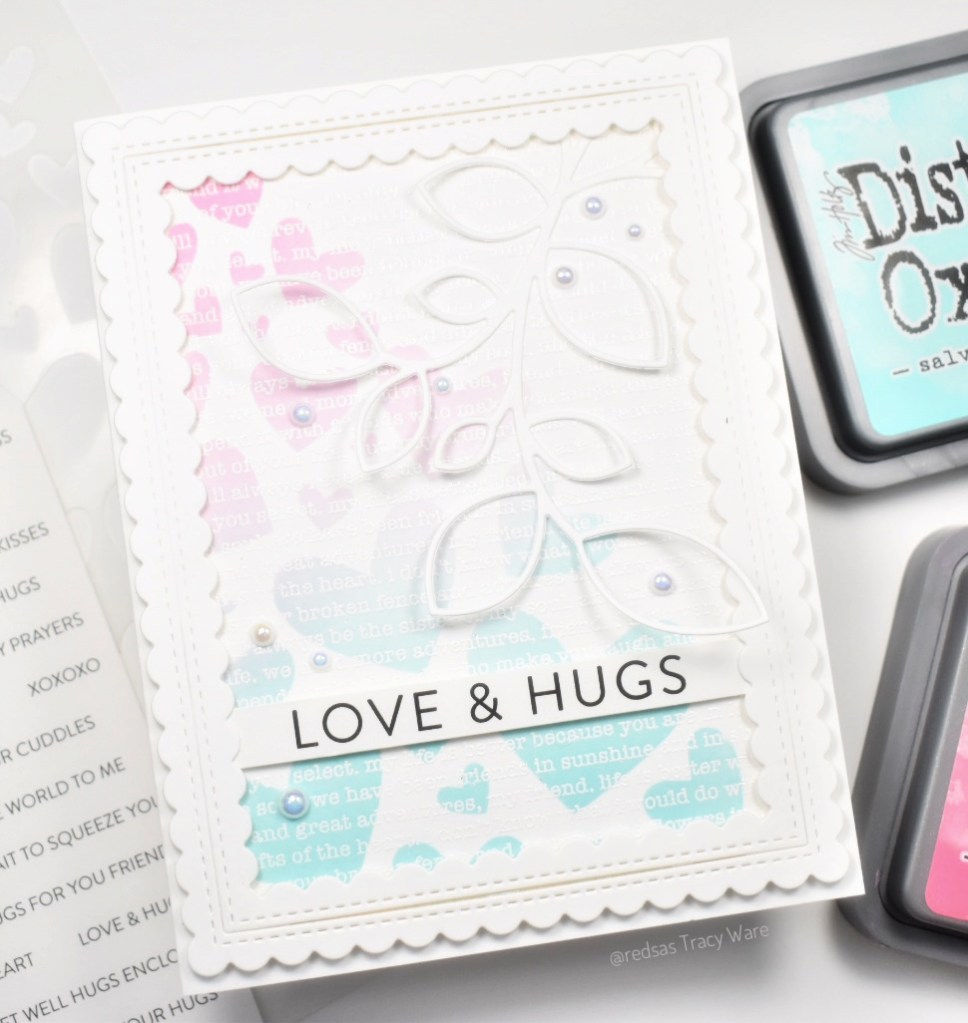
Hey! Hey! Hey! How’s it going? Have you checked out the new Rainbows release from Simon Says Stamp? I’m showcasing the new Fading Hearts Stencil on today’s project, so let’s jump right in!
I adhered this SSS sentiment strip to the panel using foam tape as well, tucking the edges slightly under the frame. Once everything was adhered, I added some Studio Katia Arctic Breeze Pearls for that much needed bling. Everything has to have bling, right?! My panel was then adhered to my card base, which is also Neenah 110lb.
That does it for this project! I hope it inspires you to get crafty in your space! Don’t forget to check out the new Rainbows release, and let me know your favorites in the comments!