Hello Friends, and welcome back! I’m back today with a non-card project featuring the new Joyeux Noel die from the latest Sweet Wishes release. Let’s go ahead and get into the details!

NOTE: all supplies are linked in the thumbnails at the end of this blog post.

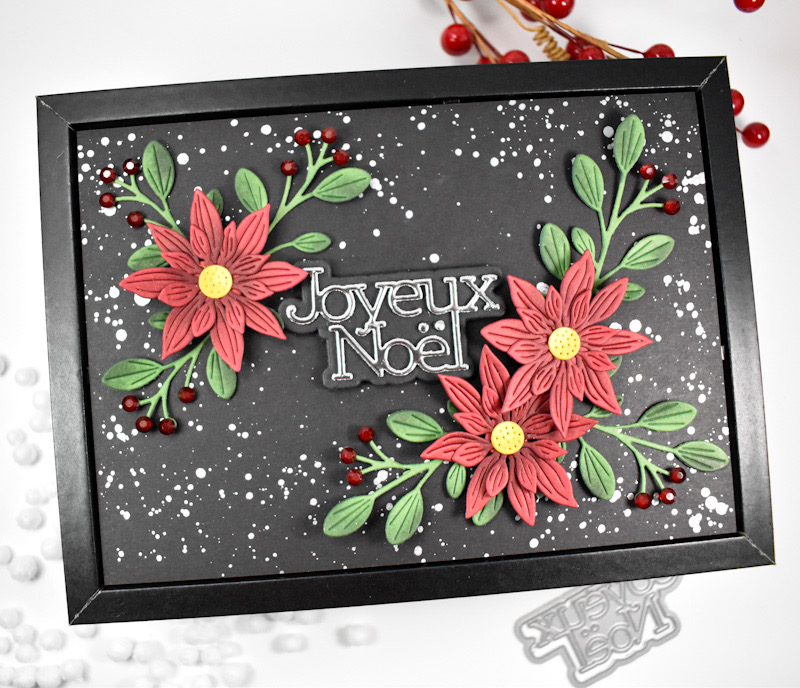
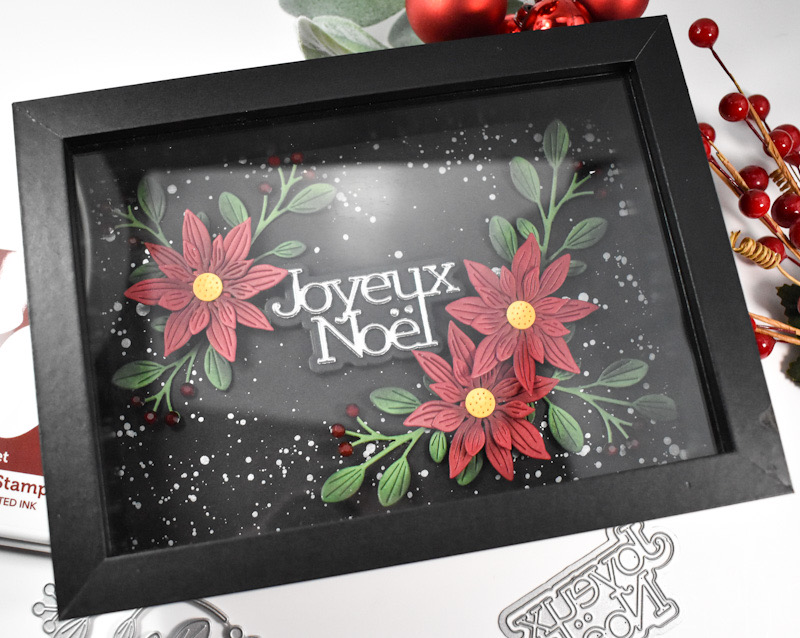
I have been wanting to do a shadow box frame project for a while now, and when I received this die, I thought that I could make a holiday type home decor project. I went to a big box craft store and purchased two shadow frames, one black and one white, because I wasn’t sure which color that I would want to use. Plus, they were 50% off, so I was basically getting two for the price of one, and who doesn’t love a good deal, right?!

My first step in this project was cutting the sentiment once from silver cardstock and three times from black cardstock. I also went ahead and cut the shadow portion twice and adhered all of those pieces together using liquid glue.

Next, I cut the Rustic Layering Flower from red cardstock, and cut the centers of the flowers from yellow cardstock. While I was cutting, I went ahead and cut the Budding Branches several times from green cardstock. I did some ink blending on all of these pieces using Cabernet, Honey and Kale inks. Once the ink blending was complete, I assembled the pieces of the flowers and set those aside.

If you know me, you know that I like to add gems in the place of berries, so I added red gems on all of my branches. So, normally you attach things in a shadow frame using pins, but that wasn’t going to work for me, so I cut a black panel the size of the opening and splattered that using silver acrylic ink.
Once that was dry, I began adhering the elements of the frame. The sentiment was adhered in the center using foam strips, the branches were glued in place and the flowers were adhered with foam squares.

That does it for this project. Please note that I did have to remove the glass for some of the photos, because there was too much glare. I hope you enjoyed this project as much as I did! I had been wanting to make a shadow frame for quite some time, and I’m so glad that I finally got around to doing it! I’m ready to make another one! Don’t forget to check out the entire Sweet Wishes release! Thanks for joining me, and I hope you have a fabulous day!

Supply List
Affiliate links used at no cost to you. What does this mean? If you use the links within this post to make a purchase, I receive a small commission, which allows me to continue to post crafty content for your enjoyment. I truly appreciate your support!
Latest Posts
- Simon Says Stamp Braided Greetings

- Together By Design Color Cube Floral

- Simon Says Stamp Cute Duckling

- Simon Says Stamp Watercolor Wild Rose

- Simon Says Stamp Striped Missing You


Lori Spitzer
This is making my eyes pop out like Tom from Tom & Jerry, it’s so good!
Lori S in PA
LikeLike
tracyware333
Thanks Lori! It was a fun one to make for sure. Hope you have a wonderful Friday!
LikeLike