Simon Says Stamp Joyful Wreath

Hello Crafty Friends and thanks for stopping by! There’s an Instagram Hop going on today to celebrate Simon Says Stamp latest release, Handmade Holiday, and there are prizes to be won! Who doesn’t love prizes, right?! I think my favorite product from this release has been the Etched Berry Branch, so today’s project is featuring that, once again! Let’s go over the deets, shall we?

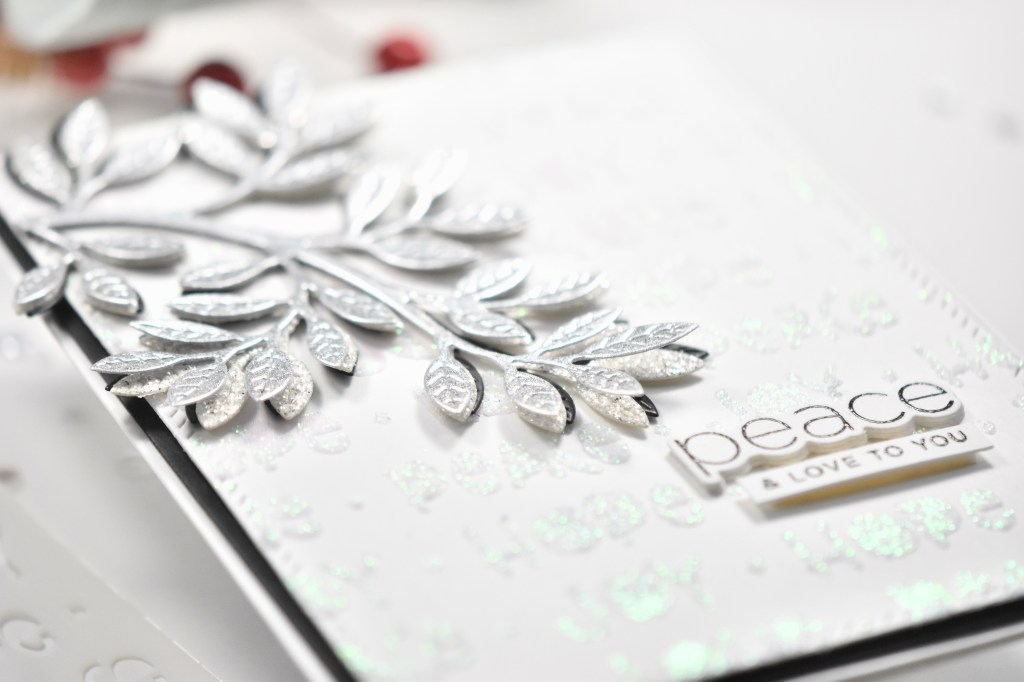
I began the project by cutting a few of the SSS Etched Berry Branch from Neenah Classic Crest 110lb cardstock and Tonic Studios Burnished Rose cardstock. I think that I ended up cutting three from each. Once those were all cut, I trimmed the leaves from the branches.
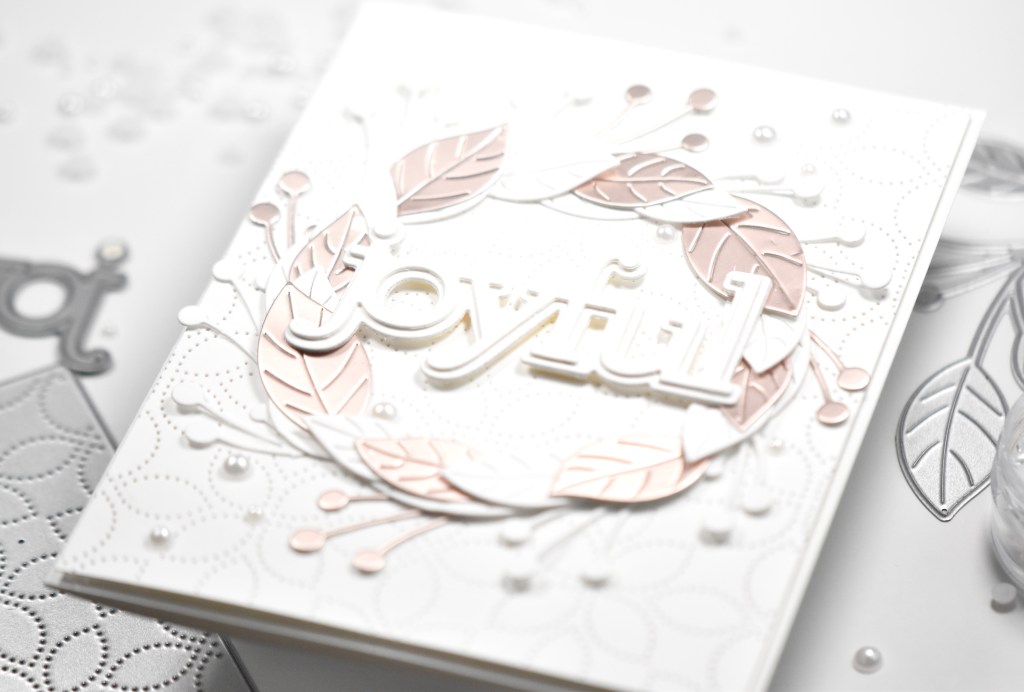
I wanted the background to have some subtle texture and interest, so I used the SSS Detail Petal Plate for this. I arranged the leaves atop the panel in a wreath fashion, gluing down only the center portion of the leaves. I glued only the center portion so that I had room to tuck the other leaves underneath.

Once all of the white leaves were glued, I then glued in the rose colored leaves. I trimmed off the berries and tucked those around the wreath as well, securing those with glue.

I die cut the SSS Joyful die twice from Neenah 110lb and cut the shadow twice from the same and adhered all of the pieces together. I placed small pieces of foam tape on the back and adhered it in the center of the wreath. No card is complete without embellishments, so I added some Soft Snowball Pearls. I think they are the perfect addition! This panel was then adhered to the card base using foam tape.

That finishes up this project! I love the soft feel of this card! I hope you’ll stop by Instagram to check out the hop! Leave comments along the way for your chance to win a $25 Simon gift card! Have a wonderful day and don’t forget to stay awesome!
Supply List:
- SSS Etched Berry Branch
- SSS Joyful Die
- SSS Detail Petal Plate
- Tonic Studios Burnished Rose Cardstock
- Neenah Classic Crest Solar White 110lb Cardstock
- Little Things from Lucy’s Pearls Soft Snowball Mix
- Bearly Art Glue
- 3M Foam Tape
- Tim Holtz Scissors
- Studio Katia Embellishment Wand
- Gemini Jr.
* Affiliate links used at no cost to you. Thanks so much for your support!
- Simon Says Stamp Rainbow Oak Leaf
- Spellbinders Dear Santa Floral Letter
- Simon Says Stamp Grungy Dewdrop Daisy

- Simon Says Stamp Pastel Birthday Wishes

- Simon Says Stamp Best Fish