Spellbinders Truly Yours Collection

Hello Crafters and welcome back to my blog! I was super excited when I was asked to create a few projects using the Spellbinders Truly Yours Collection! This is such an awesome collection because it features Glimmer plates, dies and even a great sentiment stamp set! So let’s get into today’s four projects!

For my first project, Sending Hugs Floral, I’m featuring the Rings Around the Circle Die set, a sentiment from the Mini Sincere Sentiments Glimmer Hot Foil Plate and Die set, as well as some flowers from the Heart Swans Die set. To begin my project, I die cut the Rings Around the Circle dies from Neenah Classic Crest 110lb cardstock and some yellow cardstock.

I adhered the white circles to my card panel in a random pattern, and inlaid the small yellow circles into the big circles using glue. I then die cut the flowers and leaves from the Heart Swans Die set using blue, green and yellow cardstock, and adhered the centers of the flowers. The flowers were then adhered to the middle of the circles using a combination of glue and 3M Foam Tape.
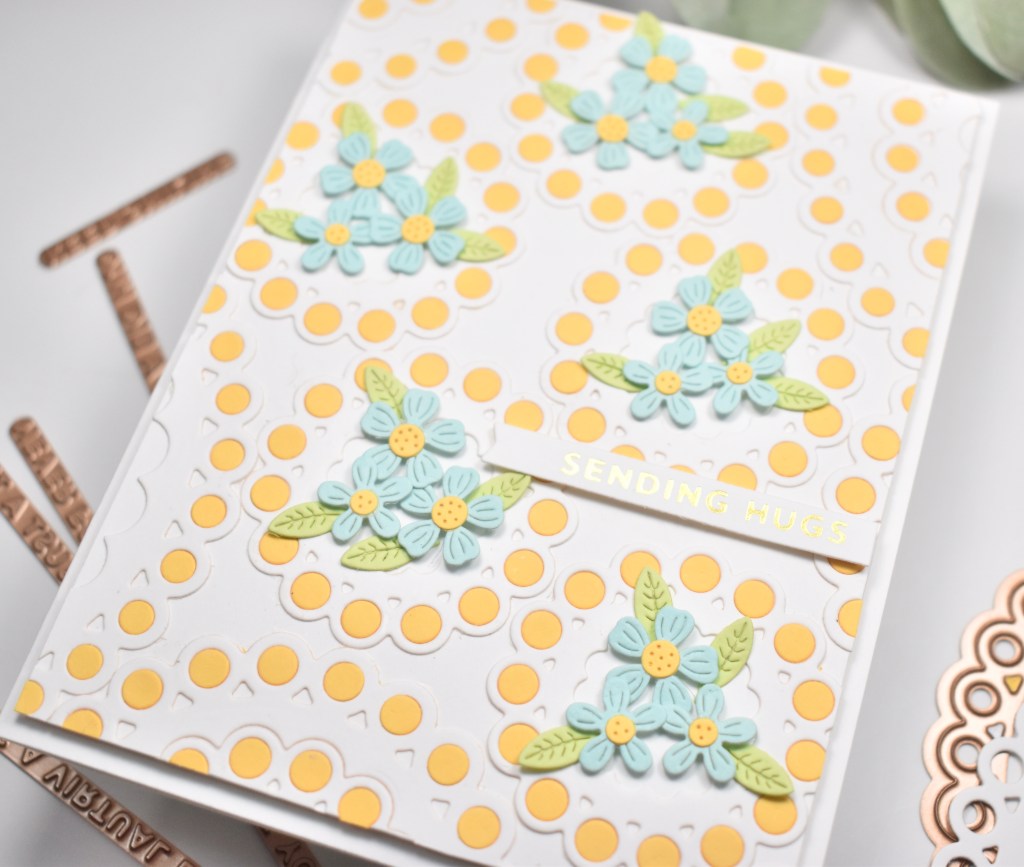
Using gold foil, I hot foiled the Sending Hugs sentiment from the Mini Sincere Sentiments Glimmer Hot Foil Plate and Die set and adhered that to my panel using foam tape. My panel was then adhered to my card base, which is also 110lb cardstock.
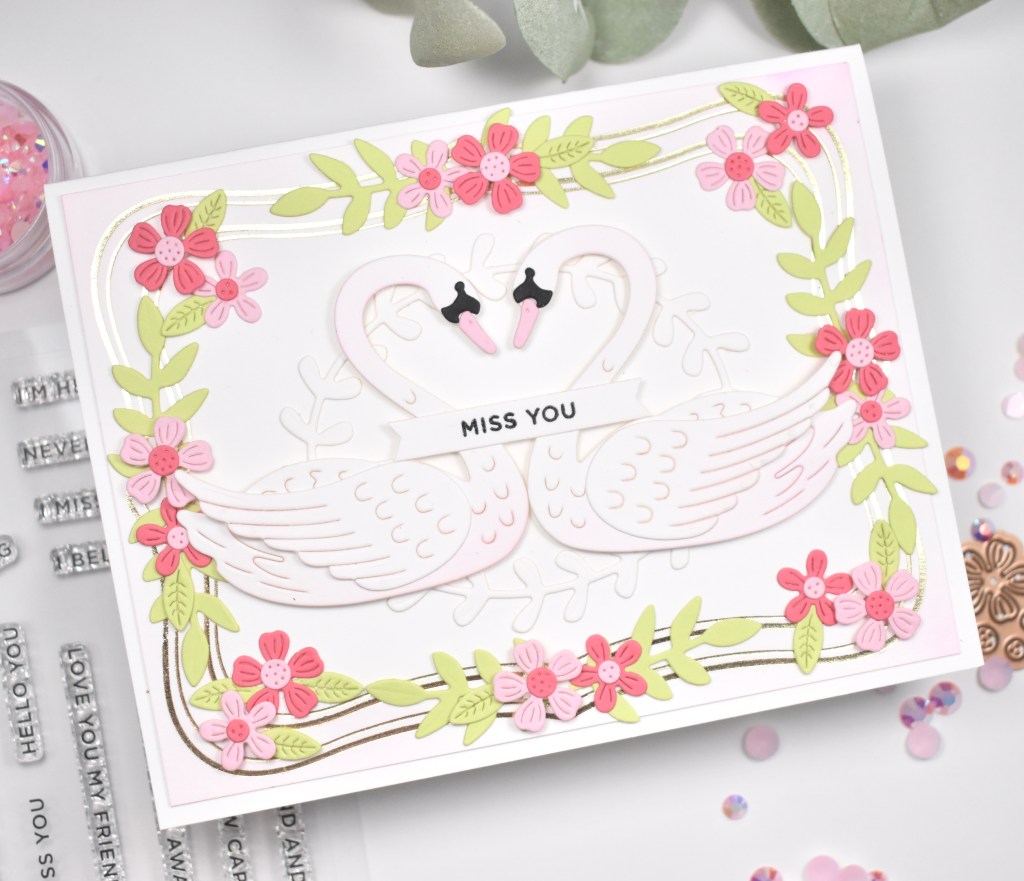
On my next project, Miss You Heart Swans, using gold foil, I doubled foiled the two largest plates from the Essential Glimmer Label Glimmer Hot Foil Plates on a panel of Neenah Classic Crest 110lb cardstock. I then die cut the wreath from the Cameo Etched Dies set from the same cardstock and adhered it to my foiled panel using glue. I die cut the swans from the Heart Swans Die set and lightly ink blended some PinkFresh Studio Sparkling Rose around the edges, and adhered those over the wreath using foam tape.

I die cut the flowers from the swan set using pinks and green cardstock and adhered the centers of the flowers. I then adhered the flowers around the the gold foil using glue and foam tape for dimension. I stamped the Miss You sentiment from the I’m Here for You Stamp and Die set using VersaFine Onyx Black Ink and heat embossed it using Ranger Clear Embossing Powder. I glued the sentiment directly to the swans in the center. My panel was then adhered to my card base.
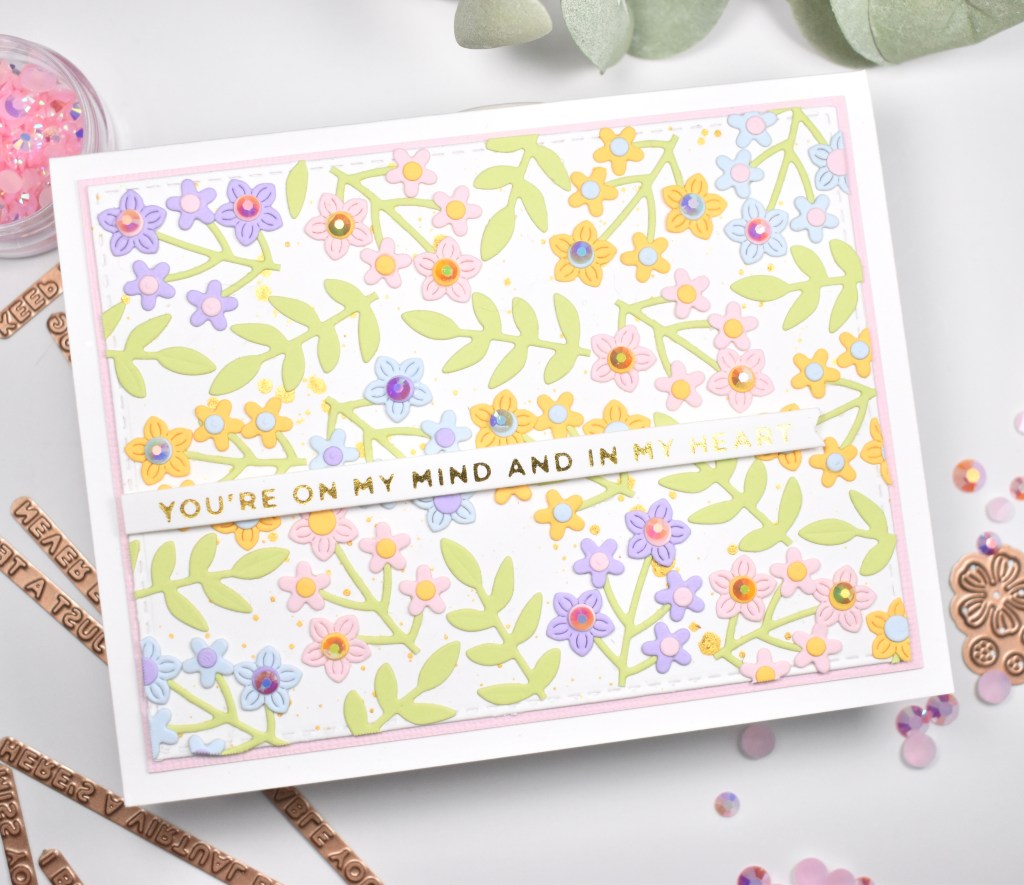
My third project, You’re on My Mind Floral, ended up being my favorite project of them all! I loved these little flowers so much that I decided to make my own background using them. For this one, I die cut a bunch of flowers and leaves from the Bouquet of Flowers Die set using blue, pink, purple, yellow and green cardstock and adhered the stems and flower centers using glue. I then arranged and glued them atop a gold splattered panel, trimming off the excess as needed.
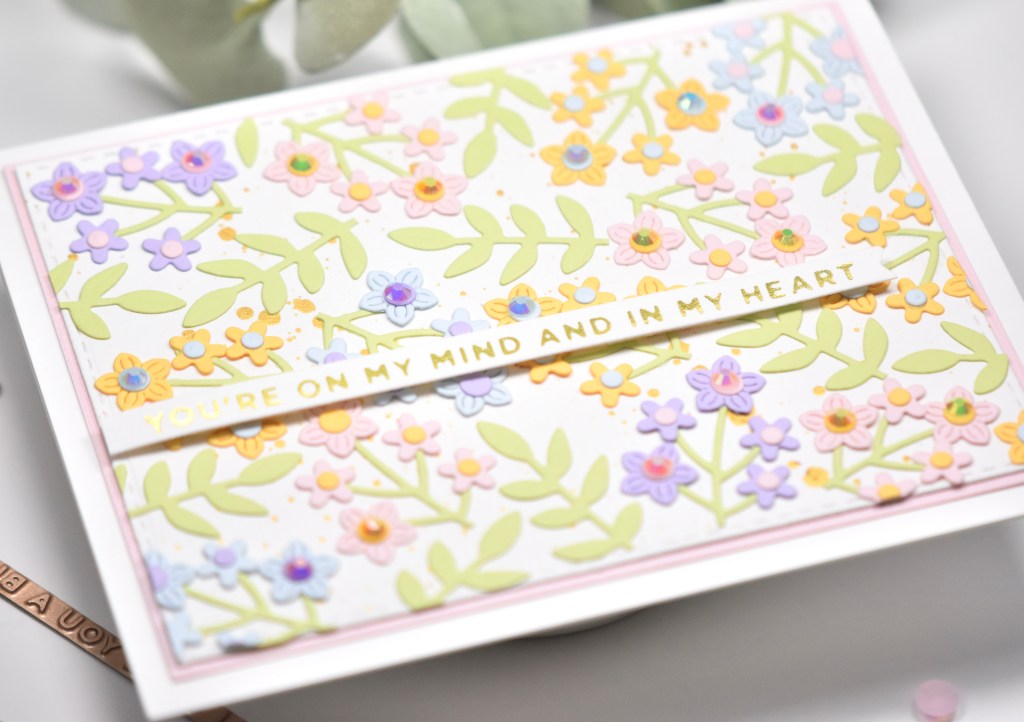
I then adhered my panel to a pink panel, and then to my card base, which is 110lb cardstock. Using gold foil, I foiled the sentiment from the Mini Sincere Sentiments Glimmer Hot Foil Plate and Die set, trimmed it out, and adhered it to my card using foam tape for dimension. To finish up, I added some PinkFresh Studio Jewels Mix to the larger flowers, because I thought some bling was in order!

For my last project, I die cut the two largest Elliptical Ovals Dies from black and white cardstock and glued those together, and then glued those to a black splattered panel. I then die cut the dress portions of the Paper Coutour Dress Dies from black cardstock, and the bow and hanger portions using glitter cardstock, and adhered those together. I again used the flowers and leaves from the Heart Swans Die set to cut those out of white cardstock.

I adhered the dress to the ovals using foam tape, and adhered the white flowers around the ovals using a combination of glue and foam tape. I then attached my panel to a panel of black cardstock to pull all of the black elements together, and then to a card base. Using silver foil, I hot foiled the sentiment from the Mini Sincere Sentiments Glimmer Hot Foil Plate and Die set, trimmed it down and glued it to the bow of the dress. To finish this card, I added some silver embellishments to the flowers for some added bling.

That does it for my projects featuring the Truly Yours Collection from Spellbinders! I hope you enjoyed them, and I hope they inspire you to get crafty!

Supply List:

*Affiliate links used at no cost to you. Thank you for your support!

Latest Instagram Posts

Simon Says Stamp Love and Hugs

Hey! Hey! Hey! How’s it going? Have you checked out the new Rainbows release from Simon Says Stamp? I’m showcasing the new Fading Hearts Stencil on today’s project, so let’s jump right in!

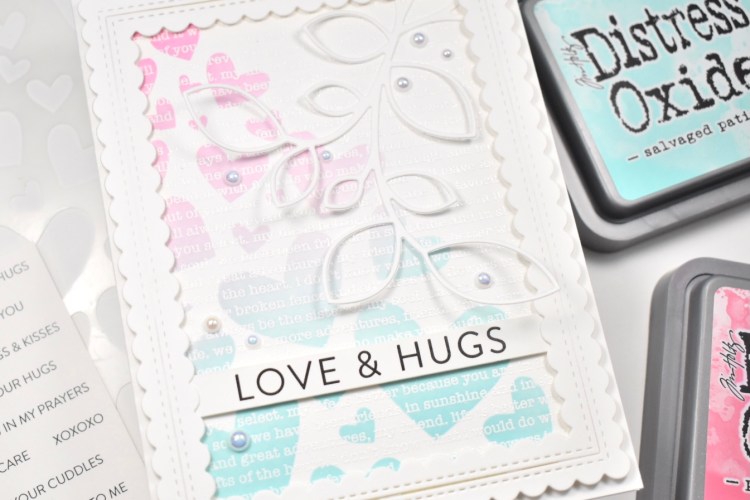
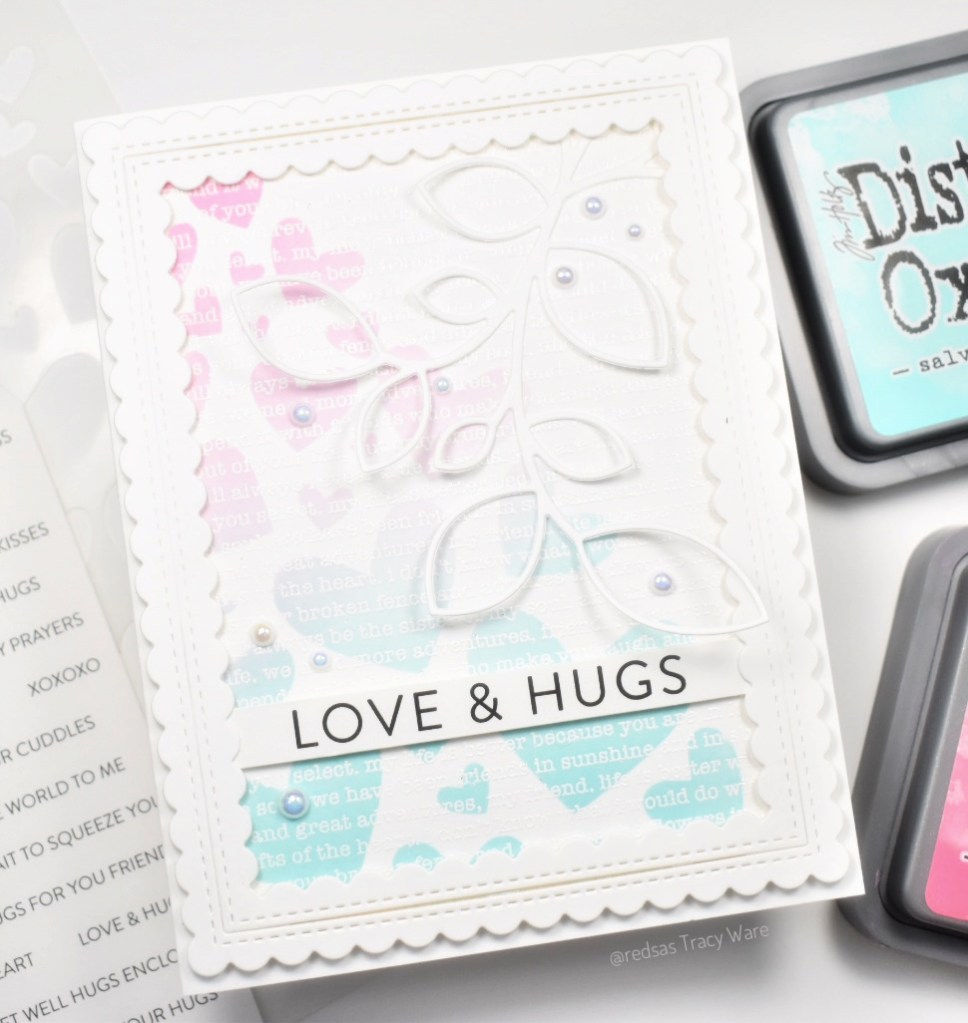
To begin this project, I stamped the SSS Friendship Text Background on a panel of Neenah Classic Crest 110lb cardstock using VersaMark Ink and heat embossed it using SSS Detail White Embossing Powder. I then affixed the Fading Hearts Stencil to the panel using masking tape, and ink blended the hearts using Distress Oxide Salvaged Patina and Picked Raspberry inks.

I die cut the SSS Outline Clustered Leaves and the PinkFresh Studio Stitched Scallop Rectangles once from Neenah 110lb. I adhered just the stem of the leaves to the heart panel using Craft Tacky Glue, because I wanted some movement of the leaves themselves, and I adhered the frame to the panel using 3M Foam Tape for dimension.

I adhered this SSS sentiment strip to the panel using foam tape as well, tucking the edges slightly under the frame. Once everything was adhered, I added some Studio Katia Arctic Breeze Pearls for that much needed bling. Everything has to have bling, right?! My panel was then adhered to my card base, which is also Neenah 110lb.

That does it for this project! I hope it inspires you to get crafty in your space! Don’t forget to check out the new Rainbows release, and let me know your favorites in the comments!

Stay awesome crafty peeps!

Supply List:

*Affiliate links used at no cost to you. Thank you for your support!

Latest Instagram Posts

Spellbinders June Card Kit of the Month

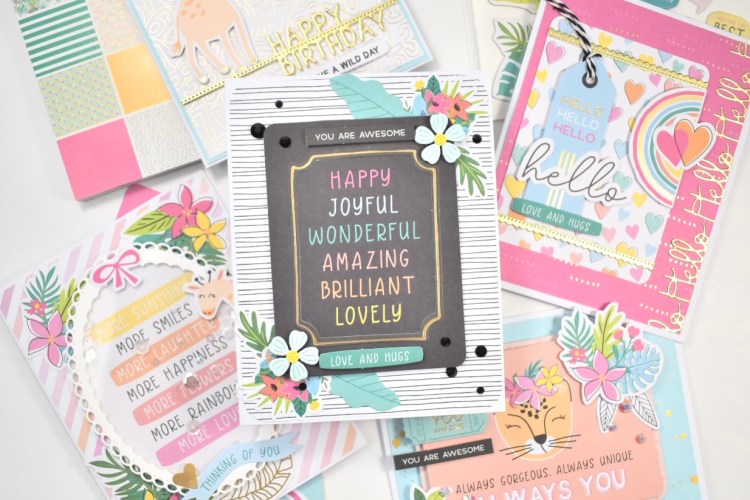
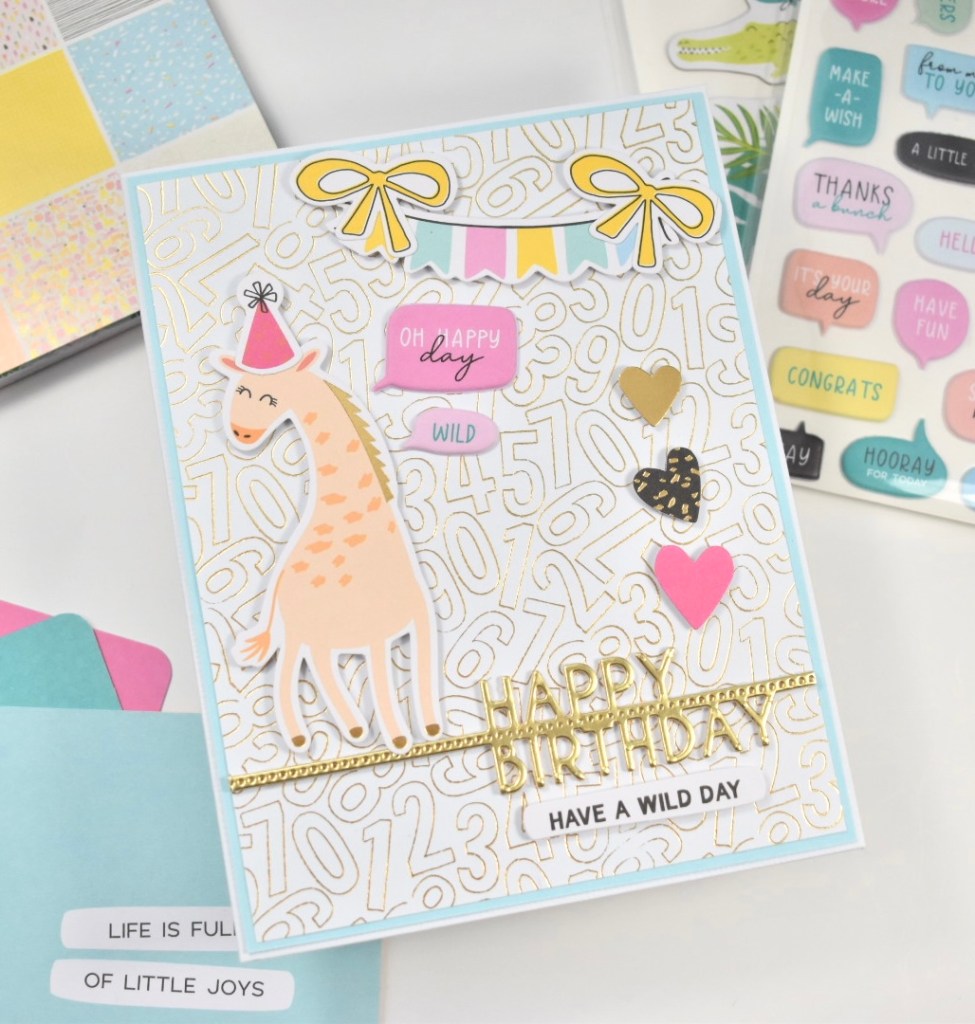
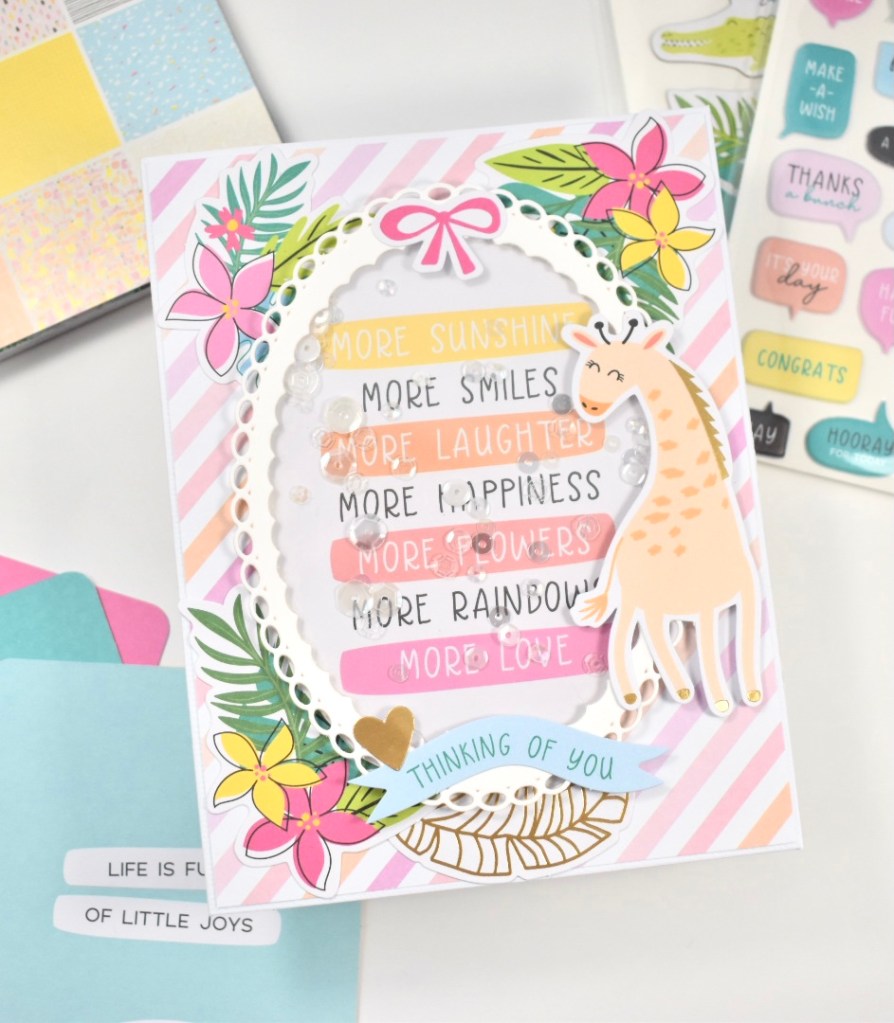
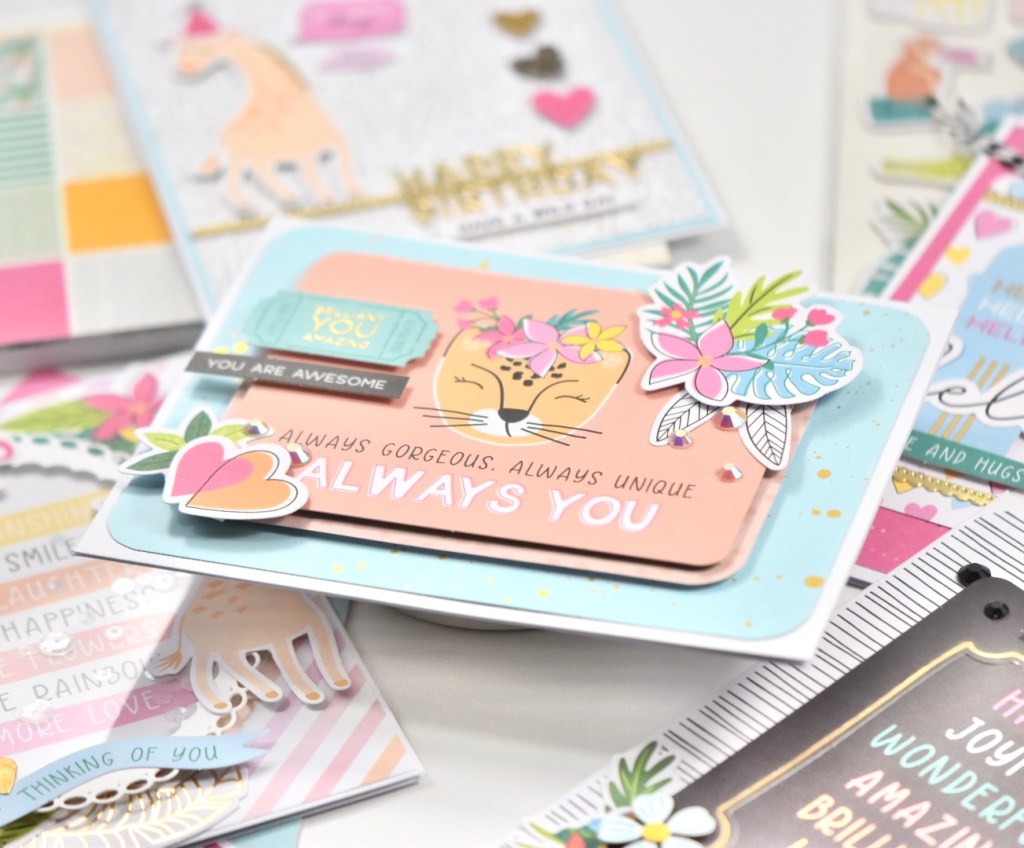
Hey Guys and welcome back! Today I’m showcasing a few cards that I created using the Spellbinders Wild Hello June Card Kit of the Month. If you’ve never tried their Card Kits, I highly recommend them! Everything you need to create at least ten cards is in this kit! I just love the ephemera pieces in this kit, as you’ll see from my set of cards. So let’s get into the them!

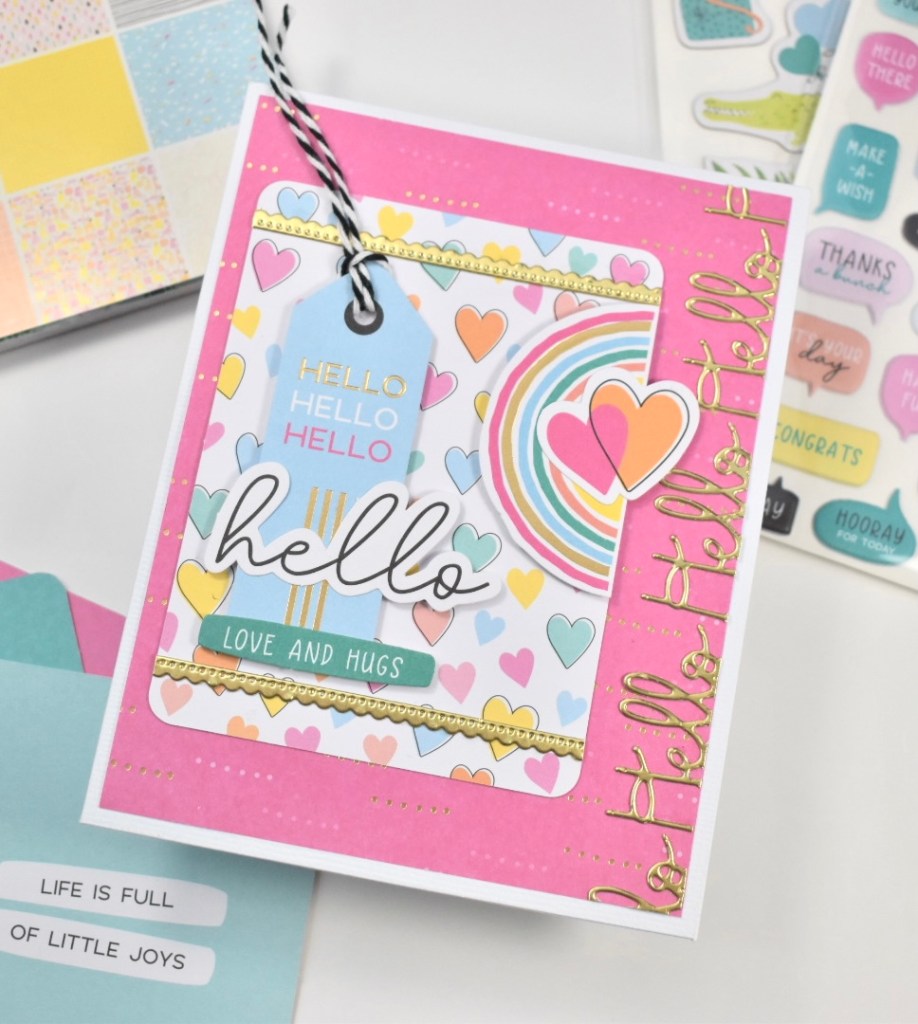
For most of my projects, I used the pack of decorative cards as the focal point, as well as, papers from the included 6×6 pack of paper. For this first Hello card, I used only elements from the kit, with the exception of the black and white twine. Everything was assembled using a combination of glue and foam tape. I did a repeat pattern of the Hello die in gold for added interest.

My second card features patterned paper, ephemera elements, puffy stickers and the Happy Birthday die. I did die cut the Happy Birthday a couple of times from heavy white cardstock and once from gold cardstock and adhered those together using glue, because dimension is life! Once again, everything was assembled using glue and foam tape.

This third card, Always You, uses those cute decorative cards again. These really do make a great focal point, which makes for a super easy card! And, I need easy sometimes! The only additional products that I used for this one is some gold splatter, a corner rounder punch and some jewel embellishments. I thought some bling was in order! Glue and foam tape pulled this one together as well!

More sunshine! More smiles! I trimmed this decorative card down to an oval, because I had in my head that this would be super cute as a shaker card! The white round oval is a die from the Elliptical Ovals set that I used in conjunction with some acetate to create the shaker. All of the other elements are from the kit.

My last card ended up being my favorite, I guess because I love the black and white elements mixed with the bright colors. Additional products used on this card were a couple of flowers that I made using the Mini Blooms and Sprigs set, along with some black jewels and a corner rounder punch. Everything was assembled with a combination of glue and foam tape.

That finishes up my projects using this fun, Wild Hello June Card Kit! This is my first card kit from Spellbinders, and I’m quite pleased at how easy it was to create cards using all of the cute tidbits included in the kit! I hope you’ll stop by their website to check it out! I’ve recently joined their Large Die of the Month and Glimmer of the Month Clubs, and am having a blast with those too! Anyhoo, thanks so much for stopping by today, and I hope you enjoyed these projects!

Stay awesome sweet friends!

Supply List:

*Affiliate links used at no cost to you. Thank you for your support!

Latest Instagram Posts

Spellbinders Deer Friend

Sweet Cardlets Collection II by Becca Feeken

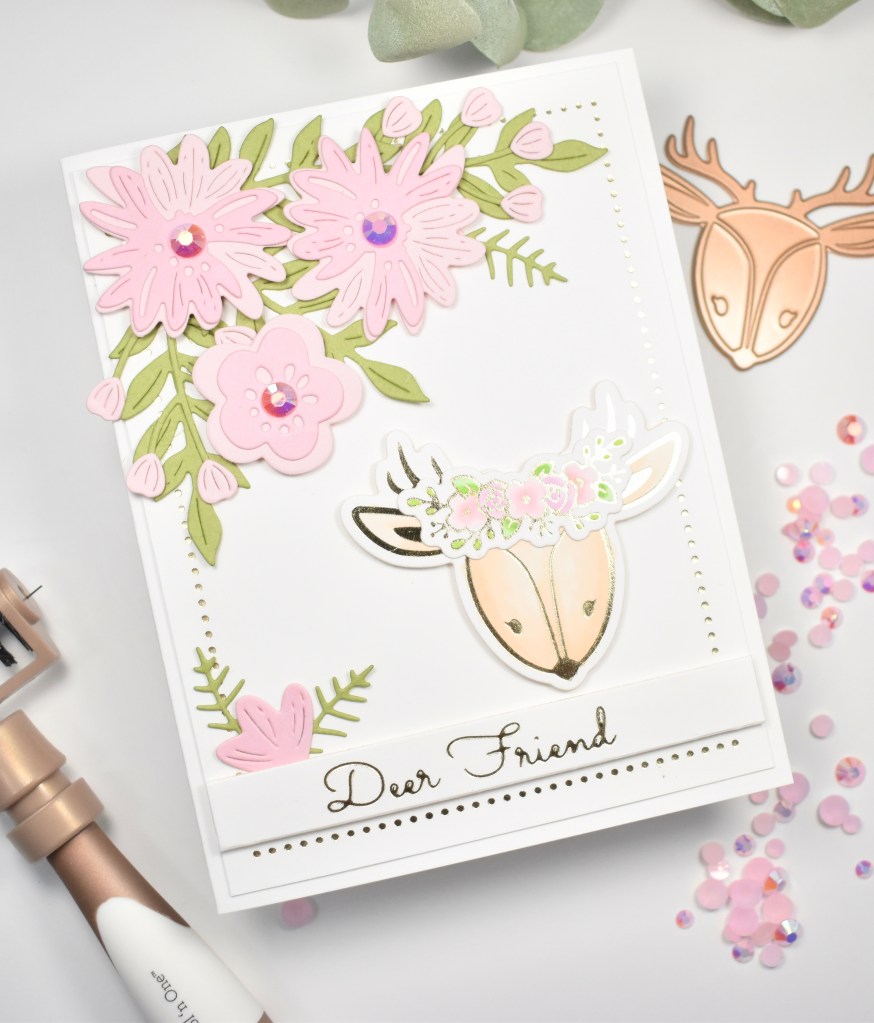
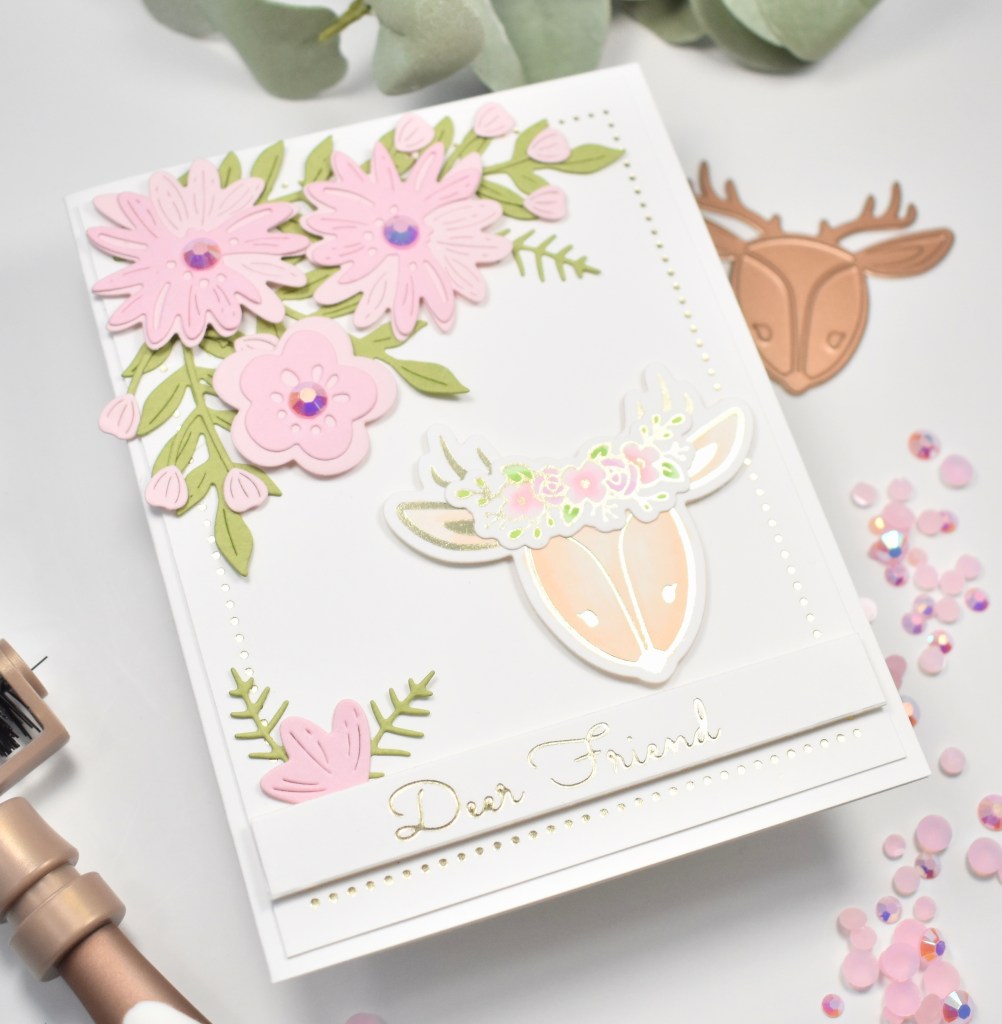
Hello! Hello! I was super excited to be able to play with the new Deer Friend Glimmer Hot Foil Plate and Die Set from Becca Feeken! This is such a cute little set and made the sweetest card. Let’s get started!

To begin, I trimmed a panel of Neenah Classic Crest 110lb cardstock, and heated up the Glimmer Hot Foil System. Using the Quick Trimmer, I trimmed some strips of Champagne Foil so that I could use the largest of the Essential Glimmer Rectangles set. Yana Smakula’s hinge method of foiling works GREAT, so I used that to position the foil strips and popped it on to hot foil. While everything was already hot, I went ahead and foiled all of the elements of the Deer Friend set.

I used Copic Markers E000, E00, YG11, YG13, RV00 and RV10 to color the deer and florals, and used the coordinating dies in the set to cut them out. I also used the Simply Perfect Layered Blooms Set to cut some florals and leaves from pinks and green cardstock. I went ahead and adhered the floral pieces together using Craft Tacky Glue.
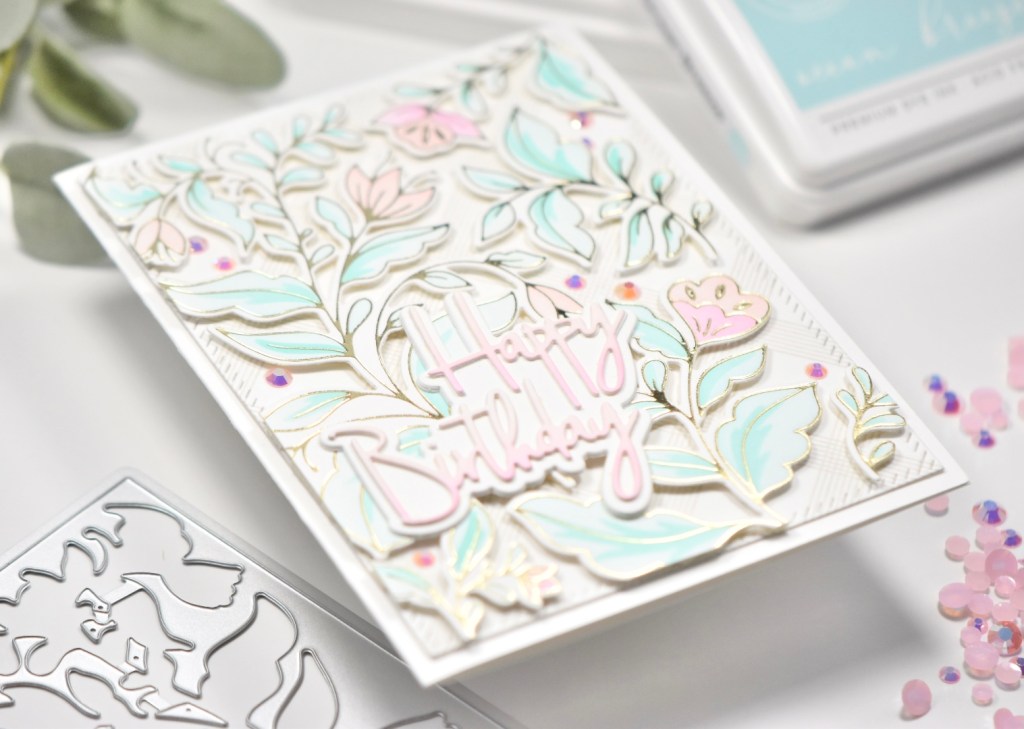
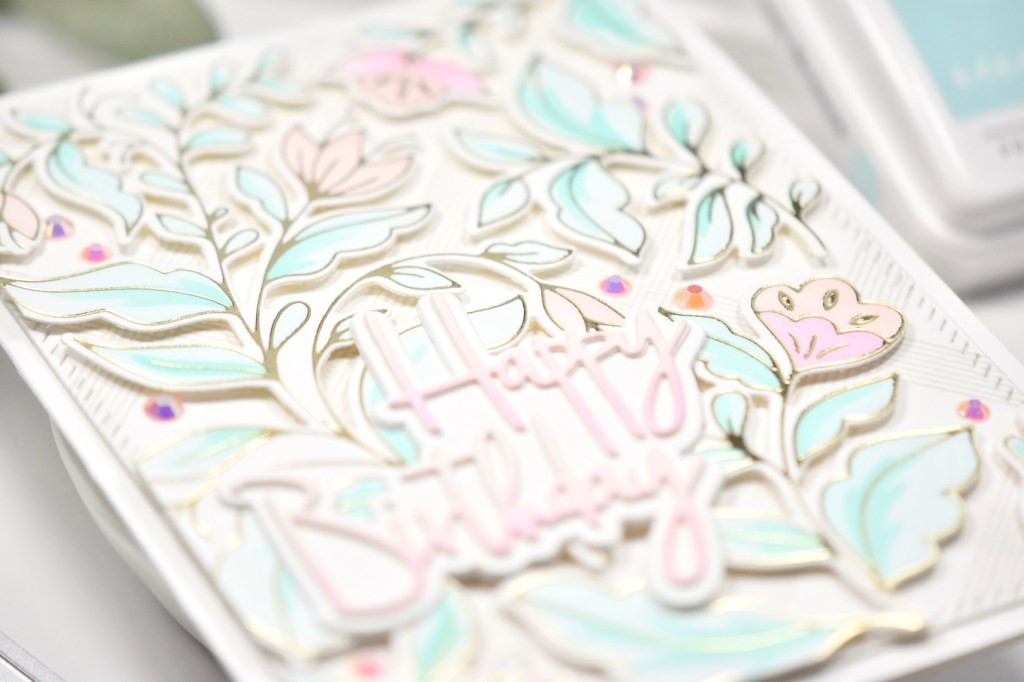
To assemble the card, I used foam tape for the sentiment and the deer in the bottom right corner, and used a combination of glue and foam tape to adhere the blooms and leaves in the upper left corner. I had a bloom left over, so I tucked it down around the sentiment. I added PinkFresh Studio Jewels to the centers of the flowers, because every card needs bling! Am I right?!?! I attached my panel to a Neenah 110lb card base to finish it up.

I hope you enjoyed this project! I think this deer is the cutest and really enjoyed playing with it! Don’t forget to check out the entire Sweet Cardlets II Collection from Becca Feeken. There’s other super cute stuff in this collection!

Thanks so much for stopping by today! Stay awesome!

Supply List:

*Affiliate links used at no cost to you. Thank you for your support!

Latest Instagram Posts

Spellbinders Delightful Darlings

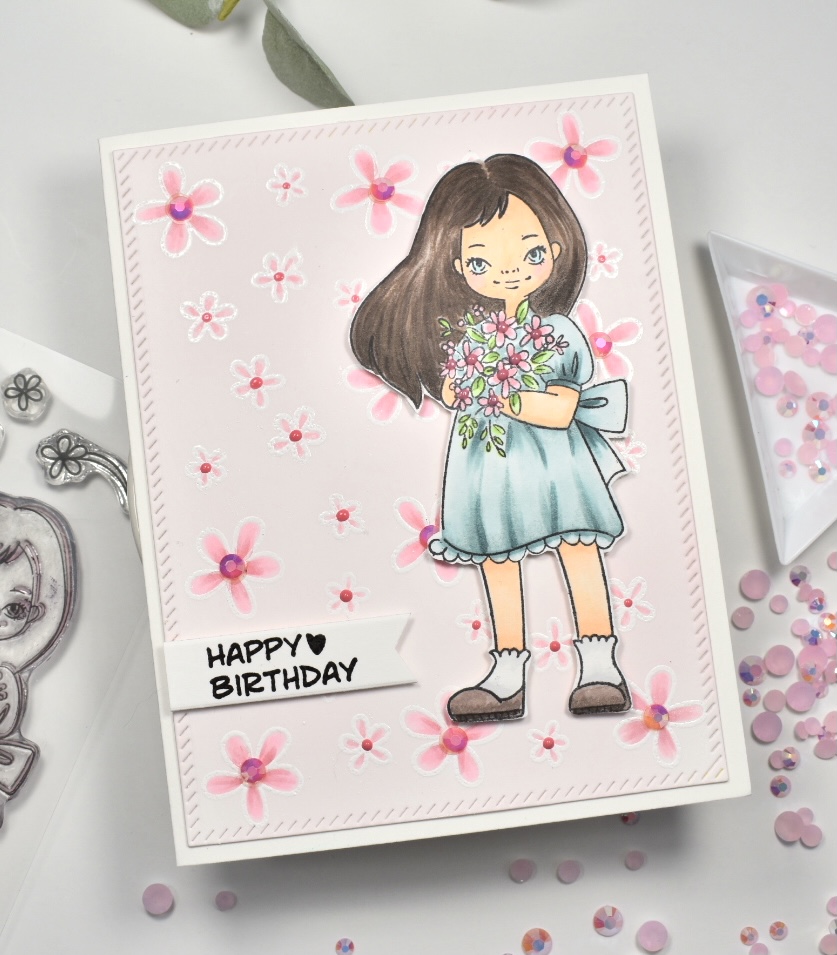
Hello Crafters and welcome back! For today’s project, I’m featuring a card using the new Darling Bouquet stamp set, which is from a series of four sets illustrated by Mayline Jung. These are super cute and super fun! So, let’s get into today’s project.

To begin, I die cut a panel of Neenah Classic Crest 110lb cardstock using the PinkFresh Studio Diagonal Stitched Rectangles and placed that in my Misti. There are three small flowers in this set, and I decided to create my own background with those. I positioned the stamps and stamped them using VersaMark Ink and heat embossed them using Simon Says Stamp Detail White Embossing Powder. I rotated my panel for additional stamping and repositioned the stamps towards the end to fill the remaining space.

I very lightly ink blended Distress Oxide Spun Sugar over the entire panel and began coloring the stamped flowers using Copic Markers RV00, RV10, RV11 and RV32. I went back to my Misti and stamped the girl using Memento Tuxedo Black Ink and colored that image using E000, E00, E70, E71, E74, E79, N0, YG11, YG13, B00, BG70, BG72, BG75. As a note, I used the same pinks to color the bouquet that I used for the background. Once the coloring was done, I fussy cut the image for mounting.

I stamped the Happy Birthday sentiment on Neenah 110lb using VersaFine Onyx Black Ink and heat embossed that using Ranger Clear Embossing Powder. I trimmed that out using the Simon Says Stamp Sentiment Label Dies, and mounted the sentiment as well as the girl on my background panel using 3M Foam Tape.

I added pink jewels to the larger flowers using PinkFresh Studio Jewel Mix, and I added small dots of Nuvo Crystal Drops Carnation Pink to the smaller flowers on the background and the bouquet. I then mounted my panel to a card base, which is Neenah Classic Crest 110lb cardstock.

That finishes today’s project! I hope you enjoyed it, and I hope it inspires you to get crafty! Thanks for stopping by!

Have a wonderful day, and stay awesome friends!

Supply List:

*Affiliate links used at no cost to you. Thank you for your support!

Latest Instagram Posts

Alex Syberia Design Love You Daffodils

Hello there Crafty Friends! I hope you’re doing well, and I thank you for stopping by today! I’m featuring the new Alex Syberia Design Daffodils A2 Card Panel for this post. Alex has a new release, and you should definitely check out her Etsy shop for all the digi stamps and loads of inspirations!

To begin my project, I printed the Daffodils on a sheet of Neenah Classic Crest 110lb cardstock and began coloring the image using Copic Markers Y06, Y08, Y11, Y13, Y15, YR27, YG13, YG17, YG91, E71 and B0000. I continued to add shading and more details, such as the leaf veining using my PrismaColor pencils.

I didn’t want to lose too much of the image, so I trimmed my panel down to 3.75″ x 5.75″ and mounted it onto a panel of black cardstock that’s just slightly larger using 3M Foam Tape. I die cut the Lawn Fawn I Love You Border sentiment once from gold cardstock and twice from the same black cardstock and adhered those together using Craft Tacky Glue. This sentiment actually says I Love You, but I trimmed it down, because I only wanted the love you portion.

I die cut the Altenew Hanging Garden die twice from gold cardstock and prepared my card base by splattering it with Royal Talens Amsterdam Oxide Black Acrylic Ink. I love this ink because it’s such a perfect consistency for splatter! I positioned my panel over the card base to determine the placement of the gold leaves, and adhered those using glue. I then glued my panel atop the leaves to finish up my card.

This was a super fun card panel to color! Don’t forget to stop by Alex’s Etsy shop to check out all of the new images!

Stay awesome friends!

Supply List:

*Affiliate links used at no cost to you. Thank you for your support!

Latest Instagram Posts

Alex Syberia Design Hello Summer

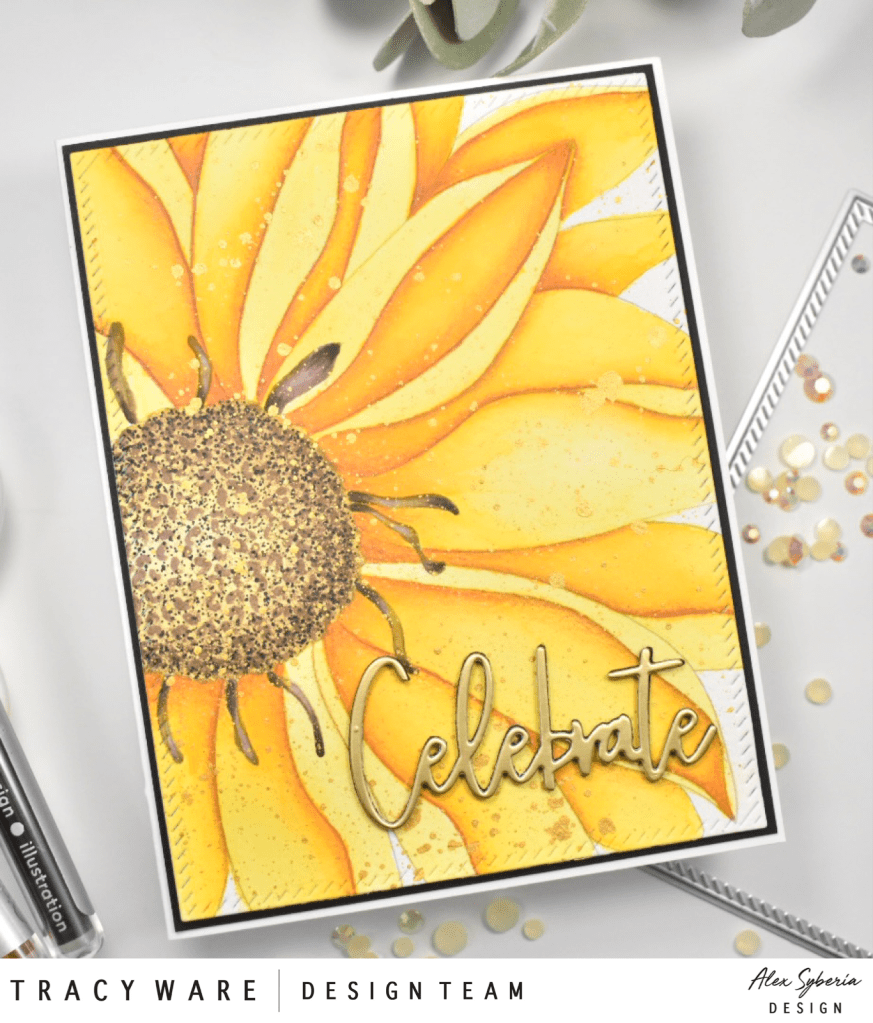
Hello and welcome back friends! I’m super excited to be joining Alex for her May release! So many cool things in this release .. birds, underwater images, girly images and of course, Alex’s amazing floral images! You’ll definitely want to check out the Etsy shop! So let’s get into today’s project.

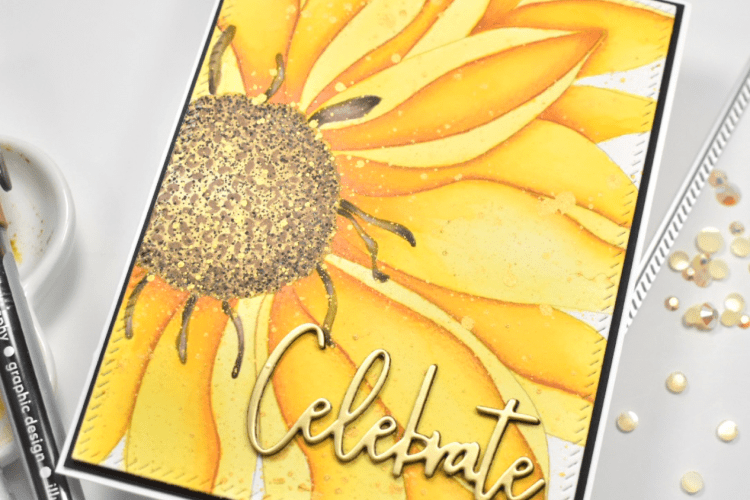
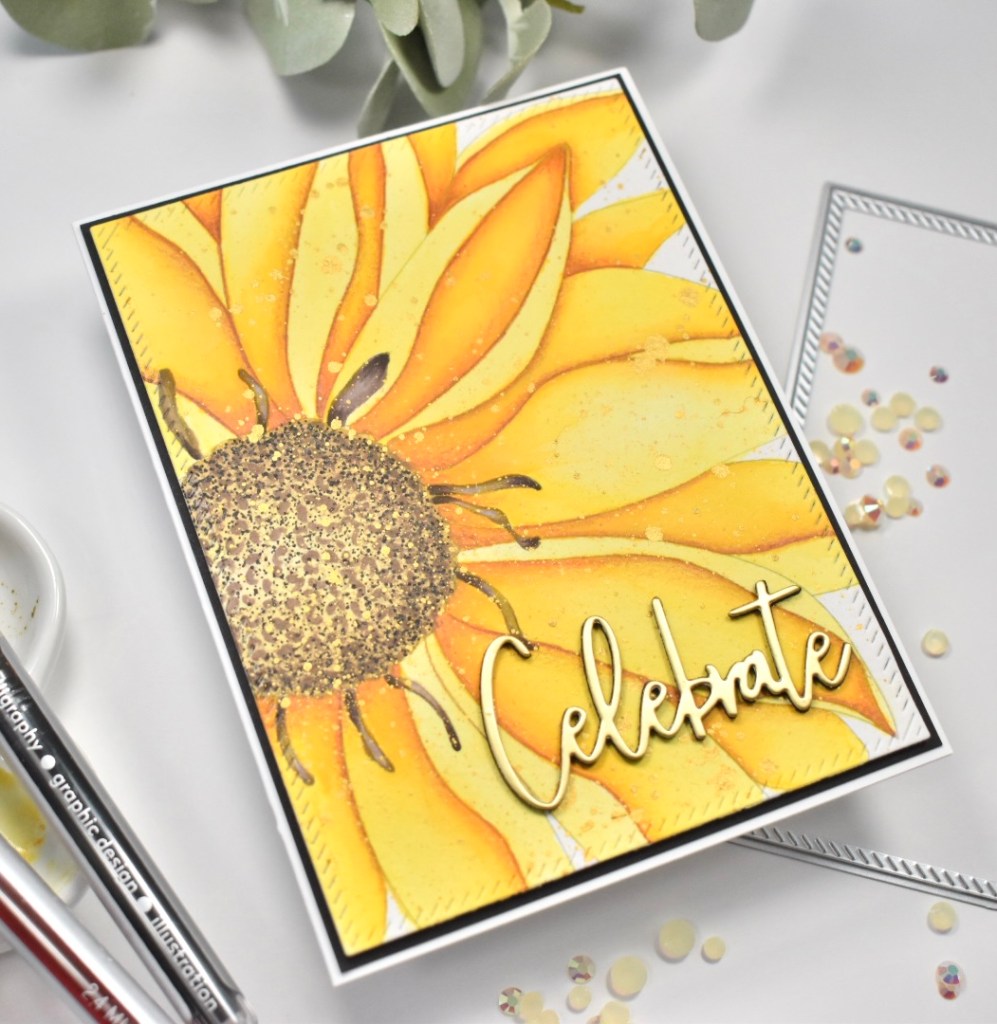
I’m using the Hello Summer A2 Card Panel and to begin, I printed the image out on a piece of Stonehenge Aqua Cold Press Watercolor paper. I then taped it down to my clipboard (Yes, I use a cheap clipboard from Target) using masking tape to prevent warping. My Karin Brushmarkers then got a good workout! I used those along with a waterbrush and a Princeton Heritage 3/0 Round Brush.

Once the watercoloring was done, I added some more detail and shading using PrismaColor pencils, Copic Markers E74 and E79, as well as, Copic Multiliner 0.3 and 0.5. I trimmed my watercolor panel out using PinkFresh Studio Diagonal Stitched Rectangle die, splattered it with Royal Talens Amsterdam Light Gold Acrylic Ink and mounted it on a panel of black cardstock using 3M Foam Tape, because dimension is life!

I settled on a Celebrate sentiment, which is from the PinkFresh Studio Classic Words Die set. I cut it once from gold cardstock and three times from black cardstock and adhered those together using Craft Tacky Glue. I then glued the sentiment directly to my card front and mounted everything on my card base, which is Neenah Classic Crest 110lb cardstock.

That does it for today’s project. I hope you enjoyed it, and I hope it inspires you to get crafty and creative! Don’t forget to hop over to the Alex Syberia Design Etsy Shop to check out the release and to see some creative inspirations as well. You don’t want to miss it!

As always, be well and stay awesome!

Supply List:

*Affiliate links used at no cost to you. Thank you for your support!

Latest Instagram Posts

PinkFresh Studio Folk Garden Birthday

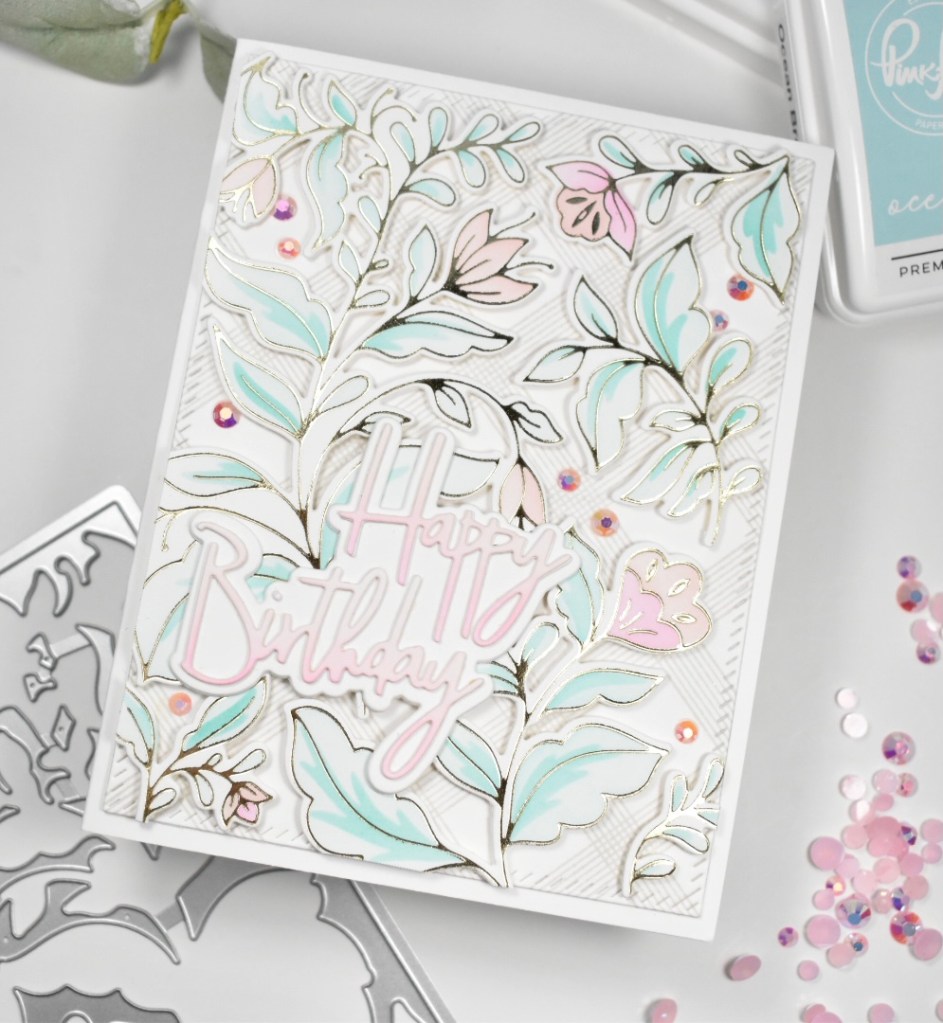
Hey Guys! Ok, I have to say it .. I’m in love with this PinkFresh Studio Folk Garden set! I ordered the foil plate, die cut and stencils, and it’s a great combination. I’m sure I’ll end up getting the stamp at some point, but am super happy with my purchase! So, let’s get into today’s project, which I love!

I began my project by foiling the Folk Garden plate on a panel of Neenah Classic Crest 110lb cardstock using the Spellbinders Glimmer Hot Foil System. I then used the coordinating stencils to add color using PinkFresh Studio Inks Ocean Breeze, Aquamarine, Ballet Slipper and Sparkling Rose and cut that panel using the coordinating die.

I needed a background for all of my leaves, so I stamped the Diamond Tiles on Neenah 110lb using Misty Coast Ink, and used the Diagonal Stitched Rectangles to trim it out. The longest part of this project was cutting all the little pieces of 3M Foam Tape to put on the back of the leaves! I placed those on my panel and trimmed off the excess.

I had in my mind that I wanted to add a really pretty gold sentiment .. guess what? I was out of gold cardstock! How does that even happen?! With that being said, I had to switch directions. My birthday card stash is seriously lacking, so I obviously went with that. I die cut the Happy Birthday sentiment from the Classic Words Die set twice from Neenah 110lb and I cut the shadow twice from the same. I needed to add color to one of the layers, and the easiest way to do that was to lay the die cut back into the negative piece and lightly ink blend over the bottom portion of my die. Once that was done, I adhered all of my layers together using Craft Tacky Glue.

My sentiment was adhered directly to the leaves and I added my required bling using the PinkFresh Studio Jewels Mix. My panel was then adhered to my card base, which is also Neenah 110lb.

I think this project came out really pretty, and I’m super happy with it! I’m so glad that you stopped by today, and I hope this project inspires you to get creative too! Don’t forget to stay awesome!

Supply List:

*Affiliate links used at no cost to you. Thank you for your support!

Latest Instagram Posts

Simon Says Stamp You’re So Kind Halftone Square Background

All the Feels Release

I’m having such a blast with the products from this release, and today’s project is one of my favorites! Mixed Media really isn’t in my wheel house, but I enjoy the mix of products and textures. You can check out the full All the Feels release HERE. Let me know what your favorites are!

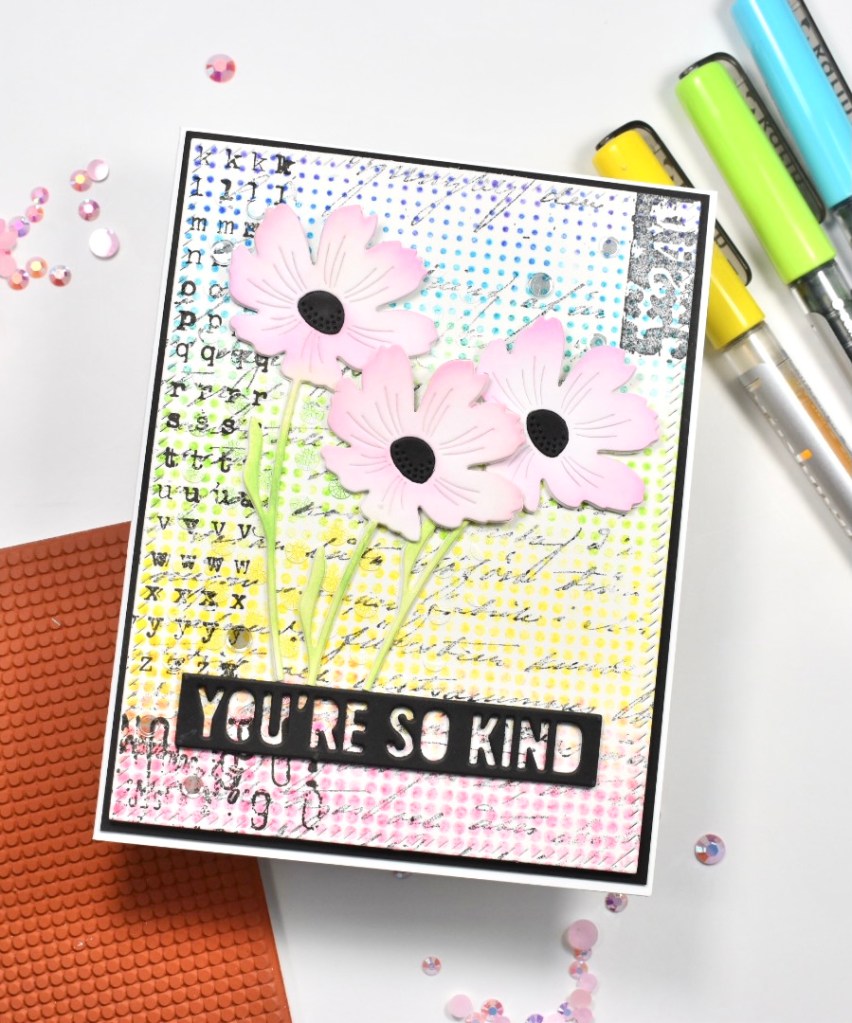
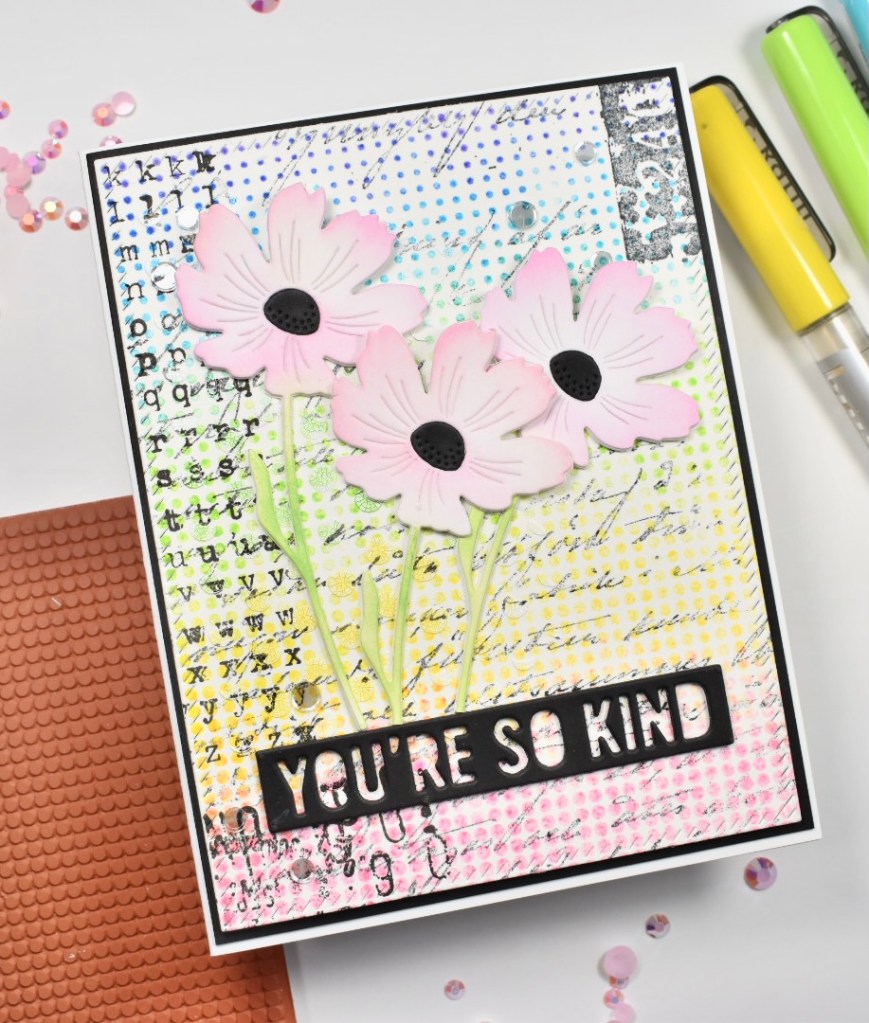
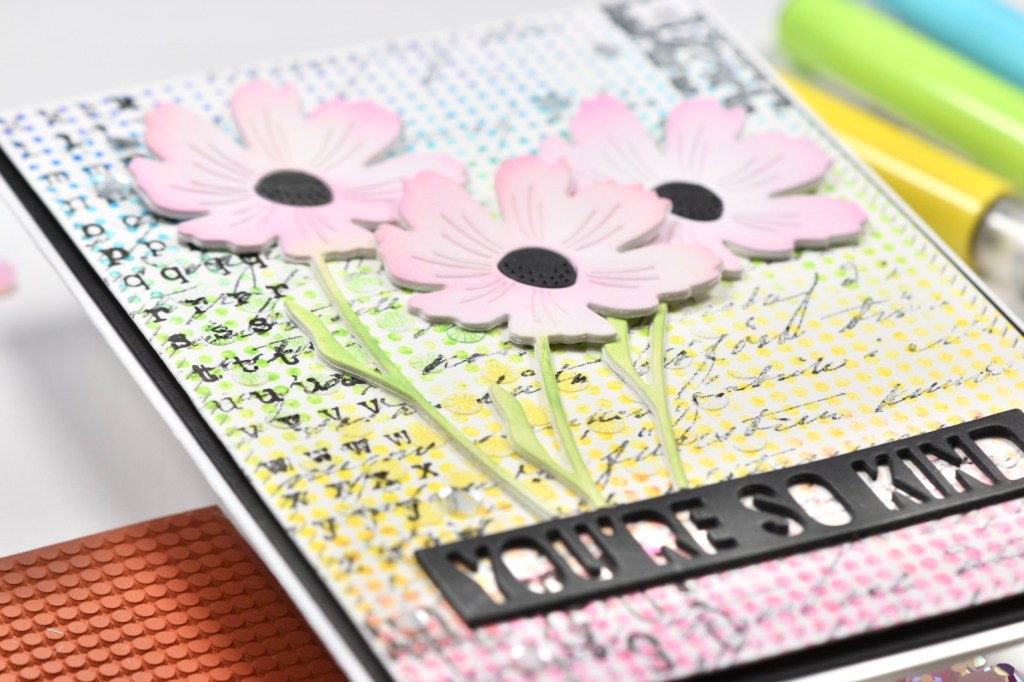
Let’s get into today’s fun project where I’m featuring the new Halftone Square Background stamp. To begin, I put a piece of Fluid Hot Press Watercolor paper in my Misti and positioned my stamp. To achieve this look, I basically scribbled Karin Brushmarkers! Super fun, super easy! I chose a few rainbow colors from my set, and I scribbled one color at a time, spritzed it with water, and stamped! What did I say? Super easy, yet I think the results were kind of cool! I repeated that process with the remaining colors.

I left my watercolor panel to dry overnight .. under some books to help with the warping. I really wanted to use some Ranger Distress Crackle Paste on this, because I had decided that I was going to try a mixed media project. I used the circle stencil from the Mini Slimline Patterns 1 set, which is also a newbie in the All the Feels release. So, I used my spatula thingie to run some paste through the stencil and left that to dry. When it was dry, I took a waterbrush and lightly touched the crackle paste with water and lightly touched that with my Karin Brushmarker. Why? Because the crackle wasn’t showing up that well, so adding just a hint of color helped .. but it still isn’t very visible.

After that was dry .. again, I whipped out some Tim Holtz Stampers Anonymous stamps, because you really can’t have a mixed media piece without Tim Holtz! Am I right?!?! I ended up using stamps from the sets Documented and Ultimate Grunge. I also used the Simon Says Stamp Old Letter Background stamp. For the background stamping, I used some Memento Tuxedo Black ink, as well as some VersaFine Onyx Black ink.

Moving on to my focal point and sentiment .. I die cut the Simon Says Stamp Cosmos Stem three times for each flower from Neenah Classic Crest 110lb cardstock. And .. I cut that little center piece from black cardstock. I thought that would tie all of my black elements together. I added color to one layer for each of the flowers using Distress Oxide Kitsch Flamingo and Distress Oxide Mowed Lawn. I adhered my flower stems together with the colored piece being on top with Craft Tacky Glue. I then die cut the Simon Says Stamp You’re so Kind sentiment three times from black cardstock, and glued those together. Why all this die cutting? Because dimension is life, and die cutting is my jam!

My next step was just dorking around with the placement of everything on my panel. Once I figured it out, I adhered my sentiment to my panel with Craft Tacky Glue, and I had to trim some of my stems before gluing those as well.

Now we all know about the bling situation! There has to be bling! Always! I opted for Simon Says Stamp Moonshine Confetti for this project. It gave just a little bit of shine, but wasn’t too distracting. I adhered my panel to a black panel using 3M Foam Tape and then glued that to my card base, which happens to be Neenah 110lb cardstock.

And there you have it! Like I said, mixed media isn’t my thing, but I do really enjoy it! It’s just so much fun to bring so many different things together on one project! I hope this inspires you to try something new or something that isn’t necessarily your thing either!

Don’t forget to check out the new release, All the Feels!

Thanks so much for stopping by and don’t forget to stay awesome!

Supply List:

*Affiliate links used at no cost to you. Thank you for your support!

Latest Instagram Posts

Simon Says Stamp Mini Slimline Patterns

All the Feels Release

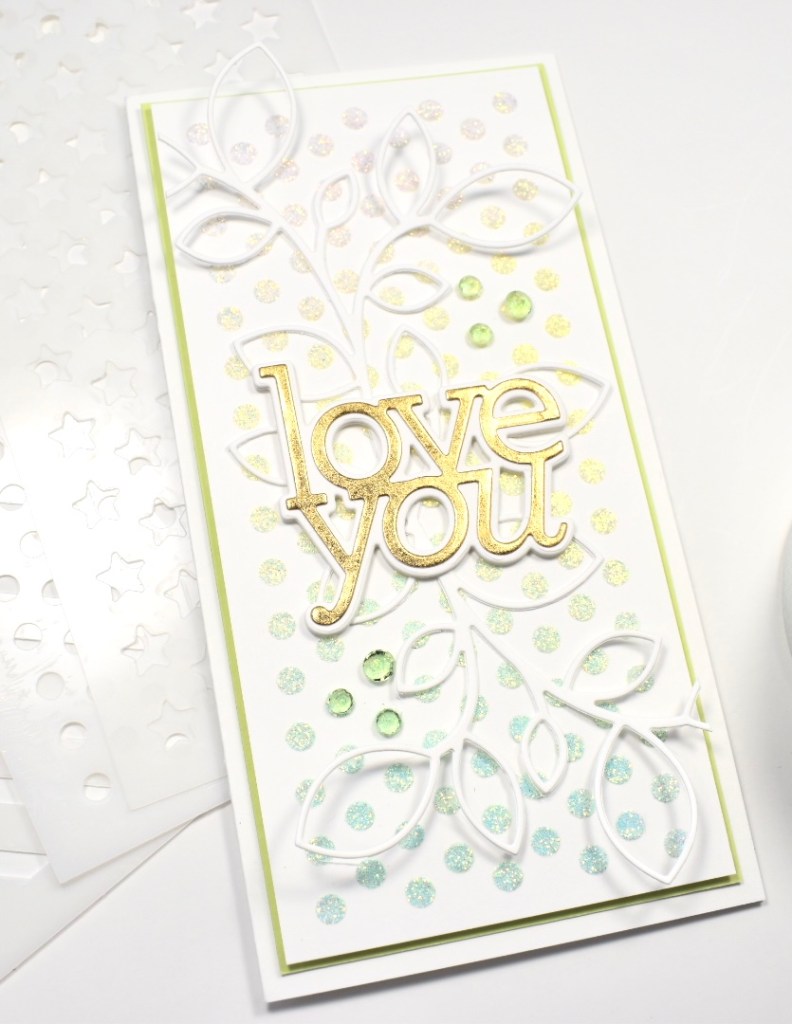
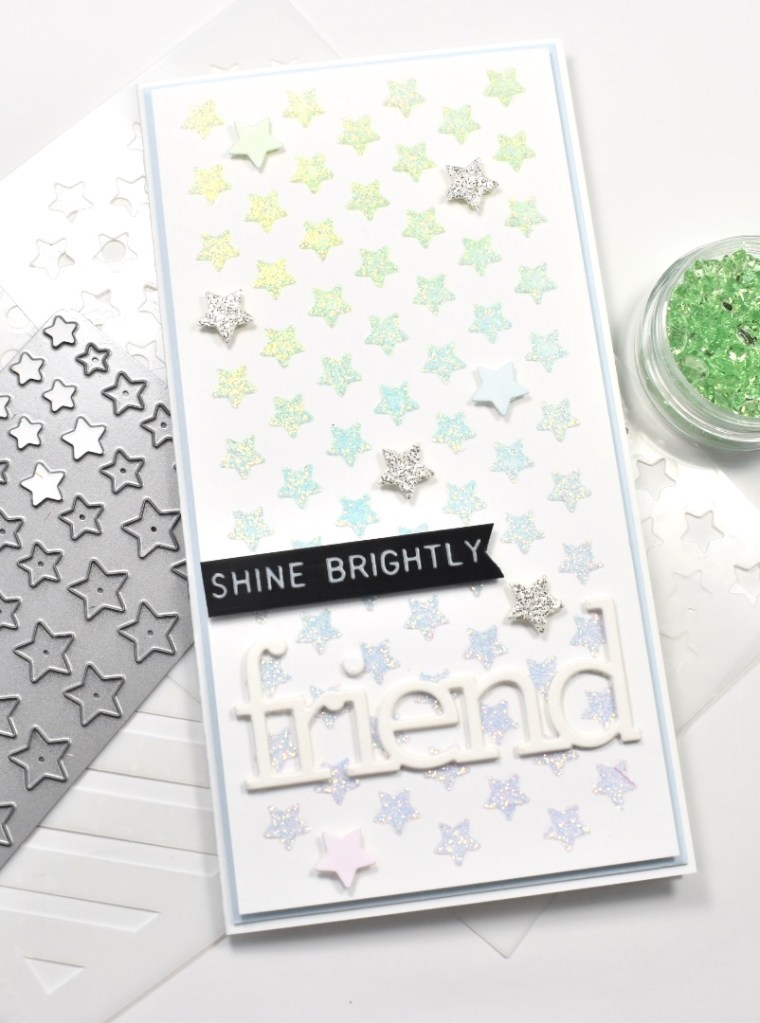
Hello and welcome back! Today I’m featuring a super fun product from the new Simon Says Stamp All the Feels release, Mini Slimline Patterns 1. This is a set of three stencils that consists of circles, stars and stripes, perfect for all of those cute mini slimline cards!

Let’s get into today’s project! To begin, I cut three panels that were the same size as the stencils from Neenah Classic Crest 110lb cardstock, and taped those to the stencils using masking tape. Since I created three cards, I’ll go through each one separately.

For the circle stencil, I ink blended PinkFresh Studio Sparkling Rose, Sunshine and Ocean Breeze. I then went over the ink with Gina K Glitz Glitter Gel – Iridescent, and set that aside to dry while I worked on my sentiment. I die cut the Simon Says Stamp Love You once from gold cardstock and three times from Neenah 110lb cardstock and adhered those together using Craft Tacky Glue. I also die cut the Simon Says Stamp Outline Clustered Leaves once from Neenah 110lb. Once my panel was dry, I glued the leaves down only using the center stem. I then glued my sentiment atop that, along with some PinkFresh Studio Crystals Mix. I adhered my panel to another panel of Concord and 9th Sprout cardstock using 3M Foam Tape. That was then adhered to my card base which happens to be Neenah Classic Crest 110lb.

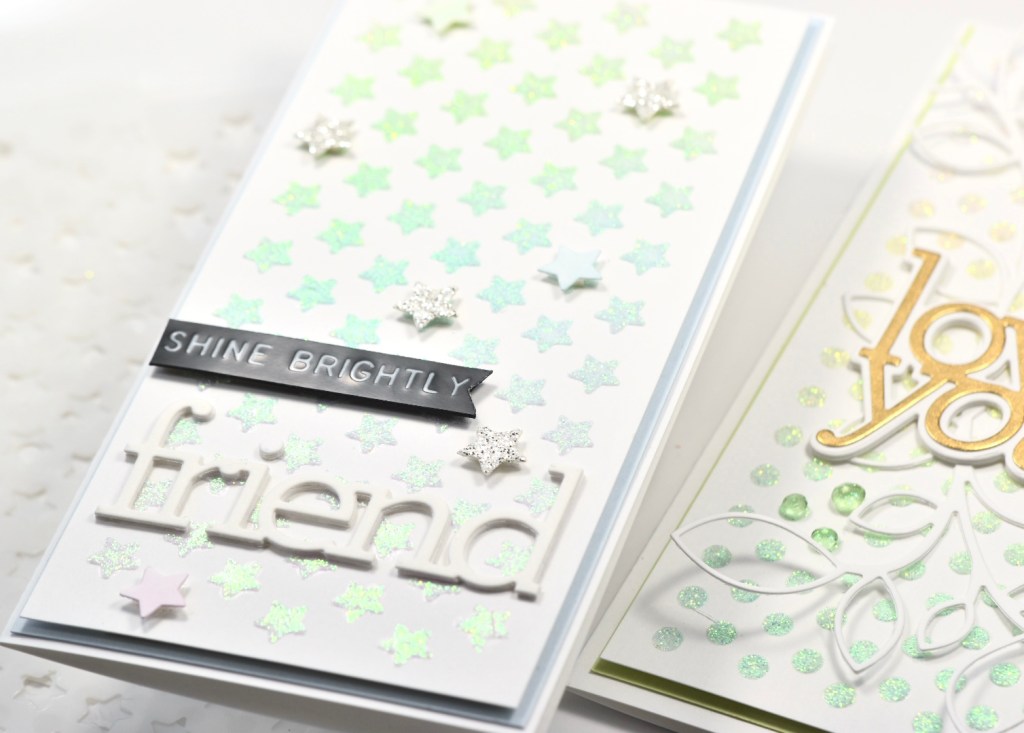
For the star stencil, I ink blended PinkFresh Studio Mint, Ocean Breeze and Soft Lilac. And again, I went over that with the Gina K Glitz Glitter Gel – Iridescent. I used the Simon Says Stamp Friends die for my sentiment and cut that three times from Neenah 110lb. I adhered those together using Craft Tacky Glue and snipped the “S” off of Friends. I used the new Mini Starts Party die to cut stars from white and glitter cardstock. I used the same inks to do a little ink blending on the white stars. I glued my friend sentiment directly to my card panel and attached the “shine brightly,” which is from Tim Holtz Idea-ology Sentiment Label Stickers, using 3M Foam Tape, along with the stars. I mounted my panel to another panel of Simon Says Stamp Sea Glass cardstock using foam tape, and that was then adhered to my card base finishing up this project.

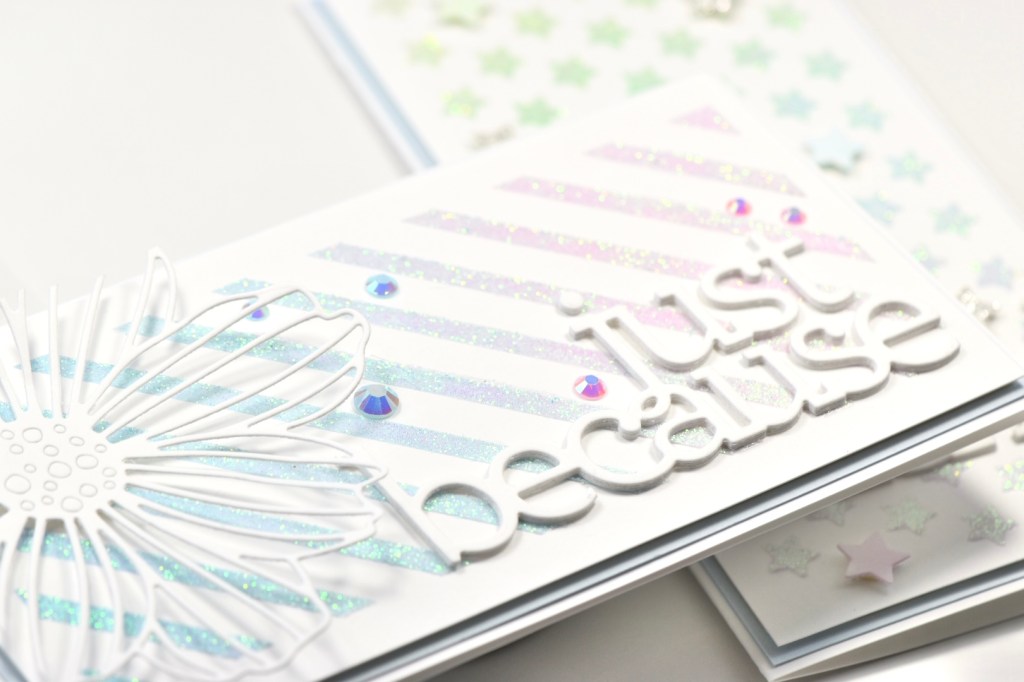
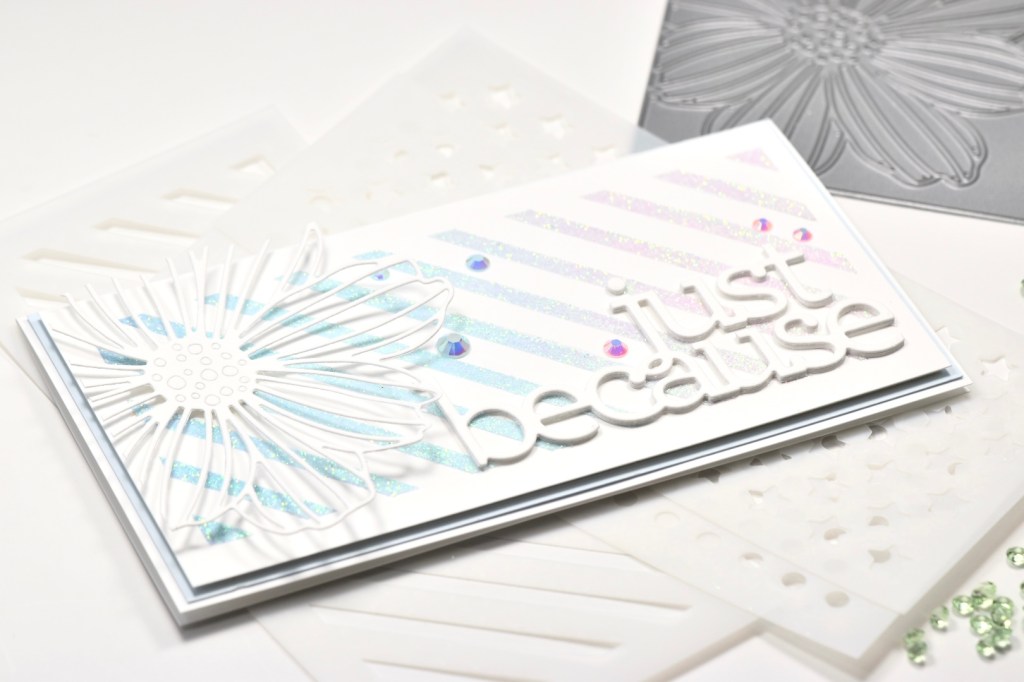
Now for the striped stencil .. I ink blended Distress Oxide Chipped Sapphire, Tumbled Glass and Spun Sugar and went over that with the same glitter gel. I die cut the Simon Says Stamp Just Because sentiment three times from Neenah 110lb and adhered those together using Craft Tacky Glue. I also used the Simon Says Stamp Cosmo Flower Frame for this one and trimmed the flower out of the frame.

I adhered my sentiment directly to my card panel, and adhered the flower using foam tape. I once again adhered this panel to another panel of Simon Says Stamp Sea Glass cardstock before adhering that to my card base. I ended up using PinkFresh Studio Jewels Mix for my necessary bling!

There’s three projects using the three stencils from the new Mini Slimline Patterns 1! These were super fun to make because I always forget about busting out my gels and pastes! Don’t forget to check out the new release, All the Feels! So much stuff to inspire you!

Thanks so much for stopping by today and stay awesome my friend!

Supply List:

*Affiliate links used at no cost to you. Thank you for your support!

Latest Instagram Posts