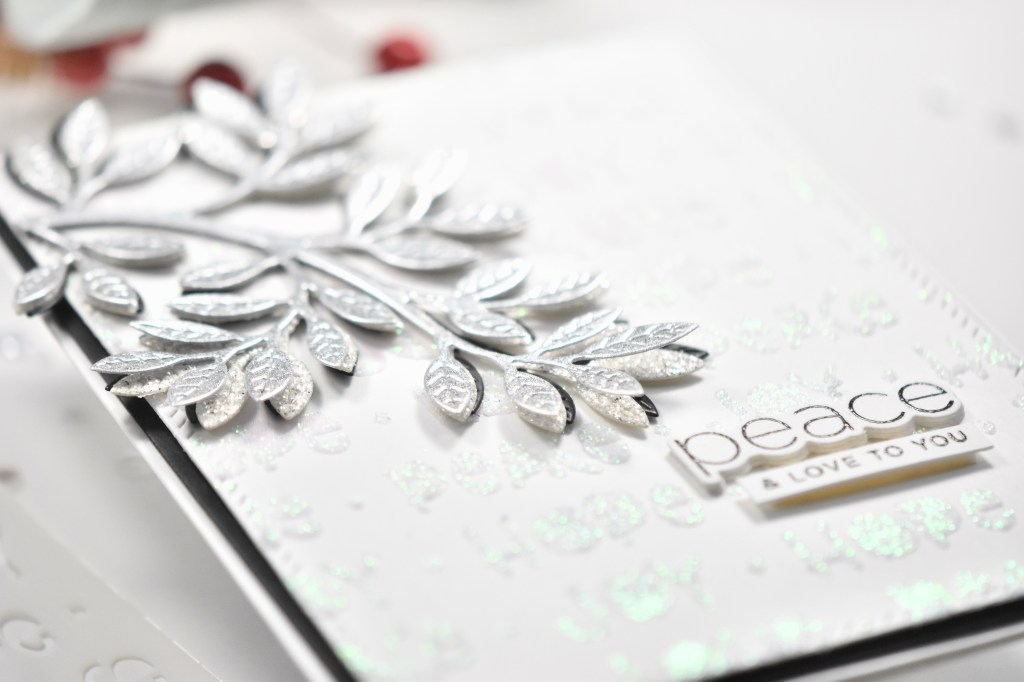
Simon Says Stamp Calm & Bright Berry Branch

Hello Lovelies, and happy release day! The new Simon Says Stamp release, Handmade Holiday, is live and ready for your viewing (and shopping) pleasure! I know that I say this every single time, but once again, it’s a gorgeous release, and you’ll definitely want to check it out! For today’s card, I’m featuring the brand new Etched Berry Branch, so let’s get right to the details!

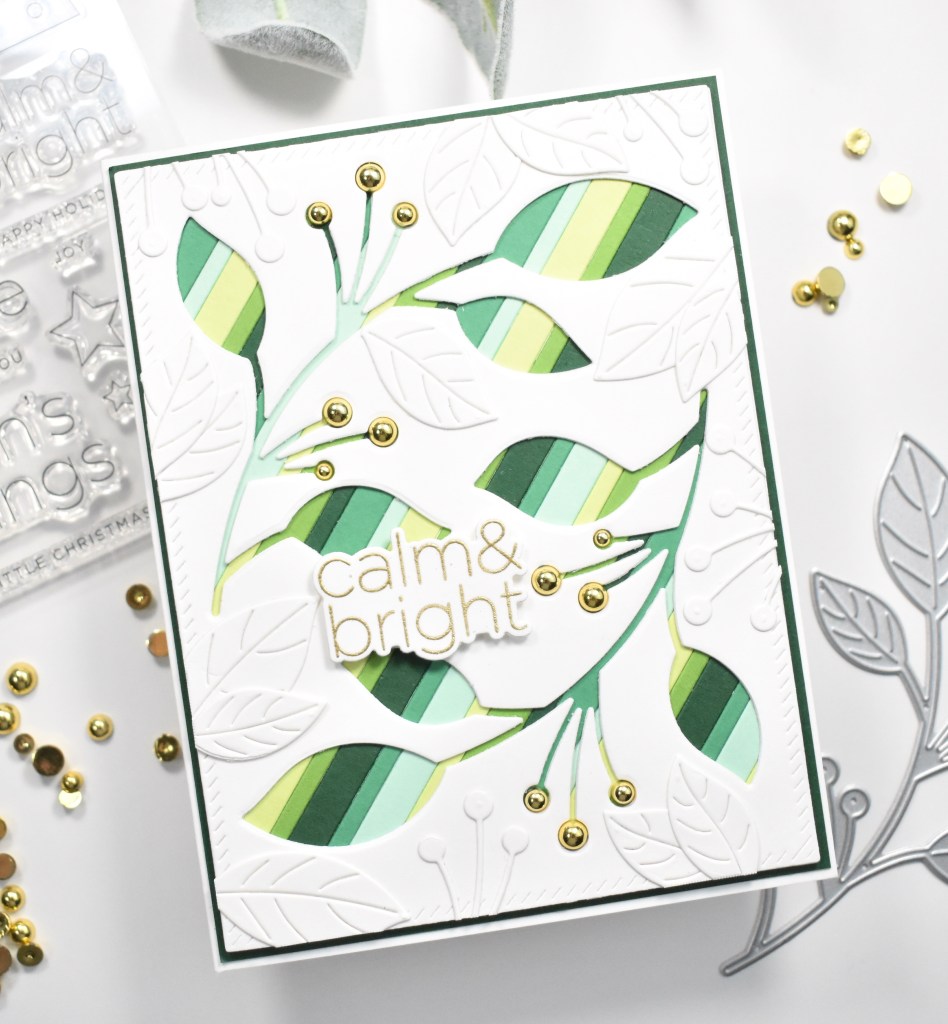
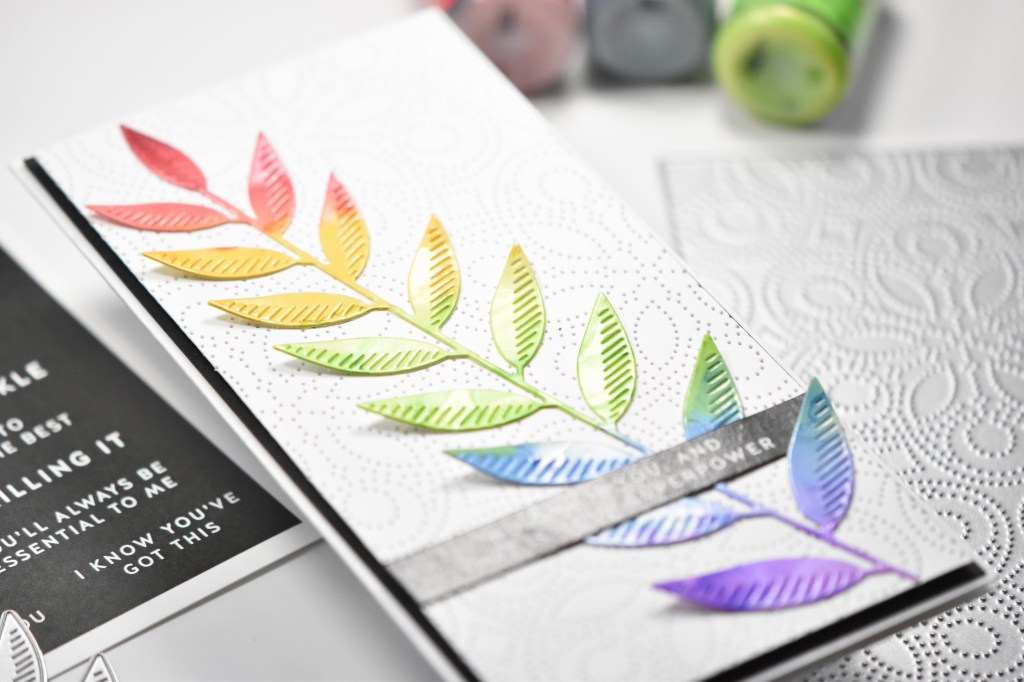
First off, I made a striped panel using green cardstock from Concord & 9th. I used the PinkFresh Studio Slim Stripes die to cut all of the stripes and adhered them diagonally on a panel of Neenah Classic Crest 80lb cardstock using liquid glue. I used the PinkFresh Studio Diagonal Stitched Rectangles to cut two panels of Neenah 110lb cardstock.

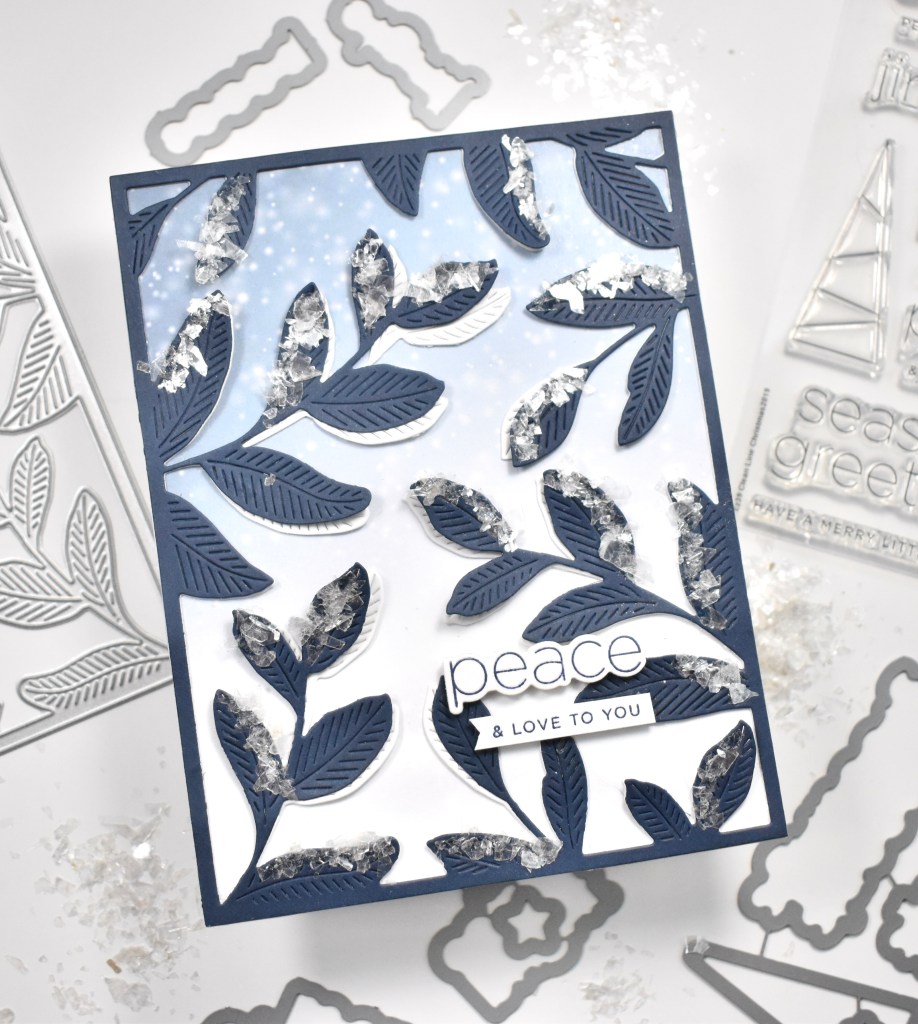
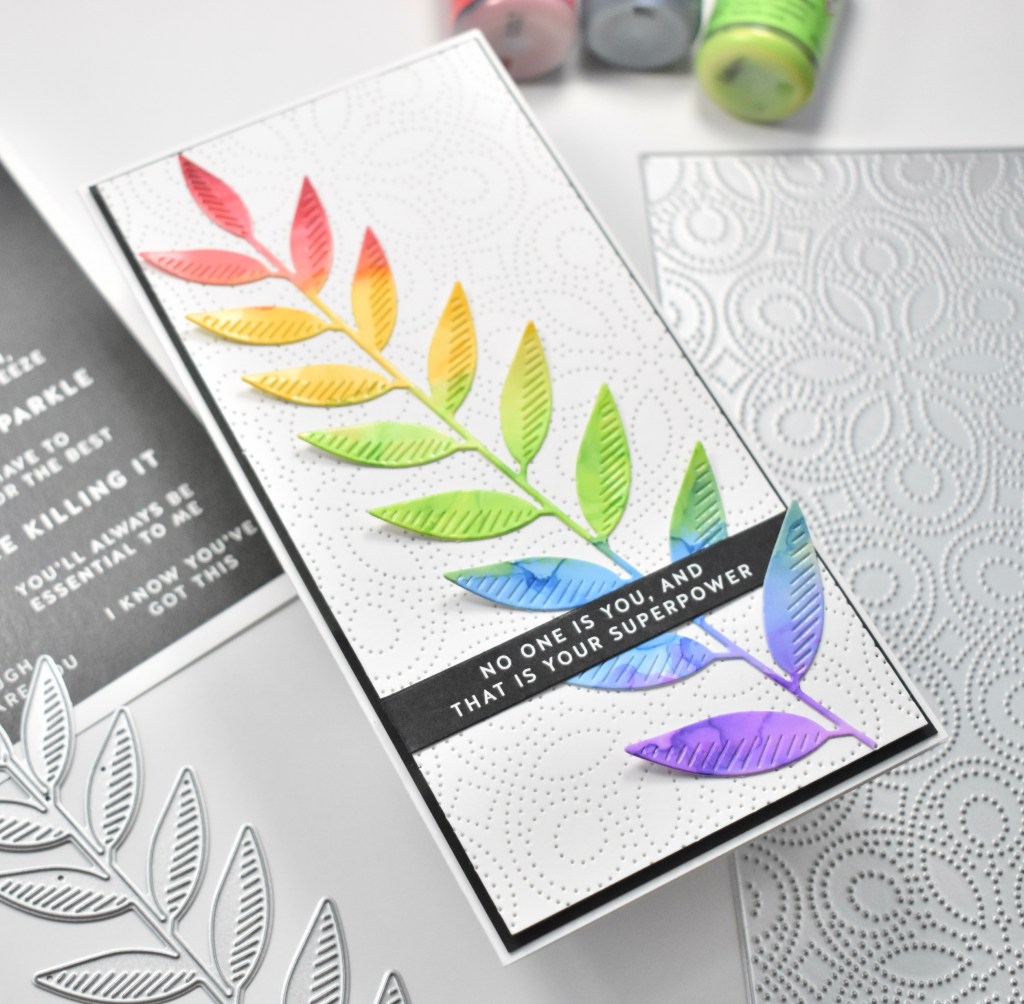
I positioned the Etched Berry Branch in the top half of the panel, taped it in place, and ran it through the die cutting machine, making sure to save the branch. I positioned the branch die again on the lower half of the panel, and ran that through the machine again. Remember that I said that I cut two panels? I wanted a double layer of the negative panel for dimension without using foam tape. I lined up both panels, taped them together and placed the branch die back into the negative piece, taping it down, and running it through the machine again. It did not cut through the second panel, which I knew would be the case, but it did leave enough of an indentation that I could position the die on the second panel and cut through that one completely.

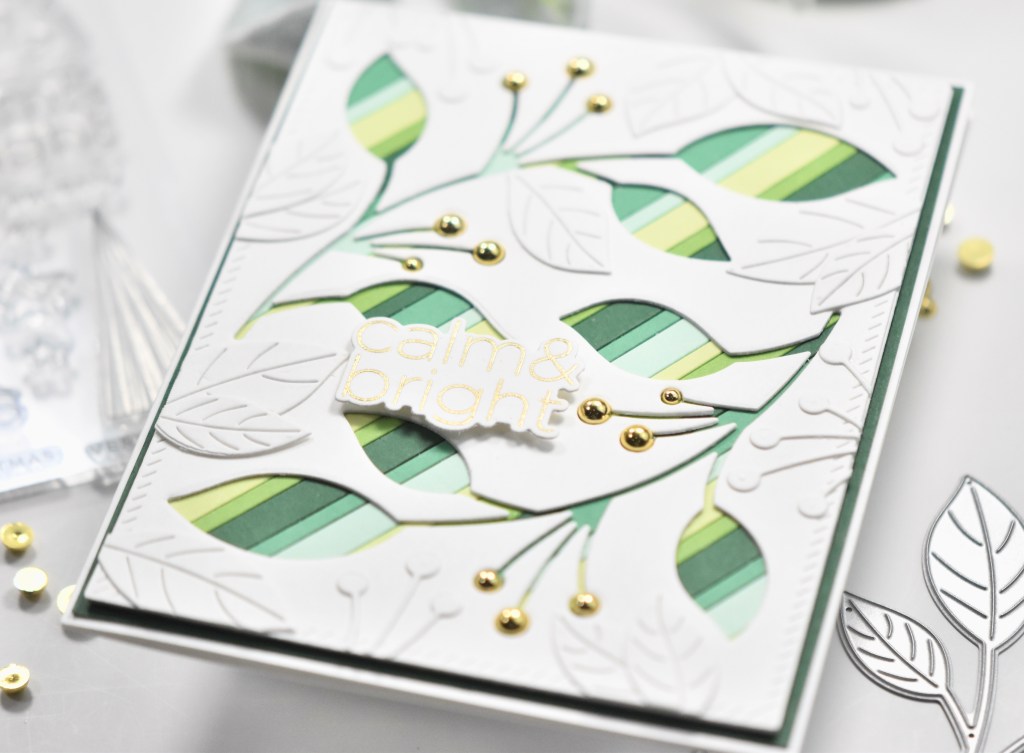
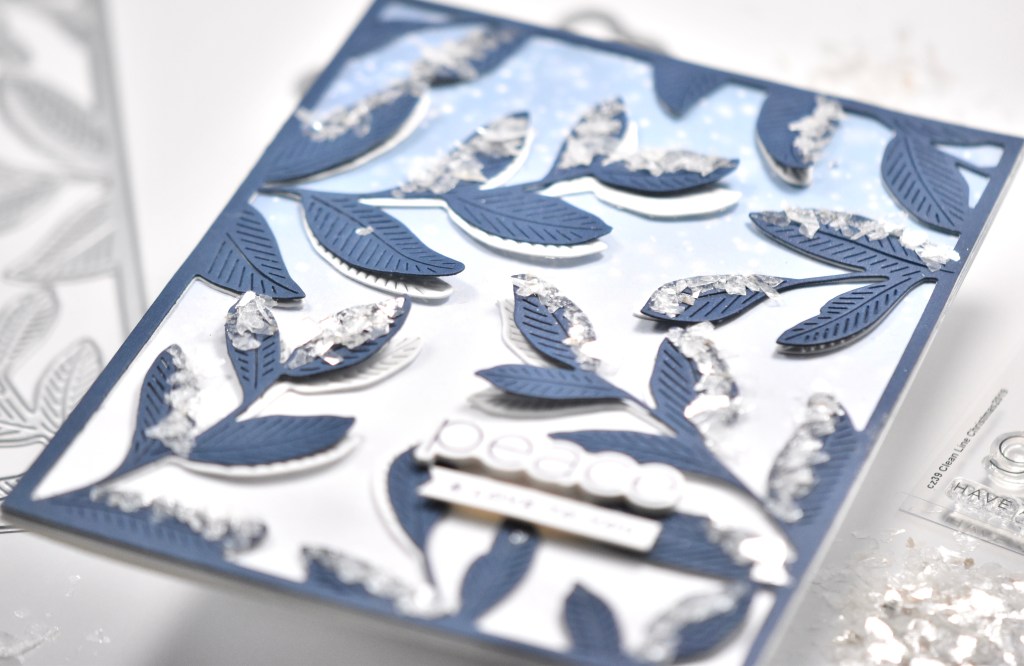
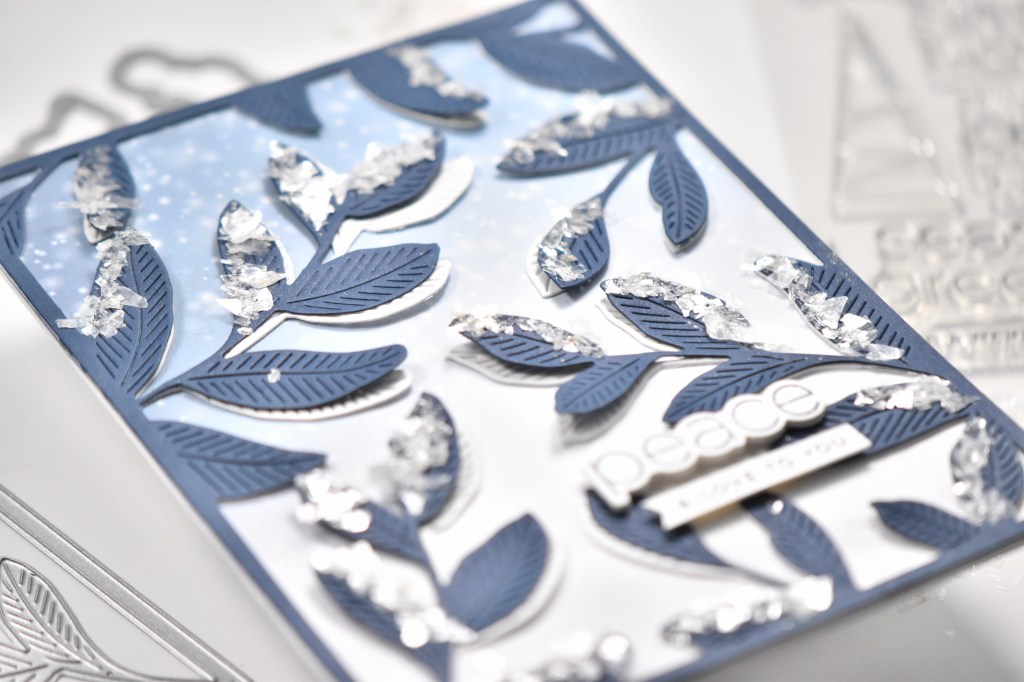
Once both of those negative panels were cut, I adhered them together using liquid glue. I once again used glue to adhere those panels to my striped panel. Now, to stop here was kind of boring, so I took the positive pieces of the berry branch and adhered those to the front of the card wherever they would fit, overlapping some as needed.

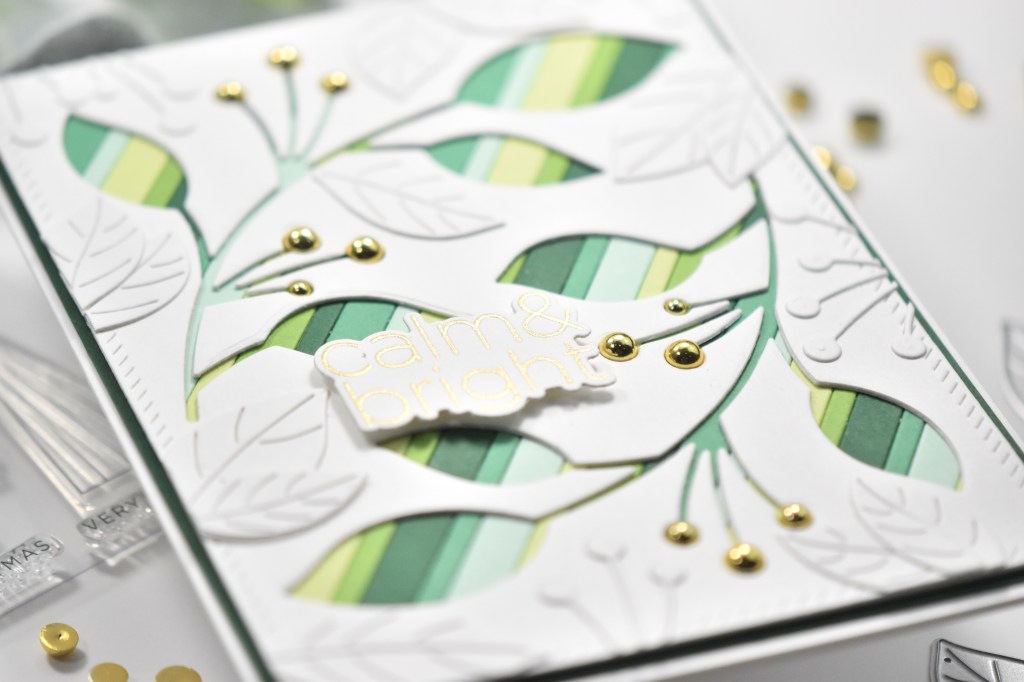
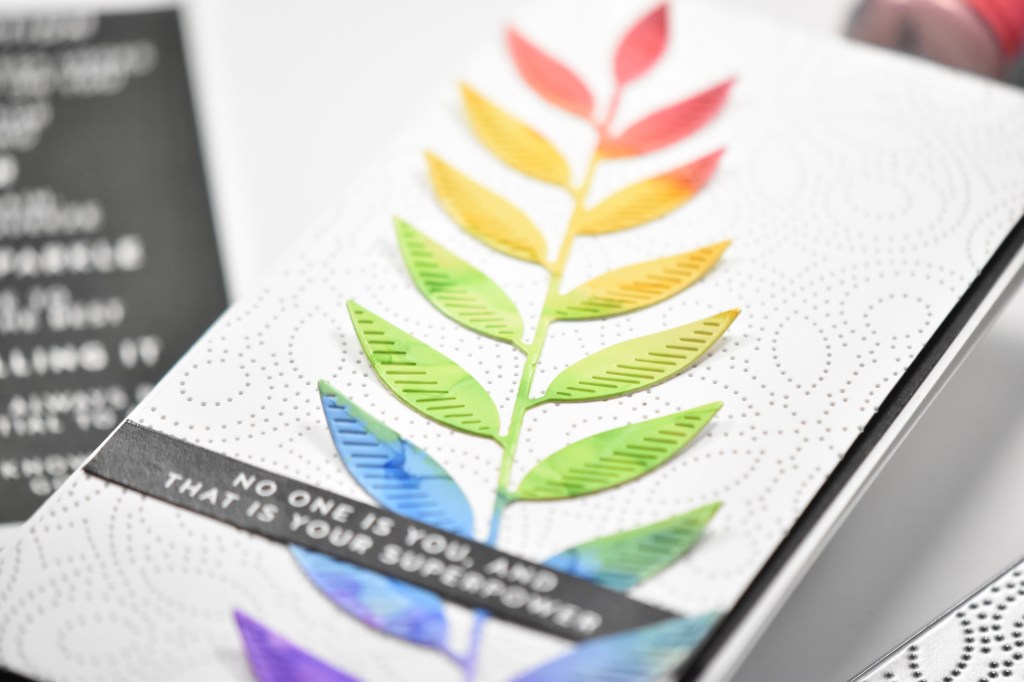
I used the calm & bright sentiment from the SSS Clean Line Christmas set, and stamped it using VersaMark ink and heat set it using Ranger Princess Gold Embossing Powder. Once that was done, I used the coordinating die to trim out the sentiment, and that was then adhered to my card using foam tape.

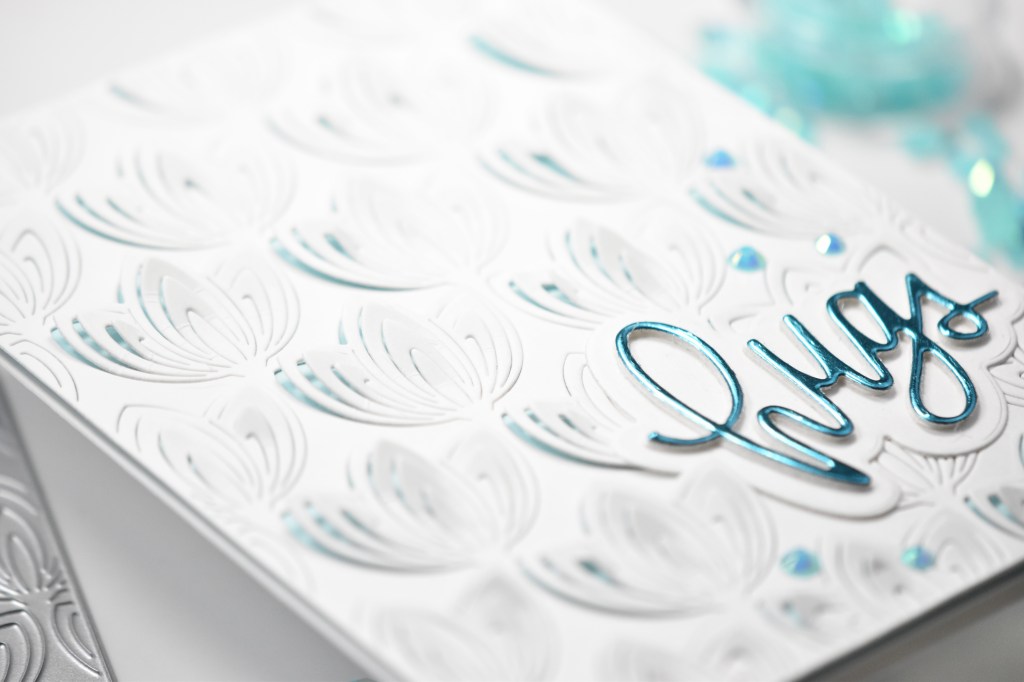
For even more added interest, I added some PinkFresh Studio Gold Metallic Pearls where the berries would be. Because that panel is two layers, they nestled down in there quite well. Everything was then adhered to a matching dark green panel before being adhered to the card base, which is Neenah 110lb.

That does it for this project! I had a lot of fun making this one! It’s a little bit outside of my norm, but I enjoyed it! I hope you’ll swing by and check out the entire Handmade Holiday release from Simon Says Stamp. You won’t be disappointed! Have a wonderful day and don’t forget to stay awesome!

Supply List:

* Affiliate links used at no cost to you. Thanks so much for your support!

Latest Instagram Posts

Simon Says Stamp Peace and Love to You

Hello Crafty Friends! Thanks so much for stopping by! There’s a new Simon release coming very soon, but today, we are having an IG Hop over on Instagram using products from the latest Peace on Earth release. I hope you’ll head over there to check it out. But for now, let’s go through the details of my card.

I don’t always like or love my own cards, but I do like this one! I began this project by using the PinkFresh Studio Diagonal Stitched Rectangles to cut a panel of Neenah Classic Crest 110lb cardstock. I then used the SSS Peace, Joy, Hope, Love Stencil along with the some Iridescent Gina K Glitz Glitter Gel to create this background panel. Super simple, yet so pretty!

For the sentiment, I opted to use the SSS Clean Line Christmas set. I’ve used this set over and over again! It ends up being my go-to set when I need a simple holiday sentiment. Anyhoo, I stamped the sentiments using VersaFine Black Onyx ink and heat embossed them using Ranger Clear Embossing Powder. I used the coordinating die to trim out the peace sentiment and just trimmed the sub-sentiment using my paper trimmer.

I used the SSS Delicate Leafy Branch and die cut it once from black cardstock, once from glitter cardstock and once from silver cardstock. I adhered all of those together, but only applying glue on the base part of the stems. By doing that, the leaves and part of the stem are “free-flowing,” which adds interest in my opinion.

To assemble the card, I glued the branch to the top corner and adhered the sentiments just below that using foam tape. I adhered the panel to black cardstock before adhering it to the card base.

That does it for this project! I hope you enjoyed it, and I hope you’ll stop by Instagram to check out the hop! Have a wonderful day and don’t forget to stay awesome!

Supply List:

* Affiliate links used at no cost to you. Thank you so much for your support!

Latest Instagram Posts

Simon Says Stamp Magnetic Happy Thoughts

Hello Crafty Friend! Hope you are doing well today! Thanks so much for stopping by to check out my project for today, featuring the Magnetic Embossing Folder from Simon’s new release, Peace on Earth. Let’s dive right in to the details!

To begin this project, I cut a panel of SSS Holographic Cardstock and placed it in the SSS Magnetic Embossing Folder and ran it through the die cutting machine. The texture catches the light so beautifully on this cardstock.

Next, I die cut the SSS Etched Crocus Stems from Neenah Classic Crest 110lb cardstock. I decided on this sentiment from the SSS XL Greetings 2 set. I stamped the sentiment using VersaFine Onyx Black Ink and heat embossed it using Ranger Clear Embossing Powder. I stamped it a second time using VersaMark Ink and heat set it again giving it a more glossy look.

I used the coordinating die to cut out the sentiment, and I cut it two more times from Neenah 110lb adhering all of those together using liquid glue. I glued the crocus flowers atop the holographic panel and glued the sentiment in the bottom corner.

This was then adhered to a black panel using foam tape before being adhered to the card base, which is also Neenah 110lb.

Super simple card today, but I love all of the texture and colors! What are your favorites from the Peace on Earth release? Have a wonderful day and don’t forget to stay awesome!

Supply List:

* Affiliate links used at no cost to you. Thank you so much for your support!

Latest Instagram Posts

Simon Says Stamp Thankful Laurel Leaves

Hello Crafty Friends! Thanks so much for stopping by today to check out my post featuring the brand new Laurel Leaves Background Plate from Simon Says Stamp’s new release, Peace on Earth! What a beautiful plate, and what a beautiful release! Let’s go through the details for today’s project!

I first die cut the SSS Laurel Leaves Background Plate from Sunshine cardstock and did a little bit of ink blending using Distress Oxide inks in Mustard Seed, Spiced Marmalade and Walnut Stain. I just wanted to give the leaves a little bit of color and depth.

Next, I found a piece of patterned paper that I thought would work good with this design. This piece happens to be from Simple Stories Cozy Days set, and was in a Simon card kit last fall. I adhered the laurel leaves panel to the patterned paper using liquid glue, while only applying glue to the outer edges and stems of the leaves.

I die cut the SSS Thankful 1 die once from mirror gold cardstock and cut the shadow three times from black cardstock and glued all of those together. I wanted to add a sub-sentiment, so I rummaged through my SSS Sentiment Strips to find one that worked.

Once I found the sentiment strip, I ran it through the Minc using gold foil. I trimmed it down to size and adhered it to the card panel using foam tape, and glued the thankful sentiment just above it.

To finish up, I added the panel to the card base, which is Neenah Classic Crest 110lb cardstock and added a few PinkFresh Studio Gold Metallic Pearls to pull it all together! I like the gold with the Sunshine cardstock and that added interest with the patterned paper! There are so many beautiful things in this Peace on Earth release, and I hope you’ll stop by and check them out! Have a wonderful day and don’t forget to stay awesome!

Supply List:

* Affiliate links used at no cost to you. Thank you so much for your support!

Latest Instagram Posts

Simon Says Stamp Magnetic Friend

Hello Lovelies, and thanks for stopping by today! I’m thoroughly enjoying Simon Says Stamp’s new release, Peace on Earth! Today’s project is featuring the new, super cool, Magnetic Embossing Folder! So let’s hop right into the details for this one!

I began by trimming an A2 panel of Neenah Classic Crest 110lb cardstock and did some ink blending using Distress Oxide, Picked Raspberry, Spiced Marmalade, Mustard Seed, Twisted Citron and Broken China. This is my favorite rainbow color combo! Once the ink blending was done, I ran the panel through in the SSS Magnetic Embossing Folder.

To be completely honest, my paper cracked while running it through with the embossing folder, so to remedy the situation and cover up those boo-boos, I pulled out a nail buffer that I use in the craft room. I just rubbed that over the top of the panel and distressed it a little more, revealing the white underneath. Voila, crisis averted!

I die cut the SSS Friends Die three times from black cardstock and adhered those together using liquid glue. I did trim off the “s” from Friends to suit my purposes. I also rummaged through my SSS Sentiment Strips to find an appropriate sub-sentiment for this card. Both of the sentiment were glued directly to the panel.

The panel was then trimmed down to just smaller than an A2 size so that I could layer it atop a black panel using foam tape. I always love incorporating black into my cards! That was then adhered to the card base, which is Neenah 110lb. I added a few Studio Katia Onyx Crystals to finish it up.

That does it for this card! I hope you like it and I hope it inspires you to get crafty! Have you checked out the Peace on Earth release yet? What are your favorites? I was just thinking that I need to start my Christmas Cards because I usually start them in October. When do you start yours? Anyhoo, have a wonderful day and don’t forget to stay awesome!

Supply List:

* Affiliate links used at no cost to you. Thank you so much for your support!

Latest Instagram Posts

Simon Says Stamp Cascading Stars

Hello! Hello! Thanks for stopping by today! I’m featuring a new background stamp from the latest Simon release, Peace on Earth. I always love Simon background stamps, and was super excited to find one in my release goodies! Let’s go through the deets for today’s project!

To begin my project, I stamped the new Star to Star Background on a panel of Neenah Classic Crest 110lb cardstock using VersaFine Onyx Black Ink and heat embossed it using Ranger Clear Embossing Powder. I then trimmed a panel out using the PinkFresh Studio Diagonal Stitched Rectangles.

My next step was to add some sparkle, so I used the SSS Fading Stars Stencil to add some some Gina K Iridescent Glitz Glitter Gel. The stencil didn’t quite fit the stars on the panel, so I just centered the stencil over some of the stars to add sparkle. It’s just enough to add a little bit of texture and interest.

I used the SSS Mini Stars Party Die to cut stars from various rainbow cardstocks from my stash. While I was die cutting, I went ahead and cut the SSS You Shine Die once from black cardstock and once from SSS Holographic cardstock, adhering those together with liquid glue.

I adhered the sentiment towards the bottom right and arranged the rainbow stars in a cascading fashion using a combination of glue and foam tape. The panel was then adhered to a black panel using foam tape again, and then to the card base, which is Neenah 110lb.

A simple card today, but I like how it turned out. I had the idea of cascading stars, but when I was laying things out, it was missing something, and that bit of glitter gel did just the trick! I hope you have a wonderful day, and don’t forget to check out the entire Peace on Earth release!

Supply List:

* Affiliate links used at no cost to you. Thank you so much for your support!

Latest Instagram Posts

Simon Says Stamp Magnetic Birthday

Hello Friends, and thanks for stopping by today! The new Simon Says Stamp release, Peace on Earth, is in full swing! Today’s project is featuring the Magnetic Embossing Folder, so let’s get right into it, shall we?

To begin, I cut an A2 panel of black cardstock, placed it inside the Magnetic Embossing Folder and ran it through the die cutting machine. I then lightly rubbed some Cosmic Shimmer Glistening Gold Lustre Polish over the embossed black panel giving it a shimmery, metallic look.

I was in need of some birthday cards, so I pulled out the SSS Happy Birthday Die and cut the sentiment once from mirror gold cardstock and once from black cardstock, adhering those together with liquid glue. I then cut the shadow twice from black cardstock and adhered all of the sentiment pieces together.

I adhered the sentiment to my embossed panel using foam tape for dimension, and I adhered a few Studio Katia Onyx Crystals for additional shine and interest. Everything was then adhered to the card base, which is Neenah Classic Crest 110lb cardstock.

Super simple project today, but I think the gold polish over the black cardstock makes a great statement! And, I now have a masculine birthday card to add to my stash! I hope you enjoyed this project, and I hope it inspires you to get crafty! Swing by and check out the entire Peace on Earth release, and let me know your favorites! Have a wonderful day, and don’t forget to stay awesome!

Supply List:

* Affiliate links used at no cost to you. Thank you so much for your support!

Latest Instagram Posts

Simon Says Stamp Laurel Peace

Hello Crafty Friends! It’s time for another awesome Simon Says Stamp release, Peace on Earth! For today’s post, I’m featuring the new Laurel Leaves Background Plate, and let me just say, this is a beautiful plate! So let’s get right into the details.

I began this project by die cutting the SSS Laurel Leaves Background Plate once from Neenah Classic Crest 110lb cardstock and once from a navy cardstock that I had in my stash. I adhered those together using liquid glue, off-setting the blue top layer slightly. I then trimmed off the excess white underneath from the off-set.

I remembered that I had some snowy patterned paper left over from a winter SSS Card Kit, so I went through those to find it. The background paper is from Whimsy Stamps Blurry Flurries paper set. I adhered the laurel leaves to the patterned paper using glue again.

After looking at the panels, I decided that it would be super beautiful if I added some “snow” to the leaves, so I did just that! I added a little bit of liquid glue to the leaves and sprinkled Ranger Distress Mica Flakes on them. And I just love the way it looks! I guess it looks more icy than snowy, but I love it just the same!

For the sentiment, I pulled out the SSS Clean Line Christmas stamp set and stamped both sentiments using Distress Oxide Blueprint Sketch. I then cleaned the stamps and re-inked them using VersaMark Ink and then heat embossed them using Ranger Clear Embossing Powder. I used the SSS Clean Line Christmas Dies to trim out the Peace sentiment and trimmed down the sub-sentiment using the paper trimmer. Those were then adhered using foam tape. Everything was then adhered to the card base, which is Neenah 110lb.

That does it for this project! I hope you enjoyed it and I hope you’ve checked out the entire Peace on Earth release! So many great things in this release! Thanks so much for stopping by, have a wonderful day, and don’t forget to stay awesome!

Supply List:

* Affiliate links used at no cost to you. Thank you so much for your support!

Latest Instagram Posts

Simon Says Stamp Leaf Spray Rainbow

Hello Lovelies and welcome back! Thanks for stopping by today! I just received my StampTember order and had to use some of the goodies right away! Today’s card is featuring the new Etched Tall Leaf Spray and the Detail Bohemian Slim Plate. Both of these are absolutely gorgeous! So let’s jump right into the details!

This was a super simple card by the way, because I used an alcohol ink panel that’s been sitting around in my stash forever! I love it when I can finally find a home for something that I’ve had a while. So the products used on the alcohol ink panel were Yupo Paper, Ranger Alcohol Ink Pearls in Deception, Sublime and Villainous along with regular alcohol ink in Lemonade and Denim. I also used the Tim Holtz Air Blower.

I die cut the SSS Etched Tall Leaf Spray from the alcohol ink panel and trimmed some Neenah Classic Crest 110lb cardstock to a mini slim line size and ran it through the die cutter using the SSS Detail Bohemian Slim Plate.

I adhered the rainbow leaf spray to the bohemian panel using liquid glue, but only applying glue to the stem and the base of the leaves. I decided on a sentiment strip from the SSS Reverse Encouraging Words, and trimmed that out and glued it over the leaf spray.

The panel was then adhered to a black panel using foam tape for dimension. This was then adhered to the card base, which is also Neenah 110lb.

Like I said, super simple card, but I love how it came out. I hope you enjoyed it and I hope it inspires you to get crafty! Have you gotten your StampTember order yet? What did you get, inquiring minds want to know!?! Hope you have a wonderful day and don’t forget to stay awesome!

Supply List:

* Affiliate links used at no cost to you. Thank you so much for your support!

Latest Instagram Posts

Simon Says Stamp Fine Petals Hugs

Hello, Hello and welcome back! Thanks for stopping by! Yup, I’m still on a StampTember kick! There’s just so many good things in this release, it’s hard to stop! For today’s project, I’m featuring another card using the new Fine Petal Background Plate. This is such a gorgeous die when it’s cut! Let’s get into the details!

I began by cutting a panel of Neenah Classic Crest 110lb cardstock using the Fine Petal Background Plate. I did have to run this through about four times to get a really good cut, but hopefully your machine cuts better! Once the panel was cut, I zhooshed most of the petals giving them plenty of definition and dimension. I did leave some un-zhooshed at the bottom for my sentiment.

I had some blue mirror cardstock that I wanted to use, so I adhered the petal panel to a color coordinating blue cardstock using liquid glue.

I cut the SSS Hugs sentiment once from this blue mirror cardstock and twice from Neenah 110lb. I also cut the shadow twice from Neenah 110lb and glued all of those layers together.

My sentiment was then glued to the bottom of the petal panel where I left the petals un-zhoosed. Everything was then adhered to the card base, which is also Neenah 110lb. Lots of dimension on this card for sure!

Here’s a reverse view of the card, so you can see the blue peeking through more clearly

To finish up, I added a few PinkFresh Studio Jewels, because every card deserves to sparkle!

That finishes this one up! Super simple and quick! That’s the wonderful thing about background plates! I hope you’ll stop by and check out the entire StampTember line up! Lots of great things to choose from! Have a wonderful day and don’t forget to stay awesome!

Supply List:

* Affiliate links used at no cost to you. Thank you so much for your support!

Latest Instagram Posts