Hello Crafty Friends and thanks for joining me toady! It’s been a minute since I’ve posted here, but it’s good to be back in the studio creating and having fun! Today’s card set is featuring several products, some new and some older favorites. So, let’s go through the details!
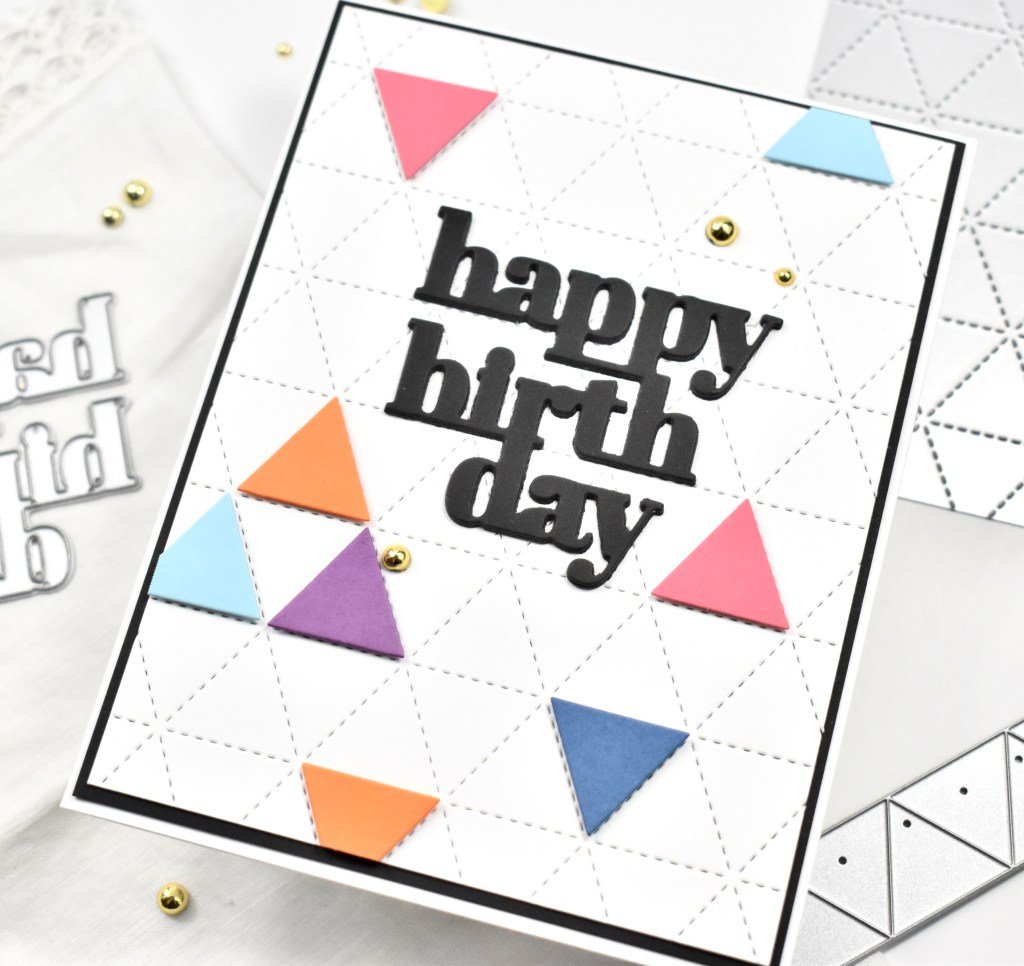
To begin, I cut several backgrounds from Neenah 110lb cardstock using the new-ish Concord and 9th Honeycomb Quilt Top die and the Triangle Background. These are so much fun and there are so many possibilities for awesome cards using different designs, as well as different color combinations. Once the backgrounds were cut, I pulled out two different sets of color combos using Concord and 9th cardstock and used the included dies to cut the triangles and hexagons.

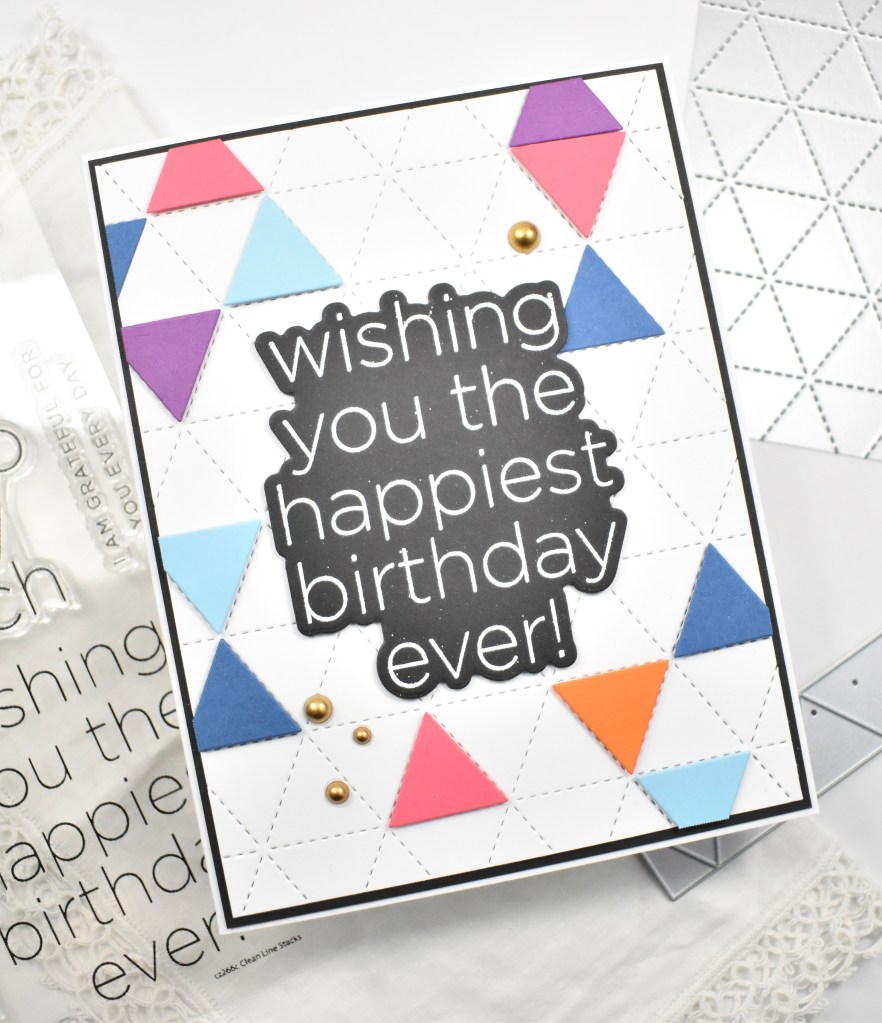
For the first card, I stamped the sentiment from the SSS Clean Line Stacks onto black cardstock using VersaMark Ink and heat embossed it using SSS Detail White Embossing Powder. I used the coordinating die set to trim it out along with two additional die cuts and adhered those together using glue. I determined the placement of the triangles and adhered the sentiment to the panel and began adhering the triangles using SSS 3D Foam Squares. The panel was then adhered to a black panel for contrast, and then to the card base. Once completed, I added some PFS Matte Gold Metallic Pearls for some added bling.
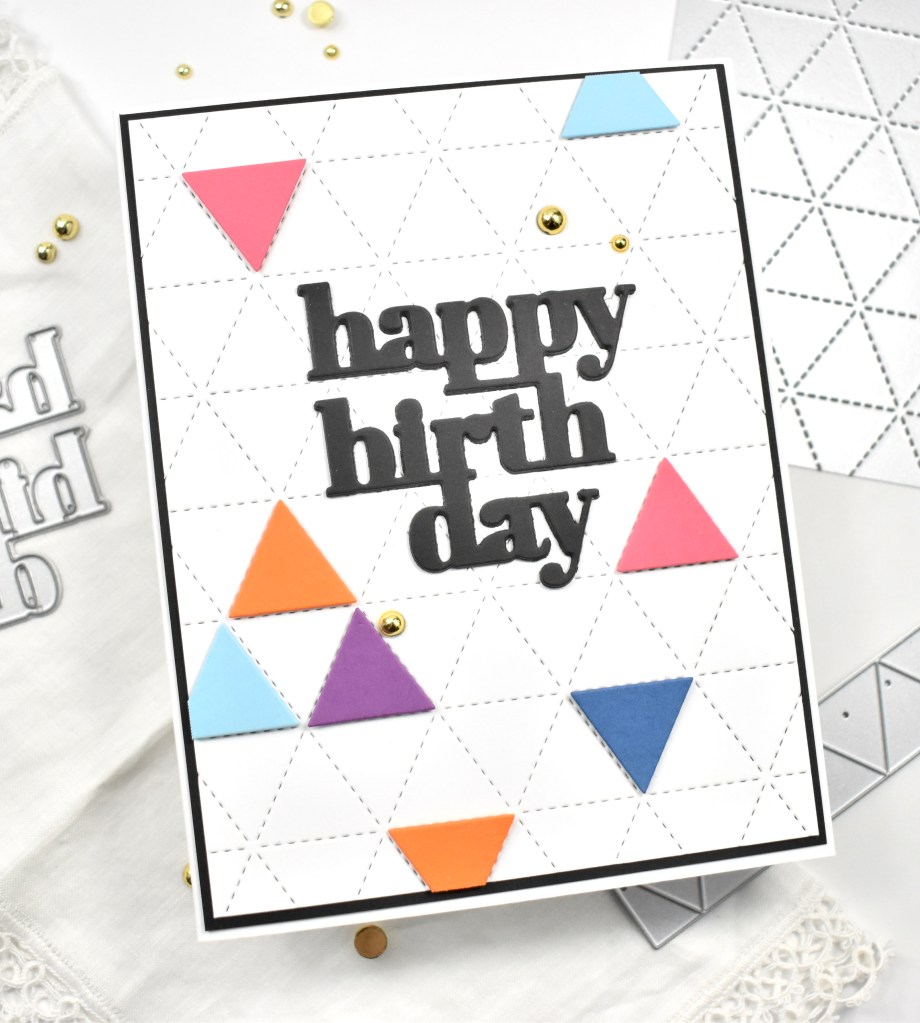
On the second card, I die cut the SSS Basic Box Card Happy Birthday sentiment three times from black cardstock, and adhered all of those together using liquid glue. Again, I adhered the sentiment and began adhering the triangles using foam squares for dimension. For this one, I added some shiny PFS Gold Metallic Pearls.
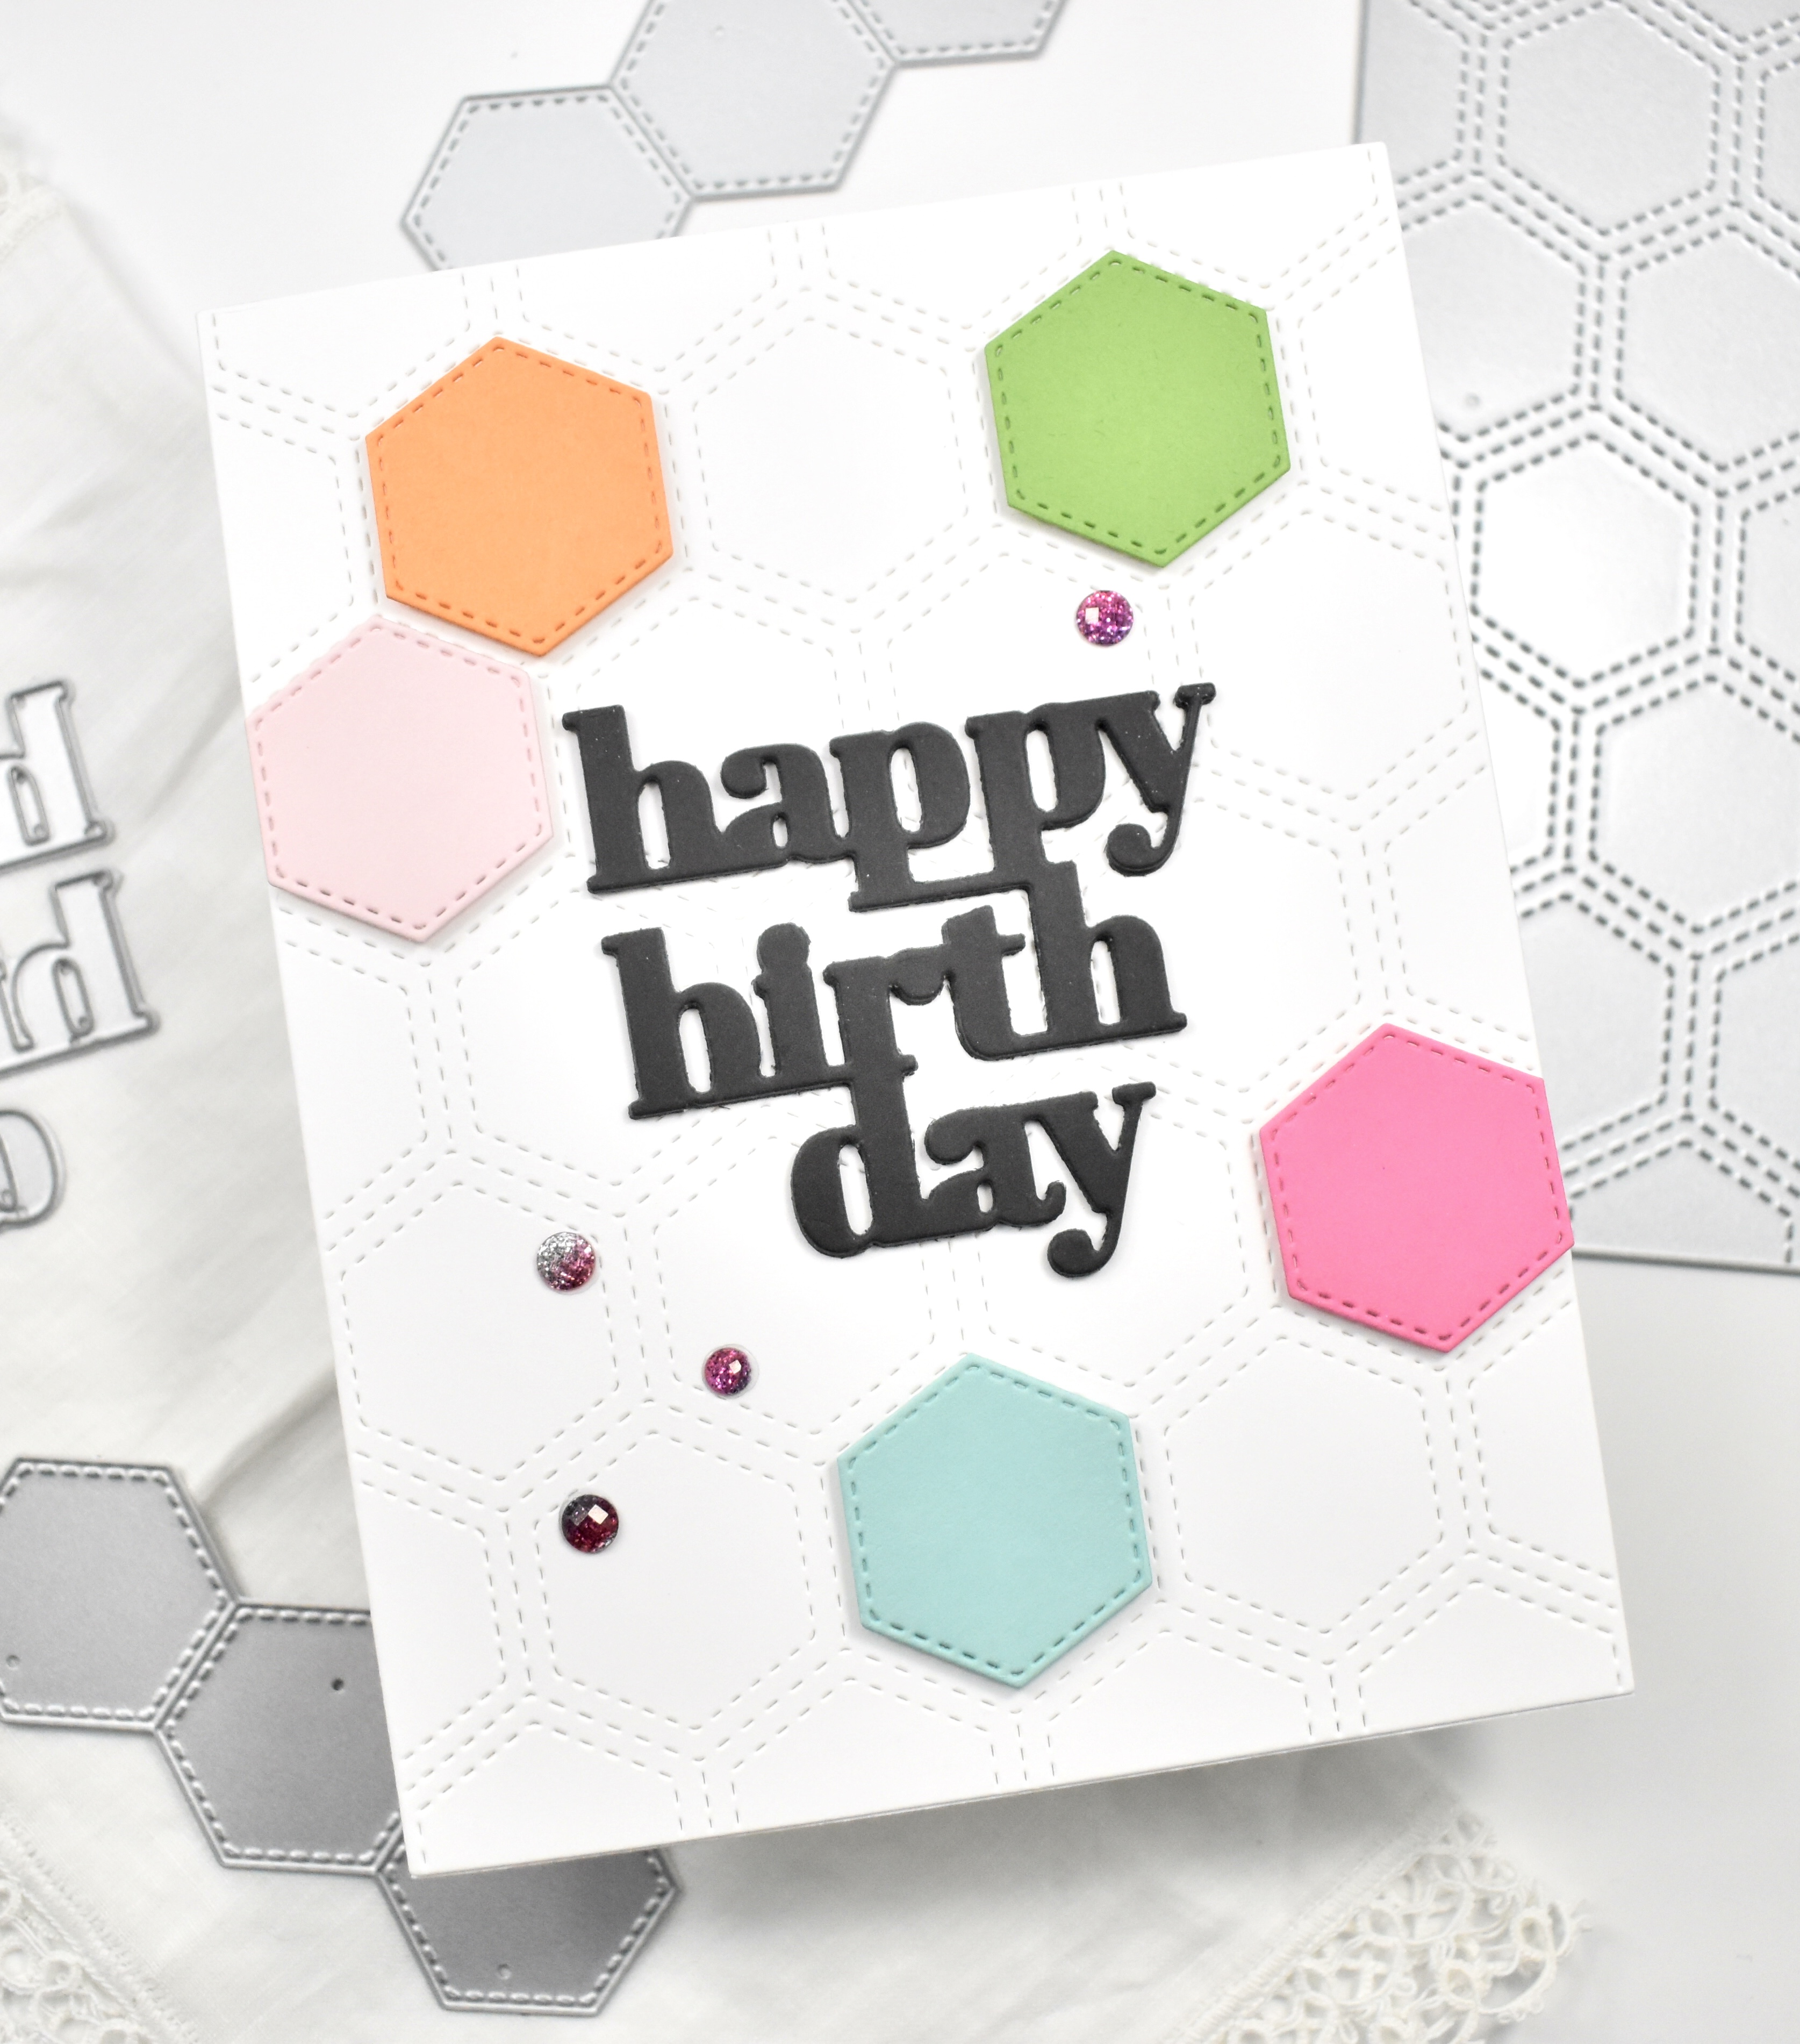
For the third card, I switched to the Honeycomb Quilt Top dies. Once again, I die cut the sentiment three times and glued those together and then glued it directly to the panel and adhered the hexagons using foam squares. For that added bling, I added some PFS Twilight Ombre Glitter Drops to finish it off before adhering everything to the card base.

I actually ended up making eleven cards using these two cover plate dies from Concord and 9th, most of them being birthday cards since my stash has kind of dwindled over time. It was super easy to do the cutting, and then sit and assemble.

I hope you enjoyed these cards, and I hope they inspire you to get crafty. Thanks again for stopping by today, and don’t forget to stay awesome!
Supply List:
- SSS Basic Box Card Happy Birthday
- SSS Clean Line Stacks, Dies, Bundle
- SSS Detail White Embossing Powder
- SSS 3D Foam Squares
- SSS Dot Tape Runner
- SSS T Square Ruler
- Concord and 9th Triangle Background
- Concord and 9th Honeycomb Quilt Top
- Concord and 9th Cardstock
- PFS Gold Metallic Pearls
- PFS Matte Gold Metallic Pearls
- PFS Twilight Ombre Glitter Drops
- PFS Embellishment Tool
- VersaMark Ink
- Misti
- Spellbinders Platinum 6
- Bearly Art Glue
- Neenah Classic Crest Solar White 110lb Cardstock
- Black Cardstock
- Anti Static Powder Tool
* Affiliate links used at no cost to you. Thanks so much for your support!
Latest Posts
- Simon Says Stamp Grungy Dewdrop Daisy

- Simon Says Stamp Pastel Birthday Wishes

- Simon Says Stamp Best Fish

- Simon Says Stamp Circle Thanks

- Simon Says Stamp Glowing Daisies