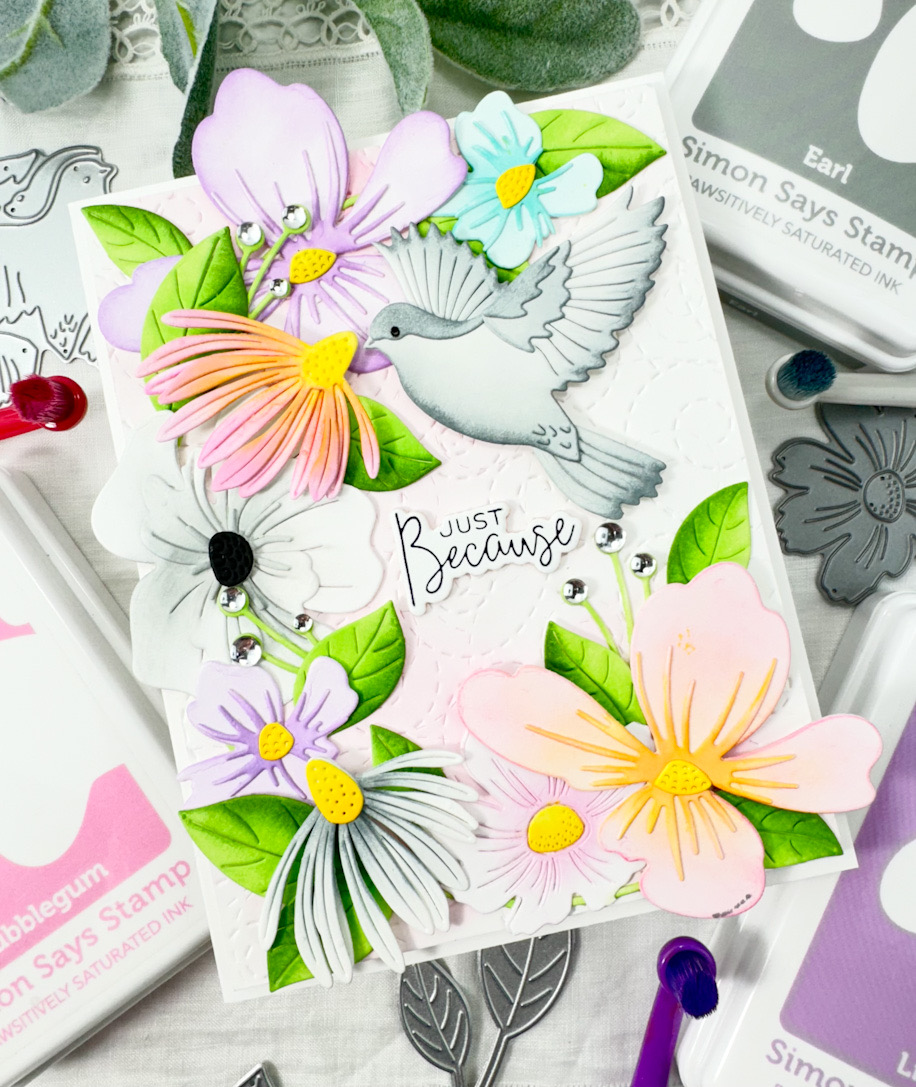
Hello Crafty Friends! I appreciate you stopping by! Today, I’m participating in an Instagram Hop to celebrate Simon Says Stamp’s latest release, Splendor, so you’ll want to head on over there to comment along the hop for your chance to win a $25 gift card. Today’s project is featuring the new Beautiful Dove die, and I knew that I wanted to pair it with a bunch of flowers. So, let’s run through all the details for this one!

To begin, I went to work on all of the flowers. I die cut the flowers from Neenah 110lb cardstock using SSS Etched Magnolia Blossom, SSS Charming Daisy, SSS Layered Dandy Flower and SSS Cosmos Stem. All florals need leaves, so I used the SSS Etched Berry Branch for those. Once everything was cut, I got started on all of the ink blending.

For the ink blending, I used SSS Pawsitively Saturated Inks in Bubblegum, Lilac, Lemonade, Sunbeam, Seafoam, Sprout and Field. I sat the florals and leaves aside, and die cut the SSS Beautiful Dove from Neenah 110lb cardstock and did some ink blending of that using Earl ink. Once all of the components for the card were assembled and complete, I got to work on the rest of the card.
I used the SSS Stitched Whirl Background and cut that from a panel Mixed Media paper. I then saturated the paper and added some light pink watercolor to it, and dried it with the heat tool. Once it was dry, I did place the panel under something heavy to flatten it out a bit. When I was ready to assemble, I did run it back through using the Whirl plate to get the die cut definition back. I’m not even going to lie, I putzed around with the placement of the flowers and leaves for WAY too long! Way too much over-thinking going on!
In all of the playing around with placement, I did trim off some of the leaves and “berry clusters,” and reserved those for adding back in later. I adhered the leaves first using liquid glue, and adhered some of the flowers with glue and some with foam strips. The dove was then adhered to the panel with foam strips as well. Next, I added back in the trimmed leaves and “berry clusters” where I had room to do so.
Because this card is so involved, and not a whole lot of space for a sentiment, I opted for a tiny sentiment. I used the BetterPress A Little Message Sentiments using BetterPress Black Ink and trimmed it out using the coordinating die. I did die cut it several times and adhered those layers together using liquid glue for a stacked look. The sentiment was then glued directly to the panel.

My panel was then adhered to the card base using foam tape. Lots of layers and dimension on this one, but I absolutely love dimension, so I’m good with that! For some bling, I added some PFS Iridescent Drops to the “berry clusters” to finish it up.
That does it for this one! I hope you enjoyed it, and I hope it inspires you to get crafty in your space! Head on over to Simon to check out the entire Splendor release! You won’t be disappointed! And don’t forget to check out the Instagram Hop for your chance to win a $25 gift card. Thank you again for stopping by, have a wonderful day and stay awesome!
Supply List:
- SSS Beautiful Dove
- SSS Etched Magnolia Blossom
- SSS Charming Daisy
- SSS Layered Dandy Flower
- SSS Cosmos Stem
- SSS Etched Berry Branch
- SSS Pawsitively Saturated Ink: Earl, Bubblegum, Lilac, Lemonade, Sunbeam, Seafoam, Sprout, Field
- SSS Stitched Whirl Background
- SSS 3D Foam Strips
- SSS Foam Tape
- SSS Small Blender Brushes
- SSS Detail Round Blender Brushes
- SSS Detail Flat Blender Brushes
- SSS Black Cardstock
- SSS Place and Score Embellishment Wand
- SSS Bone Folder
- SSS Triangle Trays
- BetterPress A Little Message Sentiments
- BetterPress Porcelain A2 Card Panels
- BetterPress Black Ink
- BetterPress Letterpress System
- Neenah Classic Crest Solar White 110lb Cardstock
- PFS Iridescent Drops
- Tim Holtz Scissors
- Bearly Art Glue
- Wagner Heat Tool
- Scor-Buddy
- Mixed Media Paper
- Spellbinders Platinum 6
* Affiliate links used at no cost to you. Thanks so much for your support!
Latest Posts
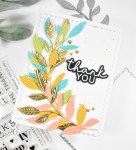
- Simon Says Stamp Leafy Thank You
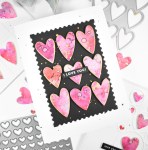
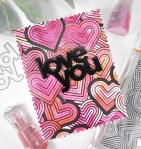
- Simon Says Stamp Love You Watercolor Hearts
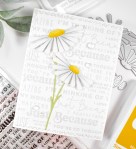
- Simon Says Stamp Just Because Daisies
- Simon Says Stamp Love You Jumbled Hearts
- Together By Design featuring Kristina Werner with Concord and 9th